10 seconds on the last press.
· The system will disarm. If the code is entered incorrectly, turn off the ignition and begin again.
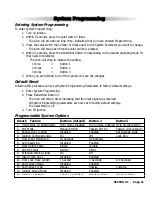
To set the Emergency Override Code:
1. Turn on ignition.
2. Within 5 seconds, press the valet switch 5 times.
· The siren will provide one long chirp, indicating that you have entered Programming.
3. Press the valet switch 3 times.
· The siren will chirp each time the valet switch is pressed.
4. Within 5 seconds, press Button 3 on the transmitter.
· The siren will chirp 3 times.
5. Press the valet switch the number of times equal to the desired code (from 1-15).
6. Turn off the ignition then arm the system.
7. Disarm the system using the new Override Code to permanently store the new code.
Note: If the code set procedure is not properly performed, turn off the ignition and begin again. The override code will not
be permanently stored until the code is used to disarm the system.
Valet Mode
The Valet Mode temporarily disables the security system so the vehicle may be operated by a mechanic or
parking attendant.
To activate or deactivate the Valet Mode:
1. Turn on the ignition.
2. Press and hold the override switch for 5 seconds.
· The siren will chirp once and the LED light will stay ON to confirm the Valet Mode is on.
· The siren will chirp twice and the LED light will turn OFF to confirm the Valet Mode is off.
3. Turn off the ignition.
While in Valet Mode the remote transmitters will continue to lock and unlock the doors, and operate the
optional auxiliary functions.
Battery Replacement
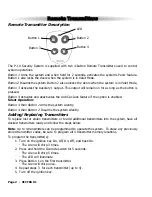
Your Remote Transmitter uses (2) 3 volt batteries (type CR2016 ), which will require replacement
in time. Depending on the amount of use, the battery may last up to six months or more before
it needs replacement.
When the battery needs replacing, the system’s operating range will decrease or the transmitter
LED may not be as bright.
In order to change the battery, separate the top and bottom halves of the case.
While replacing the battery make sure that the positive and negative terminals are positioned
correctly, then carefully reassemble the transmitter case.
Page 6 -VECTRA X1
Содержание Vectra X1
Страница 1: ...VECTRA X1 VEHICLE SECURITY SYSTEM PRODUCT MANUAL...
Страница 4: ......


