background image

Comfort Harness - Assembly 

Page 7 

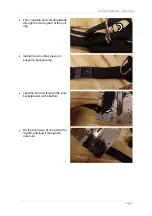
  Then, lead the belt end downwards 

through the moving part of the pull 
ring. 

  Install the two rubber pieces to 

support a backup lamp. 

  Lead the belt end through the inner 

backplate slot at the bottom. 

  On the back side, fix the belt with a 

tri-glide and lead it through the 
outer slot. 


Содержание TECLINE Comfort Harness

Страница 1: ...Comfort Harness Assembly Version 1 1 February 1 2014 ...

Страница 2: ...are that updates and amendments will be made from time to time to the manual It is the user s responsibility to determine whether there have been any such updates or amendments Neither Scubatech nor any of its directors officers employees or agents shall be liable in contract tort or in any other manner whatsoever to any person for any loss damage injury liability cost or expense of any nature inc...

Страница 3: ...Scope of Delivery 4 Assembly 4 Step 1 Installing the Shoulder Belt 4 Step 2 Installing the Right Shoulder Pad 4 Step 3 Installing the Right Pull Ring 5 Step 4 Installing the Pull Belt 6 Step 5 Installing the Left Shoulder Pad 8 Step 6 Installing the Crotch Strap 9 ...

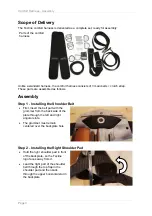
Страница 4: ...tep 1 Installing the Shoulder Belt First insert the belt part with the grommet from the back side of the plate through the left and right angular slots The grommet must remain centered over the backplate hole Step 2 Installing the Right Shoulder Pad Hold the right shoulder pad in front of the backplate so the Tecline logo faces away from it Lead the right part of the shoulder belt through the top ...

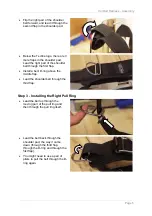
Страница 5: ...the first flap Install a bent D ring above the middle flap Lead the shoulder belt through the third flap Step 3 Installing the Right Pull Ring Lead the belt up through the moving part of the pull ring and then through the pull ring itself Lead the belt back through the shoulder pad the way it came down through the third flap through the D ring and through the first flap You might need to use a pai...

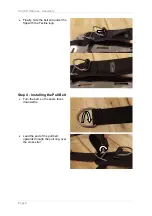
Страница 6: ... Page 6 Finally hide the belt end under the flap with the Tecline logo Step 4 Installing the Pull Belt Turn the belt so the seam faces downwards Lead the end of the pull belt upwards through the pull ring over the cross strut ...

Страница 7: ...d downwards through the moving part of the pull ring Install the two rubber pieces to support a backup lamp Lead the belt end through the inner backplate slot at the bottom On the back side fix the belt with a tri glide and lead it through the outer slot ...

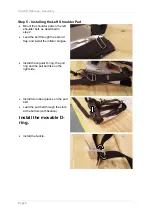
Страница 8: ...described in step 2 Lead the belt through the second flap and install the inflator bungee Install the angular D ring the pull ring and the pull belt like on the right side Install two rubber pieces on the pull belt Lead the pull belt through the slots at the bottom with fixation Install the movable D ring Install the buckle ...

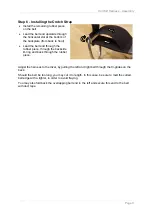
Страница 9: ...hrough the rubber piece through the backside D ring and back through the rubber piece Adjust the harness to the diver by pulling the left and right belt through the tri glides on the back Should the belt be too long you may cut it to length In this case be sure to melt the cutted belt edge with a lighter in order to avoid fraying You may also fold back the overlapping belt end to the left and secu...

Отзывы: