Follow the steps in the “Left Assembly link Removal” section, but for the right assembly link
#A5352.
SPECIFICATIONS
rIghT ASSEmBLy LInk rEmovAL
SPECIFICATIONS
MEChANICAL PARTS REMOVAL/REPLACEMENT
SPECIFICATIONS
LEFT ASSEmBLy LInk rEpLAcEmEnT
Tools Required:
*Right Angle Phillips Screwdriver *1/4” Allen Hex * 5/8” Socket * Ratchet
*Phillips screwdriver *Torque Wrench that can be set at 720 in/lbs
Between the
pivot link and
lower outer
handle assembly
Outside the
pivot link
Assembly
link
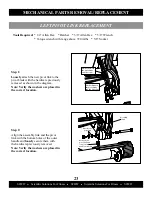
Step 1:
Align the bottom end of the assembly link
and the pivot link with the bottom holes of
the outer handle and
loosely
secure them
with t he ha rdware pr eviously r emoved.
Note: Verify the washers are placed in
the correct location.
35
SCIFIT Scientific Solutions For Fitness SCIFIT Scientific Solutions For Fitness SCIFIT
Place a small amount of Loctite 271 on
the threads of the screw, then align the top
end of the assembly link with the left pedal
link and
loosely
reattach the flat head
screw and jam nut previously removed.
Flat head Screw
Jam nut
271
Step 2:
Содержание STEP ONE
Страница 103: ...This page purposely left blank ...
Страница 104: ...Order online 24 7 at www SCIFIT com ...


