


5
/
13
CC-SMART-4K Manual
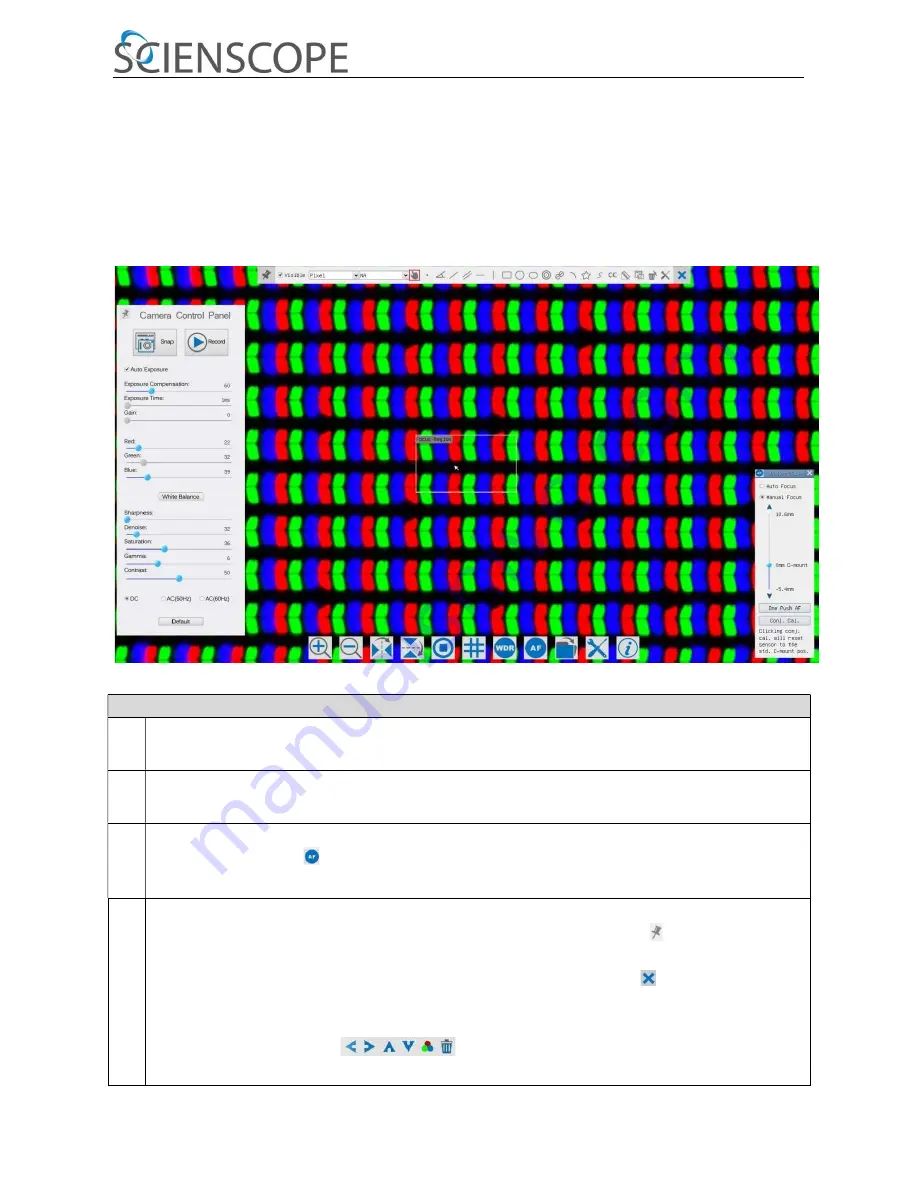
Brief Introduction of CC-SMART-4K UI and Functions
The
CC-SMART-4K
UI shown in Fig. 8 includes the
Camera Control Panel
on the left side of the video window, the
Measurement
Toolbar
on the upper side of the video window, the
Synthesis Camera Control Toolbar
on the bottom of the video window and
the
Auto Focus Control Panel
on right side of the video window.
Figure 3 The CC-SMART-4K Camera Control UI
Notes
1
When users move the mouse cursor to the left side of the video window, the
Camera Control Panel
will pop up
automatically;
2
When users move the mouse cursor to the bottom of the video window, the
Camera Control Toolbar
will pop up automatically;
3
When user moves the mouse cursor to the bottom of the video window, the
Camera Control
Toolbar will pop up
automatically. Click the button and the
Auto Focus Control Panel
will appear for autofocus operation;
4
Move the mouse cursor to the upper side of the video window, the
Measurement Toolbar
will pop up for the
calibration and measurement operations. When user left-clicks the
Float/Fixed
button on the
Measurement Toolbar
,
the
Measurement Toolbar
will be fixed. In this case the
Camera Control Panel
will not pop up automatically even if users
move mouse cursor to left side of the video windows. Only when user left-clicks the button on the
Measurement
Toolbar
to exit from measuring procedure will they be able to do other operations on the
Camera Control Panel
,
Auto
Focus Control Panel
or
Camera Control Toolbar
. During the measuring process, when a specific measuring object is selected
an
Object Location & Attributes Control Bar
will appear for changing location and properties of the
selected objects.


