background image

Содержание 830/Journey 8.0

Страница 1: ...Manual en Espa_ol LaSno Ar_ericano_ http www_schwinntitness_cor_ ASSEMBLY _ANUAL OWNEFI_S I_ IANUAI ...

Страница 2: ...e Belt Tension 20 Aligning the Walking Belt 21 Lubricating the Walking Belt Maintenance Parts Troubleshooting Warranty 31 32 32 34 38 38 38 40 41 41 42 42 43 45 47 49 To validate warranty support keep the original proof of purchase and record the following information Serial Number Date of Purchase To register your product warranty go to www schwinnfitness com register Or call 1 800 605 3369 if yo...

Страница 3: ...our own Set up this machine on a solid level horizontal surface Do not try to change the design or functionality of this machine This could compromise the safety of this machine and will void the warranty If replacement parts are necessary use only genuine Nautilus replacement parts and hardware Failure to use genuine replacement parts can cause a risk to users keep the machine from operating corr...

Страница 4: ...achine at all times Not intended for use by anyone under 14 years of age This machine is for home use only Use caution when you use this equipment or serious injury can occur To prevent injury stand on the Foot Platforms before you start the machine The maximum user weight for this machine is 136kg 300 Ib Replace any Caution Warning or Danger label that is illegible damaged or removed The heart ra...

Страница 5: ...d only until a properly grounded outlet can be installed by a qualified electrician The tab for the grounding screw must be connected to a permanent ground such as a properly grounded outlet box cover Whenever the adapter is used it must be held in place by a metal screw Grounded utlet Grounding Pin 2 Grounded Outlet Box Adapter I Screw _ Tab for Grounding Screw EmergencyStop Procedure The Treadmi...

Страница 6: ... 09 Motor Operated appliances household and commercial MaximumInclined Deck Height 15 1 inches 38 4 cm Assembled Weight approx 200 Ibs 90 7 kgs This product its packaging and components contain chemicals known to the State of California to cause cancer birth defects or reproductive harm This Notice is provided in accordance with California s Proposition 65 If you would like additional information ...

Страница 7: ...t 3 1 Tray Left 11 1 Handlebar Shroud Left 4 1 Tray Right 12 1 Power Cord 5 1 Upright Right 13 1 Safety Key 6 1 Handlebar Shroud Right 14 1 Media Cable not shown 7 1 Base Shroud Right 15 1 Silicone Lubricant Bottle not shown 8 1 Base Assembly Do not cut the Shipping Strap until the Base Assembly has been placed in the appropriate work space ...

Страница 8: ... 3 cm x 384 cm Be sure that the workout space you are utilizing has adequate height clearance taking into consideration the height of the user and the maximum incline of the machine BasicAssemblyTips Follow these basic points when you assemble your machine Read and understand the Important Safety Instructions before assembly Collect all the pieces necessary for each assembly step Using the recomme...

Страница 9: ...ions and lifting techniques Bend your knees and elbows keep your back straight and pull up equally with both arms Make sure that your own physical strength is capable of lifting the walking deck until it engages the locking mechanism Use a second person if necessary Do not use the walking belt or rear roller to lift the treadmill These parts do not lock in place and can abruptly move Injury to you...

Страница 10: ...2 Connect the Input 0utput I 0 CablesandAttachthe Uprights to Frame Note Do not crimp cables Do not fully tighten Hardware until instructed 9 1 I ...

Страница 11: ...tly toward the rear of the machine Hold up the rear of the walking deck and move to the side of the machine _Keep clear of the movement path of the walking deck The hydraulic lift is set up to drop lightly Hold onto the walking deck until approximately 2 3 of the movement down Make sure that you use proper lifting technique bend your knees and keep your back straight The walking deck can possibly ...

Страница 12: ...4 Remove the Console Backing from the Console Assembly Note Dispose of the pre installed hardware I I I 2 ...

Страница 13: ...5 Connect the I OCablesandAttachthe Consoleto FrameAssembly Note Do not crimp the Cables ...

Страница 14: ...previoussteps 7 Place the BaseShroudsontothe Frame Assembly and then unfoldthe Walking Deck Note Unfold the Walking Deck after the Base Shrouds have been placed onto the Frame Assembly The Base Shrouds do not use hardware or snap onto the Frame Assembly 6 ...

Страница 15: ...8 Attachthe Console Backing to the FrameAssembly NOTICE Attach the hardware marked below with the first then the hardware with the followed by the remain ing hardware 2 ...

Страница 16: ...9 Attachthe Handlebar Shrouds to the FrameAssembly NOTICE The parts have a right R and left L mark to assist with assembly i 11 ...

Страница 17: ...10 Snapthe Traysintothe Console Assembly NOTICE Trayedges should be flush with the face of Console 4 ...

Страница 18: ...ions 13 12 12 Final inspection Inspect your machine to ensure that all hardware is tight and components are properly assembled Besure to record the serial number inthe field provided at the front of this manual Do not use until the machine has beenfully assembled and inspected for correct performance in accordance with the Owner s Manual ...

Страница 19: ...er safety precautions and lifting techniques Bend your knees and elbows keep your back straight and pull up equally with both arms Make sure that your own physical strength is capable of lifting the walking deck until it engages the locking mechanism Use a second person if necessary Do not use the walking belt or rear roller to lift the treadmill These parts do not lock in place and can abruptly m...

Страница 20: ...prevent electrostatic discharge and protect your floor Be sure that the workout space you are utilizing has adequate height clearance taking into consideration the height of the user and the maximum incline of the deck 2 Make sure there is no object on or around the treadmill to spill or cause blockage from the fully unfolded position 3 Slightly push the walking deck forward toward the console Wit...

Страница 21: ...admill comes equipped with a durable high quality walking belt designed to provide many hours of reliable service The walking belt on a treadmill that has not been operated for a length of time either in factory packaging or after assembly can exhibit a thumping noise when started This is due to the belt taking on the curve of the front and rear rollers This is a common occurrence and does not ind...

Страница 22: ...s for home use only Do not wear loose clothing or jewelry This machine contains moving parts Do not put fingers or other objects into moving parts of the exercise equipment Always wear rubber soled athletic shoes when you use this machine Do not use the machine with bare feet or only wearing socks Set up and operate this machine on a solid level horizontal surface Use caution when you step on and ...

Страница 23: ... Exercise onthismachine requires coordination andbalance Besuretoanticipate thatchanges inbeltspeed andincline angle ofdeckcanoccurduring workouts andbeattentive inordertoavoid lossofbalance andpossible injury Amachine should never beleftunattended when plugged in Unplug fromoutletwhen notinuse andbefore putting on ortaking offparts Usethismachine onlyforitsintended useasdescribed inthismanual Don...

Страница 24: ...Dampener Console S Side Foot Support Rails H I J K L Media Tray Speaker USB Port MP3 Input Upright T Walking Belt and Deck U Power Switch V AC Inlet W Telemetry Heart Rate HR Receiver not shown X Media Cable not shown Use the values calculated or measured by the machine s computer for reference purposes only Over exercising may result in serious injury or death If you feel faint stop exercising im...

Страница 25: ...or the selected User Profile USER button Push to select the desired User Profile The Active User Display will adjust Increase A button Increases the current value or moves through the options available Left 4 button Shifts the currently active segment and moves through options OK button Confirms information or a selection Decrease T button Decreases the current value or moves through the options a...

Страница 26: ...Display The Program Display shows the course profile for the workout program A course profile has 16 columns or segments The course profile has two variables for each segment incline roundss uppeO and speed arrows lower The more intense the incline or speed setting the higher the level for that segment The flashing segment shows your current interval Heart RateZone Display The Heart Rate Zone show...

Страница 27: ...p 6ount The Distance display shows the distance count miles or km in the workout The Lap Count display shows the total number of Laps completed during the workout During a workout this workout value is only displayed when a Lap is completed or during the Workout Results mode completed Laps only no decimals Note The distance of a Lap can be customized for each User in the Edit User Profile mode The...

Страница 28: ... Take advantage of Schwinn Connect TM to see your progress over time and share your data with MyFitnessPal Review your workouts and results away from the machine when convenient for you Schwinn Connect TM allows for a workout value to be selected and have it graphed for weekly monthly or yearly comparison review If using a USB Flash Drive to import workout results to Schwinn ConnectTM 1 Insert the...

Страница 29: ...ecreasing by approximately one BPM for each year There is no indication that training influences the decrease in maximum heart rate Individuals of the same age could have different maximum heart rates It is more accurate to find this value by completing a stress test than by using an age related formula Your at rest heart rate is influenced by endurance training The typical adult has an at rest he...

Страница 30: ...out area inspect the walking belt to make sure it is centered and aligned If necessary refer to the Aligning the Walking Belt Procedure in the Maintenance section of this manual A_ The edges of the Walking Belt should be under the Side Foot Support Rails If an edge of the Walking Belt can be viewed do not operate the machine Adjust the Walking Belt until the edges are not viewable and are below th...

Страница 31: ...will enter Power Up Idle Mode if it is plugged into a power source the Power Switch turned on and the Safety Key is properly installed Nete if the Safety Key is not installed the machine will allow the User to perform all activities except to activate the Walking Belt The Console will display the reminder to insert the Safety Key SAFETY KEY Once the Safety key is installed the START button will ne...

Страница 32: ...conds 9 59 59 When done with your workout push PAUSE STOP to pause the workout Push PAUSE STOP again to end the workout Note The workout results are recorded to the current User Profile User Profiles The Console lets you store and use 4 User profiles The User profiles automatically record the workout results for each workout and allow the workout data to be reviewed The User profile stores the fol...

Страница 33: ...the Increase Decrease buttons to adjust the LAP distance value The default is 0 25 miles or 0 4 km Push the OK button to set the LAP distance value The Console display shows the SCAN prompt This option controls how the workout values are displayed during a workout The ON setting allows the Console to automatically display or scan between the workout values every 4 seconds The OFF setting allows th...

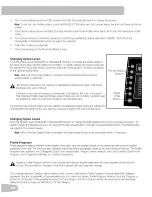
Страница 34: ...uate height clearance taking into consideration the height of the user and the maximum height of the fully inclined Deck Pre Set Buttons Incline Enter Changing Speed Levels Push the Speed Level Increase A or Decrease T buttons to change the Belt Speed at any time in a workout program To rapidly change the Speed level push the desired Pre Set Speed Button and then the Speed Enter Button The Walking...

Страница 35: ...IES HEART HEALTH HEALTHY 55 FATBURN 65 AEROBIC 75 ANAEROBIC 85 WEIGHT CONTROL FAT BURN 1 CALORIE BURN 150 CALORIE BURN 300 iNTERVAL INTERVAL INC Incline INTERVAL SPD Speed INTERVAL DUAL Incline and Speed TRAIN ENDURANCE PERFORMANCE ...

Страница 36: ...During a Workout the User can directly adjust the speed of the belt above the Maximum Speed setting if desired Note A User can push START to begin the workout if the default Goal type and value is acceptable 6 Use the Increase A or Decrease T buttons to adjust the Minimum Speed of the Belt and push OK The Profile Program will adjust so the Minimum Speed value is the lowest Speed of the Profile Pro...

Страница 37: ... rate to reach the desired heart rate zone when setting the goal The Console will display the heart rate value based on the current User settings 6 Push START to begin the workout A User can also set a Heart Rate Target value by selecting the HR TARGET program in the CUSTOM Category The Console will adjust the workout to keep the User in the desired Heart Rate zone 1 Push the PROGRAMS button until...

Страница 38: ...button to pause your workout The Console will display PAUSED 2 To continue your workout push the START button To stop the workout push the PAUSE STOP button The Console will go into Results Cool Down mode Results Cool Down Mode All workouts except Quick Start have a 3 minute Cool Down period During this Cool Down period the Console shows the Workout Results The Console will cycle through the worko...

Страница 39: ...lay 50 calories per segment for the previous seven days along with the workout value totals The Console will cycle between the workout results every 4 seconds Use the Left 4 or Right b buttons to force the cycle between the workout results 7 Push the Decrease T button to move to the LAST WORKOUT The Console will display the workout values from the last workout The Console will cycle between the wo...

Страница 40: ...ecrease buttons to adjust thecurrently active value flashing Push theLeft Right buttons tochange which segment isthecurrently active value month day yea0 5 Push OK to set 6 The Console display shows the Time prompt with the current setting Push the Increase Decrease buttons to adjust the currently active value flashing Push the Left Right buttons to change which segment is the currently active val...

Страница 41: ...f sweat With the Walking Deck lowered if an edge of the Walking Belt can be seen adjust it until the edge is not viewable Note Avoid excessive moisture on the Console Weekly Check for smooth roller operation Wipe the machine to remove dust dirt or grime Do not remove the machine motor cover dangerous voltages are present The compo nents are serviceable only by approved service personnel Note Do no...

Страница 42: ...The walking belt should be centered on your treadmill at all times Running style and a non level surface can cause the belt to move off center Minor adjustments to the 2 bolts at the rear of the treadmill are necessary when the belt is off center The edges of the Walking Belt should be under the Side Foot Support Rails If an edge of the Walking Belt can be viewed be sure to adjust the Walking Belt...

Страница 43: ...e a second person if necessary Do not use the walking belt or rear roller to lift the treadmill These parts do not lock in place and can abruptly move Injury to you or damage to the machine can occur 4 Make sure that the locking mechanism is engaged Carefully pull back on the walking deck and make sure that it does not move When you do this keep clear of movement path in case the treadmill lock is...

Страница 44: ... 8 Connect thepower cordbackintothemachine andthenintothewalloutlet 9 Turn onthepower tothemachine withthepower switch 10 Stay to onesideofyourmachine andstartthebeltattheslowest speed Letthebeltoperate forapproximately 15 seconds Besurenottotouchthewalking beltorsteponthepower cord Keepbystanders andchildren away fromtheproduct youareservicing atalltimes 11 Switch offyourmachine 12 Take careto cl...

Страница 45: ...Safety Key Port Fan Contact Heart Rate Sensor Console Cable Tray Left G Tray Right H Right Upright Cable I Upright Right J Base Shroud Right K Base Cable L Base Assembly M N O P Q Handlebar Shroud Right Upright Left Base Shroud Left Handlebar Shroud Left Power Cord ...

Страница 46: ...C BB AA Back EE Z BB CC X S Fuse X Base Support CC Incline Adjuster T Power Switch Y Deck Cushioners DD Pivot Assembly U Power Input Z Transport Wheel EE Belt Tensioner V Motor Cover AA Leveler W Side Foot Support Rails BB Lifting Cylinder ...

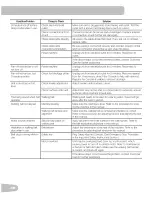
Страница 47: ...ot displayed still with relatively equal pressure applied to each side Dry or calloused hands Sensors may have difficulty with dried out or calloused hands A conductive electrode cream heart rate cream can help make better conduct These are available on the web or at medical or some larger fitness stores If tests reveal no other issues contact Customer Care for further assistance Unit operates but...

Страница 48: ... Adjust levelers until machine is level level Check surface under unit Adjustment may not be able to compensate for extremely uneven surfaces Move machine to level area Thumping sound when belt Walking belt Walking belt needs to be used for wear in period Sound will go operates away after the wear in period Walking belt not aligned Machine leveling Make sure the machine is level Refer to the proce...

Страница 49: ... mishandling accident natural disasters power surges A machine placed or used in a commercial or institutional setting This includes gyms corporations work places clubs fitness centers and any public or private entity that has a machine for use by its members customers employees or affiliates Damage caused by exceeding maximum user weights as defined in the Product s Owner s manual or warning labe...

Страница 50: ... Nautilus 8004123 081514 C Bowflex Schwinn Fitness Universah ...

Отзывы: