background image


Keys on the remote control 

1. Mute 
2. Information key (INFO) 
3. Teletext key (TTX) 
4. SCART input key (DTV/VCR) 
5. Subtitles key (SUBTITLE) 
6. EXIT key 
7. Confirm (OK) 
8.  key / navigation right 
9. Toggle between TV and radio (TV/RADIO) 
10. Previous channel key (RECALL) 
11. Search key (GOTO) 
12. Previous file key ((

|<<

13. Next file key ((

|<<

14. REPEAT key 
15. STOP key 
16. STANDBY key 
17. EPG key 
18. Audio key 
19.  key / navigation up 
20. Settings menu key (MENU) 
21. Favourites key (FAVOURITE) 
22. Numerical key (0… 9) 
23. Fast forward during playback ((

>>

24. Fast rewind during playback (

<<

25. Playback key (PLAY/ 

>)


26. Pause key 
27. Function keys (red, green, yellow, blue) 
28. RECORD key 
29. Recording list (LIST) 


Notes: 
The functions of the PVR keys are optional. 
 
The function of the colour keys green, red, yellow and blue 
varies with the different modes of operation. These


functions will always be explained in the relevant sections. 

Содержание DSR 6050 HD

Страница 1: ... 16 STANDBY key 17 EPG key 18 Audio key 19 Channel key navigation up 20 Settings menu key MENU 21 Favourites key FAVOURITE 22 Numerical key 0 9 23 Fast forward during playback 24 Fast rewind during playback 25 Playback key PLAY 26 Pause key 27 Function keys red green yellow blue 28 RECORD key 29 Recording list LIST Notes The functions of the PVR keys are optional The function of the colour keys gr...

Страница 2: ...liability for printing errors Version 1 0 DE 16 03 10 Dear customer Having in mind an environmentally friendly behaviour we ask you to switch off your receiver after usage by operating the mains switch at the rear side of the device With this you contribute to the protection of the environment and save money ...

Страница 3: ... of audio and video equipment Each person who installs connects operates cleans disposes of this receiver must be familiar with the entire content of this operating manual Always keep this operating manual in the proximity of the receiver Style features Specific style features have been given in different sections of the operating manual Thus you can easily differentiate whether it concerns normal...

Страница 4: ...Connection of an audio digital receiver 26 Connection and rough direction of the antenna 28 Getting started 34 Remote control 34 The receiver 36 Operation 37 Screen display messages when switching channels 37 User interface on the TV screen 39 Menu structure 39 Menu navigation 42 Channel list symbol TV I 43 Video settings symbol TV II 47 Installation symbol Magnifier 48 Time symbol clock and earth...

Страница 5: ...r all maintenance to qualified personnel Otherwise you will put yourself and others at risk Disconnect the receiver from the power source in case of operational disruptions Spare parts must be ordered directly from the manufacturer Modifications of the device lead to an extinction of the manufacturer s liability Remove the protection films Caution Information on separation from power source The St...

Страница 6: ... kind of humidity to avoid risk of fire and electric shock Do not open the receiver It could cause electric shock Connect the receiver only to a professionally installed mains socket of 220 V 240 V 50 Hz 60 Hz The total current at the antenna connection of the receiver LNB IN must not exceed 300 mA Pull out the mains plug from the socket if the equipment is not in use for a longer period of time O...

Страница 7: ... liability for printing errors Version 1 0 DE 16 03 10 Dear customer Having in mind an environmentally friendly behaviour we ask you to switch off your receiver after usage by operating the mains switch at the rear side of the device With this you contribute to the protection of the environment and save money ...

Страница 8: ...ion slots Ensure adequate ventilation of the receiver Do not place any heavy objects on the receiver Moisture may condense in the receiver when it is brought from a cold into a hot environment In this case wait for about an hour before operating the equipment Arrange the mains and antenna cables in such a manner that nobody can step or trip over them Correct battery handling Batteries may contain ...

Страница 9: ...teries may contain toxic agents Discard the batteries in an ecologically accepted manner and in accordance with the relevant statutory regulations Never discard the batteries with normal household waste Never expose the batteries to open fire or strong heat as otherwise there is a danger of explosion Replace the batteries always by batteries of the same type ...

Страница 10: ...f the receiver Appropriate use The receiver is designed for receiving digital unencrypted satellite channels free to air for private use It is exclusively meant for this purpose and should only be used for the same This also includes paying attention to all information contained in these operating instructions especially the safety instructions Any other use is considered to be improper and may le...

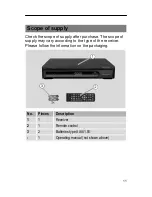
Страница 11: ... after purchase The scope of supply may vary according to the type of the receiver Please follow the information on the packaging No Pieces Description 1 1 Receiver 2 1 Remote control 3 2 Batteries type AAA 1 5V 1 Operating manual not shown above ...

Страница 12: ...ammed The satellite antenna has to be directed towards the desired satellite The receiver will scan for further new broadcasting stations as soon as you initiate the automatic scanning of broadcasting stations for this satellite Satellites not preset may be added All receiver settings can be made easily using the user interface menu on the TV screen The multilingual user interface supports the fol...

Страница 13: ...caling of SDTV channels Software update via satellite ASTRA1 19 2 E optional or via USB interface Saves the channel last watched Last Station Memory LNB control logic sound 0 22 kHz max current delivery for LNB 300 mA Symbol rate 1 35 MS s and 950 2150 MHz input frequency 2 keys at the frontage plug play The power draw in standby mode is approx 1W Mains connection 220 V 240 V 50 60 Hz 5 000 channe...

Страница 14: ... with a memory of 800 pages Digital radio reception background image for radio background display Additional channel information is displayed when the channel is changed DiSEqC 1 0 1 2 USALS is supported if an appropriate antenna unit is connected SWAP function via Recall key Screen aspect ratios can be set to 4 3 16 9 and automatically letterbox 20x multi functional timer linked with EPG sleep ti...

Страница 15: ...ntation of the paraboloidal type reflector In addition a suitable channel editor can be obtained through our hotline Then you will be able to edit the channel lists of the receiver using your computer Please read the information on our website www VFKZDLJHU de ...

Страница 16: ...fer damages Caution Information on separation from power source The Standby key of this device will not separate the device completely from the power source In addition the device will draw current To separate the device completely from the power source the mains plug must be pulled out of the socket The wire netting and the inner core of the coaxial cable carry current during operation Danger Con...

Страница 17: ...e outer insulation so that the wire netting is exposed Turn the wire netting backwards and wind it over the outer insulation in such a manner that it does not touch the inner core Remove the inner insulation together with the foil placed over it up to 2mm before reaching the wire netting Caution The wire netting and the foil must not touch the inner core The foil must enclose the inner insulation ...

Страница 18: ...18 Cut the inner core with a cable cutter in such a manner that it projects maximum 1 mm from the connector ...

Страница 19: ...19 Installation diagram Fasten the F connector of the coaxial cable onto the LNB IN antenna connection of the receiver Fasten the other end of the coaxial cable on the LNB ...

Страница 20: ... TV set Plug the SCART cable in the SCART socket VCR of the receiver if you want to connect a video set Connect the SCART cable to the video set Follow the operating manual of the video set Insert the Cinch connector of the Cinch cable in the AUDIO R and AUDIO L sockets of the receiver if you want to connect a stereo system The Scart cable is not included in the scope of supply ...

Страница 21: ...21 Connection diagram ...

Страница 22: ...ollow the operating manual of the video set If you want to connect a stereo system plug the Cinch connectors of the Cinch cable into the AUDIO R and AUDIO L sockets of the receiver Please note that the SCART and the HDMI cable are not included in the scope of supply It is impossible to operate the receiver simultaneously via the SCART and the HDMI connection You will have a signal either at the SC...

Страница 23: ...23 Connection diagram ...

Страница 24: ... AUDIO R and AUDIO L outputs of the receiver to the corresponding inputs of the TV set Caution Never connect the Phono input of your stereo system to the receiver it may damage your stereo system Strictly follow the instructions for connecting the Cinch cable given in the operating manual of your stereo system The Cinch cable is not included in the scope of supply ...

Страница 25: ...25 Connection diagram ...

Страница 26: ...er it may damage your stereo system Strictly follow instructions for connecting the Cinch cable given in the operating manual of your stereo system Caution Please follow strictly the information regarding connection in the operating manual of your audio digital receiver The coaxial cable is not included in the scope of supply Your TV set need not be switched on for radio reception You must switch ...

Страница 27: ...l output Insert the coaxial cable in the COAXIAL socket of the receiver Connect the coaxial cable to the audio digital receiver Enable the digital audio output of the receiver in the menu item System Settings TV system Connection diagram ...

Страница 28: ...u have not mounted and directed your satellite system yet you must first find a suitable location for mounting the antenna Please make sure that the antenna is directed towards the south east This means you must have a free view in this direction when you stand behind the antenna Keep in mind that the antenna must never be mounted behind a balustrade a handrail or other obstacles such as trees Whe...

Страница 29: ...ally be ensured with an installation on a wall Make sure that you can turn your antenna completely without having contact with the wall of your house before installing a corresponding wall bracket not necessarily included in the scope of supply After having made all relevant connections you can now start with the setup of the antenna Please check again that the receiver is connected with the LNB o...

Страница 30: ...you wish to receive the satellite ASTRA1 19 2 E you must set your receiver to channel location 1 for directing the antenna The same applies also for other satellites such as Hotbird If you wish to direct your antenna to Hotbird just call a preset channel of Hotbird with your receiver Third step Now direct your antenna to the satellite you selected You have several options to do so The easiest and ...

Страница 31: ... component points exactly towards the east i e rotate by 90 see following picture South East In case of digital satellite reception the receiver receives the transmission signal with a time lag Therefore turn the antenna very slowly and wait at each position for some seconds until the receiver shows the signal strength on the screen ...

Страница 32: ...A1 at 19 2 east and you are receiving the set channel on your TV set Now please check again if you are receiving the channel set on the receiver and use the remote control to zap through the channels with the CHp and CHq keys As soon as you have found the desired satellite you should improve the direction of the antenna until you get a clear image on all channels You can achieve this by an optimum...

Страница 33: ...33 Finally tighten all screws thoroughly to make sure that the direction of your antenna cannot change anymore ...

Страница 34: ...A 1 5V batteries are required for the remote control Open the battery compartment Insert two batteries according to polarities mentioned on the battery compartment Push the cover of the battery compartment carefully until the cover is locked ...

Страница 35: ...e battery compartment with a dry cloth Caution Batteries may contain toxic agents that are hazardous to health and environment Therefore always discard the batteries according to the prevailing statutory regulations Never discard the batteries with normal household waste The remote control transmits infrared signals to the receiver Please refer to the overview of the remote control for the functio...

Страница 36: ...MI connection select the respective HDMI input at the TV set Insert the mains plug of the receiver in the mains socket The device is in normal mode The current channel location will be displayed The receiver is supplied with preset TV channels and can be used directly If you want to check if new channels are available initiate a programme scan Read the information further below on this topic To ge...

Страница 37: ...he channel set on the receiver and use the remote control to zap through the channels with the CHp and CHq keys Current time according to the pre setting in the menu item Time TTX symbol This symbol is displayed if the selected broadcasting station offers teletext HD symbol Is displayed if you are connected to an HD channel SUB Subtitles available DOLBY AC3 sound track is available and selected vi...

Страница 38: ...the dotted line displays the progression of the current programme The line runs from the left to the right Below you will find the current and the following programme preceded by the start and end times of the programmes ...

Страница 39: ...e TV set need to be switched on and connected by a cable e g SCART or HDMI Press the MENU key The main menu will be displayed By pressing the EXIT key or the MENU key again you can exit this menu Navigation within the menus Top arrow 1 Menu symbol selected menu is highlighted in orange Centre arrow 2 Menu points symbols Below arrow 3 Available commands 3 1 2 3 1 2 ...

Страница 40: ...owing pages Installation symbol Magnifier page 48 Satellite settings and channel scanning see following pages Time Symbol clock earth Page 52 Auto Time settings see following pages Time zone see following pages Date see following pages Time see following pages Auto Off see following pages Option Symbol gears Page 54 Language menus see following pages Language subtitles see following pages Language...

Страница 41: ...sword see following pages Restore factory settings see following pages Information see following pages Recall list see following pages USB Symbol USB stick Page 55 Multimedia see following pages Photo settings see following pages PVR settings optional see following pages ...

Страница 42: ...e EXIT key to exit the menu Changes must be confirmed additionally Sometimes they will require a confirmation prompt Example Setting the receiver to summer time MENU key select menu time key OK select time zone adjust time zone depending on location UK GMT 00 00 for winter time or GMT 01 00 for summer time Quit the menu by pressing the EXIT key ...

Страница 43: ... the respective channel list is shown Edit channel list Requires password input Factory setting 000000 Select the channel to be changed with the and keys It will then be marked with a yellow bar The current programme of the channel is displayed in the small window on the right ...

Страница 44: ...hile zapping through the channels you can mark it with the green function key The SKIP symbol appears next to the channel The channel can now only be selected with the numerical keys of the remote control To undo this step selected the channel again and press the green function key The SKIP symbol will disappear 3 Yellow function key Lock In order to protect a channel with a password factory defau...

Страница 45: ...hannel from a favourite list mark it and press the favourite key Choose No Favourite in the windows and press the OK key The heart disappears and the channel does no longer belong to a favourite group 6 INFO Rename In order to rename a channel mark it and press the INFO key of the remote control Use the virtual keyboard to select the respective letters and write the new channel name After writing ...

Страница 46: ...46 Use the EXIT key to leave this menu If you have made any changes a message is displayed indicating that the change is saved ...

Страница 47: ...ult setting is Auto recommended for flat screen TVs is Auto for CRT TVs 4 3 letterbox Resolution Selection of the video resolution default setting 1080i HDTV quality of HD channels from 720p Used connection HDMI TV format Options PAL NTSC Auto Default setting PAL SCART output Options RGB CVBS Quit menu by pressing the EXIT key ...

Страница 48: ...ect the satellite to be scanned with the and keys You may now either scan the entire satellite or individual transponders manual scan Press the key to enter the satellite specific settings of the selected satellite These settings are important for the multi satellite reception ...

Страница 49: ...elect from the window o Scan mode Standard pre programmed frequencies transponders only Blind search no data required complete scan of the satellite o Filter All channels Free channels o Service Type All TV Radio The scanning procedure can be initiated by pressing the OK key Before starting the scanning process you will be asked whether existing channels are to be retained or deleted ...

Страница 50: ... OK key to mark the transponders to be scanned A multiple selection is possible The signal strength of the currently selected transponder will be displayed Press the blue function key Please select in the window o Scan mode Standard pre programmed frequencies transponders only Blind search no data required complete scan of the satellite o Filter All channels Free channels o Service Type All TV Rad...

Страница 51: ... data available If you make changes here the previously stored data will be lost o Red function key Add Add a new satellite or a new transponder of a satellite You must have the required data available o Yellow function key Delete After deleting a satellite or transponder you will no longer be able to watch its channels They have been removed Use the OK key to mark the satellites transponders to b...

Страница 52: ...ll be acquired from the received satellite signal Disabled Manual setting Time zone If you have enabled automatic time settings you can select the time zone here UK winter GMT 0 UK summer GMT 1 Date Manual input required if automatic time settings are disabled Time Manual input required if automatic time settings are disabled ...

Страница 53: ...ning time You can choose between 60 120 and 180 minutes 2 minutes before termination of the set remaining time a corresponding message will be displayed to inform you If you do not want the receiver to change over to standby mode just enter a command via the remote control The set remaining time will then start again Select Not active to disable this function This function has been included for ec...

Страница 54: ...ou can make your selection here Language audio If a programme is broadcast in several languages you can make your selection here Digital sound output Here you can select the digital audio format of the digital coaxial sound output Banner time Here you can set for which period the channel information will be displayed after a programme change ...

Страница 55: ... are cancelled In the condition as supplied to the customer the receiver starts in normal mode Information Technical details Please have these data at hand when contacting our service hotline Recall list Enable disable Enabled Press RECALL key to open list of previously selected channels Here you can make your selection Factory default disabled Pressing the RECALL key allows you toggle between the...

Страница 56: ...y the receiver The connected USB storage device must be FAT 32 formatted Taking into account the diversity of USB storage media available we cannot guarantee that the receiver accepts all kinds of USB storage media Depending on the storage capacity it may take several minutes before a USB storage device is detected ...

Страница 57: ... the OK key of the remote control Use the and of the remote control to leaf through the images of the current directory The red function key offers a zoom function The green and yellow function keys can be used to rotate the current image clockwise anti clockwise Use the EXIT key to return to the directory Slide show The slide show is restricted to the photos of the current folder or root director...

Страница 58: ...s mode PVR optional This option displays the directory of the USB storage device The records of the receiver can be found in the PVRRECORD folder Select the PVRRECORD folder with the OK key You will receive a list of records The selected record is shown as a preview Use the red function key to change to full screen mode The PVR function keys control the playback Pressing once Stop playback Play ke...

Страница 59: ...Mark selected record for deletion Several records can be marked for deletion The records will be deleted as soon as the OK key is pressed and twice Press the EXIT key to cancel this process Green function key Rename the current record using the virtual keyboard displayed Save by selecting the OK field and press OK key of the remote control Press the EXIT key to quit the application ...

Страница 60: ...ll screen This selection may distort the original image sizes PVR settings optional o Recording device Data of the connected USB storage device o Formatting This process irreversibly deletes all data stored on the USB storage device The formatting parameters are fixed Press OK key and acknowledge the warning message to start the formatting process ...

Страница 61: ...ia Depending on the storage capacity it may take several minutes before a USB storage device is detected Recording In order to start a record from normal mode operation press the REC key of the remote control A message appears to confirm that recording has started During the recording process it is not possible to change the channel In order to stop the record press the STOP key and confirm with t...

Страница 62: ...rt playing the selected programme Pressing once Pause playback Pressing again Continue playback Rewind fast forward By pressing this key several times speed changes Jump to previous next record Yellow function key Mark selected record for deletion Several records can be marked for deletion The records will be deleted as soon as the OK key is pressed and twice Press the EXIT key to cancel this proc...

Страница 63: ...63 Green function key Rename the current record using the virtual keyboard displayed Save by selecting the OK field and press OK key of the remote control Press the EXIT key to quit the application ...

Страница 64: ...lectronic Programme Guide The EPG provides programme information in table form if provided by the broadcasting station It shows information on broadcasting times and programmes Use the and keys to change the channel The channel name is displayed in the header line ...

Страница 65: ...ogramme to the timer Programme transfer to the time as follows If required you can edit the programme data by hand Important in point mode The selection Watch changes over to the programmed channel for example in order to record it on an attached video device or just as a reminder The Selection Record means that the programmed event will be recorded on a connected USB storage device optional ...

Страница 66: ... information about the current programme Press twice Detail information on the current programme This will also display the signal strength This information is a valuable help when directing the antenna TTX Starting teletext The receiver supports the Fasttext functions via the function keys AUDIO Some channels broadcast multiple sound tracks Here you can make the desired selection DTV VCR For SCAR...

Страница 67: ...OURITE key Press FAVOURITE key repeatedly to toggle between the favourites lists TV RADIO Switching between TV and radio mode RECALL Switch to most recent channel If this option is enabled in the menu option system recall list a list of the most recent channels will be displayed GOTO Displays a list of the satellites entered in the receiver This function makes it easier to find a channel ...

Страница 68: ... 60 the black background will disappear and the TV image will be displayed For another satellite please select a current channel from the preset channel list and then press the INFO key twice Frontal display dark The mains cable is not connected Connect mains cable to a functional mains socket No sound or image but receiver menus are displayed The antenna is not directed towards the satellite Dire...

Страница 69: ... antenna properly The LNB is defective Replace the LNB No image no sound signal strength and signal quality OK The satellite antenna has been directed to the wrong satellite Bad reception of DSF etc Wireless telephone is disturbing DECT standard Move your telephone to another place Software crash receiver cannot be operated anymore Should it come to the improbable case of a system crash separate t...

Страница 70: ...ng channel and carry out an automatic scan Password The factory set password is 0000 Cannot remember personal password Please contact the service hotline if you have forgotten your personal password Operating manual in additional languages On the website www VFKZDLJHU de this operating manual is available for download in additional languages Channel list editor On the website www VFKZDLJHU de a ch...

Страница 71: ...storage media available we cannot guarantee that the receiver accepts all kinds of USB storage media The common USB storage media known by us are compatible with this receiver For larger USB hard disks you should use an external power pack following the operating instructions of the USB hard disk If a problem cannot be rectified in spite of this please contact your specialised dealer or the manufa...

Страница 72: ...nd proper manner Never throw the batteries into normal household waste Batteries may contain toxic agents Therefore it is essential to discard the batteries according to the prevailing statutory regulations and the statutory return obligation Ask your municipal authorities or local government about different methods of disposal in an eco friendly and proper manner Hand over used batteries to a col...

Страница 73: ... 1 2 Symbol rate 2 45 MS s Error correction FEC 1 2 2 3 3 4 5 6 7 8 auto Aspect ratio 4 3 LB 4 3 PS 16 9 Auto Video resolution 720 x 576 Pal 720 x 480 NTSC 1280 x 720 1920 x 1080 Audio mode Left right stereo mono AC3 digital sound Connection options LNB IF input Type F IEC 169 24 TV SCART output only Video CVBS RGB audio L R VCR SCART output and input Video CVBS Audio L R RCA CINCH Audio L R video...

Страница 74: ... 2 0 interface Power supply Input voltage power pack 220 240V 50 60 Hz Power consumption approx 11 5 W operation with single LNB approx 1 W standby Operating temperature 0 ºC 40 ºC Storage temperature 40 ºC 65 ºC ...

Страница 75: ...le telephone call Should there arise problems with your device we kindly ask you to contact our service hotline first Proceeding like this will save you time and possible irritation Our hotline personnel will be glad to help you and explain the exact procedure of guarantee handling should it become necessary to send in your device Service hotline 49 0 0RQWDJ RQQHUVWDJ 8KU UHLWDJ 8KU Email info sch...

Страница 76: ...uisition Modifications of the device lead to an extinction of the manufacturer s guarantee obligation A crash of the system software is not considered a malfunction and no guarantee will apply Should a connected USB storage medium not be compatible with the receiver it will not be covered by the guarantee ...

Страница 77: ...th the following guidelines and standards for this product Low voltage guideline 2006 95 EC Guideline on electromagnetic compatibility 2004 108 EC Ecodesign directive 2009 125 EC Equipment type model Digital satellite receiver DSR 6050 HD Langenzenn 15 AUG 2010 Schwaiger GmbH ...

Страница 78: ...cting from multiple satellite positions for example ASTRA and Eutelsat EPG Electronic Programme Guide F connector Coaxial connector for LNB antenna cable FTA Free to air services Free of charge services that can be received without special decoder LNB Low Noise Block Amplifier Converter A device at the centre of the antenna which converts high frequency incoming signals from satellites into a low ...

Страница 79: ... signals from the antenna into video and audio signals SCART A 21 pole connector for connecting the TV set to the receiver Swap function Switches between current channel and channel last watched Transponder Satellite frequency Several digital channels can be broadcasted simultaneously on a transponder VCR Abbreviation for Video Cassette Recorder ...

Отзывы: