Assembly and settings
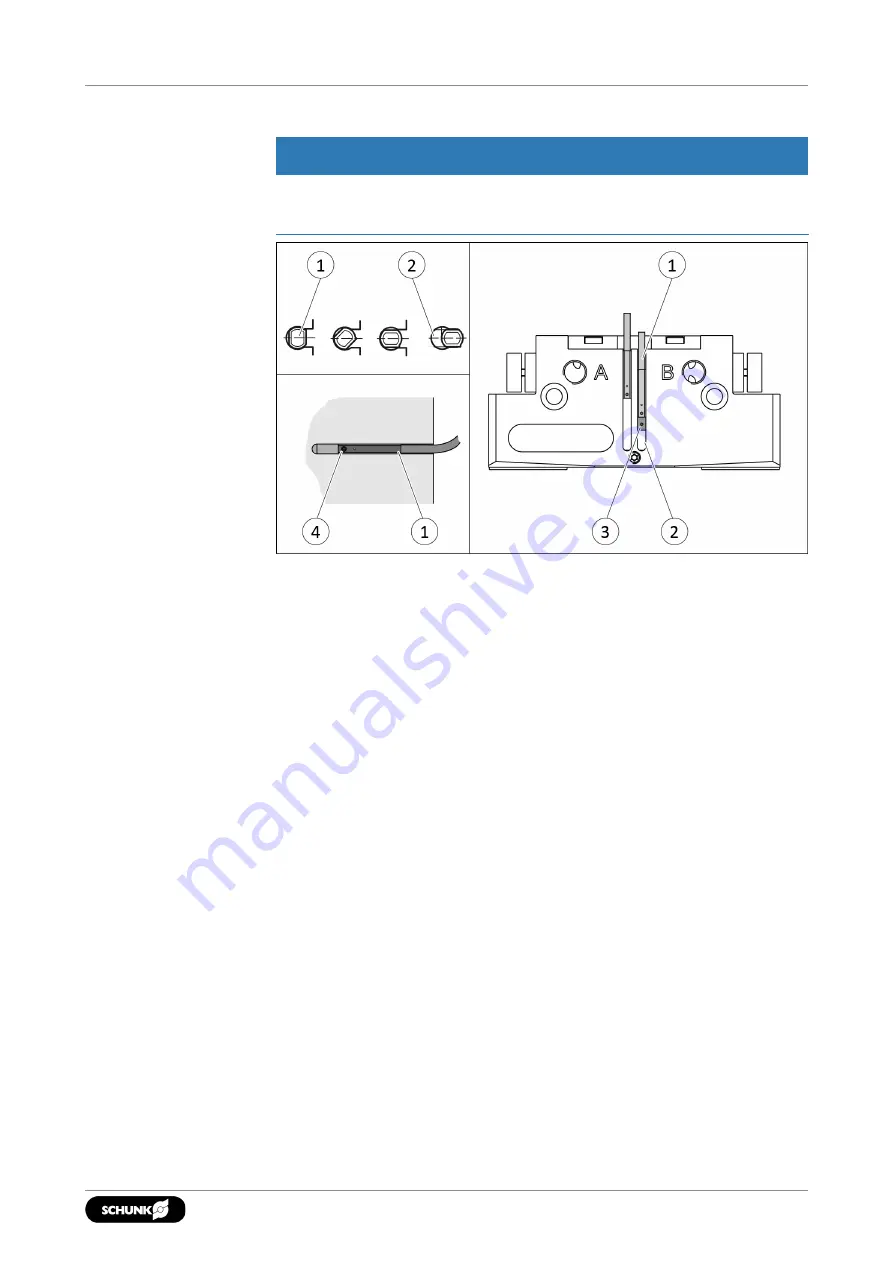
5.4.6 Mounting MMS 22 magnetic switch
CAUTION
Risk of damage to the sensor during assembly!
•
Observe the maximal tightening torque.
Position "Gripper open" or "Part gripped (I.D. gripping)"
1. Bring product in the position to be set.
2. If necessary remove T-nut (3).
3. Turn the sensor 1 (1) into the groove (2).
OR: Slide the sensor 1 (1) into the groove (2) until the
sensor 1 (1) stops at the end of the groove.
4. Pull the sensor 1 (1) back again slowly until it switches.
5. Secure the sensor 1 (1) using the set-screw (4).
Tightening torque: 10 Ncm
6. Bring product into the "Gripper open" or "Part gripped"
position and test the function.
Position "Gripper closed" or "Part gripped (O.D. gripping)"
1. Bring product in the position in which it is to be set.
2. If necessary remove T-nut (3).
3. Turn the sensor 2 (1) into the groove (2).
OR: Slide sensor 2 (1) into the groove (2) in the direction of the
housing middle (3), until the sensor 2 (1) switches.
4. Secure the sensor 2 (1) using the set-screw (4).
Tightening torque: 10 Ncm
5. Bring product into the "Gripper closed" or "Part gripped"
position and test the function.
35
02.00 | JGP-P | Assembly and Operating Manual | en | 1469637
Содержание JGP-P
Страница 1: ...Translation of Original Operating Manual Assembly and Operating Manual JGP P 2 finger parallel gripper...
Страница 65: ......
Страница 66: ......
Страница 67: ......


