background image

 5 

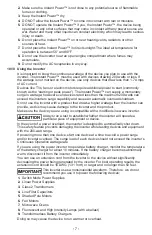
Determine which post of the battery is grounded (connected) to the chassis. If the 

5. 

negative post is grounded to the chassis (as in most vehicles), see step 6. If the 

positive post is grounded to the chassis, see step 7.

For a negative-grounded vehicle, connect the POSITIVE (RED) clip from the jump 

6. 

starter to the POSITIVE (POS, P, +) ungrounded post of the battery. Connect the 

NEGATIVE (BLACK) clip to the vehicle chassis or engine block away from the 

battery. Do not connect the clip to the carburetor, fuel lines or sheet-metal body parts. 

Connect to a heavy gauge metal part of the frame or engine block.

For a positive-grounded vehicle, connect the NEGATIVE (BLACK) clip from the jump 

7. 

starter to the NEGATIVE (NEG, N, -) ungrounded post of the battery. Connect the 

POSITIVE (RED) clip to the vehicle chassis or engine block away from the battery. 

Do not connect the clip to the carburetor, fuel lines or sheet-metal body parts. 

Connect to a heavy gauge metal part of the frame or engine block.

RiSk OF EXPLOSiON. 

If you have connected the clips backward, an audio alarm will sound. DO NOT 

turn the ON/OFF switch to the ON position. This could cause serious damage 

to the Instant Power™ or the vehicle. Reverse the connections and the audio 

alarm will stop.

Turn ON the Jump Start ON/OFF switch. Crank the engine. If the engine 

8. 

does not start within 5-8 seconds, stop cranking and wait at least 1 minute 

before attempting to start the vehicle again. (This permits the battery to cool down.)

After the engine starts, make sure to turn OFF the Jump Start switch. Disconnect the 

9. 

black clip (-), then the red clip (+), in that order.

Recharge the Instant Power™ as soon as possible after use.

10. 

RiSk OF EXPLOSiON. 

To prevent sparking, NEVER allow the clips to touch together or to contact the 

same piece of metal. Never attempt to jump start a frozen battery.

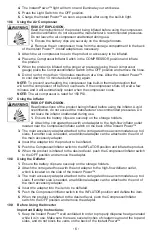
Powering a 12V dC device

10.3 

The Instant Power™ is a power source for all 12V DC accessories that are 

equipped with a 12V accessory plug. Use it for power outages and fishing or 

camping trips. 

Make sure the device to be powered is OFF before inserting the 12V DC accessory plug 

into the 12V DC accessory outlet.

Ensure the battery clips are securely clipped on the storage holders.

1. 

Open the protective cover of the DC power outlet on the front of the Instant Power™.

2. 

Plug the 12V DC device into the DC power outlet, and turn the 12V DC device on  

3. 

(if required).

If the 12V DC device draws more than 15A or has a short circuit, the internal circuit 

4. 

breaker of the Instant Power™ will trip and disconnect the power to the device. 

Disconnect the 12V DC device. The breaker will automatically reset after an  

overload occurs.

The DC power outlet is wired directly to the internal battery. Extended operation of a 12V 

DC device may result in excessive battery drain. Recharge immediately after unplugging 

the 12V DC device.

Using the USB Port

10.4 

The USB port provides up to 500mA at 5V DC.

Ensure the battery clips are securely clipped on the storage holders.

1. 

Turn the Instant Power™ On/Off switch to the ON position.

2. 

Plug in and turn the USB device on.

3. 

Reverse these steps when finished using the USB port.

4. 

Charge the Instant Power™ as soon as possible after using the USB port.

5. 

Using the Built-in Light

10.5 

Position the Instant Power™ on a flat, stable surface near the intended work area.

1. 

Ensure the battery clips are securely clipped on the storage holders.

2. 

Press the Light Switch to the ON position.

3. 

Содержание XJS22 INSTANT POWER

Страница 1: ...and blindness Keep out of reach of children ADVERTENCIA Posible Riesgo de una explosi n El contacto con una bater a de cido puede causar quemaduras y ceguera Mant ngase alejado de los ni os READ THE...

Страница 2: ...t in serious injury or death Keep out of reach of children 1 2 Do not put fingers or hands into any of the Instant 1 3 Power s outlets Do not expose the Instant Power to rain or snow 1 4 Use only reco...

Страница 3: ...nal battery of the Instant Power to freeze Never charge a 2 4 frozen battery To prevent sparking NEVER allow clips to touch together or contact the same piece of metal 2 5 Consider having someone near...

Страница 4: ...OR FIRE The Instant Power charger is for use on a nominal 6 1 120 volt circuit The plug must be plugged into an outlet that is properly installed and grounded in accordance with all local codes and o...

Страница 5: ...lighter socket Completely disconnect the charger cable when the engine is not running Using this method to charge the battery overrides the maintain mode and the battery can be overcharged Monitor the...

Страница 6: ...ant Power as soon as possible after use 10 Risk of Explosion To prevent sparking NEVER allow the clips to touch together or to contact the same piece of metal Never attempt to jump start a frozen batt...

Страница 7: ...acturer s recommended pressures Do not leave the inflator unattended during use Ensure the battery clips are securely on the storage holders 1 Attach the corrugated hose with end adapter to the high f...

Страница 8: ...use the inverter with a product that draws a higher wattage than the inverter can provide as this may cause damage to the inverter and the product Make sure the device you are using is compatible with...

Страница 9: ...ts are in place and in good working 11 3 condition for example the plastic boots on the battery clips Servicing does not require opening the unit as there are no user serviceable parts 11 4 All other...

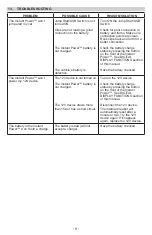
Страница 10: ...Instant Power See DIGITAL DISPLAY FUNCTIONS section of this manual Have the battery checked The Instant Power won t power my 12V device The 12V device is not turned on The Instant Power battery is not...

Страница 11: ...roduct Weight 23 9 lbs 10 84 kg AC Power Specifications Maximum Continuous Power 200 Watts Surge Capacity Peak Power 400 Watts No Load Current Draw 0 4 Amps Wave Form Modified Sine Wave Input Voltage...

Страница 12: ...uding but not limited to express implied or statutory warranties including without limitation any implied warranty of merchantability or implied warranty of fitness for a particular purpose Further Ma...

Страница 13: ...__________________ Serial Number________________________ SEE PRODUCT PROGRAMA DE REGISTRO DE 1 A O DE GARANT A LIMITADA MODELO ___________________ DESCRIPCI N ___________________________ Esta es la ni...

Страница 14: ...al completo antes de utilizar este producto 1 1 Cualquier falla podr a resultar en serias lesiones o podr a ser mortal Mant ngase alejado de los ni os 1 2 No coloque los dedos o las manos en cualquier...

Страница 15: ...de producir una corriente de cortocircuito lo suficientemente elevada como para soldar un anillo o provocar efectos similares sobre el metal causando una quemadura de gravedad Tenga especial cuidado p...

Страница 16: ...4 3 PRECAUCIONES DE CONEXI N EN CC 5 Conecte y desconecte los ganchos de salida C C s lo despu s de haber establecido 5 1 todos los interruptores del Instant Power a la posici n de apagado si es aplic...

Страница 17: ...el 100 NotA El porcentaje de carga de la bater a interna es m s confinable si el Instant Power ha sido desconectada de todos los accesorios y conexiones por unas horas Cargando la bater a interna con...

Страница 18: ...la polaridad de los bornes de la bater a El borne POSITIVO POS P de 4 la bater a generalmente posee un di metro mayor al borne NEGATIVO NEG N Determine qu borne de la bater a hace descarga a tierra s...

Страница 19: ...n en exceso del aparato de 12V de CD podr a descargar la bater a excesivamente Recargue inmediatamente despu s de desenchufar en aparato de 12V de CD El uso de Puerto USB 10 4 El puerto USB provee poc...

Страница 20: ...lector a la posici n OFF 6 apagado y quite el adaptador Uso del desinflador 10 8 Aseg rese que las pinzas est n fijas en el compartimiento 1 Fije la manguera corrugada con la punta del adaptador de la...

Страница 21: ...no por uno para evitar sobrecarga al inversor y perder energ a La absorci n de cada uno de los aparatos no debe exceder la capacidad de salida de vatios en una Operaci n Continua Si usted esta usando...

Страница 22: ...5 Instrucciones para el manejo y almacenamiento 12 Guarde el Instant Power desenchufado en posici n vertical El cable seguir 12 1 conduciendo electricidad hasta que se desenchufe del toma Almacene en...

Страница 23: ...nt Power Vea la secci n de los INDICADORES DE FUNCION DIGITALTIONS de este manual Haga un chequeo de la bater a La fuente de poder no pone a funcionar mi aparato de 12V El aparato de 12V no enciende L...

Страница 24: ...84 kg Especificaciones de energ a en CA Energ a continua m xima 200 Watts Capacidad de la oleada energ a m xima 400 Watts Corriente no obtenida 0 4 Amperes Forma de onda Modific la onda senoidal Nivel...

Страница 25: ...s expresas impl citas o legales incluidas a modo de ejemplo las garant as impl citas de comerciabilidad o adecuaci n a un fin espec fico Asimismo el Fabricante no ser responsable ante reclamos por da...

Отзывы: