25
8. Battery pack and charger.
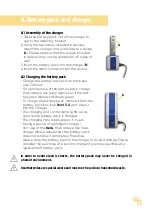
8.1 Assembly of the charger
1. Take the battery pack out of the charger to
get to the assembly bracket.
2. Using the two screws included in delivery,
mount the charger on a wall close to a socket
(
A
). Please observe that the screws included
in delivery may not be suitable for all types of
wall.
3. Insert the battery pack into the charger (
B
).
4. Insert the mains connector into the socket.
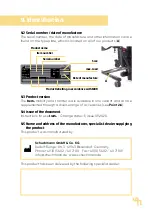
8.2 Charging the battery pack
• Charge the battery back prior to initial use
over 24 hours.
• For optimum use of the battery pack, charge
the battery pack every night even if the bat-
tery pack display still shows green.
• To charge the battery pack, remove it from the
battery pack box (see
Point 3.2
) and insert it
into the charger.
• The charging and control lamp lights up as
soon as the battery pack is charged.
• The charging time totals approx. 6 hours.
• During a period of prolonged storage /
non-use of the
tram.
,
the battery pack loses
charge. Please ensure that the battery pack
does not run down completely. Therefore,
please store the battery pack in the charger to avoid damage. Please
consider the purchase of a second charger if you have purchased a
replacement battery pack.
In order to avoid electric shocks, the battery pack may never be charged in
a humid environment.
Used batteries are special waste and must not be put into household waste.
A
b


