background image


www.scheppach.com / 

 [email protected] / 

 +(49)-08223-4002-99 / 

 +(49)-08223-4002-58

28 | GB

Information concerning noise emission measured

according to relevant standards:

Sound pressure L

pA

 = 79,7 dB(A)

Uncertainty K

PA

 = 3 dB(A)

Sound power L

WA

 = 90,9 dB(A)

Uncertainty K

WA

 = 1,83 dB(A)

Wear ear-muffs.

The impact of noise can cause damage to hearing.

Vibration A

hv

 (left/right) = 8,125 m/s

2

Uncertainty K

PA

 = 1,5 m/s

2

7. 

Before first use

Before starting the equipment

Assembling the components

Some parts of the mower come disassembled. 

For quick and easy assembly, read and follow the 

instructions below.

Important! You will need the following additional tools 

(not supplied) for assembly, and also for mainte-

nance work:

•  A 1 liter measuring jug (oil/petrol resistant)

• 

A petrol can (5 liters is sufficient for approx. 6 

operating hours)

• 

A funnel (suitable for the tankʼs petrol filler neck)

•  Household wipes (to wipe up oil/petrol residue; 

dispose of these at a filling station)

•  A petrol suction pump (plastic, available from DIY 

stores)

•  An oil can with hand pump (available from DIY 

stores)

•  Spark plug wrench

•  0,4 liter of engine oil (SAE 30/ 10W30)

Assembly

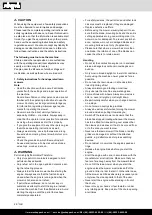
1.  Take the mower and attachment parts out of the 

packaging and check that all parts are present

2.  Insert the bottom push bar (4a) in the hole in the 

lawnmower and secure it with 2 screws (d).

3.  Attach the upper push bar (4) on the lower push 

bar (4a) with one screw (a), one washer (b) and 

one star grip nut (5) each on both sides (Fig. 4-5). 

4.  Insert the pull start handle (17) in the designated 

hook as shown in Fig. 6.

5.  Fix the cables to the push bar with the cable clips 

(18) provided (Fig. 7).

6.  Grass box (16) - open it up and click the plastic 

clips into position on the frame (Fig. 8).

7.  Mowing with grass box:

Lift  the  discharge  flap  (15)  with  one  hand  and 

hang the grass box (16) as shown in Fig. 9.

Setting the cutting height

m

 CAUTION!

Adjust the cutting height only when the engine is 

switched off and the plug boot has been pulled.

•  Before you begin to mow, check to ensure that the 

blade is not blunt and that none of the fasteners 

are damaged.

•  To prevent any imbalance, replace blunt and/or 

damaged blades as a set only (if applicable). To 

carry out this check, first switch off the engine and 

pull the spark plug boot.

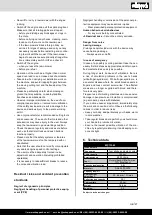
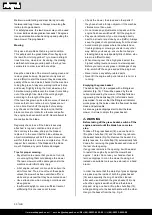
•  locate the two front wheels as well as the two re-

ar wheels into the desired cutting height (30-48-

66 mm) position. (L = left-hand thread, R = right-

hand thread)

• 

! ensure that the four wheels are fixed in the sa

-

me cutting height position (Fig. 13)

8.  Operation

m

 CAUTION!

The engine does not come with oil in it. There-

fore, ensure that you add 0,4 liters of oil before 

starting it up. Use normal, multigrade oil (SAE30). 

The oil level in the engine must be checked each 

time before mowing.

You will also need to fill in petrol, as this is also 

not supplied upon delivery.

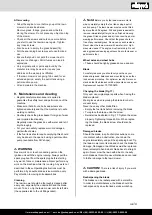
•  In order to avoid any unintentional start-ups of the 

lawn mower, it comes equipped with an engine 

brake (Fig. 1/ Item 3) which must be pulled back 

before the engine can be started. When the engine 

control lever is released it must return to its initial 

position, at which point the engine automatically 

switches off.

•  Press the engine brake lever (3) together and give 

the starter cord (17) a vigorous pull. (Fig. 14)

Attention:  

When you pull the starting rope the cutting blade 

rotates even when dissolved motor brake lever. 

Make sure that there are no body parts in danger 

zone of cutting blade.

•  Before you start mowing, you should run through 

this operation several times in order to ensure that 

the machine is working properly.

m

 WARNING

Whenever you need to perform any kind of ad-

justment and/or repair work on your lawn mower, 

wait until the blade has come to a complete stop.

Always switch off the engine before carrying out 

any adjustments, maintenance or repairs.

Содержание 5911250903

Страница 1: ...nal instruction manual 22 34 FR Tondeuse Thermique Traduction du manuel d origine 35 48 ACHTUNG Vor Inbetriebnahme die Bedienungsanleitung genau durchlesen CAUTION Read the manual carefully before operating this machine ATTENTION Lire la notice intégralement avant l utilisation de la machine www scheppach com service scheppach com 49 08223 4002 99 49 08223 4002 58 ...

Страница 2: ... www scheppach com service scheppach com 49 08223 4002 99 49 08223 4002 58 2 ...

Страница 3: ... www scheppach com service scheppach com 49 08223 4002 99 49 08223 4002 58 3 1 3 4 5 6 7 8 9 13 10 12 11 14 15 16 17 1 18 c 4a a b 5 4a 18 d e 5 e ...

Страница 4: ... www scheppach com service scheppach com 49 08223 4002 99 49 08223 4002 58 4 6 7 8 16 9 15 3 d 4 5 g 4a a 4 5 4 5 17 2 b 4a a b 17 18 16 18 e 4a d ...

Страница 5: ... www scheppach com service scheppach com 49 08223 4002 99 49 08223 4002 58 5 13 14 15 66mm 48mm 30mm 13a 16 16 13 8 max 3x 18 12 min max 17 14 17 1 3 L R rechts right droitche L links left gauche 20 7 ...

Страница 6: ... www scheppach com service scheppach com 49 08223 4002 99 49 08223 4002 58 6 22 21 10 10 ...

Страница 7: ...e Personen ausreichend Sicherheitsabstand einhalten Entfernen Sie den Zündkerzenstecker bevor Sie Wartungsarbeiten vornehmen Halten Sie Hände und Füße von den rotierenden Messern fern Wichtig Die Abgase sind giftig betreiben Sie den Motor daher nicht in unbelüfteten Bereichen Achtung heiße Oberfläche Verbrennungsgefahr Gehör und Augenschutz benutzen ACHTUNG Betriebsstoffe sind feuergefährlich und ...

Страница 8: ...zeichnis Seite 1 Einleitung 9 2 Gerätebeschreibung 9 3 Lieferumfang 9 4 Bestimmungsgemäße Verwendung 10 5 Sicherheitshinweise 10 6 Technische Daten 13 7 Vor Inbetriebnahme 13 8 Bedienung 14 9 Wartung und Reinigung 16 10 Lagerung 18 11 Entsorgung und Wiederverwertung 19 12 Störungsabhilfe 20 ...

Страница 9: ...ter Kunde Wir wünschen Ihnen viel Freude und Erfolg beim Arbeiten mit Ihrem neuen Gerät Hinweis Der Hersteller dieses Gerätes haftet nach dem gelten den Produkthaftungsgesetz nicht für Schäden die an diesem Gerät oder durch dieses Gerät entstehen bei unsachgemäßer Behandlung Nichtbeachtung der Bedienungsanweisung Reparaturen durch Dritte nicht autorisierte Fach kräfte Einbau und Austausch von nich...

Страница 10: ...ltigen EG Maschinenricht linie Vor Arbeitsaufnahme müssen sämtliche Schutz und Sicherheitseinrichtungen an der Maschine montiert sein Die Bedienungsperson ist im Arbeitsbereich ge genüber Dritten verantwortlich Die Maschine ist zur Bedienung durch eine Person konzipiert Alle Sicherheits und Gefahrenhinweise an der Maschine beachten Alle Sicherheits und Gefahrenhinweise an der Maschine vollzählig i...

Страница 11: ...wenn der Rasen mäher von und zu der zu mähenden Fläche bewegt wird Benutzen Sie den Rasenmäher niemals mit beschä digten Schutzeinrichtungen oder Schutzgittern oder ohne angebaute Schutzeinrichtungen z B Prall bleche und oder Grasfangeinrichtungen m HINWEIS Bei Nichtbeachtung dieser Anweisung besteht die Gefahr einer Beschädigung des Gerätes oder ande ren Sachwerten m Achtung Beim Benutzen von Ger...

Страница 12: ...nicht Lösen Sie die Motorbremse bevor Sie den Motor starten Starten Sie den Motor mit Vorsicht entsprechend den Herstelleranweisungen Achten Sie auf ausrei chenden Abstand der Füße zu dem Schneidmesser Beim Starten oder Anlassen des Motors darf der Rasenmäher nicht gekippt werden es sei denn der Rasenmäher muß bei dem Vorgang angeho ben werden In diesem Fall kippen Sie ihn nur so weit wie es unbed...

Страница 13: ...anzen Satz um keine Unwucht zu erzeugen Bei dieser Prüfung den Motor abstellen und den Zündkerzen stecker abziehen die beiden vorderen Räder und die beiden hinteren Räder in das Gewinde mit der gewünschte Schnitthöhe 30 48 66 mm einschrauben L Linksgewinde R Rechtsgewinde darauf achten dass die vier Räder in der gleichen Schneidhöhe befestigt sind Abb 13 Wenn Sie ungewöhnliche Beeinträchtigungen b...

Страница 14: ...rüfen Sie vor dem erneuten Anlassen den Seilzug der Motorbremse Kontrollieren Sie ob der Seilzug richtig montiert ist Ein geknicktes oder beschädigtes Abstellseil muss ausgewechselt werden 8 Bedienung m Achtung Der Motor wird ohne Öl ausgeliefert Vor Inbetrieb nahme daher unbedingt Öl einfüllen Verwenden Sie hierzu normales Mehrbereichsöl SAE 30 10W30 Der Ölstand im Motor muss vor jedem Mähen über...

Страница 15: ...ie den Grasauswurf von der Straße fern Vermeiden Sie Stellen bei denen die Räder nicht mehr greifen oder das Mähen unsicher ist Vor einer Rückwärtsbewegung vergewissern Sie sich ob nicht kleine Kinder hinter Ihnen sind Vor dem Mähen Wichtige Hinweise Ziehen Sie sich richtig an Tragen Sie festes Schuhwerk und keine Sandalen oder Turnschuhe Überprüfen Sie das Schneidemesser Ein Messer das verbogen o...

Страница 16: ...r auf die Sei te kippen entleeren Sie den Kraftstofftank mit einer Benzinabsaugpumpe vollständig Der Rasenmäher darf nicht über 90 Grad gekippt werden Am leichtesten ent In dichtem hohen Gras stellen Sie die höchste Schnittstufe ein und mähen Sie langsamer Vor dem Entfernen von Gras oder sonstigen Verstop fungen stellen Sie den Motor ab und lösen Sie das Zündkabel Entfernen Sie niemals Teile die d...

Страница 17: ...Luftfilter nur mit Druckluft oder durch Ausklopfen reinigen fernen Sie Schmutz und Gras gleich nach dem Mähen Angetrocknete Grasreste und Schmutz können zu einer Beeinträchtigung des Mähbetriebes führen Kontrollie ren Sie ob der Grasauswurfkanal frei von Grasresten ist und entfernen diese bei Bedarf Reinigen Sie den Mäher niemals mit einem Wasserstrahl oder Hochdruckreini ger Der Motor soll trocke...

Страница 18: ... dem möglicherweise Benzindämpfe mit offenem Feuer oder Funken in Berührung kommen können Lassen Sie den Motor abkühlen bevor Sie den Ra senmäher in geschlossenen Räumen abstellen Um Brandgefahr zu vermeiden halten Sie Motor Auspuff und den Bereich um den Kraftstofftank frei von Gras Blättern oder austretendem Fett Öl Vorbereitung für das Einlagern des Rasenmähers Warnhinweis Entfernen Sie das Ben...

Страница 19: ... bar Das Rückführen der Verpackung in den Materi alkreislauf spart Rohstoffe und verringert das Abfal laufkommen Verpackungsteile z B Folien Styropor können für Kinder gefährlich sein Es besteht Erstickungsge fahr Bewahren Sie Verpackungsteile außerhalb der Reichweite von Kindern auf und entsorgen Sie sie so schnell wie möglich Das Gerät und dessen Zubehör bestehen aus ver schiedenen Materialien w...

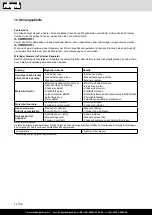
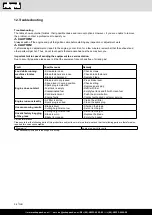
Страница 20: ...befestigung lose Messer unwuchtig Schrauben prüfen Messerbefestigung prüfen Messer ersetzen Motor läuft nicht Motorbremshebel nicht gedrückt Gashebel falsche Stellung Zündkerze defekt Kraftstofftank leer verschmutzter Kraftstoff kalte Umgebung Motor defekt Motorbremshebel drücken Einstellung prüfen Zündkerze erneuern Kraftstoff einfüllen Benzintank leeren und mit sauberem Krafstoff befüllen Primer...

Страница 21: ...tiezeitnochwirdeineneueGarantiezeitdurchdieseLeistungfürdasGerätoderfüretwaigeeingebauteErsatzteileinGanggesetzt DiesgiltauchbeiEinsatzeinesVor Ort Services Das betroffene Gerät ist in gesäubertem Zustand zusammen mit einer Kopie des Kaufbelegs hierin enthalten die Angaben zum Kaufdatum und der Produktbezeichnung der Kundendienststelle vorzulegenbzw einzusenden WirdeinGerätunvollständig ohnedenkom...

Страница 22: ...ove the ignition cable before all maintenance work and read the instructions for use Warning Risk of injury Do not let your hands or feet come in contact with the blades when the motor is running Important Exhaust gas is poisonous do not operate in an unventilated area Danger Hot surface Wear ear muffs and safety goggles Attention Operating materials are flammable and explosive Do not fill with fu...

Страница 23: ... GB 23 Table of contents Page 1 Introduction 24 2 Layout 24 3 Scope of delivery 24 4 Proper use 25 5 Safety instructions 25 6 Technical data 27 7 Before first use 28 8 Operation 28 9 Maintenance and cleaning 31 10 Storage 32 11 Disposal and recycling 33 12 Troubleshooting 34 ...

Страница 24: ... to protect it from dirt and moisture Read the instruction manual each time before operating the machine and carefully follow its information The machine can only be operated by persons who were instructed concerning the operation of the machine and who are informed about the associ ated dangers The minimum age requirement must be complied with 6 In addition to the safety requirements in these ope...

Страница 25: ... risk is exclusively borne by the user The device must not be used for commercial tech nical or industrial applications If you are not sure whether working conditions are safe or unsafe do not work with the machine The petrol lawn mower is intended for private use i e for use in home and gardening environments Private use of the lawn mower refers an annual operating time generally not exceeding th...

Страница 26: ...cir cumstances attempt to start the engine Instead remove the machine from the affected area Avoid starting the engine until the petrol fumes have completely evaporated For safety reasons the petrol tank and other tank closures must be replaced if they are damaged Replace defective mufflers Before using the mower visually inspect it to en sure that the blade mounting bolts and the entire cutting a...

Страница 27: ...ration including prohibited operations It is necessary to take sufficient breaks to reduce the noise and vibration load Residual risks and accident prevention standards Neglect of ergonomic principles Negligent handling of personal protective equip ment PPE Negligent handling or ommission of the personal pro tective equipment may cause serious injuries Wear prescribed personal protection equipment...

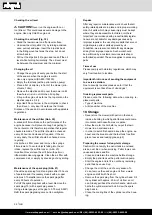
Страница 28: ...rass box 16 as shown in Fig 9 Setting the cutting height m CAUTION Adjust the cutting height only when the engine is switched off and the plug boot has been pulled Before you begin to mow check to ensure that the blade is not blunt and that none of the fasteners are damaged To prevent any imbalance replace blunt and or damaged blades as a set only if applicable To carry out this check first switch...

Страница 29: ... m CAUTION Never allow the starter cord to snap back Note In cold weather it may be necessary to repeat the starting process several times Stop engine To turn off the engine then the engine brake lever 3 and wait for the blades to stop Pull the spark plug boot from the spark plug 10 boot in order to prevent the engine from restarting Before you start the engine again check the cord for the engine ...

Страница 30: ...grades Insufficient daylight or even a sufficient level of artificial light is one reason not to mow Check the mower the blade and other parts if they have struck a foreign object or if the machine vibrates more than usual Do not make any adjustments or repairs until the engine has been switched off Pull the plug boot Pay special attention if you are mowing directly next to a street or are close b...

Страница 31: ...nderneath and the blade mount To do so tip the lawn mower onto its left side the opposite side to the oil filling socket m Note Before you tip the lawn mower onto its side completely empty the fuel tank using a petrol suction pump The lawn mower must never be tilted by more than 90 degrees Dirt and grass is easiest to remove immediately after you have finished mowing the grass Dried on grass and d...

Страница 32: ... oil Screw the spark plug back in Clean the cooling fins of the cylinder and the hous ing Checking the oil level m CAUTION Never run the engine with no or too little oil This could cause severe damage to the engine Use only SAE30 engine oil Checking the oil level Fig 18 Stand the lawn mower on a flat level surface Unscrew the oil dip stick 12 by turning anticlock wise pull out and wipe Insert the ...

Страница 33: ...rocess Wedge a few layers of corrugated cardboard between the upper and lower push bars and the engine in order to prevent any chafing 11 Disposal and recycling Transport package disposal The package protects the appliance against damage during transport Packing materials are usually cho sen depending on their environmental friendliness and disposal method and can therefore be recycled Returning t...

Страница 34: ...ade fasteners are loose Blade is unbalanced Check screws Check blade fasteners Replace blade Engine does not start Brake lever not pressed Speed lever in wrong position Spark plug is defective Fuel tank is empty Contaminated fuel Cold environment Engine faulty Press brake lever Check setting Replace spark plug Refill with fuel Empty fuel tank and fill with clean fuel Push the primer button Contact...

Страница 35: ...vant les travaux de maintenance et lisez les instructions d utilisation Attention Risque de blessure Ne pas mettre les mains et les pieds au contact de la lame lorsque le moteur tourne Important Le gaz d échappement est toxique ne pas faire fonctionner dans des zones non ventilées Attention surfaces chaudes risque de brûlures Portez des protections auditives et oculaires L exposition au bruit peut...

Страница 36: ...Page 1 Introduction 37 2 Description de l apparei 37 3 Ensemble de livraison 37 4 Utilisation conforme 38 5 Notes importantes 38 6 Caractéristiques techniques 41 7 Avant la mise en service 41 8 Utilisation 42 9 Maintenance et nettoyage 44 10 Stockage 46 11 Mise au rebut et recyclage 47 12 Dépannage 48 ...

Страница 37: ...l hu midité auprès de la machine Avant de commencer à travailler avec la machine chaque utilisateur doit lire le manuel d utilisation puis le suivre attentivement Seules les personnes formées à l utilisation de la ma chine et conscientes des risques associés sont auto risées à travailler avec la machine L âge minimum requis doit être respecté 6 En plus des indications d utilisation contenues dans ...

Страница 38: ...lle spécifiée est consi dérée comme non conforme Le fabricant ne peut être tenu pour responsable d éventuels dommages résultant d une telle utilisation seul l utilisateur en est responsable Cette machine ne doit pas être utilisée à titre profes sionnel ou industriel Si vous n êtes pas certain que toutes les conditions sont réunies pour travailler en toute sécurité n utili sez pas la machine La ton...

Страница 39: ... comme des pierres des jouets des bâtons et des fils etc pou vant être happés et éjectés par la tondeuse m ATTENTION Lʼessence est extrêmement inflammable Conservez lʼessence uniquement dans des réser voirs prévus à cet effet Faites le plein uniquement à lʼair libre et ne fumez pas pendant le remplissage Toujours faire l appoint dʼessence avant de démar rer le moteur Pendant que le moteur fonction...

Страница 40: ...un sol meuble à proximité d un amas de débris près des fossés et des buttes Observer un entretien incorrect l utilisation de pièces de rechange non conformes ou le retrait ou la modification des dispositifs de sécurité peut en traîner des dommages à l appareil et des blessures graves à la personne qui travaille avec Utiliser uniquement des outils de coupe et des accessoires recommandés par le fabr...

Страница 41: ...assem blage est simple à condition de respecter les consignes suivantes Attention Pour lʼassemblage et pour les travaux de maintenance vous aurez besoin de lʼoutillage suivant non compris dans la livraison une cuve plate collectrice dʼhuile pour la vidange dʼhuile un récipient doseur dʼun litre résistant à lʼhuile à lʼessence un jerrican dʼessence 5 litres suffisent pour 6 heures de fonctionnement...

Страница 42: ... levier le moteur et les lames s arrêtent automatiquement Avant de commencer vraiment à tondre contrôlez plusieurs fois le fonctionnement du levier marche arrêt Assurez vous que le câble fonctionne correc tement Avertissement la lame de coupe est en rotation lorsque le moteur démarre Important Avant de lancer le moteur actionnez plu sieurs fois le frein moteur afin de vérifier si le câble d arrêt ...

Страница 43: ...t le bac collecteur d herbe Si vous vous éloignez arrêtez le moteur La distance de sécurité correspondant à la longueur des tubes du guidon entre le carter de la lame et l utilisateur doit toujours être maintenue En tondant et en changeant de direction auprès des buissons et dans les pentes veuillez faire particulièrement atten tion Veillez à maintenir votre équilibre portez des chaussures à semel...

Страница 44: ...en serrés et á ce que lʼappareil soit dans un état de fonctionnement sûr Remarques relatives à la tonte Attention aux objets solides la tondeuse à gazon peut être endommagée et vous pouvez vous blesser ou blesser d autres personnes Il est possible de se brûler au contact du moteur de l échappement ou des éléments d entraînement de la lame lorsqu ils sont chauds Donc ne les touchez pas Tondez avec ...

Страница 45: ...ʼil nʼa pas perdu son aptitude au fonctionnement Nettoyez régulièrement le bac récupérateur avec de l eau et faites le sécher Remplacez toutes les pièces usées ou endomma gées pour des raisons de sécurité Si vous devez vidanger le réservoir à carburant faites le à lʼair libre en vous servant dʼune pompe dʼaspiration de carburant à acheter dans les grandes surfaces de bricolage m ATTENTION N effect...

Страница 46: ...fortement Réparation Assurez vous après toute réparation ou travail de maintenance que toutes les pièces relatives à la sécurité sont bien montées et en état irréprochable Placez les pièces dangereuses hors de portée des autres personnes et des enfants Attention Conformément à la loi sur la responsabili té civile nous ne répondons pas des dommages is sus d une réparation non conforme aux règles de...

Страница 47: ...uelques couches de carton ondulé entre le guidon supérieur le guidon inférieur et le moteur afin d éviter les frottements 11 Mise au rebut et recyclage Elimination de l emballage L emballage protège l appareil contre les chocs lors du transport En général le matériel d emballage est choisi de fa çon à ce qu il réponde aux règles de protection de l environnement et d élimination des déchets par con...

Страница 48: ...lame Moteur ne démarre pas levier du frein moteur non appuyé mauvaise position de lʼaccélérateur bougie dʼallumage défectueuse réservoir à essence vide carburant impur température basse moteur défectueux appuyez sur le levier du frein contrôlez le paramétrage remplacez la bougie dʼallumage remplissez de carburant videz le réservoir et remplissez le d essence propre appuyez sur le starter consultez...

Страница 49: ... www scheppach com service scheppach com 49 08223 4002 99 49 08223 4002 58 49 A ...

Страница 50: ... www scheppach com service scheppach com 49 08223 4002 99 49 08223 4002 58 50 B ...

Страница 51: ...prehlasuje nasledujúcu zhodu podla smernice EU a noriem pre výrobok HR ovime izjavljuje da postoji sukladnost prema EU smjernica i nor mama za sljedece artikle RS potvrđuje sledeću usklađenost prema smernicama EZ i normama za artikal RO declară următoarea conformitate corespunzător directivelor şi normelor UE pentru articolul BG декларира съответното съответствие съгласно Дирек тива на ЕС и норми ...

Страница 52: ... dentro de este plazo se torne inútil a causa de fallas de material o de fabricación Las piezas que no son fabri cadas por nosotros mismos serán garantizadas hasta el punto que nos corresponda garantía del suministrador anterior Los costes por la colocación de piezas nuevas recaen sobre el comprador Están excluidos derechos por modificaciones aminoraciones y otros derechos de indemnización por dañ...

Отзывы: