


www.scheppach.com
26 | GB
11. Electrical connection
The electrical motor installed is connected and ready
for operation. The connection complies with the appli-
cable VDE and DIN provisions.
The customer‘s mains connection as well as the exten-
sion cable used must also comply with these regulations.
Damaged electrical connection cable
The insulation on electrical connection cables is often
damaged.
This may have the following causes:
• Pressure points, where connection cables are
passed through windows or doors.
• Kinks where the connection cable has been improp-
erly fastened or routed.
• Places where the connection cables have been cut
due to being driven over.
• Insulation damage due to being ripped out of the wall
outlet.
• Cracks due to the insulation ageing.
Such damaged electrical connection cables must not
be used and are life-threatening due to the insulation
damage.
Check the electrical connection cables for damage regu-
larly. Ensure that the connection cables are disconnected
from electrical power when checking for damage.
Electrical connection cables must comply with the ap-
plicable VDE and DIN provisions. Only use connection
cables of the same designation.
The printing of the type designation on the connection
cable is mandatory.
For single-phase AC motors, we recommend a fuse
rating of C 16A or K 16A for machines with a high start-
ing current (from 3000 watts)!
12. Cleaning
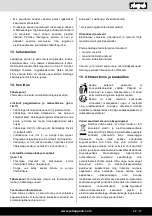
Danger!
Remove the battery before carrying out any cleaning
work.
• Keep protective devices, air vents and the motor
housing as free of dust and dirt as possible. Rub
the device clean with a clean cloth or blow it off with
compressed air at low pressure.
Note!
Always move the workpiece from the left to the
centre of the sanding disc, never beyond!
Risk of injury due to workpiece being thrown away!
Surface sanding on the sanding belt
Hold the workpiece firmly.
Watch your fingers!
Risk of
injury!
Guide the workpiece by pressing it firmly on the table
and evenly across the sanding belt.
Attention!
Be particularly careful when sanding very
thin pieces and extra long pieces (perhaps even with-
out sanding table).
Apply only enough pressure to allow the sanding belt to
remove sanded material.
Switching on and off the grinding machine (fig. 1)
• The switch (7) is located on the electrical box. To
switch on, press “I” (green). To switch off, press “O”
(red).
Transverse cutting gauge (fig. 1)
• A transverse cutting gauge (12) for using on the plate
table has been supplied with the grinding machine.
• The guide can be used up to 45 ° to the left or right
by loosening the locking button and setting the
transverse cutting gauge to the desired angle. Then
the button is tightened again.
Supporting plate for the belt (fig. 14)
• The supporting plate (j) is a very strong piece of
steel that provides a good support surface during
the grinding process.
• The plate must be adjusted so that it almost touches
the sanding belt. To adjust, loosen the two screws
that hold the plate on the machine frame. Then, ad-
just the plate and tighten the screws again.
• To remove the plate in order to carry out special
work (e.g. polishing or grinding contours), loosen the
two fastening screws and remove the plate.
Suction system (fig. 15)
• There are two suction nozzles (10 + 11) with a diam-
eter of 38 mm, which can easily be connected to a
suction system.
Содержание 4903304901
Страница 2: ...www scheppach com 2 0 I 1 2 3 1 2 8 6 7 9 4 5 12 12 9 6 10 11...
Страница 3: ...www scheppach com 3 3 4 5 6 7 a 2 10 12 5 h b c e f g d 2 g f 3 b c d e d e d e 10...
Страница 4: ...www scheppach com 4 8 9 10 11 12 13 9 i 6...
Страница 5: ...www scheppach com 5 14 15 16 17 18 0 I j 11 10 3 k 1 9 4...
Страница 89: ...www scheppach com...
Страница 90: ...www scheppach com 90...