background image

Deutsch

   - 3 -

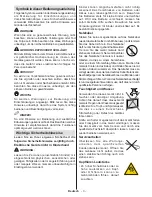
Symbole in dieser Bedienungsanleitung

Folgende Symbole werden in der Bedienungsanleitung 

als Markierung für Einschränkungen und 

Vorsichtsmaßnahmen sowie Sicherheitshinweise 

verwendet. Bitte beachten Sie solche Hinweise aus 

Gründen der Sicherheit.


WARNUNG

Wenn Sie eine so gekennzeichnete Warnung nicht 

beachten, können ernsthafte Verletzungen oder Tod 

die Folge sein. Bitte beachten Sie diese Warnungen 

unbedingt, um den sicheren Betrieb zu gewährleisten.


GEFAHR ELEKTRISCHER SCHLÄGE!

Mit dem Blitzsymbol in dem Dreieck soll der Benutzer 

vor gefährlicher Hochspannung im Inneren des 

Gerätes gewarnt werden. Diese kann so hoch sein, 

dass die Gefahr eines elektrischen Schlages für 

Personen besteht!


VORSICHT

So wird eine Vorsichtsmaßnahme gekennzeichnet, 

die Sie ergreifen oder beachten sollten, damit Sie 

sich nicht verletzen oder Sachschaden entsteht. Bitte 

beachten Sie diese Hinweise unbedingt, um den 

sicheren Betrieb zu gewährleisten.


WICHTIG

So werden Warnungen zur Bedienung und 

Einschränkungen angezeigt. Bitte lesen Sie diese 

Hinweise unbedingt, damit Sie das System richtig 

bedienen und Beschädigungen vermeiden.


HINWEIS

So sind Hinweise zur Bedienung und zusätzliche 

Erläuterungen gekennzeichnet. Das Beachten solcher 

Hinweise ist empfehlenswert, damit die Funktionen 

optimal genutzt werden können.

Wichtige Sicherheitshinweise

Lesen Sie zu Ihrer eigenen Sicherheit die 

folgenden Sicherheitshinweise sorgfältig durch.

Elektrische Geräte nicht in Kinderhand


WARNUNG

Lassen Sie Personen (einschließlich Kinder) mit 

eingeschränkten physischen, sensorischen oder 

geistigen Fähigkeiten oder mangels Erfahrung und/

oder mangels Wissen niemals unbeaufsichtigt ein 

Elektrogerät verwenden! 

Kinder können mögliche Gefahren nicht richtig 

erkennen! Das Verschlucken von Batterien oder 

Akkus kann lebensgefährlich sein. Bewahren 

Sie Batterien stets für kleine Kinder unerreichbar 

auf. Wird eine Batterie verschluckt, müssen Sie 

sofort ärztliche Hilfe suchen. Bewahren Sie auch 

Verpackungsfolien für Kinder unerreichbar auf. Es 

besteht Erstickungsgefahr.

Netzkabel

Stellen Sie keine Gegenstände auf das Netzkabel 

(weder das Gerät selbst, noch Möbel usw.) und klemmen 

Sie das Kabel nicht ein. Das Netzkabel 

darf nur am Stecker gehandhabt werden. 

Trennen Sie das Gerät niemals durch 

Ziehen am Kabel vom Netz und berühren 

Sie das Netzkabel niemals mit nassen 

Händen, da dies zu einem Kurzschluss 

oder zu einem Stromschlag führen kann. Machen Sie 

niemals Knoten in das Kabel, und binden Sie es nie mit 

anderen Kabeln zusammen. Das Netzkabel muss so 

verlegt werden, dass niemand auf das Kabel treten kann. 

Beschädigungen am Netzkabel können zu Bränden oder 

Stromschlägen führen. Wenn das Netzkabel beschädigt 

ist und ausgetauscht werden muss, darf dies nur durch 

qualifizierte Personen erfolgen.

Feuchtigkeit und Wasser

Verwenden Sie dieses Gerät nicht in 

feuchter oder dunstiger Umgebung. 

Achten Sie darauf, dass dieses Gerät 

niemals Regen oder Wasser ausgesetzt 

ist.Meiden Sie Tropf- und Spritzwasser, 

da dies zu einem Kurzschluss, 

Stromschlag oder Defekt des Gerätes  

führen kann. 
Sollte ein harter Gegenstand auf das Gerät fallen 

oder Flüssigkeit in das Gerät eindringen, müssen 

Sie das Gerät vom Netz trennen und durch eine 

qualifizierte  Fachkraft  überprüfen  lassen,  bevor  es 

wieder betrieben werden kann.

Servicearbeiten

Überlassen Sie alle Wartungs-

a r b e i t e n   d e m   q u a l i fi z i e r t e n 

Kundendienstpersonal. Öffnen Sie 

das Gehäuse nicht selbst, da dies 

einen elektrischen Schlag nach sich 

ziehen kann.

Kopfhörer-Lautstärke

• Zu hoher Schalldruck oder zu 

hohe Lautstärken von Kopf- 

oder Ohrhörern können zu 

Gehörschäden führen, darauf 
zu achten.

Содержание 22LE-E5900

Страница 1: ......

Страница 2: ...itte lesen Sie die Anleitung aufmerksam durch denn Sie erfahren viel Wissenswertes über das Gerät und nur so können Sie alle Funktionen optimal nutzen Dies dient auch Ihrer Sicherheit und bewahrt Sie vor möglichen Schäden Zur weiteren Unterstützung oder im Falle von Fragen besuchen Sie unsere Webseite www schaub lorenz com Wir wünschen Ihnen nun viel Vergnügen mit Ihrem neuen Gerät Ihr SCHAUB LORE...

Страница 3: ... rund um das Fernsehgerät einen Freiraum von mindestens 10 cm ein Verwenden Sie dieses Gerät nur in gemäßigtem Klima 10 cm 10 cm 10 cm Inhalt Einleitung 2 Bestimmungsgemäßer Betrieb 2 Vorbereitung 2 Symbole in dieser Bedienungsanleitung 3 Wichtige Sicherheitshinweise 3 Außer Betrieb nehmen und lagern 5 Umweltinformationen 5 TV Eigenschaften 6 Anzeigen des TV 6 TV Bedien taste Betrieb 7 Bedienung m...

Страница 4: ...ögliche Gefahren nicht richtig erkennen Das Verschlucken von Batterien oder Akkus kann lebensgefährlich sein Bewahren Sie Batterien stets für kleine Kinder unerreichbar auf Wird eine Batterie verschluckt müssen Sie sofort ärztliche Hilfe suchen Bewahren Sie auch Verpackungsfolien für Kinder unerreichbar auf Es besteht Erstickungsgefahr Netzkabel Stellen Sie keine Gegenstände auf das Netzkabel wede...

Страница 5: ...nQuellenintensiverHitzestrahlung wie elektrischen Radiatoren ausgesetzt werden Kerzen und andere offene Flammen müssen zu jeder Zeit von diesem Produkt ferngehalten werden um das Ausbreiten von Feuer zu verhindern Batterien dürfen niemals zu großer Hitze wie direkter Sonneneinstrahlung Feuer o ä ausgesetzt werden Belüftung Die Schlitze und Öffnungen des Empfängers dienen der Belüftung und sollen e...

Страница 6: ...er Fernbedienung und packen Sie die Fernbedienung zum TV Gerät HINWEIS Das TV Gerät sollte in einem trockenen und staubfreien Raum gelagert werden Umweltinformationen Dieses TV Gerät wurde so konstruiert dass es die Umwelt schützt und weniger Energie verbraucht Sie können helfen die Umwelt zu schonen und gleichzeitig Geld sparen indem Sie die Energiesparfunktion des TV Geräts verwenden Um den Ener...

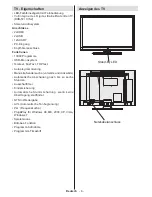
Страница 7: ...FasText TOPtext Autoprogrammierung Manuelle Sendersuche vorwärts und rückwärts Automatische Abschaltung nach bis zu sechs Stunden Ausschalttimer Kindersicherung Automatische Stummschaltung wenn keine Übertragung stattfindet NTSC Wiedergabe AVL Automatische Tonbegrenzung PLL Frequenzsuche Plug Play für Windows 98 ME 2000 XP Vista Windows 7 Spielemodus Bild Aus Funktion Programm Aufnahme Programmm T...

Страница 8: ...uf dem Bildschirm wird eine Lautstärkeskala Schieberegler eingeblendet Programmauswahl Drücken Sie zuerst den Steuerschalter einmal um den Kanal zu wechseln Bewegen Sie nun den Schalter nach oben um das nächste Programm auszuwählen oder nach unten um das vorhergehende Programm auszuwählen Ansicht des Hauptmenüs Der Menübildschirm kann nicht über den Steuerschalter aufgerufen werden AV Modus Drücke...

Страница 9: ...tärke 14 Taste Zurück 15 Favoritenkanallisten 16 Bildgröße 17 My button 1 18 My button 2 19 Teletext 20 Elektronischer Programmführer EPG 21 Stummschaltung 22 Info 23 Verlassen Rückkehr 24 Ok Bestätigung 25 Programm weiter zurück 26 Navigationstasten 27 Schnell Menü 28 Kanäle tauschen 29 Taste Blau 30 Taste Gelb 31 Untertitel Ein Aus 32 Schneller Vorlauf 33 Stop 34 Pause im Medienbrowser Modus Tim...

Страница 10: ...r der Montage an der Wand alle Ihre Kabel an die Rückseite des Fernsehers anschließen Sie dürfen nur dann das CI Modul einsetzen oder herausnehmen wenn das TV Gerät ABGESCHALTET ist Weitere Informationen über die Einstellungen finden Sie in der Bedienungsanleitung des Moduls Stecken Sie das CAM Modul und die SmartCard in den Steckplatz der sich im Anschlussfach auf der Rückseite des TV Geräts befi...

Страница 11: ...hren kann 4 Schalten Sie das TV Gerät wieder an und warten Sie einen Moment bis die Karte erkannt wird Sobald die Karte erkannt wurde startet die Authentifizierung des CA Moduls inkl Karte 5 Wenn kein Modul eingesetzt ist erscheint der Hinweis Es konnte kein Common Interface Modul gefunden werden Weitere Informationen zur Nutzung Ihres Moduls finden Sie in der Bedienungsanleitung des Moduls CAM mo...

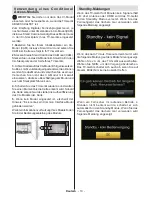
Страница 12: ... ziehen Sie den Netzstecker aus der Steckdose Hinweis Wenn das TV Gerät in den Standby Modus geschaltet wird kann die LED blinken um anzuzeigen dass bestimmte Funktionen wie die Standby Suche Download über Antenne oder ein Timer aktiv sind Die LED kann auch blinken wenn Sie das TV Gerät aus dem Standby Modus einschalten Erste Installation Nach dem ersten Anschalten erscheint das Sprachauswahl Menü...

Страница 13: ...eblendet Sie müssen ein Suchtyp auswählen um Sender aus der gewünschten Quelle zu speichern Antenneninstallation Wenn Sie die Option ANTENNE aus dem Bildschirm Suchtyp auswählen sucht das DTV nach digitalen terrestrischen TV Sendern HINWEIS Sie können die Taste MENU drücken um abzubrechen Wenn alle Kanäle gespeichert sind wird die Kanalliste auf dem Bildschirm angezeigt Wenn Sie die Kanäle nach LC...

Страница 14: ...EqC wird ein weiterer Menübildschirm angezeigt Sie können vier DiSEqC Optionen sofern verfügbar einstellen Drücken Sie die GRÜNE Taste um alle Satelliten zu durchsuchen oder drücken Sie auf die GELBE Taste um nur nach dem gekennzeichneten Satelliten zu suchen Wenn Sie eine DiSEqC Option auswählen wird der Such Typ Bildschirm angezeigt Wählen Sie eine Option und fahren Sie fort Folgende Optionen si...

Страница 15: ...n und den Medienbrowser starten Gehen Sie dazu wie folgt vor Schließen Sie eine USB Festplatte an den USB Eingang seitlich am TV Gerät an Sie können zwei USB Geräte an Ihr TV Gerät anstecken Wenn beide USB Geräte Musik Bilder und Videos enthalten wird der OSD Auswahlbildschirm angezeigt Das erste an das TV Gerät angeschlossene USB Gerät wird dabei als USB Laufwerk 1 bezeichnet Wählen Sie mit den T...

Страница 16: ... Bildzoom Stellt den Bildzoom auf Auto 16 9 Untertitel 14 9 14 9 Zoom 4 3 oder Kino nur im Scart Modus mit SCART PIN8 Hochspannungs Niederspannungsschaltung verfügbar HDMI True Black optional Wenn Sie von der HDMI Quelle aus fernseh schauen ist diese Funktion im Bild Einstellungs Menü verfügbar Sie können diese Funktion verwenden um das Schwarz der Bilder zu verstärken Filmmodus optional Filme wer...

Страница 17: ...xternen Verstärker an den Fernseher anschließen wählen Sie die Option Lineout Wenn Sie Kopfhörer an den Fernseher anschließen wählen Sie die Option Kopfhörer Dynamischer Bass Aktiviert oder deaktiviert den Dynamic Bass Surround Sound optional Der Surround Modus kann auf Ein oder Aus gestellt werden Digitaler Ausgang Stellt den Audiotyp für den Digitalausgang ein Inhalt Menü Einstellungen Condition...

Страница 18: ...r gesucht wenn das Gerät im Stand by Modus ist Wenn das Gerät neue oder noch nicht vorhandene Sender findet wird ein Menü einge blendet in dem Sie die Änderungen annehmen oder verwerfen können Die Kanalliste wird aktualisiert und nach diesem Prozess verändert Bitte aktivieren Sie die Standby Suche Einstellung um Ihren Fernseher die automatische Aktualisierung der Sendefrequenz des Senders der ausg...

Страница 19: ...für die Feineinstellung von analogen Kanälen aus Diese Funktion ist nicht verfügbar wenn keine analogen Kanäle gespeichert sind Erste Installation Löscht alle gespeicherten Kanäle und Einstellungen setzt das TV Gerät auf die Werkseinstellungen zurück und beginnt die Erstinstallation Für weitere Informationen zu diesem Vorgang können Sie die Anweisungen im Abschnitt Erstinstallation befolgen Menü E...

Страница 20: ...ie können einen Timer für zukünftige Programme einstellen Um eine bereits eingestellte Timer abzubrechen markieren Sie das Programm und drücken Sie die Taste OK Wählen Sie dann die Option Timer löschen Der Timer wird gelöscht Hinweis Sie können nicht zwei Timer oder Aufnahmen für zwei gleichzeitige Sendungen programmieren Aufzeichnen eines Programms WICHTIG Wenn Sie ein neues USB Festplattenlaufwe...

Страница 21: ...enan DrückenSiedieTaste AUFNAHME um die Sofortaufnahme zu stoppen Während der Aufnahme können Sie nicht den Sender oder die Quelle wechseln oder den Medienbrowser aufrufen Aufgenommene Programme ansehen Benutzen Sie im Hauptmenü die Tasten oder um den Medienbrowser auszuwählen Markieren Sie im Aufnahmebibliothek mit den Tasten oder die Option Aufnahmebibliothek und drücken Sie OK um sie aufzurufen...

Страница 22: ...es einmal gedrückt wird aktiviert es den Videotext falls verfügbar Um die analoge Videotext Seite anzuzeigen drücken Sie es erneut Drücken Sie nochmals diese Taste um den Teletext Bildschirm über dem Programm anzuzeigen Durch erneutes Drücken wird der Teletextmodus beendet BACK Indexseite Dient zurAuswahl der Teletext Indexseite i INFO Anzeigen Zeigt verborgene Informationen an OK Halten Hält fall...

Страница 23: ...en Wählen Sie im Menü Weitere Einstellungen die Option Softwareupgrade und drücken Sie die Taste OK um das Menü Upgradeoptionen zu wählen Wählen Sie im Menü Upgradeoptionen die Option Suche nach Upgrade und drücken Sie OK Wird ein neues Upgrade gefunden beginnt das Gerät mit dem Herunterladen Ein Fortschrittsbalken zeigt die verbleibende Dauer an Nach Abschluss des Herunterladens wird eine Meldung...

Страница 24: ...erbilder entstehen Manchmal können Sie die Bildqualität verbessern indem Sie dieAntenne anders ausrichten Kann das Bild bzw der Text kaum erkannt werden 4 Überprüfen Sie ob Sie die richtige Frequenz eingegeben haben 5 Bitte stellen Sie die Kanäle neu ein 6 Die Bildqualität kann sich verschlechtern wenn zwei Geräte gleichzeitig an das TV Gerät angeschlossen werden Trennen Sie in diesem Fall eines d...

Страница 25: ...ukte Batterien Typische Anzeigemodi PC In der folgenden Tabelle werden einige der üblichen Video Display Modi dargestellt Unter Umständen unterstützt Ihr TV keine verschiedenen Auflösungen Ihr Gerät unterstützt bis zu 1920x1200 Inhalts verzeichnis Auflöung Frequenz 1 640x400 70Hz 2 640x350 85Hz 3 640x400 85Hz 4 640x480 60Hz 5 640x480 66Hz 6 640x480 72Hz 7 640x480 75Hz 8 640x480 85Hz 9 800x600 56Hz...

Страница 26: ...Bildschirmanzeige RF ANTENNENEINGANG 75 Ohm nicht geregelt BETRIEBSSPANNUNG 220 240V AC 50 Hz AUDIO Deutsch Nicam Stereo AUDIO AUSGANGSLEISTUNG WRMS 10 THD 2 x 2 5 LEISTUNGSAUFNAHME W 50 W max Energieeffizienzklasse im Auslieferzustand A 22 W PANEL 16 9 Lizenzinformationen Hergestellt unter Lizenz der Dolby Laboratories INHABER DER MARKENZEICHEN und das Doppel D Symbol sind Warenzeichen der Dolby ...

Страница 27: ...ek mp4 mov MPEG1 2 Layer 3 AAC HEAAC AC3 EAC3 LPCM ADPCM H 264 1080Px2 25fps1080P 50fps Andere 1080P 30fps 50Mbit Sek avi MPEG1 2 4 Xvid H 264 VC1 WMV3 Sorenson H 263 Motion JPEG MPEG1 2 Layer 1 2 3 AAC HEAAC AC3 EAC3 LPCM ADPCM WMA H 264 1080Px2 25fps 1080P 50fps Andere 1080P 30fps 50Mbit Sek flv H 264 Sorenson H 263 MPEG1 2 Layer 3 AAC HEAAC LPCM ADPCM H 264 1080Px2 25fps 1080P 50fps Andere 1080...

Страница 28: ...äts anschließen können Sie sich an die folgenden Auflösungsinformationen halten 56Hz 60Hz 66Hz 70Hz 72Hz 75Hz 640x400 þ 640x480 þ þ þ þ 800x600 þ þ þ þ þ 832x624 þ 1024x768 þ þ þ þ þ 1152x864 þ þ þ 1152x870 þ 1280x768 þ 1360x768 þ þ 1280x960 þ þ 1280x1024 þ þ 1400x1050 þ þ 1440x900 þ þ 1600x1200 þ 1680x1050 þ 1920x1080 þ 1920x1200 þ ...

Страница 29: ... zwischen Geräten verwendet HDMI High Definition Multimedia Interface DieserAnschluss liefert ein unkomprimiertes digitales Video und Audiosignal hoher Qualität Dabei werden Audio und Videosignale über einen einzigen Anschluss ausgegeben NTSC Der in den USA verwendete Standard für Zeilen TV Signale der auch in einigen anderen Ländern verwendet wird OSD Bildschirmanzeige On Screen Display Informati...

Страница 30: ...klassifiziertes Laserprodukt handelt Ausserhalb des Gerätes nur schwache Laser und ungefährliche Hinweise Sicherheitshinweise Achtung um Feuer oder elektrischen Schlag zu vermeiden nicht das Gehäuse oder die Rückseite öffnen Der Blitz mit Pfeilkopf in einem gleichseitigen Dreieck soll den Nutzer auf das Anliegen von nicht isolierter gefährlicher Spannung im Gerätegehäuse aufmerksam machen die star...

Страница 31: ...e Schäden verursachen Verwenden Sie keine Reinigungsmittel die Alkohol Ammoniak Benzen oder Schleifmittel enthalten da diese das Gerät beschädigen können Verwenden Sie zum Reinigen ein weiches feuchtes Tuch Hitze und Wärme Setzen Sie das Gerät nicht direkter Sonnenstrahlung aus Achten Sie darauf das das Gerät keinen direkten Wärmequellen wie Heizung oder offenem Feuer ausgesetzt ist Achten Sie dar...

Страница 32: ... in Wahrheit schädlich sein Um sich davor zu schützen stellen Sie die Lautstärke auf einen niedrigen Pegel ein Erhöhen Sie die Lautstärke langsam bis Sie problemlos und klar hören können Schäden an Ihrem Gehör sind vielfältig und können nicht rückgängig gemacht werden Sollten sich Ihnen Beschwerden im Ohr bemerkbar machen kontaktieren Sie bitte einen Arzt Störungen anderer Gerätschaften Sollten wä...

Страница 33: ...nnzeichnung wieder verwertbar Mit der Wiederverwendung der stofflichen Verwertung oder anderen Formen der Verwertung von Altgeräten leisten Sie einen wichtigen Beitrag zum Schutze unserer Umwelt Bitte erfragen Sie bei der Gemeindeverwaltung die zuständige Entsorgungsstelle Copyright Urheber und andere Eigentumsrechte am Inhalt liegen bei Schaub Lorenz International GmbH Alle Rechte am Inhalt verbl...

Страница 34: ...es agent for this Schaub Lorenz product n Österreich Austria HB Austria electronic products Vertiebs GmbH Pfarrgasse 52 1230 Wien AUSTRIA www hb europe com n Deutschland Germany HB Germany Vertriebs GmbH Martin Behaim Str 12 63263 Neu Isenburg GERMANY www hb europe com ...

Страница 35: ...rtes Zubehör wie z B Kabel Ste cker usw verwendet werden Bei Eingriff in das Gerät durch nicht autorisierte Personen erlöschen jegliche Gewährleistungs und Garantieansprüche Leistung aus Garantie oder Gewähleistung erfolgt nicht bei Schäden welche durch unsachgemäße Installation fehlerhafte Bedienung sowie durch mechanische Beschädigungen durch Unfall oder Stoß entstanden sind Anlagen Kaufbeleg Re...

Страница 36: ... Please read this instruction book carefully since you could learn a lot about he handling and the usage of this product Apart of that it is important due to security reasons and to prevent injuries In case of further questions or in case that any help is needed please visit our webpage www schaub lorenz com Enjoy your new Schaub Lorenz product Sincerely your SCHAUB LORENZ Team ...

Страница 37: ...a 220 240 V AC 50 Hz outlet Warning Do not leave your TV in standby or operating mode when you leave your house Positioning the TV For ventilation please leave a clear space of at least 10cm all around the TV Do not block the ventilation openings Do not place the TV on sloping or unstable surfaces the TV may tip over To prevent damage to the TV do not place any objects on top of the TV Only use th...

Страница 38: ...h liquids such as flower vases on top of the TV Avoid from dripping or splashing If any solid object or liquid falls into the cabinet unplug the TV and have it checked by qualified personnel before operating it any further Ventilation The slots and openings on the TV set are intended for ventilation and to ensure reliable operation To prevent overheating these openings must not be blocked or cover...

Страница 39: ... You can use Power Save Mode setting located in the Picture Settings menu If you set Power Save Mode as Eco the TV will switch to energy saving mode and luminance level of TV set will be decreased to optimum level Note that some picture settings will be unavailable to be changed when the TV is in Power Save Mode If Picture Off is selected Screen will be off in 15 seconds message will be displayed ...

Страница 40: ...ton twice the source list will appear on screen Scroll through the available sources by pushing the button up or down To turn the TV off Press the middle of the button down and hold it down for a few seconds the TV will turn into standby mode NOTE You can move the switch upward or downward to change the volume If you want to change the channel press the middle of the switch once Position 3 and the...

Страница 41: ...l swap 29 Blue button 30 Yellow button 31 Subtitle on off 32 Rapid advance 33 Stop 34 Pause in media browser mode Timeshift recording 35 Multimedia browser 36 Picture mode selection 37 Standby button 38 Function LED Using My button 1 Press MY BUTTON 1 for five seconds when on a desired source channel or link until the MY BUTTON IS SET message is displayed on the screen This confirms that the selec...

Страница 42: ...into the back of the TV before mounting on the wall Insert or remove the CI module only when the TV is SWITCHED OFF You should refer to the module instruction manual for details of the settings Insert the CAM and then the viewing card to the slot that is located in the terminal cover at the rear side of the TV The module should be correctly inserted it is impossible to insert fully if reversed The...

Страница 43: ...rcefully inserted 4 Connect the TV to the mains supply switch on and then wait for few moments until the card is activated 5 When no module is inserted No Common Interface module detected message appears on the screen You can refer to the module instruction manual for details of the settings CAM module Standby Notifications If the TV does not receive any input signal e g From an aerial or HDMI sou...

Страница 44: ...te When the TV is switched to standby mode standby LED can blink to indicate that features such as Standby Search Over Air Download or Timer is active The LED can also blink when you switch on the TV from standby mode First Time Installation When turned on for the first time the language selection menu appears The message Welcome please select your language is displayed in all language options lis...

Страница 45: ...ress OK Press OK button to quit channel list and watch TV LCN is the Logical Channel Number system that organizes available broadcasts in accordance with a recognizable channel sequence Cable Installation If you select CABLE option and press OK button on the remote control to continue the following message will be displayed on the screen To continue please select YES and press OK To cancel operati...

Страница 46: ...ore making any connections to the TV set in order to avoid any possible data loss Manufacturer will not be responsible for any file damage or data loss It is possible that certain types of USB devices e g MP3 Players or USB hard disk drives memory sticks may not be compatible with this TV The TV supports FAT32 and NTFS disk formatting but recording will not be available with NTFS formatted disks N...

Страница 47: ... Select Channel List item by using Left or Right button Press OK to view menu contents Select Edit Channel List to manage all stored channels Use Up or Down and OK buttons to select Edit Channel List Press Up or Down button to select the channel that will be processed Press Left or Right button to select a function on Channel List menu Use P P buttons to move page up or down Press MENU button to e...

Страница 48: ... 9 Zoom 4 3 or Cinema Auto Only available in Scart mode with SCART PIN8 high voltage low voltage switching HDMI True Black optional While watching from HDMI source this feature will be visible in the Picture Settings menu You can use this feature to enhance blackness in the picture Film Mode optional Films are recorded at a different number of frames per second to normal television programmes Turn...

Страница 49: ...ound mode can be changed as On or Off Digital Out Sets digital out audio type Install and Retune Menu Contents Automatic Channel Scan Retune Displays automatic tuning options Digital Aerial Searches and stores aerial DVB stations Digital Cable Searches and stores cable DVB stations Analogue Searches and stores analogue stations Digital Aerial Analogue Searches and stores aerial DVB and analogue st...

Страница 50: ...rypted When this setting is on search process will locate the encrypted channels as well If it is set as Off encrypted channels will not be located in automatic search or manual search Blue Background Activates or deactivates blue background system when the signal is weak or absent Software Upgrade To ensure that your TV always has the most update information you can use this setting In order for ...

Страница 51: ...ingconfiguresthepowerupmodepreference AlwaysOn TheTValwaysswitches on when main on off button is pressed Standby The TV always powers up in Standby mode Last State The TV always switches on with the last selected channel source Biss Key Biss is a satellite signal scrambling system that is used for some broadcasts If you need to enter BISS key on a broadcast you can use Biss Key setting located in ...

Страница 52: ...celled Note It is not possible to record or set timer for two or more individual events at the same time interval Recording a Programme IMPORTANT When using a new USB hard disk drive it is recommended that you first format the disk using your TV s Format Disk option To record a programme you should first connect a USB disk to your TV while the TV is switched off You should then switch on the TV to...

Страница 53: ... a playing point Note Viewing main menu and menu items will not be available during the playback Press STOP button to stop a playback and return to return to Recordings Library Slow Forward If you press PAUSE button while watching recorded programmes slow forward feature will be available You can use button to slow forward Pressing button consecutively will change slow forwarding speed Recordings ...

Страница 54: ...are Upgrade Your TV is capable of finding and updating new software upgrades over broadcast channels For broadcast channels search TV looks the available channels stored in your settings So before software upgrade search it is advised to auto search and update all available channels 1 Software upgrade search via user interface It is possible manually to check if there is a new software upgrade for...

Страница 55: ...Is the aerial connected properly 3 Are the plugs connected tightly to the aerial socket 4 Is the aerial cable damaged 5 Are suitable plugs used to connect the aerial 6 If you are in doubt consult your dealer No sound 1 Has the TV been set to mute To cancel mute press the button or increase the volume level 2 Sound is coming from only one speaker Is the balance set to one extreme See Sound Menu sec...

Страница 56: ...z 12 800x600 72Hz 13 800x600 75Hz 14 800x600 85Hz 15 832x624 75Hz 16 1024x768 60Hz 17 1024x768 66Hz 18 1024x768 70Hz 19 1024x768 72Hz 20 1024x768 75Hz 21 1024x768 85Hz 22 1152x864 60Hz 23 1152x864 70Hz 24 1152x864 75Hz 25 1152x864 85Hz 26 1152x870 75Hz 27 1280x768 60Hz 28 1360x768 60Hz 29 1280x768 75Hz 30 1280x768 85Hz 31 1280x960 60Hz 32 1280x960 75Hz 33 1280x960 85Hz 34 1280x1024 60Hz 35 1280x10...

Страница 57: ...ANNEL INDICATOR On Screen Display RF AERIAL INPUT 75 Ohm unbalanced OPERATING VOLTAGE 220 240V AC 50 Hz AUDIO German Nicam Stereo AUDIO OUTPUT POWER WRMS 10 THD 2x2 5 POWER CONSUMPTION W 50 W max PANEL 16 9 display Default energy efficiency A 22W Licence Notifications Manufactured under license from Dolby Laboratories TRADEMARK ACKNOWLEDGMENT and the double D symbol are trademarks of Dolby Laborat...

Страница 58: ...4 mov MPEG1 2 Layer 3 AAC HEAAC AC3 EAC3 LPCM ADPCM H 264 1080Px2 25fps 1080P 50fps Other 1080P 30fps 50Mbit sec avi MPEG1 2 4 Xvid H 264 VC1 WMV3 Sorenson H 263 Motion JPEG MPEG1 2 Layer 1 2 3 AAC HEAAC AC3 EAC3 LPCM ADPCM WMA H 264 1080Px2 25fps 1080P 50fps Other 1080P 30fps 50Mbit sec flv H 264 Sorenson H 263 MPEG1 2 Layer 3 AAC HEAAC LPCM ADPCM H 264 1080Px2 25fps 1080P 50fps Other 1080P 30fps...

Страница 59: ...t supplied you can refer to the following resolution information 56Hz 60Hz 66Hz 70Hz 72Hz 75Hz 640x400 þ 640x480 þ þ þ þ 800x600 þ þ þ þ þ 832x624 þ 1024x768 þ þ þ þ þ 1152x864 þ þ þ 1152x870 þ 1280x768 þ 1360x768 þ þ 1280x960 þ þ 1280x1024 þ þ 1400x1050 þ þ 1440x900 þ þ 1600x1200 þ 1680x1050 þ 1920x1080 þ 1920x1200 þ ...

Страница 60: ...ctrical shock CE Certification Symbol We have conducted tests and demonstrated our compliance with all relevant EU guidelines and requirements An exclamation mark in an equilateral triangle should indicate to the user that important usage maintenance and service instructions are located in the manual accompanying the device A laser product symbol on the back of the device indicates that this devic...

Страница 61: ...mage inside the device Do not use any cleaning products which contain alcohol ammonia benzene or abrasives as these can damage the unit Use a soft damp cloth for cleaning Heat and Warmth Do not place this device in direct sunlight Ensure that the device is not exposed to a direct heat source such as a radiator or an open fire Make sure that the device s ventilation openings are not covered Importa...

Страница 62: ...you can in fact be harmful in reality To protect yourself from this set the volume to a low level Increase the volume slowly until you can hear clearly and without difficulty There are many kinds of auditory damage and they cannot be reversed If you notice disturbances with your ears please contact a doctor Interference with Other Devices If interference with radio or television reception occurs d...

Страница 63: ...signation recyclable By recycling material recycling or other forms of reutilizing old devices you are making an important contribution to the protection of the environment Please ask your local authorities about the appropriate recycling collection center Copyright The copyrights and other property rights to the contents are held by Schaub Lorenz International GmbH All rights to the contents rema...

Страница 64: ...cas où une personne avale une pile Tenir les films d emballage hors de portée des enfants Risque de suffocation Source D alimentation Ce téléviseur ne doit être raccordé qu à une prise de 220 240 V AC 50 Hz Avertissement Ne laissez pas votre téléviseur en veille ou en fonctionnement lorsque vous quittez votre domicile Positionner le téléviseur Pour la ventilation laissez un espace d au moins 10 cm...

Страница 65: ...r par un personnel qualifié avant de continuer à l utiliser Ventilation Les fentes et les orifices du téléviseur sont prévus pour la ventilation et pour assurer un fonctionnement fiable Pour éviter la surchauffe ces orifices ne doivent pas être obstrués ni couverts de quelque façon que ce soit Une source de chaleur et flammes N exposez pas le téléviseur directement à la lumière solaire ou à des so...

Страница 66: ...onnée le message l écran s éteignera dans 15 secondes s affichera à l écran Sélectionnez l option POURSUIVRE et appuyez sur OK pour continuer L écran sera désactivé dans 15 secondes Si vous désactiver le mode Économie d énergie le mode d affichage sera automatiquement défini sur Dynamique Veuillez mettre le téléviseur hors tension et le débrancher du secteur lorsque vous ne vous en servez pas Cett...

Страница 67: ...tre à l écran la liste de sources Parcourrez les sources disponibles en appuyant sur le bouton Haut ou Bas Pour éteindre le téléviseur Appuyez au milieu du bouton Bas et maintenez le enfoncé pendant quelques secondes jusqu à ce que le téléviseur passe en mode Veille REMARQUE Vous pouvez déplacer le contacteur vers le haut ou vers le bas pour modifier le volume Si vous souhaitez changer de chaîne a...

Страница 68: ...30 Touche jaune 31 Sous titre Marche Arrêt 32 Avance rapide 33 Stop 34 Pause en mode vidéo du Navigateur média Enregistrement décalé 35 Navigateur multimédia 36 Sélection du mode Image 37 Bouton de mise en veille 38 La fonction de LED Utilisation de Mon bouton 1 Une fois sur une source une chaîne ou un lien souhaité appuyez sur MON BOUTON 1 pendant cinq secondes jusqu à ce que le message MON BOUTO...

Страница 69: ...sez le kit de montage en option mural fourni Il est recommandé de brancher tous vos câbles à l arrière du téléviseur avant tout montage mural Insérez ou effacez le module CI uniquement lorsque le téléviseur est ETEINT Consultez le manuel d instructions du module pour plus d informations sur les réglages Insérez le module CAM puis la carte dans la fente située dans le couvercle du terminal à l arri...

Страница 70: ... le premier est inséré avec une certaine pression 4 Branchez le téléviseur à la prise de courant allumez la et attendez un moment jusqu à ce que la carte soit activée 5 Lorsqu aucun module n est inséré le message Aucun module d interface commun détecté apparaît à l écran Consultez le manuel d utilisation du module pour les détails relatifs aux réglages CAM module Notifications de veille Lorsque le...

Страница 71: ... veille Pour éteindre complètement le téléviseur débranchez le cordon d alimentation de la prise secteur Remarque Lorsque le téléviseur est en mode de veille le voyant lumineux du mode veille clignote pour signifier que des options comme Recherche en mode veille téléchargement automatique ou Minuterie sont actives La LED peut également clignoter lorsque vous allumez le téléviseur à partir du mode ...

Страница 72: ...nne Si vous sélectionnez l option ANTENNE à partir de l écran Type de recherche la télévision numérique recherchera les diffusions terrestres numériques REMARQUE Vous pouvez appuyer sur la touche MENU pour annuler Une fois toutes les stations disponibles enregistrées la liste des chaînes s affichera à l écran Si les chaînes retrouvées vous intéressent en fonction du LCN veuillez sélectionner Oui p...

Страница 73: ...Lecture de média via entrée USB Vous pouvez connecter un lecteur de disque dur USB ou une carte mémoire USB à votre téléviseur grâce aux entrées USB du téléviseur Cette option vous donne la possibilité de lire des fichiers mémorisés dans un disque USB Les disques durs externes de 2 5 et 3 5 pouces hdd avec alimentation externe sont pris en charge IMPORTANT Vous devez sauvegarder vos fichiers avant...

Страница 74: ...s configurer les favoris ou les stations actives à inclure dans la liste en utilisant les options Liste de chaînes Pressez le bouton MENU pour afficher le menu Principal Sélectionnez la rubrique Liste des chaînes en utilisant le bouton Gauche ou Droite Appuyez sur OK pour afficher le contenu du menu Sélectionnez l option Modifier la liste des chaînes pour gérer toutes les chaînes mémorisées Utilis...

Страница 75: ... titre 14 9 14 9 Zoom 4 3 ou Cinéma Auto Disponible uniquement en mode Péritel avec commutation a haute faible tension pour PERITEL 8 BROCHES HDMI True Black en option Lorsque vous regardez le téléviseur à partir de la source HDMI cette option est visible dans le menu Paramètres de l image Vous pouvez utiliser cette option pour renforcer la noirceur de l image Mode Film en option Les films sont en...

Страница 76: ...ver le mode Son Surround Sortie Digitale Règle le type de sortie audio numérique Installation et Réglage Le Contenu du Menu Balayage de chaîne automatique Nouveau réglage Affiche les options de réglage automatique Antenne numérique Recherche et enregistre les chaînes DVB Câble numérique Recherche et enregistre les chaînes câblées DVB Analogique Recherche et mémorise les stations analogiques Antenn...

Страница 77: ...oks for the time info in the broadcast then to the user preference and lastly to the teletext time information Sources Active ou désactive les options sources sélectionnées Paramètres du satellite Affiche les paramètres Autres réglages Affiche les autres options de réglage du téléviseur Temporisation du menu Change la durée de temporisation des écrans de menu Balayage des chaînes cryptées Lorsque ...

Страница 78: ...seur pour actualiser la fréquence de diffusion de l émetteur automatiquement la definition de diffusion et les changements similaires Mode de mémorisation en option Si vous regardez la télévision dans un magasin vous pouvez activer ce mode Lorsque le mode Magasin est activé certains éléments du menu TV peuvent ne pas être disponibles pour réglage Allumer le mode Ce paramètre permet de configurer l...

Страница 79: ...our afficher l écran Options Sélectionnez l option Régler la minuterie sur Événement et appuyez sur la touche OK Vous avez la possibilité de définir une minuterie pour les programmes à venir Pour annuler une minuterie existante sélectionnez le programme en question et appuyez sur la touche OK Sélectionnez ensuite l option Supprimer la minuterie La minuterie sera annulée Remarque Il est impossible ...

Страница 80: ... T R E M E N T d e l a télécommande pour enregistrer l émission suivante sur l EPG Dans ce cas l écran affichera les émissions programmées pour l enregistrement Appuyez sur la touche STOP pour annuler l enregistrement instantané Au cours de l enregistrement il est impossible de basculer d une diffusion ou d une source différente et d afficher le navigateur média Regarder les programmes enregistrés...

Страница 81: ...d affichage quand le télétexte est activé P P et numéros de 0 à 9 Appuyez pour sélectionner une page Remarque La plupart des stations TV utilisent le code 100 pour leurs pages d index Votre TV supporte à la fois les systèmes FASTEXT et TOP text Lorsque ces systèmes sont disponibles les pages sont divisées en groupes ou en sujets Lorsque le système FASTEXTest disponible certaines sections d une pag...

Страница 82: ...hain démarrage Remarque relative au redémarrage Le redémarrage est la dernière étape du processus de mise à jour d un logiciel lorsque le téléchargement de celui a été effectué avec succès Pendant le redémarrage le téléviseur réalise des initialisations finales Pendant l opération de redémarrage le panneau d alimentation se ferme et le LED avant le signale par un clignotement Environ 5 minutes plu...

Страница 83: ...lez contacter votre fournisseur Pas de son 1 Est ce que le téléviseur est réglé pour couper le son Pour annuler la coupure de son appuyez sur le bouton ou augmenter le volume 2 Le son sort d un seul haut parleur Est ce que la balance est à l extrémité d une direction Consultez le menu Son Télécommande ne fonctionne pas Votre téléviseur ne répond pas à la télécommande Il est possible que les piles ...

Страница 84: ...80 72Hz 7 640x480 75Hz 8 640x480 85Hz 9 800x600 56Hz 10 800x600 60Hz 11 800x600 70Hz 12 800x600 72Hz 13 800x600 75Hz 14 800x600 85Hz 15 832x624 75Hz 16 1024x768 60Hz 17 1024x768 66Hz 18 1024x768 70Hz 19 1024x768 72Hz 20 1024x768 75Hz 21 1024x768 85Hz 22 1152x864 60Hz 23 1152x864 70Hz 24 1152x864 75Hz 25 1152x864 85Hz 26 1152x870 75Hz 27 1280x768 60Hz 28 1360x768 60Hz 29 1280x768 75Hz 30 1280x768 8...

Страница 85: ...TRÉE D ANTENNE RF 75 Ohms Non équilibré TENSION DE FONCTIONNEMENT 220 240V AC 50 Hz AUDIO German Nicam Stéréo APUISSANCE DE SORTIE WRMS 10 THD 2 x 2 5 CONSOMMATION ÉLECTRIQUE W 50 W max Effi cacité énergétique par défaut A 22W PANNEAU 16 9 Notification de licence Fabriqué sous licence de Dolby Laboratories RECONNAISSANCE DE MARQUE COMMERCIALE et le symbole du double D sont des marques commerciales...

Страница 86: ...4 mov MPEG1 2 Layer 1 2 3 AAC HEAAC AC3 EAC3 LPCM ADPCM H 264 1080Px2 25fps1080P 50fps Autres 1080P 30fps 50Mbit sec avi MPEG1 2 4 Xvid H 264 VC1 WMV3 Sorenson H 263 Motion JPEG MPEG1 2 Layer 1 2 3 AAC HEAAC AC3 EAC3 LPCM ADPCM H 264 1080Px2 25fps 1080P 50fps Other 1080P 30fps 50Mbit sec flv H 264 Sorenson H 263 MPEG1 2 Layer 1 2 3 AAC HEAAC AC3 EAC3 LPCM ADPCM H 264 1080Px2 25fps 1080P 50fps Othe...

Страница 87: ...ecteurs à votre téléviseur à l aide des câbles DVI non fournis 56Hz 60Hz 66Hz 70Hz 72Hz 75Hz 640x400 þ 640x480 þ þ þ þ 800x600 þ þ þ þ þ 832x624 þ 1024x768 þ þ þ þ þ 1152x864 þ þ þ 1152x870 þ 1280x768 þ 1360x768 þ þ 1280x960 þ þ 1280x1024 þ þ 1400x1050 þ þ 1440x900 þ þ 1600x1200 þ 1680x1050 þ 1920x1080 þ 1920x1200 þ ...

Страница 88: ...a ingoiata rivolgersi immediatamente a un medico Tenere le pellicole da imballaggio fuori dalla portata dei bambini Rischio di soffocamento Fonte di alimentazione La TV funziona con una tensione di rete di 220 240 V AC uscita 50 Hz Avvertenza Non lasciare la TV in standby o in funzione quando si esce da casa Posizionamento della TV Per la ventilazione lasciare uno spazio libero di almeno 10 cm tut...

Страница 89: ... potrebbe essere pericoloso Non ponete oggetti pieni di acqua come vasi di fiori in cima al TV Tenere lontano da gocciolii e spruzzi Se un qualunque oggetto solido o liquido cade nel mobile scollegare la TV e farla controllare da personale qualificato prima di farla funzionare ulteriormente Ventilazione Le fessure e le aperture sulla TV sono destinate alla ventilazione e ad assicurare un funzionam...

Страница 90: ... spegnerà in 15 secondi compare a video Selezionare PROCEED quindi premere OK per continuare La schermata si spegnerà in 15 secondi Nel caso in cui venga disattivata la modalità Power Save Mode la modalità immagine verrà impostata in modo automatico su Dynamic Quando la TV non viene usata si prega di spegnerla o scollegarla dalla presa di corrente In tal modo anche il consumo di energia verrà rido...

Страница 91: ...mmi Timeshift programmi 10000 programmi Sistema menu OSD Presa scart per dispositivi esterni video videogiochi set audio ecc Sistema audio stereo Televideo fastext TOP text Collegamento cuffia Sistema programmazione automatica Sintonizzazione manuale avanti e indietro Spegnimento automatico dopo un massimo di sei ore Timer spegnimento Blocco bambini Audio in modalità muto automatica in assenza di ...

Страница 92: ...le del pulsante comparirà a video l elenco delle sorgenti Scorrere fra le fonti disponibili premendo il pulsante su o gi Per spegnere la TV Premere la parte centrale del pulsante già e tenerla premuta per alcuni secondi la TV passa in modalità standby Nota possibile spostare l interruttore su o giù per modificare il volume Se si desidera cambiare i canali premere una volta al centro dell interrutt...

Страница 93: ... 32 Avanzamento rapido 33 Stop 34 Pausa in modalità video Browser Multimediale Registrazione timeshift 35 Browser multimediale 36 Selezione modalità immagine 37 Tasto Standby 38 LED funzione NOTA La distanza di funzionamento è di circa 7 m Utilizzo del mio pulsante 1 Premere MY BUTTON 1 per cinque secondi quando ci si trova sulla sorgente sul canale o sul link desiderato fino a che a video non com...

Страница 94: ...zione dei canali DTV Mpeg4 H 264 o durante la modalità in Browser multimediale l output non sarà disponibile mediante la presa a scart Quando viene usato il kit di montaggio a parete opzionale consigliamo di collegare tutti i cavi sulla parte posteriore della TV prima di procedere con l installazione a parete inserire o rimuovere il modulo CI solo quando la TV è SPENTA Per dettagli sulle impostazi...

Страница 95: ... 4 Collegare la TV all alimentazione di rete accendere ed attendere qualche secondo fino a che la scheda si attiva 5 Quando non viene inserito alcun modulo sulla scherma viene visualizzato il messaggio Nessun modulo Interfaccia comune rilevato Per dettagli sulle impostazioni consultare il manuale d uso del modulo CAM module Notifiche standby Nel caso in cui la TV non riceva alcun segnale in ingres...

Страница 96: ...pegnere completamente la TV scollegare il cavo di alimentazione dalla presa di rete Nota Quando la TV viene messa in modalità standby il LED di standby potrebbe lampeggiare per indicare che alcune funzioni come ad esempio la Ricerca Standby lo Scaricamento OverAir o il Timer sono attive Il LED lampeggia anche quando si accende la TV dalla modalità standby Prima installazione Quando viene accesa pe...

Страница 97: ...elezionare un tipo di ricerca per cercare e salvare le trasmissioni dalla sorgente desiderata Installazione antenna Se dalla schermataTipo di ricerca viene selezionata ANTENNA la TV digitale ricercherà trasmissioni TV in formato digitale terrestre NOTA È possibile premere il tasto MENU per annullare Dopo che tutte le stazioni disponibili sono state salvate sullo schermo verrà visualizzato un Elenc...

Страница 98: ...o con l elenco dei servizi Astra Elenco predefinito Esegue la ricerca in accordo con l elenco dei canali preimpostati Per salvare e uscire premere il tasto OK Riproduzione multimediale trame ingresso USB È possibile collegare una unità di disco rigida esterna oppure uno stick di memoria USB alla TV usando gli ingressi USB della TV Questa funzione consente di riprodurre i file memorizzati in una un...

Страница 99: ...l Elenco dei Canali È possibile modificare questo elenco dei canali impostare i canali preferiti o le stazioni attive da elencare servendosi delle opzioni Elenco Canali Premere il tasto MENU per visualizzare il menu principale Selezionare l opzione Elenco Canali usando il tasto Sinistra o Destra Premere OK per visualizzare i contenuti del menu Selezionare Modifica Elenco Canali per gestire tutti i...

Страница 100: ...4 9 Zoom 4 3 o Cinema Auto disponibile unicamente in modalità Scart con commutazione alta tensione bassa tensione SCART PIN8 HDMI True Black Quando si guarda da una sorgente HDMI la funzione sarà visibile nel menu Impostazioni Immagine Sarà possibile usare questa funzione per migliorare l oscurità dell immagine Modalità Film I film sono registrati in un numero diverso di fotogrammi per secondo ris...

Страница 101: ...lla TV impostare quest opzione come Cuffia Basso dinamico Attiva o disattiva la funzione Bass dinamico Audio cuffie opzionale La surround audio può essere impostata su On od Off Uscita digitale İmposta il tipo di audio in uscita Installa e Sintonizza contenuti del menu Ricerca automatica dei canali Retune Risintonizzazione Visualizza le opzioni di sintonizzazione automatica Antenna digitale Ricerc...

Страница 102: ...erranno aggiornate Se c è una trasmissione in corso le informazioni verranno prese dalla stessa In altre parole le informazioni sul tempo saranno disponibili conformemente a queste priorità come prima cosa la TV cerca le informazioni orarie nella trasmissione poi nelle preferenze utente e da ultimo nelle informazioni orarie del televideo Fonte attiva o disattiva le opzioni sorgente selezionate Imp...

Страница 103: ...to e modificato dopo questa procedura Attivare l impostazione Pausa ricerca per attivare nella TV l aggiornamento automatico della frequenza di trasmissione del broadcaster la definizione di trasmissione e modifiche simili Modalità di sintonizzazione opzionale Nel caso in cui la TV venga accesa in un negozio sarà possibile attivare questa modalità Quando la Modalità Store è attivata alcuni element...

Страница 104: ...ne timer per programmi futuri Per annullare la funzione promemoria già impostata evidenziare il programma e premere il pulsante OK In seguito selezionare l opzione Elimina Timer Il timer verrà annullato Note non È possibile registrare o impostare lo stesso timer per due o più eventi simili con lo stesso intervallo di tempo Registrazione di un programma IMPORTANTE Quando si utilizza una nuova unità...

Страница 105: ...fferente trasmissione o fonte e visualizzare il Browser multimediale non è possibile durante la registrazione Visione dei programmi Registrati Dal menu principale usare i tasti o per selezionare il Browser Media Nel menu principale evidenziare la voce Menu Registrazioni utilizzando i pulsanti o e premere OK per accedere Verrà visualizzato il Menu Registrazioni Selezionare la voce registrati dalla ...

Страница 106: ...e nella trasmissione Premere nuovamente per visualizzare la pagina di televideo analogica Premere di nuovo per posizionare la schermata televideo sul programma mix Premere nuovamente il tasto per uscire dalla modalità televideo BACK Indice Seleziona la pagina dell indice del televideo i INFO Mostra Mostra informazioni nascoste per esempio soluzioni di giochi OK Fermo Ferma una pagina quando serve ...

Страница 107: ... termine del download viene visualizzato un messaggio di errore che invita a riavviare e attivare il nuovo software Premere OK per continuare con la procedura di riavvio 2 Ricerca 3 AM e modalità aggiornamento Nel caso in cui sia attivato il menu Automatic scanning RicercaAutomatica in Upgrade Options Opzioni di Aggiornamento la TV si attiva alle ore 03 00 e ricerca canali di trasmissione per nuov...

Страница 108: ...dubbio contattare il rivenditore Nessun suono 1 È stato disattivato l audio della TV Per annullare premere il pulsante o aumentare il livello del volume 2 L audio viene emesso solo da un altoparlante Il bilanciamento è impostato solo ad un estremo Vedere il Menu Suono Telecomando non funziona L apparecchio TV non risponde più al telecomando Le batterie potrebbero essere scariche sarà possibile usa...

Страница 109: ...Hz 36 1280x1024 85Hz 37 1400x1050 60Hz 38 1400x1050 75Hz 39 1400x1050 85Hz 40 1440x900 60Hz 41 1440x900 75Hz 42 1600x1200 60Hz 43 1680x1050 60Hz 44 1920x1080 60Hz 45 1920x1200 60Hz Dettagli TRASMISSIONE TV PAL SECAM B G D K K I I L L RICEZIONE DIGITALE DVB T MPEG2 DVB T MPEG4 HD DVB T2 MPEG2 DVB T2 MPEG4 HD DVB T MPEG 5 MPEG 4 Solo per il Regno Unito DVB C MPEG2 DVB C MPEG4 HD DVB S S2 MPEG2 DVB S...

Страница 110: ...p4 mov MPEG1 2 Layer 1 2 3 AAC HEAAC AC3 EAC3 LPCM ADPCM H 264 1080Px2 25fps1080P 50fps Altre 1080P 30fps 50Mbit sec avi MPEG1 2 4 Xvid H 264 VC1 WMV3 Sorenson H 263 Motion JPEG MPEG1 2 Layer 1 2 3 AAC HEAAC AC3 EAC3 LPCM ADPCM WMA H 264 1080Px2 25fps 1080P 50fps Altre 1080P 30fps 50Mbit sec flv H 264 Sorenson H 263 MPEG1 2 Layer 3 AAC HEAAC LPCM ADPCM H 264 1080Px2 25fps 1080P 50fps Altre 1080P 3...

Страница 111: ... dotazione e possibile fare riferimento alle seguenti informazioni sulla risoluzione 56Hz 60Hz 66Hz 70Hz 72Hz 75Hz 640x400 þ 640x480 þ þ þ þ 800x600 þ þ þ þ þ 832x624 þ 1024x768 þ þ þ þ þ 1152x864 þ þ þ 1152x870 þ 1280x768 þ 1360x768 þ þ 1280x960 þ þ 1280x1024 þ þ 1400x1050 þ þ 1440x900 þ þ 1600x1200 þ 1680x1050 þ 1920x1080 þ 1920x1200 þ ...

Страница 112: ......

Отзывы: