3
Pro Tools Setup
Launch Pro Tools, then select “Peripherals...”
from the Setup menu. Select the ‘MIDI
Peripherals’ tab in the Peripherals window.
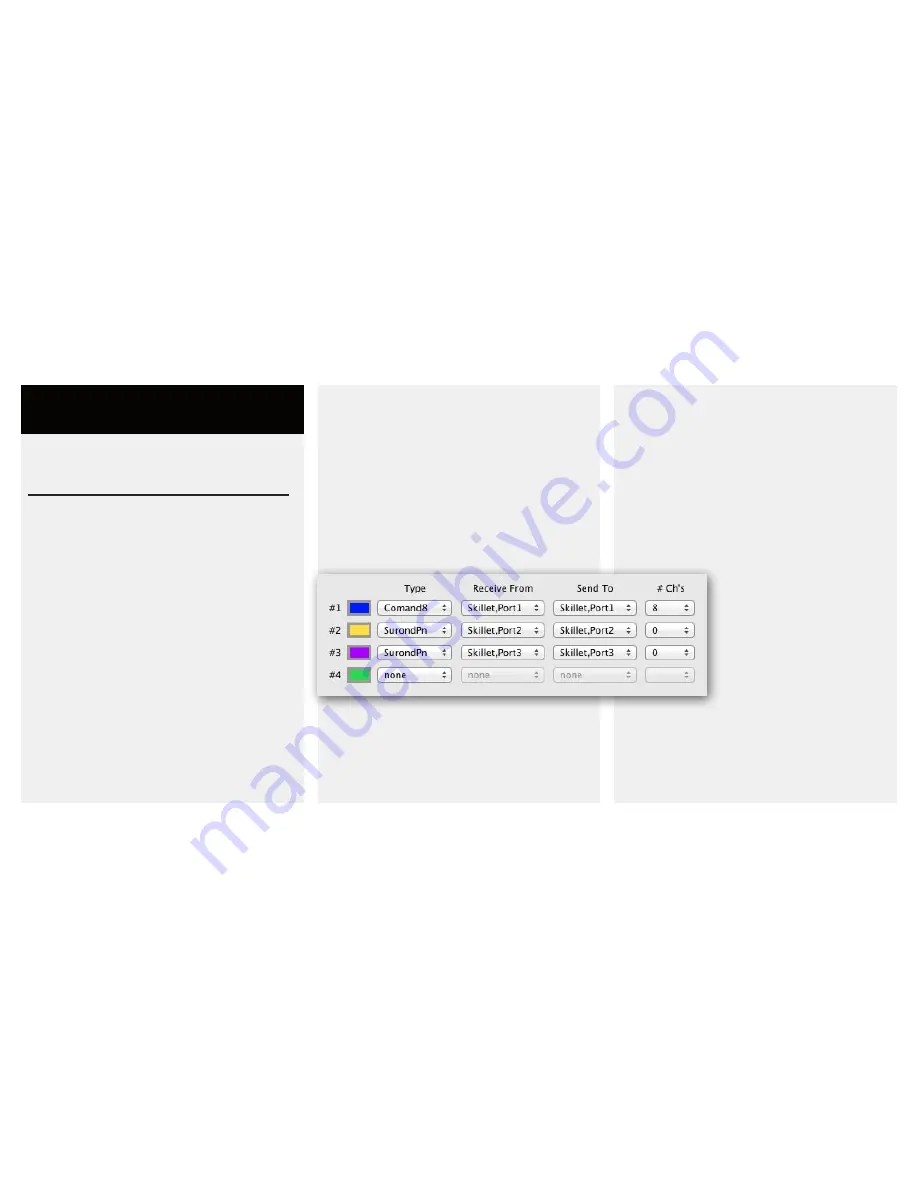
Skillet is recognized as a Command8 device,
and two Surround Panner devices.
Setup should look like this:
Slot #1 should have a type of “Command 8”, and
uses Skillet Port 1 to receive and send.
Slots #2 and #3 should both have types of
“Surround Panner” and use Skillet Ports 2 and 3
respectively.
On Windows, Ports 2 and 3 of Skillet
may appear as ‘MIDIIN2(Skillet)’ and
‘MIDIIN3(Skillet).’ This is normal.
After closing the Peripherals window, you
should see a number of things happen. The
top 8 audio tracks in Pro Tools will be given a
blue border, and Skillet’s two motorized faders
should jump to match the fader position on the
two topmost audio tracks.
Although 8 tracks are
highlighted in Pro Tools,
Skillet only addresses the
first two of those tracks.
You can use Skillet’s ‘Bank’
and ‘Nudge’ buttons to
focus the faders on different
tracks.
Chapter 2
Quick Start
To begin, if you would like to use one of the
slottable Skillet feet that are included, slot it
into the bottom of Skillet now. Attach the USB
cable to your computer. Next, attach the power
adapter, footswitch, and then the included USB
cable to Skillet.
When you first start up your Skillet, you will
be greeted by a one-time setup page on the
touchscreen. Choose from “Pro Tools” or
“MIDI” modes.
If you are setting up Skillet as a generic MIDI
controller, continue to Chapter 4. If you are
setting Skillet up for use with Avid Pro Tools,
read on.


