manualshive.com logo in svg
background image

OPERATOR’S 

MANUAL

Part No. 03321

Printed 9/12

Printed in USA

© 2012

Scag Power Equipment

Division of Metalcraft of Mayville, Inc.

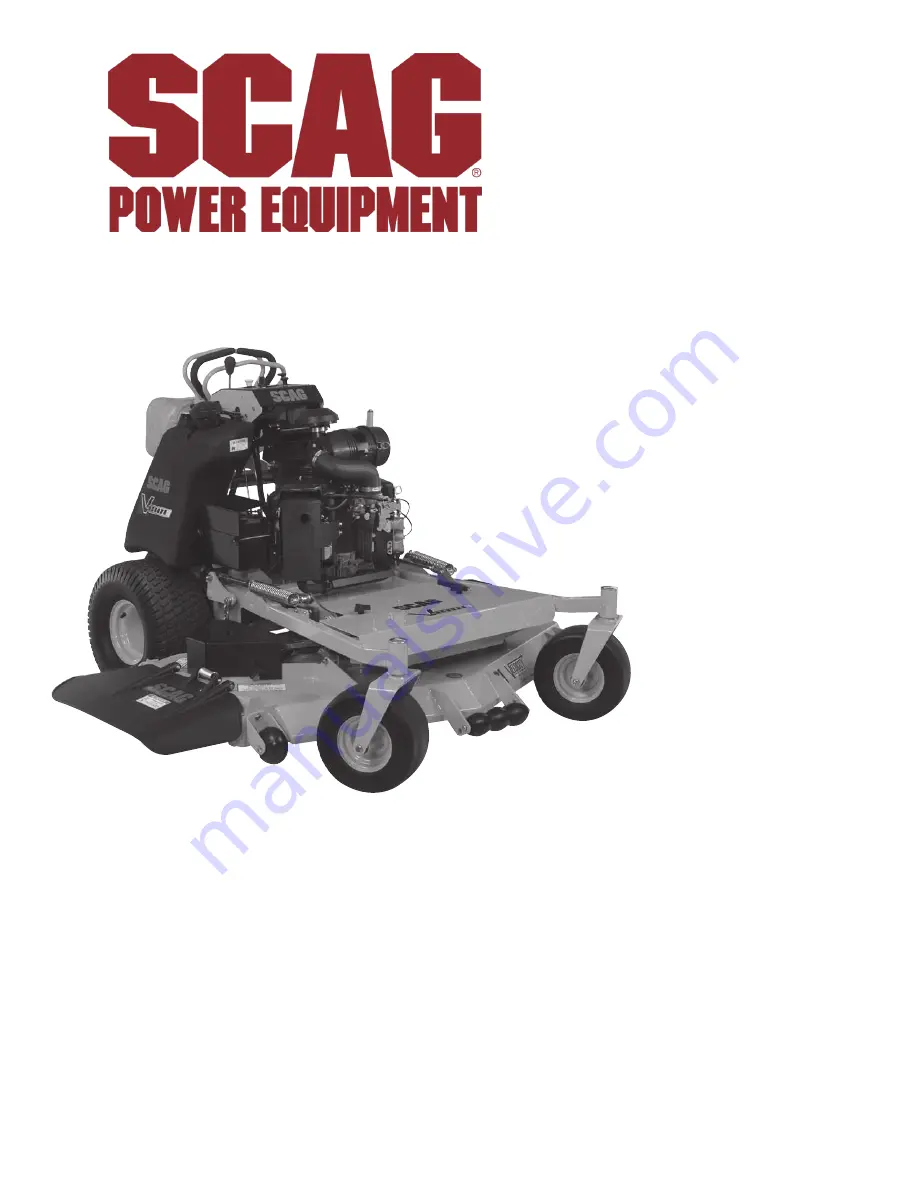
Congratulations on owning a Scag mower! This manual contains the 

operating instructions and safety information for your Scag mower. Reading 

this manual can provide you with assistance in maintenance and adjustment 

procedures to keep your mower performing to maximum efficiency. The 

specific models that this book covers are listed on the inside cover. Before 

operating your machine, please read all the information enclosed.

V-Ride

Model: 

SVR36A-600FX


SVR48V-691FX


SVR52V-730FX


SVR61V-801FX

Содержание SVR36A-15FS

Страница 1: ...uctions and safety information for your Scag mower Reading this manual can provide you with assistance in maintenance and adjustment procedures to keep your mower performing to maximum efficiency The...

Страница 2: ...ve the spark plug wire and ignition key If a mechanism becomes clogged stop the engine before cleaning Keep hands feet and clothing away from power driven parts Keep others off the mow er only one per...

Страница 3: ...SECTION 3 9 3 1 ENGINE 9 3 2 Electrical 9 3 3 ENGINE DECK 9 3 4 Cutter Deck 10 3 5 Weights and Dimensions 10 3 6 PRODUCTIVITY 10 OPERATING INSTRUCTIONS SECTION 4 11 4 1 CONTROLS AND INSTRUMENT IDENTI...

Страница 4: ...Fuel System 36 7 6 Engine Air Cleaner 37 7 7 Battery eLECTRIC START MODELS 37 7 8 DRIVE BELTS 38 7 9 CUTTER BLADES 38 7 10 TIRES 40 7 11 Body and deck 40 ILLUSTRATED PARTS LIST SECTION 8 42 8 1 SCAG...

Страница 5: ...g SERIAL NUMBER PLATE LOCATION Mower Serial Number Plate Location Figure 1 1 GENERAL INFORMATION USE ONLY SCAG APPROVED ATTACHMENTS AND ACCESSORIES Attachments and accessories manufactured by companie...

Страница 6: ...On Start Spring Tension on Idler Off Stop Oil Falling Hazard Thrown Object Hazard Fast Slow Continuously Variable Linear Cutting Element Basic Symbol 481039S Pinch Point Cutting Element Engage Hour me...

Страница 7: ...l contains important information about safety To avoid injury and possible death carefully read the message Be sure to fully understand the causes of possible injury or death Signal Word It is a disti...

Страница 8: ...n the drive position D and the parking brake is applied Never operate equipment with the interlock system disconnected or malfunctioning Be sure the interlock switches are functioning 10 correctly Fue...

Страница 9: ...11 Disengage power to cutter deck before crossing 12 roads walks or gravel drives Mow only in daylight or good artificial light 13 NEVER raise the deck with the blades engaged 14 Take all possible pr...

Страница 10: ...he engine See the engine operator s manual for information on engine settings To reduce fire hazard keep the cutting units drives 6 muffler and engine free of grass leaves excessive grease oil and dir...

Страница 11: ...engine on or near any forest covered brush covered or grass covered land unless the exhaust system is equipped with a spark arrestor meeting any applicable local or state laws Other states or federal...

Страница 12: ...ation A spark arrestor may be required The operator should contact local fire agencies for laws or regulations relating to fire prevention requirements 483900 483900 supplied with California models on...

Страница 13: ...ystem Hydraulic Drive with Two Variable Displacement Pumps and Two Cast Iron High Torque Wheel Motors Hydraulic Pumps Two Hydro Gear PG Series 10 cc 36 48 52 or PK Series 12 cc 61 Hydraulic Pumps with...

Страница 14: ...ng Tapered Roller Bearings with Top Access Grease Fitting and Grease Overfill Relief Poppet Spindle Pulleys Split Steel with Tapered Locking Hub Cutter Deck Belts B section with Kevlar Cords Electric...

Страница 15: ...ngage the deck drive Engine Choke Control Figure 4 1 3 Used to start a cold engine Engine Throttle Control Figure 4 1 4 Used to control the engine speed Pushing the lever forward increases engine spee...

Страница 16: ...nd the neutral lock lever is in the neutral lock position The system shuts off the engine if the operator releases the left hand steering lever with the deck drive engaged the operator releases the le...

Страница 17: ...pull the left steering control lever back The further the steering control is pulled back the quicker the mower will turn left See Figure 4 3 To steer the mower to the right while traveling forward p...

Страница 18: ...eck drive Engage the deck drive by pulling out on the yellow 2 switch located on the instrument panel to the engage position See Figure 4 4 390S0138 PULL UP TO ENGAGE PUSH DOWN TO DISENGAGE Cutter Eng...

Страница 19: ...a when lowering or raising the operator platform Make sure the operator platform is supported when the latch lever is released Make sure the latch lever secures the platform when folding it in the rai...

Страница 20: ...on a flat level surface only Do not 1 park the machine on an incline Disengage the cutter blades 2 Shift the neutral lock lever into the neutral N 3 position Engage the parking brake 4 Slow the engine...

Страница 21: ...et or tall grass mow the grass twice 6 Raise the mower to the highest setting for the first pass and then make a second pass to the desired height Use a slow travel speed for trimming purposes 7 Opera...

Страница 22: ...ng Strips of Uncut Grass in Cutting Path Width of Deck SGB018 Dull worn blades Sharpen blades Incorrect blade sharpening Sharpen blades Low engine RPM Run engine at full RPM Belt slipping Adjust belt...

Страница 23: ...er Bent spindle area See your authorized SCAG dealer Dull blade Sharpen blade Uneven Cut on Uneven Ground WavyAppearance High Low Scalloped Cut or Rough Contour Width of Deck SGB021 Uneven ground May...

Страница 24: ...t Ground speed too fast Slow speed to adjust for conditions Wet grass Cut grass after it has dried out Step Cut Ridge in Center of Cutting path Width of Deck SGB024 Blades not mounted evenly Adjust pi...

Страница 25: ...just the brake linkage rod until the there is a 1 4 gap between the tire and right hand brake bellcrank The right hand side must be adjusted first before adjusting the brake weldment on the left side...

Страница 26: ...ck until the drive wheel stops moving Turn the rod an additional 1 2 turn See Figure 6 2 LOOSEN JAM NUT LOOSEN JAM NUT ADJUST HERE Tracking Adjustment Right Side Figure 6 2 Repeat for the LH wheel See...

Страница 27: ...ill cause the control rod to stroke the RH pump less slowing down the RH wheel See Figure 6 2 NOTE If after making the adjustment as outlined in step 2A the machine creeps forward or backward the neut...

Страница 28: ...de until the distance from the top of the cutter deck to the floor is the same as the measurement on the LH side of the machine Tighten the two elastic stop nuts to secure the cutter 3 deck in the pro...

Страница 29: ...per hand and eye protection when working with cutter blades Check the measurement from the floor to the cutter 3 blade tip at the rear of the left side blade If the measurement is not at 3 an adjustme...

Страница 30: ...be raised or lowered to precisely tailor the deck s performance for the type of grass being cut The baffle can be set in seven 7 different positions for optimum performance A 3 1 2 or 3 3 4 Position S...

Страница 31: ...m Cut Baffle Adjustment Mounting Slot Selected Mounting Hardware Location Slot A Hole 1 Hole 2 Hole 3 Hole 4 Height inches 3 3 4 4 1 4 4 3 4 5 1 4 Slot B Hole 2 Hole 3 Hole 4 Height inches 3 1 2 4 4 1...

Страница 32: ...not be operated with less than the number of weights listed above electric clutch adjustment 6 7 The electric clutch serves two functions in the operation of the mower In addition to starting and stop...

Страница 33: ...r 4 1 WEIGHT FOR 48 52 61 2 WEIGHTS FOR 36 3 OPTIONAL FOR ALL MODELS 1 2 13 ELASTIC STOP NUT 1 2 13 x 2 3 4 ONE WEIGHT 1 2 13 x 4 1 2 TWO WEIGHTS 1 2 13 x 5 1 2 THREE WEIGHTS Front Weight Adjustment F...

Страница 34: ...30 R Section 6 A B C A B C G OPERATOR CUSHION ADJUSTMENTS ONE MOUNTING BRACKET LOCATION THREE OPERATOR CUSHION LOCATIONS Operator Cushion Adjustment Figure 6 12...

Страница 35: ...lades See paragraph 7 8 X Apply grease to fittings See paragraph 7 2 X Check safety interlock system See paragraph 4 2 X Change engine oil and filter See paragraph 7 4 X Check belts for proper alignme...

Страница 36: ...ngs See paragraph 7 2 X Drain hydraulic system and replace oil and filter See paragraph 7 3 X Adjust electric PTO clutch See paragraph 6 6 Lubrication 7 2 GREASE FITTING LUBRICATION CHART LOCATION LUB...

Страница 37: ...brication Fitting Points Figure 7 1 GREASE FITTING LUBRICATION Lubricant Interval Lithium MP White Grease 2125 40 Hours Weekly Chassis Grease 100 Hours Bi weekly Chassis Grease 200 Hours Monthly 2 1 5...

Страница 38: ...in Procedure C Changing Hydraulic Oil Filter Element Fill the reservoir to full 2 1 4 inches below the filler 4 neck with 20W50 motor oil Replace the reservoir fill cap Start the engine and 5 drive fo...

Страница 39: ...before changing the oil and removing the filter HYDRAULIC OIL FILTER DRAIN PLUG Hydraulic Oil Filter Figure 7 3 C Changing Hydraulic Oil Filter Element The hydraulic oil filter should be changed afte...

Страница 40: ...trailer Never store the machine or fuel container where 5 there is an open flame spark or pilot light such as on a water heater or other appliances Never fill containers inside a vehicle or on a truc...

Страница 41: ...IC START MODELS 7 7 WARNING Lead acid batteries produce flammable and explosive gases To avoid personal injury when checking testing or charging batteries DO NOT use smoking materials near batteries K...

Страница 42: ...post then connect the negative cable to the negative battery post DRIVE BELTS 7 8 All drive belts are spring loaded and self tensioning however after the first 2 4 8 and 10 hours of operation the belt...

Страница 43: ...placing the blades 1 Raise the mower deck to the highest position Place 2 the lanyard pin in the highest cutting height position to prevent the cutter deck from falling Secure the cutter blades to pre...

Страница 44: ...ee Drive Wheels 12 PSI Body and deck 7 11 Caution Do not wash any portion of the equipment while it is hot Do not wash the engine use compressed air After each use wash the mower and cutter deck 1 Use...

Страница 45: ...41 R Section 7 NOTES...

Страница 46: ...other than Scag Power Equipment are not approved for use on this machine Scag approved attachments and accessories Mulch Plate p n 9258 9286 9287 9288 Hurricane Mulch p n 9263 9283 9284 9285 GC F4 p...

Страница 47: ...43 R Section 8...

Страница 48: ...3 4 7 10 8 9 6 6 4 12 3 2 11 7 8 9 13 14 7 8 15 16 18 20 15 18 19 17 21 68 18 18 22 26 25 24 23 27 28 29 30 34 33 32 18 18 35 16 54 53 31 36 37 38 39 39 41 40 42 43 44 45 46 47 58 57 56 55 52 5 48 50...

Страница 49: ...LH Pusharm Assy RH Nut 1 2 20 UNF Rod End 1 2 20 RH Grease Fitting Shaft Weldment Wheel Anti Scalp Lever Deck Level U Nut 3 8 16 Bolt Hex Head 3 8 16 x 2 Special Nut Elastic Stop 7 16 14 Bolt Carriage...

Страница 50: ...10 8 2 3 4 7 6 6 13 12 14 69 8 10 17 17 18 19 16 15 14 20 20 22 21 21 26 23 24 25 27 28 29 30 32 31 33 34 62 62 61 16 35 14 14 29 36 37 38 39 41 40 42 43 44 39 45 46 47 57 55 54 53 52 50 49 48 51 20 6...

Страница 51: ...6 14 Bolt Hex Head 3 8 16 x 2 Special Nut Elastic Stop 7 16 14 Nut Elastic Stop 5 16 18 Lockwasher 5 16 Spring Spring Cutter Deck Spindle Assembly Shaft Spindle Seal Upper Bearing Assembly Grease Fitt...

Страница 52: ...4 4 5 7 9 8 6 10 5 8 9 11 5 8 12 12 13 13 14 17 15 16 18 19 20 20 18 21 22 23 24 25 26 27 28 29 31 30 33 34 35 48 36 37 38 39 39 41 40 42 43 44 45 46 57 55 56 54 53 52 49 50 51 63 62 18 61 20 59 5 58...

Страница 53: ...ter Deck w Decals Nut Elastic Stop 5 16 18 Lockwasher 5 16 Spring Spring Cutter Deck Spindle Assembly Shaft Spindle Seal Upper Bearing Assembly Grease Fitting Valve Grease Relief Housing Spindle Space...

Страница 54: ...8 8 8 8 8 8 8 9 10 5 12 4 9 12 10 9 5 11 6 6 4 11 7 5 14 4 9 9 10 15 12 4 56 17 16 18 18 19 20 21 22 14 15 24 25 26 27 28 34 36 36 37 37 33 34 38 39 40 7 21 23 9 9 8 8 8 8 12 41 32 43 35 23 29 30 31...

Страница 55: ...Lift 36A Bearing Deck Lift 48V 52V Flatwasher 3 4 766 x 1 25 x 0598 Retaining Ring 750 E Bolt Hex Head 3 8 16 x 3 Flatwasher 3 8 391 x 938 x 105 Nut Elastic Stop 3 8 16 Actuator Rod Bearing Handle Wel...

Страница 56: ...8 8 12 9 42 4 14 5 8 9 12 10 8 9 8 11 6 6 7 4 11 8 13 8 8 8 10 9 12 9 5 14 4 60 59 59 59 60 21 22 20 19 15 18 16 58 17 18 15 42 44 45 46 23 30 29 61 24 25 26 28 34 27 36 37 34 33 38 39 40 21 7 23 9 12...

Страница 57: ...6 x 1 25 x 0598 Retaining Ring 750 E Bolt Hex Head 3 8 16 x 3 Flatwasher 3 8 391 x 938 x 105 Nut Elastic Stop 3 8 16 Actuator Rod Bearing Handle Weldment Deck Latch Spring Deck Latch Spacer Bolt Hex H...

Страница 58: ...S A 3 35 34 33 1 2 4 46 6 47 30 15 19 21 13 20 24 48 22 25 28 29 27 36 37 17 41 44 15 45 46 13 38 23 6 5 2 32 40 42 31 49 43 SVR61 Only 17 16 6 11 10 9 8 7 9 12 13 14 15 15 13 18 15 18 B 26 37 C 26 C...

Страница 59: ...ex Head 3 8 16 x 2 Bearing Footplate Assembly 36 Incl 26 Footplate Assembly 48 52 Incl 26 Footplate Assembly 61 Incl 26 Latch Weldment Bolt Carriage 5 16 18 x 1 30 31 32 33 34 35 36 37 38 39 40 41 42...

Страница 60: ...14 15 22 11 25 26 29 30 27 28 34 33 31 32 10 24 36 32 39 34 40 43 41 42 37 38 37 38 38 11 10 9 8 11 10 9 7 6 5 4 3 1 38 38 2 24 45 SVR 36A 2012 SVR Steering Controls 34 33 31 32 SVR 36A SVR 48V SVR 5...

Страница 61: ...Nut Elastic Stop 5 16 18 Linkage Assembly Spacer Pump Bolt Hex Head 5 16 18 x 1 3 4 Bellcrank Brake Weldment SVR 36A Bellcrank Brake Weldment SVR 48V 52V Bellcrank Brake Weldment SVR 61V Brake Keeper...

Страница 62: ...58 R Section 8 SVR FUEL SYSTEM 1 2 4 6 5 8 7 3 9 10 11 TO FUEL FILTER 9 10 23 Tank Purge A A To Engine Purge Port B B 12 13 14 14 13 14 14 14 15 16 17 18 19 20 21 22...

Страница 63: ...sher 5 16 375 x 875 x 083 10 04030 03 Lockwasher 5 16 Spring 11 04001 08 Bolt Hex Head 5 16 18 x 3 4 12 484279 01 Tube Fuel Tank Insert 4 13 484345 Hose Vapor Recovery 3 16 order by inch 14 48059 05 C...

Страница 64: ...3 5 5 5 5 5 5 3 B 6 6 5 10 9 14 8 13 11 12 4 4 7 17 18 6 54 M M 64 F N N 7 5 3 1 15 16 19 20 46 61 68 68 63 60 24 25 21 54 52 26 25 25 22 23 32 33 36 33 34 35 37 38 39 40 41 27 28 29 31 30 51 52 50 5...

Страница 65: ...Hex Castle Nut 3 4 28 Wheel Nut Anti Rotation Bracket 36A Anti Rotation Bracket 48V 52V Pulley 5 45 OD Tapered Bore Key 5 x 5 x 25mm Tapered Hub 15mm Bore Belt Pump Drive Bolt Hex Head 1 4 20 x 1 Gr...

Страница 66: ...3 5 3 3 3 3 3 3 5 5 5 5 5 5 3 B 6 6 5 10 9 14 8 13 11 12 4 4 7 17 18 6 54 M M 64 G F N N 7 5 3 1 15 16 19 20 46 61 68 61 68 63 60 25 21 24 54 52 26 25 25 22 23 32 33 36 33 34 35 37 38 39 40 41 27 28 2...

Страница 67: ...Stem Tire 20 x 10 5 8 4 Ply Lockwasher Wheel Motor Hex Castle Nut 3 4 28 Wheel Nut Anti Rotation Bracket Pulley 5 45 OD Tapered Bore Key 5 x 5 x 25mm Tapered Hub 15mm Bore Belt Pump Drive Bolt Hex He...

Страница 68: ...64 R Section 8 ELECTRICAL SYSTEM 10 21 23 24 25 26 27 28 15 A 1 2 3 S C A G P O W E R E Q U IP M E N T 4 5 6 7 8 9 12 13 14 11 22 16 A 2 0 2 0 17 29 18 19 20...

Страница 69: ...O 10 Amp Key Switch Lockwasher 5 8 Internal Tooth Nut 5 8 32 Special Key Chain w Keys Key w Shroud Choke Control SVR Throttle Control SVR Bolt Carriage 10 24 x 1 2 Locknut 10 24 Hourmeter Bolt Hex Hea...

Страница 70: ...66 R Section 8 REPLACEMENT DECALS AND INFORMATION PLATES 1 2 3 4 5 6 7 8 9 10 Heavy Duty Commercial 484453...

Страница 71: ...483405 Decal Warning 3 483961 Decal Belt Cover 4 483059 Decal 36A 483199 Decal 48V 483200 Decal 52V 483201 Decal 61V 5 483407 Decal Spinning Blades 6 48404 Decal Metalcraft Made in USA 7 483977 Decal...

Страница 72: ...EL W RED STRIPE BLACK W RED STRIPE BLACK W RED STRIPE BLACK W RED STRIPE BLACK YELLOW GREEN GREEN BLACK W RED STRIPE BLACK WHITE GREEN YELLOW BLACK GREEN BLACK WHITE WHITE RED YELLOW BLACK BLUE YELLOW...

Страница 73: ...the expense of returning it to the owner after repair will be paid for by the owner Scag s responsibility is limited to making the required repairs and no claim of breach of warranty shall be cause fo...

Страница 74: ...2012 Scag Power Equipment Division of Metalcraft of Mayville Inc...

Отзывы: