background image

14

Function Operations

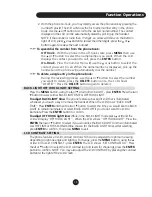
  TIME SETTING

    If you have subscribed to Caller ID, the date and time will be automatically set when the 

first call is received. To set the time manually follow the instructions below:

    Press the 

MENU

 button, using the   or   scroll to SET TIME - press 

ENTER

, then using the 

keypad, enter the correct time, date and day of week. Press the 

DELETE

 button to exit.

    The setting sequence is hours - minutes - month - date - year - day of week.
    After the year setting, the cursor for day of week will flash, you can use the   or   button 

to activate/deactivate this setting. If the flashing cursor is active, the day of week will set 

automatically, or if deactivated, the LCD will only show the “TOTAL CALLS XX” in the 

standby state.

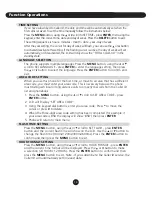
  LANGUAGE SELECTION

    The phone supports multiple languages. Press the 

MENU

 button, using the   or   

scroll to SET LANGUAGE - press 

ENTER

 to enter the language setting, then press 

the   or   button to select the language. Press the 

ENTER

 button to confirm and 

exit.

  AREA CODE SETTING

    When you use this phone for the first time, or move to an area that has a different 

area code, you must enter your area code. This is necessary because the phone 

must distinguish local or long distance calls to properly dial calls from the Caller ID 

list and phonebook.

1.  Press the 

MENU

 button, using the   or   scroll to SET AREA CODE - press 

ENTER

 button.

2  LCD will Display “SET AREA CODE”.
3.  Using the keypad dial buttons, enter your area code. Press 

*

 to move the 

cursor or press 

#

 to delete.

4.  When the three-digit area code setting has been completed (for example: if 

your area code is 858 the display will show ‘858’) then press 

ENTER

5.  Phone will return to main menu

  FLASH TIME SETTING

    Press the 

MENU

 button, using the   or   scroll to SET FLASH - press 

ENTER


button and the current flash time will show on the LCD. Use the   or   button to 

change the flash time (100ms/120ms/300ms/600ms). Press the 

ENTER

 button to 

confirm and then press the 

MENU

 button to exit.

  HOUR FORMAT SETTING

    Press the 

MENU

 button, using the   or   scroll to HOUR FORMAT - press 

ENTER


and the current time format will be displayed. Press the   or   button to make 

a selection (24 HOUR / 12 HOUR). Press the 

ENTER

 button to confirm and then 

press the 

MENU

 button to exit. 

Note - If you subscribe to the Caller ID service, the 

Caller ID will automatically set time and date.

Содержание SBC-225

Страница 1: ...Users Manual SBC 2 Line Multi Function Caller ID Speakerphone SBC 225 In case of difficulities visit our service center at www sbctelephones com or call 800 400 5156...

Страница 2: ...NS 4HE TELEPHONE COMPANY MAY MAKE CHANGES IN ITS COMMUNICATIONS FACILITIES EQUIPMENT OPERATIONS OF PROCEDURES WHERE SUCH ACTION IS REQUIRED IN THE OPERATION OF ITS BUSINESS AND IN COMPLIANCE WITH 2ULE...

Страница 3: ...ng Instructions 5 Location Controls 6 Function Buttons 7 Function Operations 12 Caller ID on Call Waiting 16 Receiving Call Records 17 Reviewing Display Messages 17 Message Waiting Total New Calls Pri...

Страница 4: ...number outgoing call in memory 70 name number phonebook 20 number name in speed dial memory 20 one two touch memory speed dial buttons Backlit LCD with contrast control Real time clock with date time...

Страница 5: ...uld result in a risk of fire or electrical shock 8 Take the phone to a qualified technician when it requires repair work or service To reduce the risk of electrical shock do not disassemble the teleph...

Страница 6: ...m your local telephone company voice mail waiting indicators will inform you that there is a message waiting in your voice mailbox CHECK THE CONTENTS OF THE BOX Box should contain Handset with handset...

Страница 7: ...gh clearance to slip snugly over each screw head 3 Pull out the mounting stand to the wall mounting position shown In figure 5 CM v E R U G I E R U G I E R U G I E R U G I E R U G I 4 5 3 2 73 E R U G...

Страница 8: ...n 14 FLASH button 15 PAUSE button 16 CALL WTG OFF button 17 HEADSET button 18 HOLD button 19 LINE 1 button 20 LINE 2 button 21 CONFERENCE button 22 REDIAL button 23 SPEAKER button 24 Volume and button...

Страница 9: ...on hold Press the HOLD button A red LED indicator on the button will light up and the LCD will display L Holding Indicating that that either L1 or L2 is on hold To continue the conversation just pres...

Страница 10: ...tton and use the and buttons to scroll through the dialed call records When the number you want to redial is displayed pick up handset and the number displayed on the LCD will be dialed SPEAKER Functi...

Страница 11: ...connected to the initial caller Note If you do not subscribe to Call Waiting pressing the FLASH button during a call will disconnect the current call Pause Function Use this function when a delay is n...

Страница 12: ...cursor flashing on the right side of the LCD 4 Enter the phone number then press SAVE 5 The cursor will now be flashing on the first letter of the name line of the LCD on the left side of the LCD Note...

Страница 13: ...he PAUSE button twice 3 Enter the number that you would like to forward to 4 Press and hold the CALL FORWARD ON button until the LCD displays SAVE OK To activate call forwarding press CALL FORWARD ON...

Страница 14: ...git s NOTE the maximum number of digits that can be entered is 20 if the number exceeds 20 the LCD will show TOO LONG and the exceeding digits will not be stored 3 After finishing the number setting p...

Страница 15: ...ING Press the MENU button using the or scroll to BACK LIGHT press ENTER Press the or button to select either BACK LIGHT TIME or OFF HOOK LIGHT To adjust BACK LIGHT time The phone features a backlight...

Страница 16: ...rea that has a different area code you must enter your area code This is necessary because the phone must distinguish local or long distance calls to properly dial calls from the Caller ID list and ph...

Страница 17: ...o confirm and then press the MENU button to exit Note 1 In the DD MM mode the time sequence is day month 2 In the MM DD mode the time sequence is month day CALL WAITING SETTING Press the MENU button u...

Страница 18: ...u are having a conversation 1 When you are on the line the telephone will display the name and number of the second caller 2 Press the FLASH button to answer the second caller 3 When you have finished...

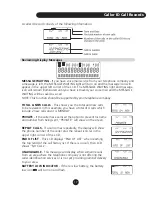
Страница 19: ...reviewed In this example you have a total of 4 calls which include 2 new calls and it is MONDAY PRIVATE If the caller has exercised the option to prevent his name and number from being sent PRIVATE wi...

Страница 20: ...ll show DELETE and then press the DELETE button again to remove this number press any button to exit If you press the DELETE button for about 6 seconds the LCD will show ALL DELETE and press the DELET...

Страница 21: ...ID WILL NOT WORK PROPERLY NO CALL DATA RECEIVED Caller ID data can take up to two rings to appear on the screen If data does not appear or does not appear correctly check the following Call your telep...

Страница 22: ...rved SBC is a trademark of AT T Knowledge Ventures L P Licensed to Grace Digital Inc Printed in China This product has a one year over the counter warranty For any inquiries after the warranty period...

Отзывы: