EN
8 MAINTENANCE AND SERVICE
8.2
Maintenance of the 12 V DC power supply battery
8.2.1
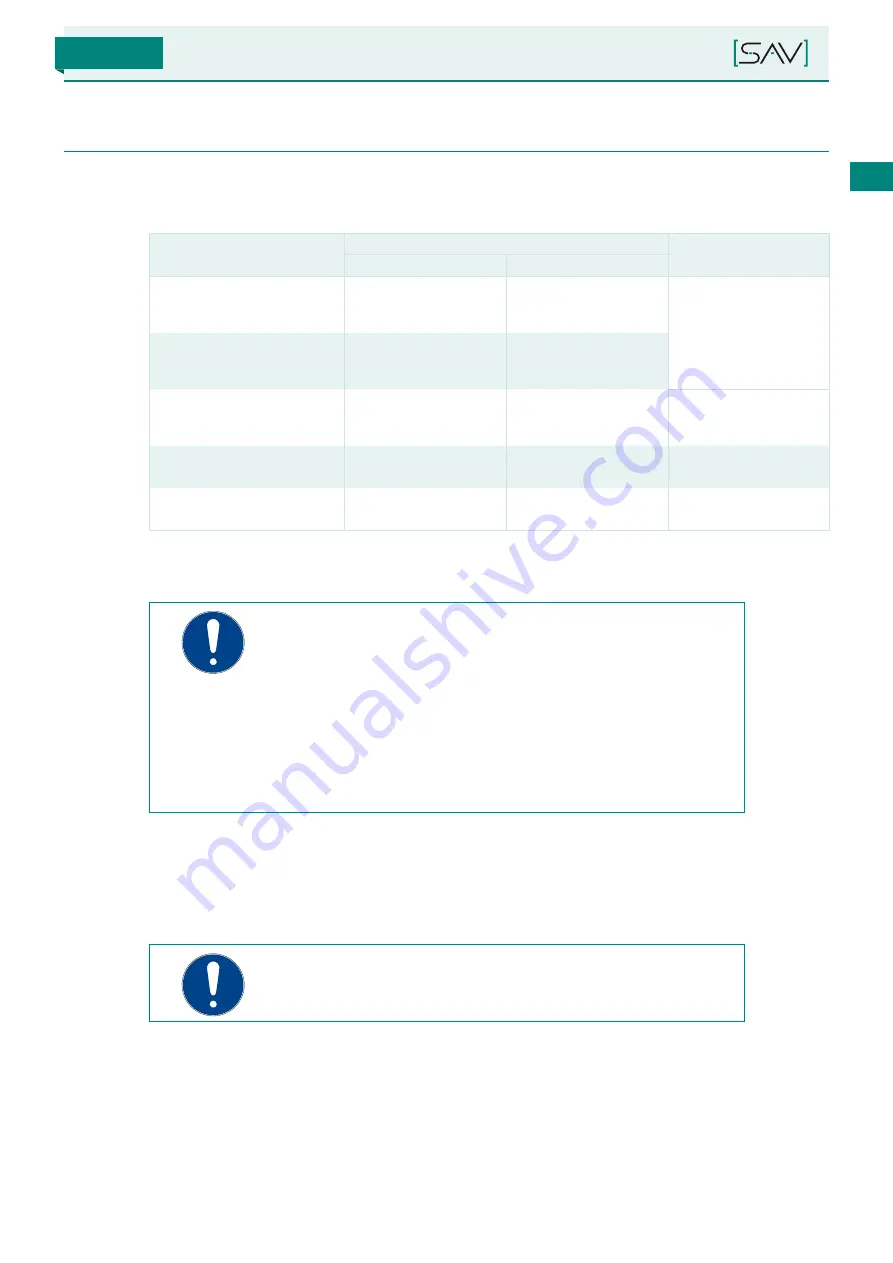
Checking the battery
Measure
Frequency/conducted by
Note
every month
every 3 months
Visual inspection of the battery (check
end pieces, connections, bracket and
battery compartment for corrosion)
Maintenance engineer,
mechatronic
Maintenance engineer,
specialised mechatronic
No cracks or leaks, deforma-
tion of the battery, bracket
or battery compartment are
permissible.
Visual inspection of the contact surfac-
es between battery and bracket or the
battery compartment
Maintenance engineer,
mechatronic
Maintenance engineer,
specialised mechatronic
Check whether the ambient tem-
perature is in the permissible range
between 5 and 25 °C.
Maintenance engineer,
mechatronic
Maintenance engineer,
specialised mechatronic
The optimum working tem-
perature is between 20 and
25 °C.
Check the temperature of the minus
pole of the battery.
–
Maintenance engineer,
specialised mechatronic
Use a contactless thermom-
eter.
Clean the battery.
–
Maintenance engineer,
specialised mechatronic
–
8.2.2
Charging the battery
NOTE!
The expected duration for charging the battery depends on the ambient
temperature and the state of charge of the power supply battery.
■
If the battery is fully discharged and the ambient temperature is 20 °C,
the expected charging period is approx. 8 to 9 hours until the full capaci-
ty has been reached.
■
If the battery is fully discharged and the ambient temperature is 20 °C,
the expected charging period is approx. 1 hour until the minimum capaci-
ty has been reached.
1. Switch off the lifting magnet.
2. Connect the power supply cable to the supply socket on the front cover of the battery-powered lifting magnet,
then connect to the 230 V AC power supply.
3. After switching on, the indicator light for recharging on the display panel starts flashing and the LED bar display
lights up.
NOTE!
If battery charging does not start, see section 9 “Troubleshooting”.
4. Battery charging is indicated by the flashing LEDs of the bar display in the display panel of the lifting magnet.
The current state of charge can be displayed by briefly pressing one of the control buttons on the panel of the
lifting magnet.
5. The end of the charging process (maximum state of charge) is indicated by all LEDs in the bar display lighting
up. The installed charger goes to stand-by mode.
SAV 531.42
Version 1.0
[
103
]
Содержание SAV 531.42
Страница 3: ...BATTERIE LASTHEBEMAGNETE BETRIEBSANLEITUNG Version 1 0 DE SAV 531 42 just experts ...
Страница 56: ...SAV 531 42 NOTIZEN Version 1 0 56 ...
Страница 57: ...BATTERY POWERED LIFTING MAGNETS OPERATING INSTRUCTIONS Version 1 0 EN SAV 531 42 just experts ...
Страница 110: ...NOTES SAV 531 42 Version 1 0 110 ...
Страница 111: ......


