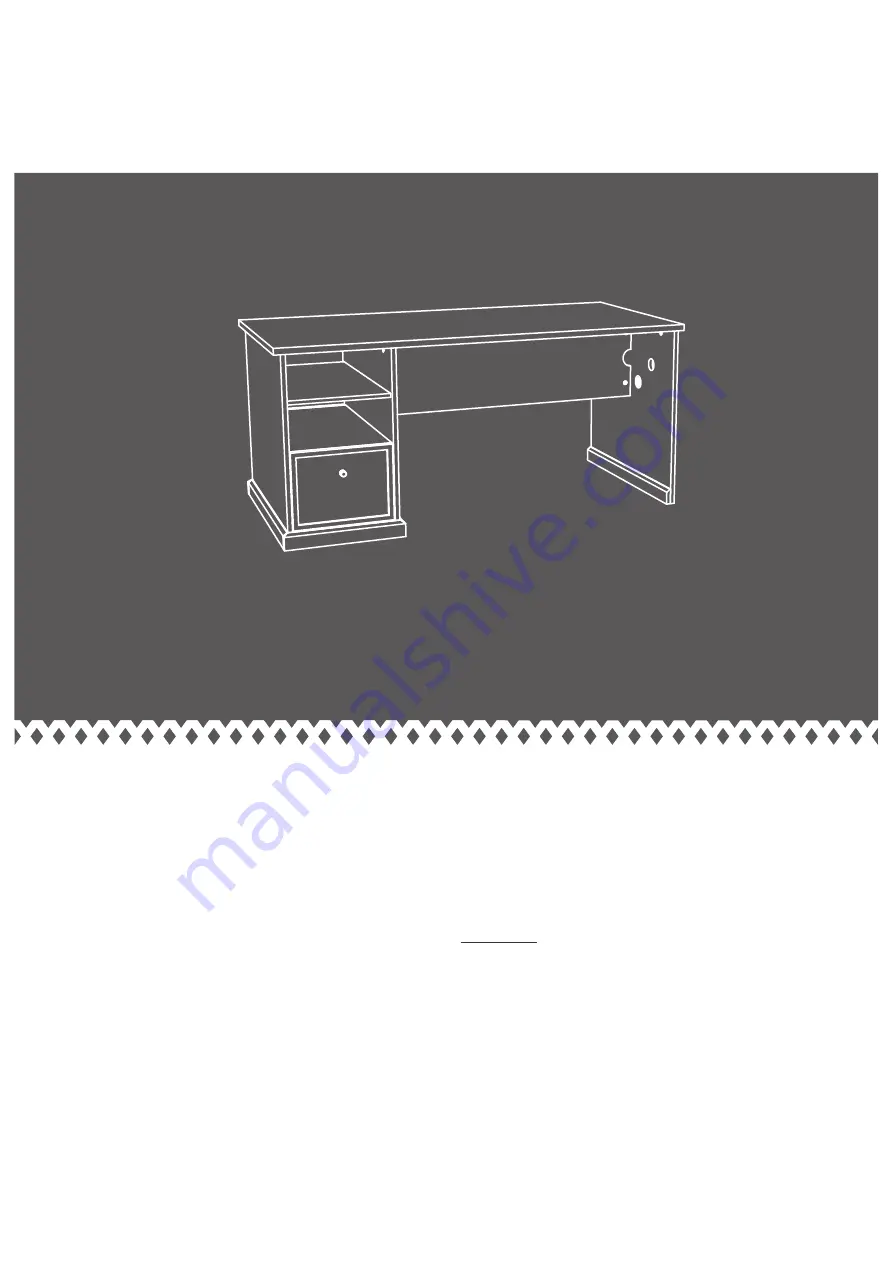
Craft Table
NOTE:
THIS INSTRUCTION
BOOKLET CONTAINS
IMPORTANT
SAFETY INFORMATION.
PLEASE READ AND KEEP FOR FUTURE REFERENCE.
English pg 1-20Français pg 21-24Español pg 25-28
Страница 1: ...Craft Table NOTE THIS INSTRUCTION BOOKLET CONTAINS IMPORTANT SAFETY INFORMATION PLEASE READ AND KEEP FOR FUTURE REFERENCE English pg 1 20 Français pg 21 24 Español pg 25 28 ...
Страница 2: ...s Required Part Identification Hardware Identification Assembly Steps Français Español Safety Warranty No 2 Phillips Screwdriver Tip Shown Actual Size 3 4 5 20 21 24 25 28 29 30 31 Skip the power trip This time Short Screwdriver Page 2 ...
Страница 3: ... this part identification to help identify similar parts Now you know our ABCs A RIGHT END 1 B LEFT END 1 C UPRIGHT 1 E SHELF 2 F BACK 1 G LONG BASE MOLDING 2 H SHORT BASE MOLDING 2 I BRACE 2 J RAIL EXTENSION 2 K LEFT DRAWER SIDE 2 L DRAWER BACK 2 M RIGHT DRAWER SIDE 2 N DRAWER BOTTOM 2 O DRAWER FRONT 2 P TOP 1 A B C P E E F G G H H I I J J K K L L M M N N O O Page 3 421417 ...
Страница 4: ...ENSION RAIL 4 2 EXTENSION SLIDE 4 WOOD DOWEL 1 5 KNOB 2 6 RIGHT FILE GLIDE 2 8 10 ELECTRICAL CORD 1 SILVER 1 2 FLAT HEAD SCREW 16 15 SILVER 13 16 PAN HEAD SCREW 8 14 SILVER 1 3 16 FLAT HEAD SCREW 8 11 SILVER 1 3 16 PAN HEAD SCREW 6 12 LEFT FILE GLIDE 2 9 CAM SCREW 47 4 Page 4 421417 16 SILVER 11 16 MACHINE SCREW 2 17 11 16 PAN HEAD SCREW 8 METAL BRACKET 4 18 WASHER 2 19 ...
Страница 5: ...rrow 3 Arrow 3 å Push forty seven HIDDEN CAMS 3 into the ENDS A and B UPRIGHT C SHELVES E BACK F BRACES I LEFT DRAWER SIDES K and M 3 Arrow 3 Arrow 3 Arrow The arrow in the HIDDEN CAM must point toward the hole in the edge of the board Hole 47 used Page 5 ...
Страница 6: ...Step 2 4 å Turn forty five CAM SCREWS 4 into the ENDS A and B UPRIGHT C TOP P SHORT BASE MOLDINGS H and DRAWER FRONTS O å NOTE Two CAMS SCREWS will be used in step 11 O x 2 H x 2 P C B A Page 6 ...
Страница 7: ...MOLDINGS G to the LEFT END B and UPRIGHT C Use six SILVER 1 3 16 PAN HEAD SCREWS 12 Step 3 C B SILVER 13 16 FLAT HEAD SCREW 8 used for the EXTENSION RAILS 14 J J Surface with more holes Surface with more holes G G Curved edge SILVER 1 3 16 FLAT HEAD SCREW 6 used for the BASE MOLDINGS 12 Page 7 Remember Righty tighty Lefty loosey ...
Страница 8: ...ach EXTENSION RAIL turn a SCREW into the hole shown in the enlarged diagram Then slide the inner cartridge of the EXTENSION RAIL in to find the other hole that lines up with the hole in the END and UPRIGHT Turn a SCREW into this hole å NOTE The EXTENSION SLIDES will be used later for the DRAWERS Open end Open end Open end 1 1 1 1 C B Page 8 SILVER 1 2 FLAT HEAD SCREW 8 used in this step 15 Push up ...
Страница 9: ...å Fasten the SHELVES E to the UPRIGHT C Tighten six HIDDEN CAMS Step 5 1 2 Page 9 Surface with HIDDEN CAMS C E E Surface with HIDDEN CAMS ...
Страница 10: ...å Fasten the BRACES I to the UPRIGHT C Tighten four HIDDEN CAMS Step 6 1 2 I I Surface with HIDDEN CAMS Page 10 C Finished edge Finished edge ...
Страница 11: ...Step 7 1 2 Page 11 E E I I B Short Screwdriver å You will need a short screwdriver in this step å Fasten the LEFT END B to the SHELVES E and BRACES I Tighten ten HIDDEN CAMS ...
Страница 12: ...å Fasten the SHORT BASE MOLDINGS H to the UPRIGHT C and LEFT END B Tighten four HIDDEN CAMS Step 8 1 2 B C H H Flat edge Flat edge Page 12 Side Step Make nachos Optional but recommended ...
Страница 13: ...Step 9 1 2 Page 13 F A Notch Surface with HIDDEN CAMS These edges must be even å Fasten the BACK F to the RIGHT END A Tighten two HIDDEN CAMS ...
Страница 14: ...å Stand your unit upright å Turn two CAM SCREWS 4 into the UPRIGHT C å Fasten the BACK F to the UPRIGHT C Tighten two HIDDEN CAMS Step 10 1 2 F Surface with HIDDEN CAMS 4 C Page 14 ...
Страница 15: ...Lastly turn the large nut back onto the female end of the ELECTRICAL CORD 10 as shown below å Insert the WOOD DOWEL 5 into the hole in the edge of the RIGHT END A å Fasten the TOP P to the RIGHT END A BACK F UPRIGHT C and LEFT END B Tighten ten HIDDEN CAMS å NOTE Be sure the WOOD DOWEL in the RIGHT END inserts into the TOP A 10 10 Male end of ELECTRIC CORD Female end of ELECTRIC CORD 1 2 B C F 5 l...
Страница 16: ...O Be sure the DRAWER BOTTOM inserts into the DRAWER BACK groove K K K M M M N N L 2 1 O O O Unfinished surface Groove å Fasten a DRAWER BACK L to the DRAWER SIDES K and M Use four BLACK 1 3 16 FLAT HEAD SCREWS 11 å NOTE Be sure the DRAWER BOTTOM N inserts into the groove of the DRAWER BACK L å Repeat this step for the other drawer BLACK 1 3 16 FLAT HEAD SCREW 8 used in this step 11 Page 16 3 ...
Страница 17: ... a SILVER 11 16 MACHINE SCREW 16 å Repeat this step for the other drawer å You have the option to fasten the 421414 Hutch or 421416 Organizer Hutch to your unit If you purchased the 421414 Hutch go to the next step If you purchased the 421416 Organizer Hutch go to Step 15 now To complete the Craft Table assembly without Hutch attachment go to Step 16 now K M 2 2 Use hole 3 K M 8 9 6 O SILVER 1 2 F...
Страница 18: ...e holes on the underside of the TOP P Use four 11 16 PAN HEAD SCREWS 17 å Fasten the METAL BRACKETS on the TOP P to the 421414 Hutch Use two WASHERS 19 and four 11 16 PAN HEAD SCREWS 17 å Go to Step 16 now to complete the Craft Table assembly 421414 Hutch 19 18 18 19 P 11 16 PAN HEAD SCREW 8 used in this step 17 4 used 18 ...
Страница 19: ...s on the underside of the TOP P Use four 11 16 PAN HEAD SCREWS 17 å Fasten the METAL BRACKETS on the TOP P to the 421416 Organizer Hutch Use two WASHERS 19 and four 11 16 PAN HEAD SCREWS 17 å Go to the next step to complete the Craft Table assembly 421416 Organizer Hutch 11 16 PAN HEAD SCREW 8 used in this step 17 18 4 used 18 19 P 19 18 ...
Страница 20: ...nto the unit until they are fully inserted The drawers will push in hard until it is all the way in then it will slide in and out easier å NOTE Please read the back pages of the instruction booklet for important safety information å This completes assembly Clean with your favorite furniture polish or a damp cloth Wipe dry To cover HIDDEN CAMS 7 And to celebrate why not share your success story Pag...
Страница 21: ...ENTRIQUE ESCAMOTABLE 47 4 VIS D EXCENTRIQUE 47 5 CHEVILLE EN BOIS 1 6 BOUTON 2 7 CARTE DE CACHE D EXCENTRIQUE 1 8 COULISSE DROITE DE CLASSEUR 2 9 COULISSE GAUCHE DE CLASSEUR 2 10 CORDON ÉLECTRIQUE 1 11 VIS TÊTE PLATE 30 mm ARGENTÉE 8 12 VIS TÊTE GOUTTE DE SUIF 30 mm ARGENTÉE 6 14 VIS TÊTE GOUTTE DE SUIF 20 5 mm ARGENTÉE 8 15 VIS TÊTE PLATE 13 mm ARGENTÉE 16 16 VIS À MÉTAUX 18 mm ARGENTÉE 2 17 VIS ...
Страница 22: ... cartouche interne de la GLISSIÈRE D EXTENSION vers l intérieur pour trouver l autre trou qui est aligné sur le trou dans l EXTRÉMITÉ et le MONTANT Faire tourner une VIS dans ce trou REMARQUE Les COULISSES D EXTENSION seront utilisées ultérieurement pour les TIROIRS ÉTAPE 3 Fixer les EXTENSIONS DE GLISSIÈRE J à l EXTRÉMITÉ GAUCHE B et au MONTANT C Utiliser huit VIS TÊTE PLATE 20 5 mm ARGENTÉES 14 ...
Страница 23: ... comme il l est indiqué ci dessous Enfin revisser le gros écrou sur l extrémité femelle du CORDON ÉLECTRIQUE 10 comme il l est indiqué ci dessous S assurer de bien insérer la CHEVILLE EN BOIS 5 dans le trou dans le chant de l EXTRÉMITÉ DROITE A Fixer le DESSUS P à l EXTRÉMITÉ DROITE A à l ARRIÈRE F au MONTANT C et à l EXTRÉMITÉ GAUCHE B Serrer dix EXCENTRIQUES ESCAMOTABLES REMARQUE S assurer de bie...
Страница 24: ... mm ARGENTÉE 16 Répéter cette étape pour l autre tiroir Il est possible de fixer le Surmeuble 421414 ou le Surmeuble organiseur 421416 à votre unité Si on a fait l achat le Surmeuble 421414 aller à l étape suivante Si on a fait l achat le Surmeuble organiseur 421416 aller à l étape 15 maintenant Pour terminer le montage de la Table pour travaux d artisanat sans Surmeuble aller à l étape 16 maintena...
Страница 25: ...5 PASADOR DE MADERA 1 6 POMO 2 7 TARJETA CON CUBIERTAS DE EXCÉNTRICO 1 8 CORRIMIENTO DERECHO DEL ARCHIVADOR 2 9 CORRIMIENTO IZQUIERDO DEL ARCHIVADOR 2 10 CABLE ELÉCTRICO 1 11 TORNILLO PLATEADO DE CABEZA PERDIDA de 30 mm 8 12 TORNILLO PLATEADO DE CABEZA REDONDA de 30 mm 6 14 TORNILLO PLATEADO DE CABEZA REDONDA de 20 5 mm 8 15 TORNILLO PLATEADO DE CABEZA PERDIDA de 13 mm 16 16 TORNILLO PLATEADO PARA...
Страница 26: ...e se alinea con el agujero del EXTREMO y PARAL Atornille un TORNILLO dentro de este agujero NOTA Las CORREDERAS DE EXTENSIÓN se utilizarán más tarde para los CAJONES PASO 3 Fije los RIELES DE EXTENSIÓN J al EXTREMO IZQUIERDO B y al PARAL C Utilice ocho TORNILLOS PLATEADOS DE CABEZA PERDIDA de 20 5 mm 14 Fije las MOLDURAS DE BASE LARGAS G al EXTREMO IZQUIERDO B y al PARAL C Utilice seis TORNILLOS P...
Страница 27: ...tremo hembra del CABLE ELÉCTRICO 10 como se indica a continuación Inserte el PASADOR DE MADERA 5 dentro del agujero en el borde del EXTREMO DERECHO A Fije el PANEL SUPERIOR P al EXTREMO DERECHO A al DORSO F al PARAL C y al EXTREMO IZQUIERDO B Apriete diez EXCÉNTRICOS ESCONDIDOS NOTA Asegúrese de que el PASADOR DE MADERA fijado al EXTREMO DERECHO se inserte dentro del PANEL SUPERIOR PASO 10 Ponga la...
Страница 28: ...DONDA de 17 mm 17 Vaya al paso 16 ahora para completar el ensamblaje de la Mesa de Artesanía PASO 13 Fije dos CORREDERAS DE EXTENSIÓN 2 a los LADOS DE CAJÓN K y M Utilice cuatro TORNILLOS PLATEADOS DE CABEZA PERDIDA de 13 mm 15 Empuje el CORRIMIENTO IZQUIERDO DE ARCHIVADOR 9 sobre el borde superior del LADO IZQUIERDO DE CAJÓN K y el CORRIMIENTO DERECHO DE ARCHIVADOR 8 sobre el borde superior del L...
Страница 29: ...ise utilisation peut être à l origine de risques d accident ou peut endommager le mobilier et les articles ménagers Lire attentivement le tableau suivant À surveiller Danger éventuel Solution Tablettes ou tiroirs surchargés En cas de chargement inadéquat l élément peut être lourd du haut Risque de blessure Du mobilier mal équilibré risque de se renverser Tablettes et tiroirs surchargés risquent de...
Страница 30: ... está diseñado y provisto con ruedecitas La inclinación o rotura del mobiliario es posible si se mueve de manera inadecuada Lesión física El mobiliario puede ser muy pesado Rotura de las superficies especialmente las unidades con dos pedestales con cajones en cada extremo Descargue los estantes y cajones desde arriba hacia abajo antes de mover la unidad No empuje la unidad especialmente sobre un pi...
Страница 31: ...era ou rembourser sur sa seule décision la valeur de toute composante de mobilier défectueuse peut exiger une confi rmation indépendante du défaut revendiqué ainsi qu une preuve d achat Les pièces de rechange seront garanties uniquement pendant la période restante de la garantie originale NE SERA EN AUCUN CAS RESPONSABLE de TOUT DOMMAGE ACCESSOIRE OU CONSÉCUTIF DE TOUTE SORTE et lesdits dommages so...