98648-020-40
Operating Manual
PMA.Evolution | PMA.HD
EVO1S1 | SPO1S1Paint-mixing Scale
Страница 1: ...98648 020 40 Operating Manual PMA Evolution PMA HD EVO1S1 SPO1S1 Paint mixing Scale ...
Страница 2: ......
Страница 3: ...Factor 23 6 6 2 Weighing Using the Recalculation Function 23 6 7 Menu Settings 25 6 7 1 Accessing the SETUP Menu 25 6 7 2 Configuring the Main Menu Settings 25 6 7 2 1 Accessing the Setup Menu 25 6 7 2 2 Language Setting 26 6 7 2 3 Standard Default Settings 0 1 g Polyrange 0 05 g 0 1 g and Grams Parts per Pound Not for Verified Models 26 6 7 2 4 Activating the Toggle Key Not for Verified Models 26...
Страница 4: ...low risk that could result in property damage if it is not avoided This symbol is an indication of a function or setting on the device indicates that caution should be exercised while working identifies useful information This symbol provides information for the sale of scales verified for use in legal metrology In the following the term verified is used to mean verified for use in legal metrology...
Страница 5: ... to your local mains voltage 2 2 Installation Instructions Do not operate the scale if its housing AC adapter or any connections are damaged Immediately disconnect the damaged device from the power by pulling the plug Do not expose the scale the AC adapter or the accessories supplied by Sartorius to extreme temperatures aggressive chemical vapors moisture shocks vibrations or strong electromagneti...
Страница 6: ...e paint can on a firm stable surface Observe the additional safety precautions and hazard warnings in subsequent chapters 2 3 Intended Use This scale is only intended for mixing colors and paints outside of potentially explosive atmospheres Appropriate containers must be used for loading each type of material The scale can be operated via the keypad as a stand alone device or using application sof...
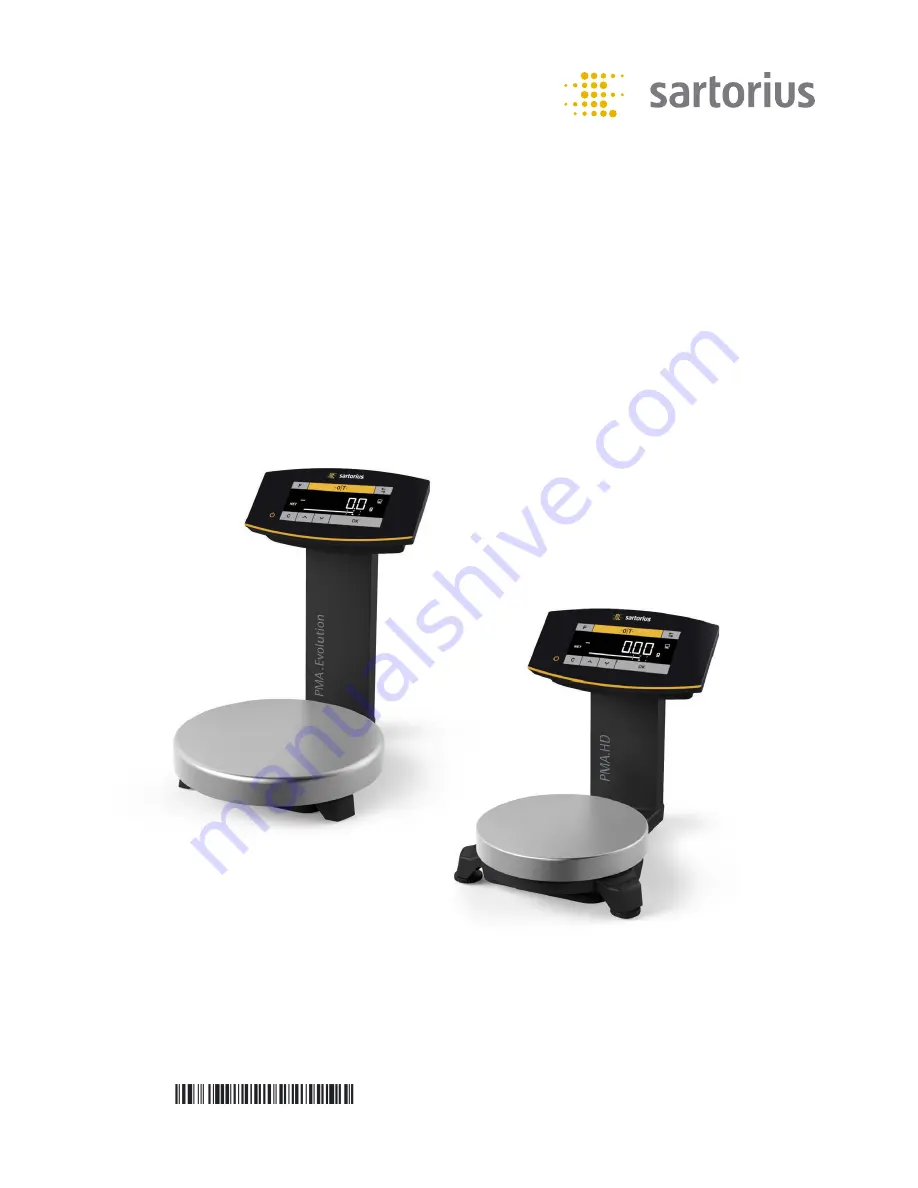
Страница 7: ... EVO1S1 SPO1S1 Operating Instructions 7 Device Overview 3 Device Overview 3 1 Front View 3 2 1 Item Name 1 Operating and display elements see also Chapter 3 3 page 9 2 Support column 3 Weighing pan ...
Страница 8: ...holders 3 Support column 4 AC adapter with country specific mains adapter optional Figure may deviate from product 5 Leveling feet PMA HD and verified models only 6 Leveling PMA HD and verified models only 7 USB connection cable 8 Anti theft locking device 9 Menu access switch 7 3 2 4 2 9 8 1 5 5 6 ...
Страница 9: ...creen should only be operated by lightly pressing it using the tips of your fingers Button Function Factor key for paint mixing applications Zeroing taring Z Toggle key Toggles the decimal places and or unit Depends on the menu setting j On standby Clear key display of correction factor for paint mixing applications O Up P Down ENTER key MEM key for paint mixing applications ...
Страница 10: ...tes that an internal process is in progress For verified models indicates an invalid weight value 10 Tolerance range has been exceeded 11 Target value for bar graph 12 Tolerance range 13 Bar graph scaled display showing capacity usage in percent 14 Fourteen segment display 15 Trend display 16 Info on weight entry via application keypad preset tare 17 Net value 18 Plus or minus sign of the weight 1...
Страница 11: ...t 1 1 3 4 4 DIG 4 digits low 1 1 3 5 AUTOZ Automatic zero drift correction 1 1 6 ON On 1 1 6 1 o OFF Off 1 1 6 2 WT UNIT Weight units 1 1 7 o GRAMS Grams 1 1 7 2 PT P LB Parts per pound1 1 1 7 14 DSP DEC Accuracy1 1 1 8 o ALL Show all decimal places 1 1 8 1 POLYR Multi interval lab 1 1 8 13 CAL ADJ Calibration adjustment 1 1 9 o CAL EXT External calibration adjustment with default weight 1 1 9 1 L...
Страница 12: ...1 3 o ENABLE Keypad enabled 2 1 3 1 LOCKED Keypad locked 2 1 3 2 BACKLT Background light 2 1 4 10 PCT 2 1 4 1 20 PCT 2 1 4 2 30 PCT 2 1 4 3 40 PCT 2 1 4 4 50 PCT 2 1 4 5 60 PCT 2 1 4 6 o 70 PCT 2 1 4 7 80 PCT 2 1 4 8 90 PCT 2 1 4 9 100 PCT 2 1 4 10 BARGR Bar graph on off 2 1 5 OFF Display without bar graph 2 1 5 1 o ON Display with bar graph 2 1 5 2 ON MODE Switch on behavior 2 1 6 o ON STB On sta...
Страница 13: ...1 BIT 2 2 4 1 2 BITS 2 2 4 2 HANDSH Type of handshake 2 2 5 SOFTW Software handshake X On X Off 2 2 5 1 HARDW Hardware handshake RTS CTS 2 2 5 2 o NONE No handshake 2 2 5 3 DATABT Number of data bits 2 2 6 o 7 BITS 7 data bits 2 2 6 1 8 BITS 8 data bits 2 2 6 2 COMMUN Communication parameters 3 SBI SBI communication parameter 3 1 MAN AUT Output 3 1 1 MAN W O Print individual value without stabilit...
Страница 14: ...NO Version number firmware 5 1 SER NO Serial number 5 2 Model Model designation 5 3 TYPE Name type information 5 4 INTRO Intro text if available 5 5 LANG Language selection 6 D German 6 1 UK US o English 6 2 F French 6 4 I Italian 6 5 E Spanish 6 6 NL Dutch 6 7 P BR Portuguese 6 8 PL Polish 6 9 TR Turkish 6 10 PYC Russian Cyrillic 6 11 SLO Slovenian 6 12 SRB Serbian 6 13 CODES Number codes 6 25 ...
Страница 15: ...on a stable even surface that is not exposed to vibrations Maintain free access to the device at all times Choose a location that is not subject to the following negative influences Heat heater or direct sunlight Drafts from open windows AC systems and doors Extreme vibrations during weighing Heavy traffic areas personnel Extremely high humidity Electromagnetic fields Extremely dry air Acclimatiza...
Страница 16: ...assembly is described in the following 4 4 1 Power Supply Assembly If using a power supply it will need to be assembled Using the wrong mains adapter may cause a fatal electric shock and damage the equipment Never plug the mains adapter into the socket when it is disconnected from the AC adapter danger of electrical shock t t Select the correct mains adapter for your mains power supply The mains a...
Страница 17: ...oved button from above and pull back on the mains adapter t t Push the power plug adapter out of the power supply and remove it Power Connection Safety Precautions Only use original Sartorius AC adapters The AC adapter has an IP rating of IP40 in accordance with EN60529 IEC60529 Make sure that the voltage rating printed on this unit matches the voltage at the place of installation If the stated su...
Страница 18: ...ble t t Lay the USB cable through the cable holders on the back of the scale Connection to the Power Supply t t Insert the USB cable into a USB socket of a PC or laptop Connecting an AC Adapter Option t t Insert the USB cable into the YEPS01 USB AC adapter t t Plug the AC adapter into the wall outlet supply voltage 4 5 Anti theft Locking Device t t If required secure the scale at the back ...
Страница 19: ... of the level indicator Air bubble at 12 o clock Turn both feet clockwise Air bubble at 3 o clock Turn the left foot clockwise and the right foot counterclockwise Air bubble at 6 o clock Turn both feet counterclockwise Air bubble at 9 o clock Turn the left foot counterclockwise and the right foot clockwise 5 2 Warm up Time To ensure accurate results are delivered the scale must warm up for at leas...
Страница 20: ...eight display is locked and the padlock symbol lights up continually Unlocking t t Press the padlock symbol H to deactivate the lock t t Enter the password if set see Chapter 6 7 2 6 page 27 y y The lock is deactivated 6 3 Zeroing Taring t t Briefly press the 0 key 6 4 Calibration Adjustment The scale needs to be re leveled and then adjusted each time its setup location is changed Warm up Time To ...
Страница 21: ...t t Remove the calibration weight from the weighing pan 6 5 Weighing Using a Verified Balance in Legal Metrology The Type Approval Certificate for verified scales is only valid for non automatic weighing instruments For automatic operation with or without additional integrated equipment please follow the applicable national regulations for the installation location The temperature range C listed o...
Страница 22: ...e desired weight formula is reached t t Remove the filled paint can from the weighing pan When the scale is tared and the second decimal place with a resolution of 0 05 g is activated via the toggle key Z weighing up to 999 95 g with two decimal places can be performed Values over 999 95 g can only be weighed using one decimal place Danger of Scale Damage Never close a paint can using a hammer whi...
Страница 23: ...500 g 3rd component Total 1000 g t t Place the empty container on the weighing pan t t Briefly press the 0 key to tare t t Press the factor key several times until the factor 25 is displayed below the factor key t t Slowly add the first component 250 g until the display shows 250 g t t Add the second color component 250 g until the display shows 500 g t t Add the third component 500 g until the di...
Страница 24: ...nent t t Add the second color component 110 g until the display shows 110 g t t Briefly press the key to save the value y y STO 02 appears on the display the second value is saved y y 03 appears in the top left of the display third color component t t Add the third color component 200 g until the display shows 200 g Oops You poured in too much 203 g The correct value for the formula is 200 0 g t t...
Страница 25: ... scale to ambient conditions as an example SETUP SCALE AMBIEN t t Press the key for approx two seconds y y Level 1 of the SETUP menu is displayed t t Select the SETUP menu item of the first level using the O P keys t t Press the key y y Level 2 of the SETUP menu is displayed t t Select the SCALE menu item of the second level using the O P keys t t Press the key y y Level 3 of the SETUP menu is dis...
Страница 26: ... P LB t t Press O P e g select ALL DSP DEC Accuracy t t Press o appears o ALL y y The new code is set POLYR t t Press several times to exit the menu 6 7 2 4 Activating the Toggle Key Not for Verified Models When the toggle key Z is active you can use it to toggle the unit between e g grams parts per pound or the decimal place The unit and or decimal place is toggled when the key is pressed t t Acc...
Страница 27: ... and the display shows a padlock symbol Activation of the LOCK function is configured under EXTRAS t t Access the Setup menu see Chapter 6 7 2 1 page 25 Level 1 Level 2 Level 3 Level 4 DEVICE t t Press O P select DEVICE press EXTRAS t t Press O P select EXTRAS press LOCK t t Press O P select LOCK press o ON t t Press O P select ON OFF t t Press o appears y y The LOCK function is activated t t Pres...
Страница 28: ...ears Press and reenter the old password NEW PW y y When you make a correct entry NEW PW appears briefly so that you can enter the new password y y This appears _ _ _ _ _ _ y y The first line flashes t t Make the following inputs O P keys Selects numbers 0 to 9 Go back to the previous number You can enter spaces to delete the number password Confirm entry or go to the next number t t Repeat to ente...
Страница 29: ...nd all other plastic parts Cleaning the Control Panel t t Turn off the device before cleaning the control panel since touching the screen could trigger unwanted inputs Cleaning the Device Housing t t Clean the device t t Use a soft cloth to dry the device 7 2 Maintenance Electrical Hazard from Voltage or Current Repair work on the optional AC adapter must only be carried out by trained service tec...
Страница 30: ...ve vibration or draft Weighing pan is being affected at some point by outside influences Set up scale in another area Adjust the scale settings see Chapter 3 4 Menu List page 11 Is the weight readout obviously incorrect The sample is not stable Scale not tared before weighing Tare before weighing No weight value is shown and the padlock symbol H is displayed PC connection to the scale has been int...
Страница 31: ...nic equipment be separated from normal household waste in order to recycle it The crossed out waste bin symbol indicates that separate collection is required In Germany and several other countries Sartorius itself assumes responsibility for the return and legally compliant disposal of its electronic and electrical products These products may not be placed with household waste or be brought to coll...
Страница 32: ...ftware or hardware Electromagnetic compatibility In accordance with EN 61326 1 IEC 61326 1 Electrical equipment for measurement control and laboratory use EMC requirements Part 1 General Requirements Interference resistance Basic requirements Transient emissions Class B Suitable for use in residential areas and areas that are connected to a low voltage network that also supplies residential buildi...
Страница 33: ...Verified Models with EC Type Approval Certificate Model specific Specifications Specification Unit Value Model name PMA Evolution EVO1S1 Accuracy class Type PMA EV Weighing capacity max g 7500 Scale interval d g 0 1 Verification scale interval e g 1 Temperature range 10 C 30 C Tare equalization range subtractive 100 from max weighing capacity Specification Unit Value Model name PMA HD SPO1S1 Accur...
Страница 34: ...C Port 11 5 1Purpose This device can be connected to a PC via the USB interface A virtual serial interface virtual COM port is set up on the PC as a device type via the USB port This virtual serial interface is identified and operated by the application program The xBPI and SBI protocols can be transmitted via the virtual serial interface ...
Страница 35: ...s now ready for operation t t Connect the scale to the USB port of the computer see Chapter 4 4 2 Connecting the Scale page 18 Windows usually adds the virtual port in the position following your highest numbered COM port Example For a PC with up to 4 COM ports the new virtual port would then be COM5 see Device Manager 11 5 4Installation Instructions for Windows XP and Above Changing the Port Numb...
Страница 36: ...trol panel pack of 10 YDC03PMA10 In use cover for support arm PMA Evolution pack of 10 YDC03PMA CO10 In use cover for weighing pan PMA Evolution pack of 10 YDC03PMA WP10 Calibration weights for PMA Evolution 5 kg accuracy class F2 YCW654 AC 00 2 kg accuracy class F2 YCW624 AC 00 1 kg accuracy class F2 YCW614 AC 00 for PMA HD 2 kg accuracy class F1 YCW623 AC 00 1 kg accuracy class F1 YCW613 AC 00 1...
Страница 37: ...mity Licenses 14 1 EU Declaration of Conformity The attached Declaration of Conformity hereby confirms compliance of the device with the directives cited The declaration of conformity supplied here is for verified balances for use in the EEA Please keep it in a safe place ...
Страница 38: ...38 EVO1S1 SPO1S1 Operating Instructions Conformity Licenses ...
Страница 39: ...de reasonable protection against harmful interference in a residential installation This equipment generates uses and can radiate radio frequency energy and if not installed and used in accordance with the instructions may cause harmful interference to radio communications However there is no guarantee that interference will not occur in a particular installation If this equipment does cause harmf...
Страница 40: ...40 EVO1S1 SPO1S1 Operating Instructions Conformity Licenses ...
Страница 41: ...lacas y Marcas Etichette e Sigilli Typ Waage Type weighing instrument Type d instrument de pesage Tipo del instrumento de pesaje Tipo di strumento per pesare PMA EV PMA HD EG Baumusterprüfbescheinigung EC type examination certificate Certificat d examen UE de type Certificado de examen UE de tipo Certificato di esame UE del tipo UK3066 ...
Страница 42: ...evice Dispositif indicateur Dispositivo indicador Dispositivo di visualizzazione Metrologische Daten Max Min e und wenn vorhanden d Metrological data Max Min e and if existent d Données métrologiques Max Min e et si disponible d Datos metrológicos Máx Mín e y d si está disponible Dati metrologici Max Min e e d se disponibile Sicherungsstempel selbstklebende Marke oder Plombe Protective mark self a...
Страница 43: ...ce Masculine or feminine forms are used to facilitate legibility in these instructions and always simultaneously denote the other gender as well Copyright notice This instruction manual including all of its components is protected by copyright Any use beyond the limits of the copyright law is not permitted without our approval This applies in particular to reprinting translation and editing irresp...