


Imprint: SARRAS e.U.
–
Ignaz Köck Straße 10, 1210 Vienna, Austria
Visit us on www.sarras-shop.com
Page 4
Chapter 3
–
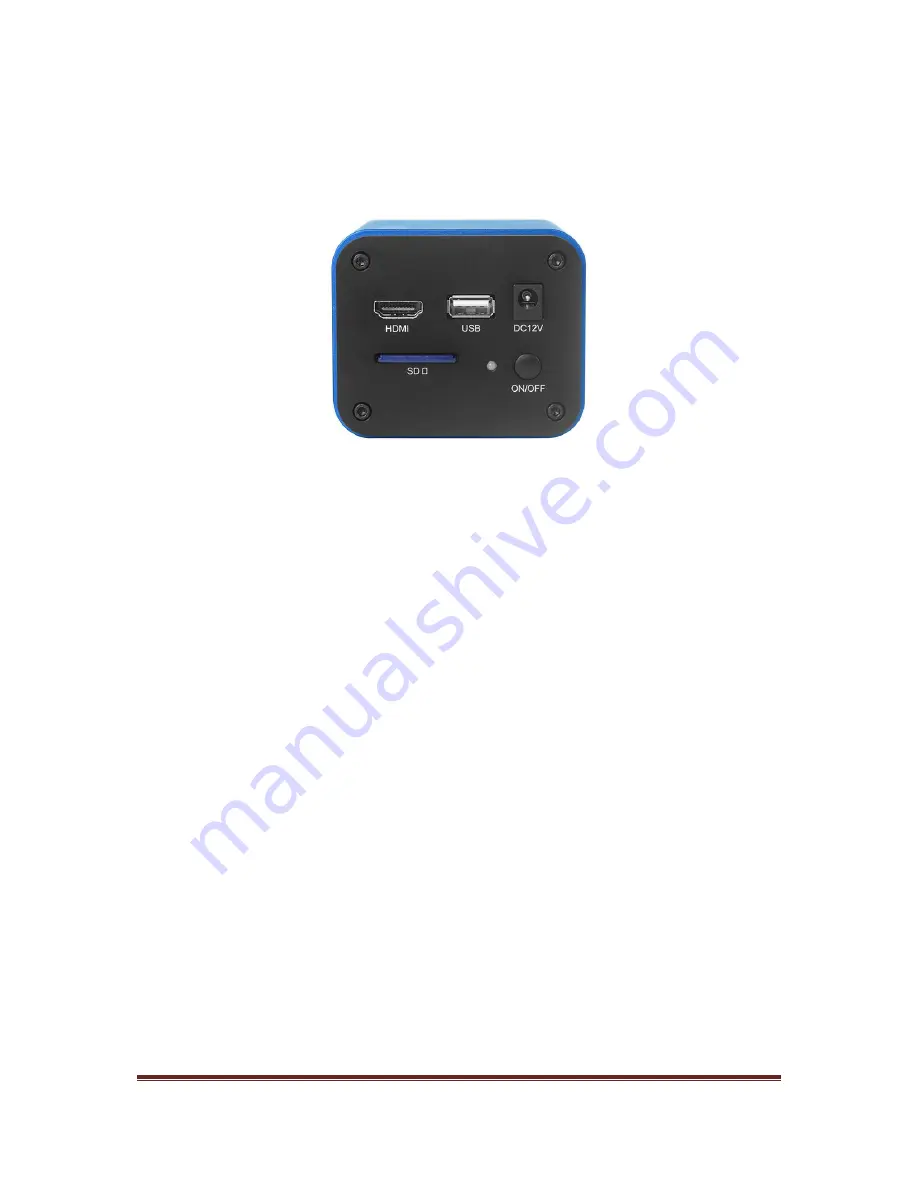
Overview of the Camera Interfaces
On the back of the camera you can find the following interfaces:
BACK OF THE CAMERA
•
HDMI
: Connection to a HDMI monitor
•
USB
: In HDMI-Mode you connect there the USB mouse in order to use the On-Screen Menu.
In USB-Mode you connect the camera with the USB port of your computer.
•
DC12V
: Connection to the included power supply
•
ON/OFF
: Switch on/off the camera
•
SD
: SD card slot for SD cards in order to capture photos and videos. If you want to use your
own SD cards, it is suggested to use a
Class 10
SD card.
On the back of the camera there is also a control LED
–
the following color codes apply:
•
Dark:
the camera is not supplied with power
•
Red:
the camera is supplied with power but is not operating
•
Blue:
the camera is operating. The change from red to blue happens as soon as you press the
ON/OFF switch which switches the camera on
Содержание XCAM01
Страница 1: ...User Guide XCAM01...


