background image

INSTRUCTION MANUAL

Video Cassette Recorder

81VMN20401--- / HJ420UD 

★★★★★

Printed in China

1. Before Using Your VCR

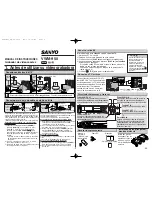
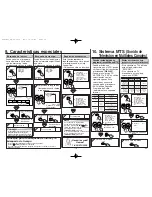
If channel 3 is already occupied for broadcasting,

1) Set your TV to channel 4.
2) Insert a pre-recorded tape into this unit.
3) Press 

[PLAY 

B

B

]

once to start playback.

4) After a few seconds, press 

[PLAY 

B

B

] on the unit

for 3 seconds.

• The RF output channel will change to channel 4 from channel 3 and

you will see a playback picture.

• When a picture does not appear on the TV screen, repeat step 4).

5) Press 

[

C

C

STOP]

to stop playback.

ANT

IN

OUT

RF Cable 

(supplied)

(Back of VCR)

(Back of TV)

(Back of TV)

Plug the AC power cords of the VCR and TV into the AC outlets.

4

Disconnect

Antenna

or

2

Connect

3

Connect

Cable TV

Signal

Antenna

or

Cable TV

Signal

Basic TV  Connection

RF Output Channel

Select this connection when you want to view or record a
scrambled channel. With this connection, channels cannot
be changed on the VCR. You can view or record ONLY the
channels you have selected on the cable box or the satellite
box.
• While you are recording, only the recorded channel can

be viewed.

To select channels of the cable box or satellite box

1) Turn on the unit by pressing 

[POWER]

, then press

[VCR/TV]

. The “POWER” and the “VCR/TV” lights on

the front panel will appear, then press 

[CHANNEL ] 

to select channel 3 or 4 (the

same channel as the output channel of the cable box
or satellite box).

• If you use the channel 4, you need to change the

unit’s RF output to channel 4. Refer to “RF Output
Channel”.

2) On the TV, select channel 3 or 4 (the same channel as

you have selected at step 1).

3) On the cable box or satellite box, select the channel

you want to view or record.

Select this connection when you want to change channels
on the unit. With this connection, you may watch one
channel while recording another.
• You may not view or record a scrambled channel.

To select channels of the cable box 

1) On the cable box, select channel 3 or 4 (the same

channel as the VCR’s RF output channel.)

• Refer to “RF Output Channel”.

2) On the TV, select the same channel as the output

channel (3 or 4) of the cable box.

3) Turn on the unit by pressing 

[POWER]

, then press

[VCR/TV]

. The “POWER” and “VCR/TV” lights on the

front panel will appear, then select the channel you
want to view or record.

To play back a tape

Follow the steps 1) to 2) above, then play back a tape.
• Refer to “Playback” on page 4.

To view one channel while recording another

1)While you are recording on the unit, press

[VCR/TV]

.

2)On the cable box, select the channel you want to view.

Hints for Cable Box or Satellite Box

ANT

IN

OUT

RF cable

(supplied)

(Back of VCR)

IN

OUT

E

(Back of TV)

Antenna

or

Cable TV 

signal

Connection A

(Cable  box or 

Satellite box)

- 1 -

ANT

IN

OUT

RF cable 

(supplied)

RF cable

(Back of TV)

IN

OUT

(Cable box)

E

Connection B

Antenna

or

Cable TV 

signal

(Back of VCR)

You can use the AUDIO OUT jacks and
VIDEO OUT jack on the back of the
unit if your TV has Audio/Video Input
jacks. In this case, you need to set the
TV to external Line Input Mode. Please
refer to your TV’s owner’s manual.

Front & Rear Terminals

Stereo TV  Connection

ANT

AUDIO

VIDEO

IN

OUT

OUT

IN

OUT

L

R

IN

L

R

AUDIO OUT

VIDEO

OUT

(Back of TV)

AUDIO

ANT

IN

OUT

VIDEO

OUT

L

R

IN

Audio/Video Cables

(not supplied)

L

R

AUDIO IN

VIDEO

IN

IN

OUT

(Back of VCR)

• Remote control 

(NA323) with 
two AA batteries

• RF cable 

• Instruction manual

Supplied Accessory

Installing the Batteries for
the Remote Control

Install two AA batteries
(supplied) matching the
polarity indicated on
the bottom of the
remote control.

ANT

AUDIO

VIDEO

IN

OUT

OUT

IN

OUT

L

R

IN

ANT

AUDIO

VIDEO

IN

OUT

OUT

IN

OUT

L

R

IN

VIDEO IN jack

Connect the video cable coming from the
video output jack of a camcorder, another
VCR or an audio-visual source (laser disc
player, video disc player, etc.) here.

POWER

VCR/TV

TAPE IN

MENU

TIMER

REC

CHANNEL

POWER

L–AUDIO–R

VIDEO

AV INPUT

• Quick setup guide

Quick Setup Guide

VWM-950

VIDEO OUT jack

Connect the video cable here through the
video input jack of a camcorder, another
VCR or a TV.

ANT IN jack

Connect your antenna or cable box
here.

ANT OUT jack

Connect the supplied RF cable to the
antenna input jack on your TV.

AUDIO IN jacks

Connect the audio cables coming from the
audio output jacks of a camcorder, another
VCR or an audio source here.

AUDIO OUT jacks

Connect the audio cables here through to
the audio input jacks of a camcorder, another
VCR, a stereo amplifier or an audio system.

Hint

Hint

• The RF output channel may not

change when you adjust track-
ing during playback. In this
case, stop the playback, and
start the playback again. After
that, press 

[PLAY 

B

B

]

on the

VCR for 3 seconds again.

 HJ420UD_EN/SP.QX33  05.1.14 14:06  Page 1

Содержание VWM-950

Страница 1: ...nnel you want to view or record To play back a tape Follow the steps 1 to 2 above then play back a tape Refer to Playback on page 4 To view one channel while recording another 1 While you are recording on the unit press VCR TV 2 On the cable box select the channel you want to view Hints for Cable Box or Satellite Box ANT IN OUT RF cable supplied Back of VCR IN OUT E Back of TV Antenna or Cable TV ...

Страница 2: ...rounding conductors location of antenna dis charge unit connection to grounding electrodes and requirements for the grounding electrode Fig A 14 Lightning For added protection for this video product during a lightning storm or when it is left unattended and unused for long periods of time unplug it from the wall outlet and discon nect the antenna or cable system This will pre vent damage to the vi...

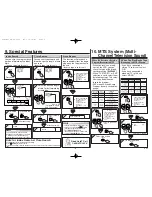
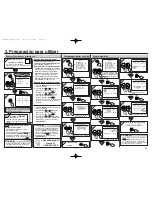
Страница 3: ...UTE AM PM STOP PLAY STOP PLAY F FWD F FWD 3 3 CLOCK SET MONTH DAY YEAR 1 0 0 3 HOUR MINUTE AM PM STOP PLAY F FWD 4 4 CLOCK SET MONTH DAY YEAR 1 0 0 3 2 0 0 5 HOUR MINUTE AM PM STOP PLAY F FWD 5 5 CLOCK SET MONTH DAY YEAR 1 0 0 3 MON 2 0 0 5 HOUR MINUTE AM PM 0 5 STOP PLAY F FWD 6 6 CLOCK SET MONTH DAY YEAR 1 0 0 3 MON 2 0 0 5 HOUR MINUTE AM PM 0 5 4 0 STOP PLAY F FWD 7 7 CLOCK SET MONTH DAY YEAR 1...

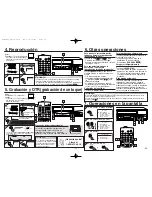
Страница 4: ... frame If the picture begins to vibrate vertically during the still mode press CHANNEL to stabilize the picture If the picture is distorted or rolling verti cally adjust the vertical hold control on your TV if equipped Counter Reset Press C RESET EXIT To play back in slow motion Press SLOW during playback or the still mode If the noise bar appears on the TV screen you can reduce it by pressing CHA...

Страница 5: ...he power 2 Press MENU to select the main menu 3 Press PLAY B B or C C STOP to select TIMER PROGRAM MING then press F FWD g g 4 Press PLAY B B or C C STOP to select the program number which you want to check The details of the program you selected will appear on the TV screen Press F FWD g g or h h REW to go the digit you want to change then press PLAY B B or C C STOP to enter correct numbers You m...

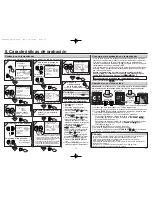
Страница 6: ...elevision Sound Select TV STEREO or SAP 2 2 To exit the menu C RESET EXIT 2 2 AUDIO OUT B HIFI ON MONO F FWD Select HIFI or MONO STOP PLAY Time Search Index Search Auto Repeat WhenYou Receive or Record a Program Broadcast in MTS WhenYou Play Back aTape Recorded in Hi Fi Stereo Press twice SEARCH MODE Press once 0 01 9 59 1 minute 9 hours and 59 minutes 01 20 F FWD REW To rewind To fast forward 4 4...

Страница 7: ...e is dry FCC Warning This equipment may generate or use radio frequency energy Changes or modifications to this equipment may cause harmful interference unless the modifications are expressly approved in the instruction manual The user could lose the authority to operate this equip ment if an unauthorized change or modi fication is made Important Copyright Information Unauthorized recording or use...

Страница 8: ...S WARRANTY DUE TO CAUSES BEYOND ITS CONTROL SOME STATES DO NOT ALLOW LIMITATIONS ON HOW LONG AN IMPLIED WARRANTY LASTS AND OR DO NOT ALLOW THE EXCLUSION OR LIMITATION OF CONSEQUENTIAL DAMAGES SO THE ABOVE LIMITATIONS AND EXCLUSIONS MAY NOT APPLY TO YOU THIS WARRANTY GIVES YOU SPECIAL LEGAL RIGHTS YOU MAY HAVE OTHER RIGHTS WHICH VARY FROM STATE TO STATE R03 12 18 M LABOR 1 YEAR PARTS 1 YEAR CARRY I...

Страница 9: ...video de una videocámara otra videograbadora o una fuente audiovisual reproductor de discos láser reproductor de discos de video etc POWER VCR TV TAPE IN MENU TIMER REC CHANNEL POWER L AUDIO R VIDEO AV INPUT Guía de inicio rápido Quick Setup Guide VWM 950 Toma VIDEO OUT Conecte el cable de video a la toma de entrada de video de una videocámara otra videograbadora o un TV Seleccione esta conexión c...

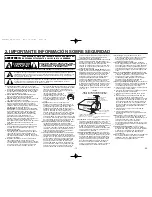
Страница 10: ...obre la unidad del cable del interior de cobre de antena tamaño de los conductores tierra ubicación de la unidad de descarga de la antena conexión a los electrodos tierra y requerimientos de los electrodos tierra Fig A 14 Tormentas Para añadir una protección a este aparato de vídeo durante tormentas rayos etc o cuando es dejado desatendido y sin ser usado durante largos periodos de tiempo desenchú...

Страница 11: ...RA MINUTO AM PM STOP PLAY STOP PLAY F FWD F FWD 3 3 AJUSTE DE RELOJ MES DIA AÑO 1 0 0 3 HORA MINUTO AM PM STOP PLAY F FWD 4 4 AJUSTE DE RELOJ MES DIA AÑO 1 0 0 3 2 0 0 5 HORA MINUTO AM PM STOP PLAY F FWD 5 5 AJUSTE DE RELOJ MES DIA AÑO 1 0 0 3 LUN 2 0 0 5 HORA MINUTO AM PM 0 5 STOP PLAY F FWD 6 6 AJUSTE DE RELOJ MES DIA AÑO 1 0 0 3 LUN 2 0 0 5 HORA MINUTO AM PM 0 5 4 0 STOP PLAY F FWD 7 7 AJUSTE D...

Страница 12: ... a vibrar verticalmente duante el modo de imagen fija presione CHANNEL para estabilizar la imagen Si la imagen se distorsiona o avanza verticalmente ajuste el control de retención vertical en su TV si está equipado Reposición del contador Presione C RESET EXIT Para reproducir en cámara lenta Presione SLOW durante la reproducción o el modo de imagen fija Si aparecen barras de ruido en la pantalla d...

Страница 13: ...cipal presionando MENU 3 Presione PLAY B B o C C STOP para selrccionar PROGRAMAR Después presione F FWD g g 4 Presione PLAY B B o C C STOP para seleccionar el número de programa que desea verificar Los detalles del programa seleccionado aparecerán en la pantalla de TV Presione F FWD g g o h h REW para ir a la cifra que desea cambiar Después entre los números correctos presionando PLAY B B o C C ST...

Страница 14: ...EXIT 2 2 SALIDA DEL AUDIO B ESTEREO ON MONO F FWD Seleccione ESTEREO o MONO STOP PLAY Búsqueda de tiempo Búsqueda de índices Repetición automática Cuando reciba o grabe un programa transmitido en MTS Cuando reproduzca una cinta grabada en estéreo de alta fidelidad Presione dos veces SEARCH MODE Presione una ves 0 01 9 59 1 minuto 9 horas y 59 minutos 01 20 F FWD REW Para rebobinar Para el avance r...

Страница 15: ...Advertencia de la FCC Este equipo puede generar o utilizar energía de radiofrecuencias Los cambios o modificaciones en este equipo pueden provocar interferencias peligrosas a menos que las modificaciones hayan sido aprobadas a título expreso en el manual de instrucciones El usuario puede perder la autoridad para utilizar este equipo si se hace un cambio o modificación no autorizado Importante info...

Страница 16: ...o 2 Esta garantía no se aplica a para la caja o partes decorativas cabezales de vídeo rotos o dañados pilas o mantenimiento de rutina 3 Esta garantía no se aplica tampoco al desembalaje preparación instalación transporte del producto para su reparación o instalación del producto después de ser reparado 4 Esta garantía no se aplica a para reparaciones o reemplazos necesitados por cualquier causa má...

Отзывы: