background image

– 20 –

3-9. Language Setting

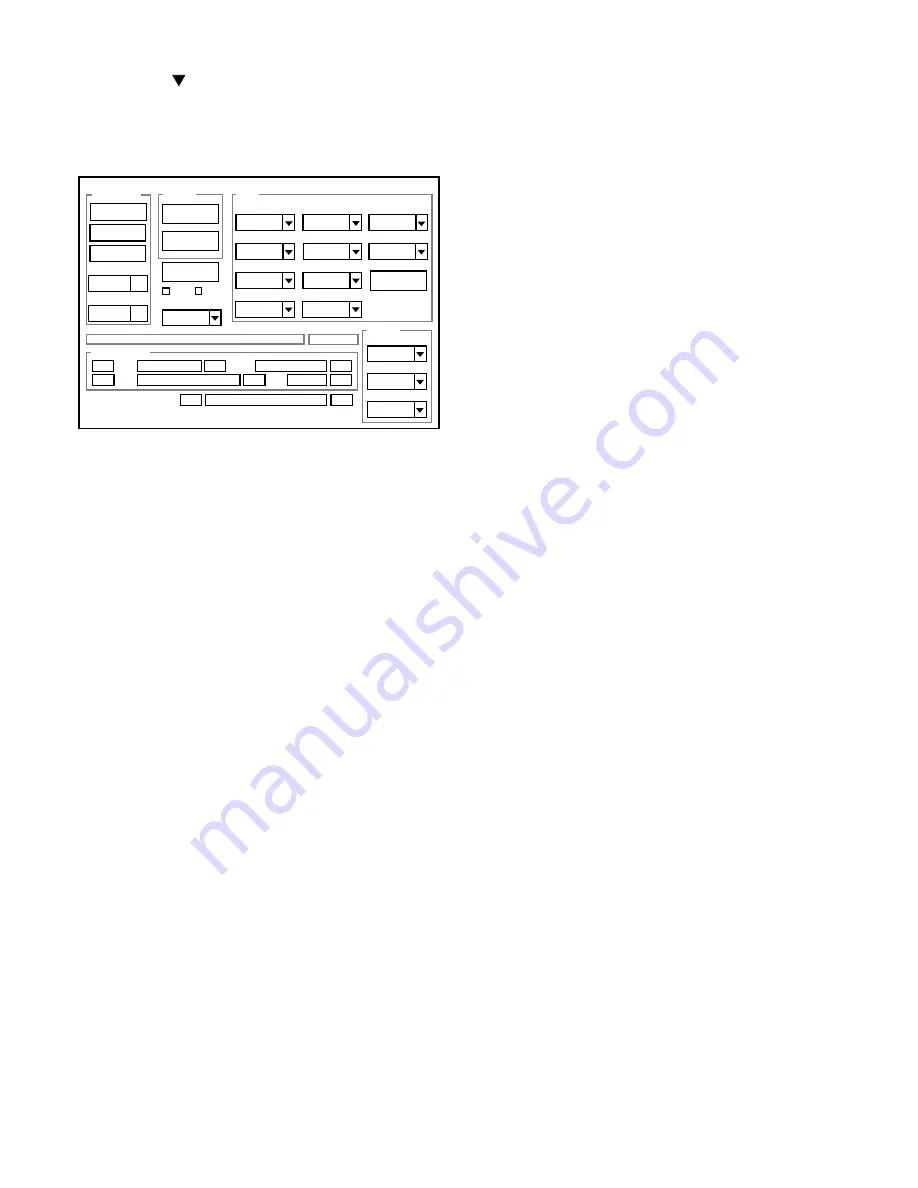
1. Click on the "     " mark located on the right of the

"Language" display BOX.

2. Select language. (Default is English.)
3. End "DscCal" and remove the camera before turning the

camera power OFF.

3-10. Reset Setting
Carry out reset settings after replacing CP1 board.

1. Turn on the camera.
2. Press the MENU button.
3. Choose the OPTION.
4. Choose the RESET SETTINGS, and press the SET button.
5. Select Yes, and press the SET button.

3-11. The Compulsive boot starting method

1. Keep MENU button and SET button depressed while switch-

ing on the power.

2. Connect the camera and the computer with USB cable.

3-12. Firmware uploading procedure

1. Uploading the firmware should be carried out if the version

number (COMPL PWB XX-X) on the replacement circuit
board is lower than the version of the distributed firmware.
For XX-X, enter the name of the circuit board containing the
firmware.

2. The firmware is distributed by e-mail in self-extracting archive

format. Change the extension of the distributed file to .EXE
and save it in your preferred folder.

3. When you double-click the saved file, the firmware (binary

file) will be saved in the same folder.

4. The firmware must not be distributed without permission.

1. Overwriting firmware from the SD card
Preparation:

SD card: SD card with firmware rewritten into the root direc-
tory
Data: S813Nxxx.bin (xxx: version)

Overwriting method:

1. Insert the above SD card.
2. Turn on the camera.
3. Press the PLAY button.
4. Press the MENU button. The playback setting screen ap-

pears.

5. Choose the OPTION icon.
6. Choose the FORMAT.
7. Press the left arrow button for 2 seconds. FIRMWARE UP-

DATE will display.

8. Choose YES.
9. Press the SET button. Update is starting.

Note:

Do not turn off the camera’s power or remove the SD card
while the firmware is being updated.
The power will turn on automatically after the update is com-
plete.

2. Overwriting firmware from the calibration software
Preparation:

PC with overwriting firmware copied to the preferred folder in
the HD.
Data: S813Nxxx.bin (xxx: version)

Overwriting method:

1. Connect the camera’s USB/AV terminal to the computer’

USB connector.

2. The USB Connection screen appears on the camera’s LCD

monitor. Choose the “CARD READER”, and press the SET
button.

3. Double-click on the DscCalDi.exe.
4. Click the Firmware.
5. Choose the fimware file to use for overwriting, and click

the Yes.

6. Update is starting. The message will appear, and choose

OK.

7. After the update is complete, disconnect the USB cable

and turn the camera’s power off.

Note:

Do not turn off the camera’s power while the firmware is be-
ing updated.

3-13. Program data writing to NAND-Memory

Preparation:

SD card: SD card with data written into the root directory
Data: S813Nxxx.bin (xxx: version)

Overwriting method:

1. Insert the above SD card.
2. Turn on the camera.
3. Press the PLAY button.
4. Press the MENU button. The playback setting screen ap-

pears.

5. Choose the OPTION icon.
6. Choose the FORMAT.
7. Press the left arrow button for 2 seconds. FIRMWARE UP-

DATE will display.

8. Choose YES.
9. Press the SET button. Update is starting.

If “NAND Verify Error”, “NAND Source Error”, “NAND
Checksum Error” and “NAND Error” are displayed, turn off
the camera and carry out overwriting.

Note:

Do not turn off the camera’s power or remove the SD card
while the firmware is being updated.

Firmware

Image

AWB

Focus

UV Matrix

R Bright

RGB Offset

Tint

B Bright

Gain

Phase

LCD

Calibration

Upload

PAF Cal.

LCD Type

H AFC

Test

VCOMDC

VCOMPP

Cal Data

Cal Mode

OK

OK

EVF

USB storage

Get

Set

VID

Set

PID

Set

Serial

Set

Rev.

Set

Setting

Language

Video Mode

VCO

Factory Code

Hall Cal.

Backrush pulse :

Set

Get

Содержание VPC-S6

Страница 1: ...ate from the resistance wattage and voltage ratings shown CAUTION Danger of explosion if battery is incorrectly replaced Replace only with the same or equivalent type recommended by the manufacturer Discard used batteries according to the manufacturer s instructions NOTE 1 Parts order must contain model number part number and description 2 Substitute parts may be supplied as the service parts 3 N ...

Страница 2: ...alent and which lets you adjust the tip temperature up to 450 C 842 F It should also have as good temperature recovery characteris tics as possible Set the temperature to 350 C 662 F or less for chip compo nents to 380 C 716 F for lead wires and similar and to 420 C 788 F when installing and removing shield plates The tip of the soldering iron should have a C cut shape or a driver shape so that it...

Страница 3: ... 24 4 7 8 9 11 5 6 10 14 V3B V3A V1 V4 V3L V3R V2 V1S Vertical register transfer clock Vertical register transfer clock Signal output 6 0 V 0 V 12 V Aprox 12 V Vertical register transfer clock VO V6 V5R V5L 6 0 V 0 V 6 0 V 0 V GND Reset gate clock GND Circuit power DC 12 V GND 0 V 4 5 V 7 8 V ØRG 13 16 12 15 VDD DC Protection transister bias 6 0 V PT DC HL H1 Horizontal register transfer clock Sub...

Страница 4: ...cks generated from the SHP and SHD pulses and it is here that CDS correlated double sampling is carried out After passing through the CDS circuit the signal passes through the AGC amplifier VGA Variable Gain Amplifier It is A D converted internally into a 10 bit signal and is then input to ASIC IC101 The gain of the VGA amplifier is con trolled by pin 31 33 serial signal which is output from ASIC ...

Страница 5: ...data and three exposures are made to obtain the optimum picture The data which has already been stored in the SDRAM is read by the CPU and color generation is carried out Each pixel is interpolated from the surrounding data as being ei ther R G and B primary color data to produce R G and B data At this time correction of the lens distortion which is a characteristic of wide angle lenses is carried...

Страница 6: ...hort circuited for the length of time determined by internal fixing of IC501 all output is turned off The control signal P ON are recontrolled to restore output 3 Analog System Power Output 12 V A 3 45 V A and 6 0 V A are output Feedback for the 12 V A is provided to the switching controller Pin 4 of IC501 so that PWM control can be carried out 4 Digital 3 25 V Power Output VDD3 is output Feedback...

Страница 7: ...nsformer 1 5 Rectifier circuit The high voltage alternating current which is generated at the secondary side of T5401 is rectified to produce a high voltage direct current and is accumulated at electrolytic ca pacitor C5412 1 6 Voltage monitoring circuit This circuit is used to maintain the voltage accumulated at C5412 at a constance level After the charging voltage is divided and converted to a l...

Страница 8: ...I O O O I I O O O O I O I O O O O I I I I I I O O I I I I O O I O Outline System reset Backup battery charge control Key matrix input Key matrix output Key matrix output Key matrix output Command request Direct coupled line to ASIC Backlight ON OFF D D converter LCD system ON OFF signal D D converter digital system ON OFF signal 3 Strobe charge control SREQ Touch sensor pulse output VF LED L light...

Страница 9: ...SYA block carries out overall control of camera operation by detecting the input from the keyboard and the condition of the camera circuits The 8 bit microprocessor reads the signals from each sensor element as input data and outputs this data to the camera circuits ASIC or to the LCD display device as operation mode setting data Fig 5 1 shows the internal communication between the 8 bit microproc...

Страница 10: ...t microprocessor halts 8 MHz of the main clock and operates 32 768 kHz clock counting by subclock Also the battery for backup is charged 16 hours from it to be attached When the power switch is on the 8 bit microprocessor starts processing The 8 bit microprocessor first sets both the PON signal at pin 12 and the PAON signal ASIC to High and then turn on the power circuit After PON signal is to Hig...

Страница 11: ...7 x 4 4 Cabinet bottom 5 Cover battery 6 Stand 7 Three screws 1 7 x 4 8 Two screws 1 7 x 3 9 Cabi back 10 Screw 1 7 x 4 11 Screw 1 7 x 4 12 Screw 1 7 x 3 13 Screw 1 7 x 2 14 Cabinet top Cabi front 15 FPC NOTE Discharge a strobe capacitor with the discharge jig VJ8 0188 for electric shock prevention When assembling tighten the screws order a b c ...

Страница 12: ...4 5 6 6 7 8 9 10 11 2 2 REMOVAL OF LCD 1 Spacer under monitor 2 LCD 3 Remove the solder 4 FPC 5 Two screws 1 4 x 3 5 6 Two screws 1 7 x 4 7 FPC 8 Holder monitor 9 Screw 1 7 x 2 10 Spring earth CP1 11 Unit sw FPC ...

Страница 13: ...he solder 5 Spacer trigger 6 Remove the solder 7 Remove the solder 8 Screw 1 7 x 4 When assembling tighten the screws order a b c 9 CP1 board 10 Remove the solder 11 Condensor 12 FPC 13 Three screws 1 4 x 3 5 14 Lens assembly 15 Assy flash 16 Spacer battery 17 Two screws 1 7 x 3 18 Holder strap 19 Dec self LED 20 Spacer fuse 21 Remove the solder 22 Assy wire batt 23 Terminal batt A 24 Holder chass...

Страница 14: ...4 REMOVAL OF CABI FRONT AND TB1 BOARD 1 Three screws 1 7 x 3 2 Cabinet top 3 Cabi front 4 Spacer flash 5 Screw 1 7 x 2 5 6 Shield tape TB1 7 Screw 1 7 x 2 5 8 TB1 board 9 Spring shutter 10 Dec top LED 11 Button shutter 12 Button power ...

Страница 15: ... 15 2 5 BOARD LOCATION CP1 board TB1 board ...

Страница 16: ...ling USB driver Install the USB driver with camera or connection kit for PC 4 Pattern box color viewer Turn on the switch and wait for 30 minutes for aging to take place before using Color Pure It is used after adjusting the chroma meter VJ8 0192 adjust color temperature to 3100 20 K and luminosity to 900 20 cd m2 Be careful of handling the lump and its circumference are high temperature during us...

Страница 17: ...2 Set the camera so that it becomes center of the screen in the collimator 3 Double click on the DscCalDi exe 4 Click the Focus and click the Yes 5 Lens adjustment value will appear on the screen 6 Click the OK Measuring Point ADJ Location Measuring Equipment ADJ Value CL501 Frequency counter VR501 504 4 1 kHz Camera Collimator COMPL PWB CP 1 636 090 4156 IC501 Oscillation Frequency Adjustment Len...

Страница 18: ... and MS values If AGC a1 a2 a3 a4 a5 CHECK wc0 wc1 wc2 CHECK_FS wfc0 wfc1 wfc2 and MS ms1 ms2 the ad justment values fulfill the conditions below they are determined as within specifications Adjustment value determination a1 1023 a2 1023 a3 1023 a4 1023 a5 1023 wc0 128 2 wc1 128 2 wc2 130 40 wfc0 128 2 wfc1 128 2 wfc2 130 40 1200 ms1 3500 1200 ms2 3600 Adjustment values other than the above are ir...

Страница 19: ...ect 0 in the LCD VCOMPP 3 Adjust LCD VCOMPP so that the amplitude of the CL404 waveform is 5 60 V 0 1 Vp p 6 2 LCD VcomDC Adjustment Adjusting method 1 Adjust LCD VCOMDC so that the amplitude of the CL404 waveform is 4 40 V 0 05 Vp p VR501 CL501 CL404 CL402 Camera Pattern box color viewer CL404 waveform 5 60 V 0 1 Vp p CL404 waveform 4 40 V 0 05 Vp p GND CL402 3 8 Factory Code Setting 1 Check the ...

Страница 20: ...ot turn off the camera s power or remove the SD card while the firmware is being updated The power will turn on automatically after the update is com plete 2 Overwriting firmware from the calibration software Preparation PC with overwriting firmware copied to the preferred folder in the HD Data S813Nxxx bin xxx version Overwriting method 1 Connect the camera s USB AV terminal to the computer USB c...

Страница 21: ...and check the USB storage data VID SANYO PID S6 Serial Rev 1 00 4 Check the Serial in the above USB storage data If the displayed value is different from the serial number printed on the base of the camera enter the number on the base of the camera Then click the Set button 5 Next check VID PID and Rev entries in the USB storage data If any of them are different from the values in 3 above make the...

Страница 22: ...CHECK IC302 CHECK IC302 IC301 37 BAT OFF CHECK IC303 D3002 D3003 IC301 24 OSCILLATION CHECK X3002 R3009 C3010 C3011 CHECK IC301 PUSH RELEASE SWITCH SB LED IS FLASHING WHEN AUTO LUMINOUS RED STROBE CHARGE INOPERATIVE CHECK STA BLOCK CN301 5 6 SCAN IN 1 2 PULSE INPUT CHECK SYA BLOCK CHECK DMA BLOCK TAKING INOPERATIVE NO NO LOW LOW LOW NO YES YES HIGH HIGH HIGH YES NO YES YES NO ...

Страница 23: ...23 MEMO ...

Страница 24: ...P Q5405 4051700308 TR CPH5504 E N S P Q5406 4051834003 TR3LN01S TL E N S P Q5409 4060196505 TR CY25BAH 8F T13 F10 N S P Q9001 4052127807 TR UP05C8G N S P Q9502 4051670403 TR EMD12 N S P Q9503 4051828507 TR EMH16 N S P INTEGRATEDCIRCUITS IC101 4105858306 IC KS755U2464CBP N S P IC103 4095885405 IC EDS2532AABH 75 N S P IC121 4095716105 IC TV00047002AAGD N S P IC172 4094469309 IC NJM2125F N S P IC301 ...

Страница 25: ...0 1U K 10V N S P C3010 4032762806 CERAMIC 18P J 50V N S P C3011 4032761908 CERAMIC 22P J 50V N S P C3012 4032761007 CERAMIC 0 01U K 16V N S P C3013 4032761304 CERAMIC 1000P K 50V N S P C3014 4033380306 CERAMIC 0 1U K 10V N S P C3015 4033818106 CERAMIC 1U K 6 3V N S P C3017 4033380306 CERAMIC 0 1U K 10V N S P C3018 4033380306 CERAMIC 0 1U K 10V N S P C5001 4032761304 CERAMIC 1000P K 50V N S P C5002...

Страница 26: ... MT GLAZE 0 000 ZA 1 16W N S P R3005 4012261503 MT GLAZE 0 000 ZA 1 16W N S P R3006 4012587009 MT GLAZE 150K DC 1 16W N S P R3007 4012587009 MT GLAZE 150K DC 1 16W N S P R3009 4012250408 MT GLAZE 330K JA 1 16W N S P R3013 4012249303 MT GLAZE 1K JA 1 16W N S P R3015 4012251405 MT GLAZE 47KJA1 16W N S P R3020 4012251603 MT GLAZE 390JA1 16W N S P R3031 4012249006 MT GLAZE 10KJA1 16W N S P R3045 40122...

Страница 27: ...7 SOCKET FPC 19P N S P COMPL PWB TB 1 6360904170 VARISTORS VA334 4080500504 VARISTORAVR M1005C080MT VA337 4080500504 VARISTORAVR M1005C080MT SEMICONDUCTOR Q3301 4051155207 TR 2SC4617 R DIODES D3301 4072481804 LEDQSMN C186 D3308 4072353507 DIODEMA4S111 D3309 4072353507 DIODEMA4S111 CAPACITORS C3301 4033146407 CERAMIC 7P D 50V C3302 4032762905 CERAMIC 12P J 50V C3303 4033146407 CERAMIC 7P D 50V C330...

Страница 28: ...663 DEC ACCESS LED SX813 J 17 6360931701 ADHESIVE DEC ACCESS 813 J 18 6360897540 BUTTONMENU SX813 J 19 6360897533 BUTTONZOOM SX813 J 20 6360897588 CABINET BACK SX813 J 21 6360937994 SPACERFLASH SX813 J 22 6360904170 COMPLPWB TB 1 23 6360933934 SHIELDTAPE_TB1_SX813 24 6360897861 SPRING SHUTTER SX813 J 25 6360897656 DEC TOP LED SX813 J 26 6360932746 SPACER TOP LED SX813 J 27 6360897519 BUTTONPOWER S...

Страница 29: ...29 Cabinet 1 SX813 J 2005 08 Ver 1 101 28 101 20 7 13 14 10 105 101 27 24 30 29 25 26 21 31 5 6 4 9 106 33 101 107 107 19 18 15 32 16 17 101 106 107 3 2 102 101 1 8 11 12 N S P 104 22 23 103 103 ...

Страница 30: ... 813 17 6360917286 SPACER CONDENSER SX813 J 18 6360937352 COMPLPWB CP 1SV SX813 19 6360908017 SPACER CON SX812 J 20 6360917248 SPACERHOLDERMONITOR 813 21 6360932173 HOLDERTB2 SX813 J 22 6360932517 SPACER HOLDER TB2 SX813 J 23 6360897694 HOLDERMONITOR SX813 J 24 6360912502 ASSY WIRE LCD W SX813 J 25 6360912496 ASSY WIRE LCD R SX813 J 26 6360879669 SPACER LCD SX71B EX 27 6450739880 LCD TM020QV A08 0...

Страница 31: ...31 Cabinet 2 SX813 J 2005 08 Ver 1 30 27 29 102 28 110 24 16 20 109 31 31 21 22 10 11 1 2 3 4 5 6 108 108 7 8 9 106 15 18 14 17 13 12 106 23 106 26 106 110 C5412 19 25 ...

Страница 32: ...Sep 05 SANYO Electric Co Ltd Osaka Japan Printed in Japan ...

Отзывы: