background image

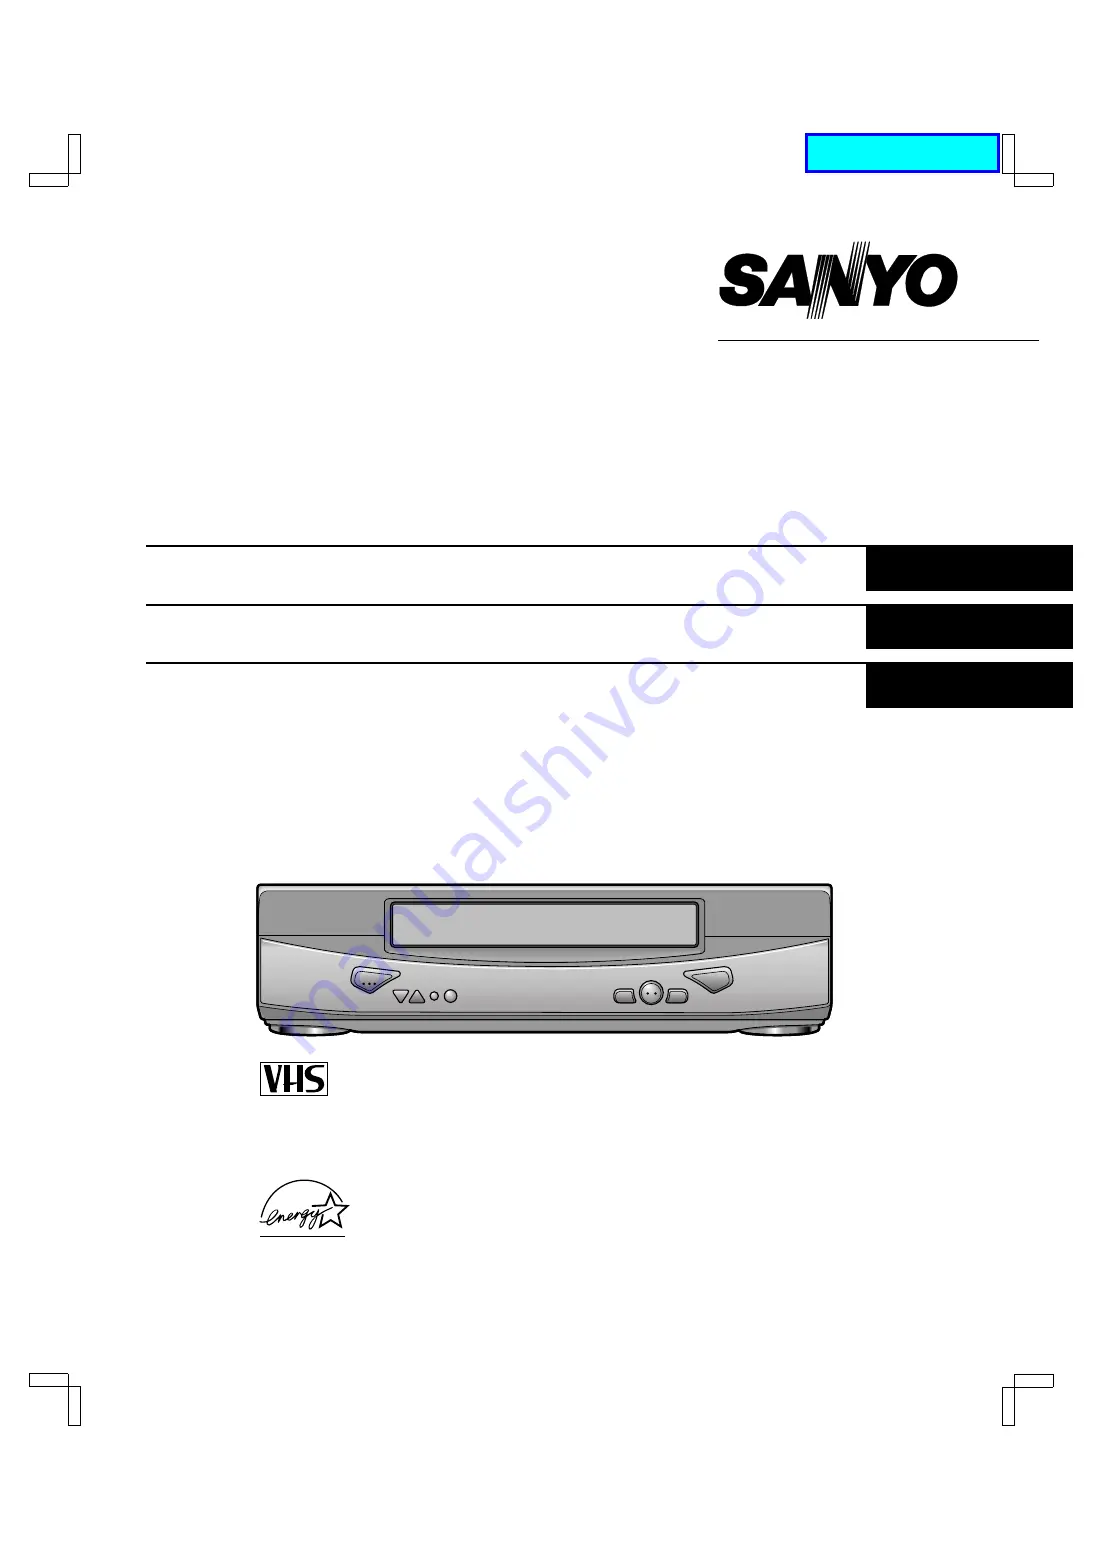
INSTRUCTION MANUAL

VHR-M340

Video Cassette Recorder

English

Magnétoscope à cassette

Français

Videograbador

Español

Only cassettes marked 

w

 can be used with this video cassette recorder.

Please read this manual and accompanying “IMPORTANT SAFETY INSTRUCTIONS” sheet carefully before connecting your
VCR and operating it for the first time.
Be sure to read carefully and follow all the PRECAUTIONS on page 1.
Keep the manual in a safe place for future reference.

(CA)

®

As an E

NERGY

 S

TAR

®

 Partner, 

SANYO has determined that
this product or product model 
meets the E

NERGY

 S

TAR

®


guidelines for energy efficiency.

SC4W/NA (VHR-M340 GB) Tue. Jan. 18/2000
 

Language Contents

Содержание VHR-M340

Страница 1: ...ng IMPORTANT SAFETY INSTRUCTIONS sheet carefully before connecting your VCR and operating it for the first time Be sure to read carefully and follow all the PRECAUTIONS on page 1 Keep the manual in a safe place for future reference CA As an ENERGY STAR Partner SANYO has determined that this product or product model meets the ENERGY STAR guidelines for energy efficiency SC4W NA VHR M340 GB Tue Jan ...

Страница 2: ...ot place the unit on a carpet because this will block the ventilation holes œ Install the VCR in a horizontal position only œ Avoid locations subject to strong vibrations œ Avoid moving the VCR between cold and hot locations see Moisture Condensation Problems this page œ Do not place the VCR directly on top of the TV as this may cause playback or recording problems Avoiding Electric Shock or Fire ...

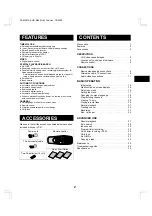
Страница 3: ...ON Initial setup 12 Multifunction on screen displays 14 On screen menu 15 Setting the clock 17 Changing the menu language 19 Programming channels 19 Viewing TV only 20 Playing a rental tape 20 Normal playback 21 Tracking control 22 Recording 23 Rec List super 25 ADVANCED USE Special playback 27 Zero search 28 Index search 28 Program timer recording 29 Quick timer recording QTR 32 Child lock 33 Ad ...

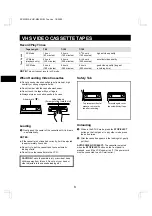
Страница 4: ...in automatically NOTES œ If the cassette is not inserted correctly it will be ejected in approximately 3 seconds œ Do not try to pull the cassette out once automatic loading starts œ Do not force the cassette into the VCR CAUTION To avoid possible injury or accident keep children away from this unit Do not put your hand or other objects into the cassette loading slot Safety Tab Unloading 1 When in...

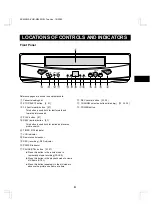
Страница 5: ...tor 8 Remote control sensor 9 REC recording RF3 indicator F POWER indicator G PAUSE STILL button 23 27 œ Press this button in the record mode to temporarily stop a recording PAUSE œ Press this button in the playback mode to view a still frame STILL œ Press this button repeatedly in the still mode to advance the picture one frame at a time H REC record button 23 32 I CHANNEL selection buttons l and...

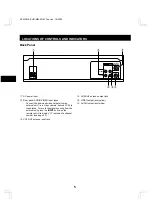
Страница 6: ... VCR to these jacks To record the signals coming from the external unit press the INPUT button on the remote control to display L1 instead of a channel number see page 23 3 VHF UHF antenna input jack 4 VHF UHF antenna output jack 5 VIDEO output jack yellow 6 AUDIO output jack white VHF UHF FROM ANT TO TV OUT IN IN OUT VIDEO AUDIO AC IN 5 6 2 1 3 4 SC4W NA VHR M340 GB Tue Jan 18 2000 5 ...

Страница 7: ...button 21 U TV VCR mode button 12 Lets you select TV or VCR mode When VCR mode is selected the VCR indicator lights on the front panel V 0 Zero Search button 28 1 2 3 4 5 6 7 8 9 0 0 REC TYPE SP SLP DPC POWER CH TRACK 100 INPUT SET MENU INDEX 2 SLOW Ad JUMP DISPLAY TV POWER TV INPUT TV CH TV CH VOL VOL RESET TV VCR PAUSE STILL STOP REW FF PLAY OK 1 2 5 7 I 9 F 8 G H J P Q N 6 3 4 K L M O T V S R U...

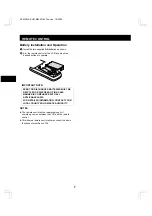
Страница 8: ...ED BATTERIES MUST BE RECYCLED OR DISPOSED OF IN A SAFE MANNER IN COMPLIANCE WITH ALL APPLICABLE LAWS FOR DETAILED INFORMATION CONTACT YOUR LOCAL COUNTY SOLID WASTE AUTHORITY NOTES œ The remote control will not operate properly if something comes between the VCR and the remote control œ This infrared remote control will also control the basic functions of most Sanyo TVs SC4W NA VHR M340 GB Tue Jan ...

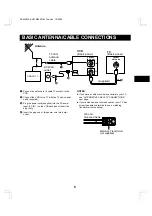
Страница 9: ...into a wall outlet NOTES œ If you have a cable converter connected to your TV see ALTERNATIVE CABLE TV CONNECTIONS next page œ If your antenna has a twin lead cable or your TV has screw type antenna terminals use a matching transformer not supplied VHF UHF FROM ANT TO TV OUT IN AC IN Antenna 75 ohm antenna cable VCR Back panel TV Back panel VHF UHF ANTENNA IN CABLE TV or 1 supplied 2 3 4 AC Wall o...

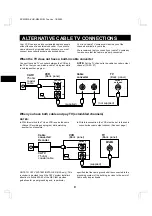
Страница 10: ...d channels NOTES œ With this method the TV and VCR receive the same channel Recording one program while watching another is not possible œ With this connection the VCR must be set to the cable converter decoder output channel See next page NOTE TO CATV SYSTEM INSTALLER USA only This reminder is provided to call the CATV system installer s attention to Article 820 40 of the NEC that provides guidel...

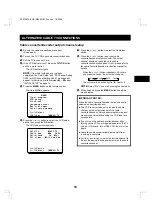
Страница 11: ...s the or button to set your cable converter decoder output channel The output channel should be indicated on the cable converter decoder back panel If not please refer to the cable converter decoder instruction manual for details Press the or button repeatedly Each time you press the button the selection changes The selection is indicated by the z next to it NOTE Select No if you are not using the...

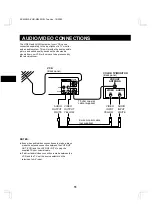
Страница 12: ...de always make the antenna connection between the VHF UHF OUT VCR and the VHF UHF IN TV using the supplied 75 ohm coaxial cable œ If a direct audio video connection is made between the VCR and the TV set the source selector on the television to A V input VIDEO VHF UHF FROM ANT TO TV OUT IN OUT AUDIO AUDIO OUTPUT WHITE VIDEO OUTPUT YELLOW VIDEO INPUT YELLOW AUDIO INPUT WHITE VCR Back panel VIDEO AU...

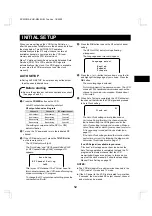
Страница 13: ...ing press the number button 3 or 4 4 Press the OK button to save the RF output channel setting The RF3 or RF4 indicator stops flashing disappears The Language select menu will appear Language select English Español Français 5 Press the ù or û button to move down or up the list and highlight the language of your choice Press the OK button The menu language is selected Auto tuning memory appears on ...

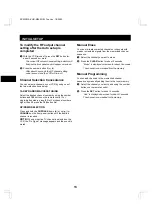
Страница 14: ...irst UP DOWN SELECTION Press and hold the CH TRACK down l or up j or CHANNEL on the front panel button until the desired channel is received NOTE When an inactive TV channel is selected on the VCR the No Signal message appears and the sound is muted Manual Erase You can eliminate unwanted channels or channels with weak or scrambled signals from the memorized channel sequence 1 Select the channel y...

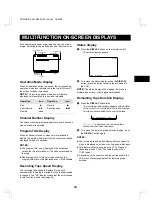
Страница 15: ... speed is changed The SS display means that the smart speed record function is used see page 24 Status display 1 Press the DISPLAY button on the remote control The status display appears 2 To remove the status display press the DISPLAY button press the button twice if a tape is loaded in the VCR NOTE The status display will not appear if a menu is displayed on screen or during special playback Rem...

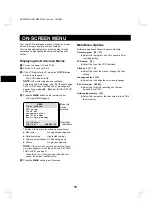
Страница 16: ...s indications OK Set MENU TV The menu items are color coded as shown below œ Menu title On magenta background œ Option selected Highlighted in green œ Operations indications On blue background œ Others On gray background NOTE If the clock has not yet been set the Clock set menu appears To set the clock see SETTING THE CLOCK on page 17 Press the ù or û button to select the desired option then press...

Страница 17: ...lection 5 When finished press the MENU button to save the settings VCR Setup Menu Options Reference pages are shown in square brackets CATV TV 19 œ Indicate whether you subscribe to cable TV or use antenna Cable box 10 step 8 œ If you use a cable converter decoder cable box set the output channel Child Lock 33 œ Select this to block picture and sound Off timer œ Select this to set the VCR to autom...

Страница 18: ...e steps under Automatic Clock Adjustment Automatic Clock Adjustment 1 Press the MENU button The main MENU appears 2 Press the ù or û button to select the Clock set option then press the OK button The Clock set menu appears Clock set 03 07 Wed 2001 09 30 PM Clock adjust zAuto Off DISPLAY Clock adjust ùû Day STD shift AM PM Cancel OK Set 3 Press the button until the wrong clock setting is erased the...

Страница 19: ...Set NOTES œ When entering the year press the two number buttons that correspond to the last two digits of the year i e 00 for 2000 05 for 2005 or 25 for 2025 œ If you press the wrong button press the button to erase the wrong number Then press the correct button to continue 5 When finished press the OK button to save the settings Standard Daylight Time Adjustment The clock time can be easily chang...

Страница 20: ...œ If the input source is set to L1 press the INPUT button on the remote control until the channel number appears on screen Channel Programming 1 Follow the steps in Before starting above 2 Press the MENU button The main MENU appears 3 Press the ù or û button to select the VCR setup option then press the OK button The VCR setup menu appears CATV TV zCATV TV Cable box zNo Ch02 Child Lock On zOff Off...

Страница 21: ...egins œ At the end of the tape the VCR stops then rewinds œ The cassette is ejected after rewinding Playback of Copyguarded Tapes Some prerecorded tapes employ a copyguard system that may cause intermittent distortion in the upper portion of the picture during playback This distortion is more likely to be visible on an older TV If you experience this problem do the following 1 Select a TV station ...

Страница 22: ...ure control Manual Manual picture control Every time the DPC button is pressed the setting will change Auto Ö Manual Ö Auto When Manual is selected the DPC picture control screen is displayed DPC Manual õõõõõõõõÙõõõõõõõõ Sharpness Adjustment 3 While looking at the picture displayed on screen press the or button until the picture is adjusted as desired Press the button for a sharper image or press ...

Страница 23: ...omatically adjust the tracking for the optimum results If noise still appears MANUAL TRACKING CONTROL 1 Press and hold the CH TRACK l or j button or CHANNEL on the front panel during playback to eliminate the noise streaks from the picture The automatic tracking control mode is canceled To return to automatic tracking eject the cassette then reinsert it SC4W NA VHR M340 GB Tue Jan 18 2000 22 ...

Страница 24: ...t panel when you want to stop recording The REC indicator goes off The STOP indicator b appears on the screen for about 3 seconds Rec List Super Feature The Rec List Super feature lets you keep track of all recordings you make on this VCR The information automatically includes the channel number date and start time In addition you have an option to add the program type to the information list See ...

Страница 25: ...r example when recording a 150 minute program onto a T 120 120 minute tape The recording will be done in SP mode for almost 105 minutes and in SLP mode for the last 45 minutes During Smart Speed Recording SS will appear on the screen NOTES œ During timer recording the set end time will be considered as the time the program ends œ If during Quick Timer Recording QTR the end time is set using the RE...

Страница 26: ...ng to be listed Rec List super Ch Date Start Type 01 5 06 9 00 Movie 22 5 15 6 30 04 5 21 7 30 Sport L1 5 27 7 30 Game 05 6 01 SPORTS DIGEST L1 6 02 6 30 Child ùû Select OK Play 5 Press the STOP button if the desired recording is listed 6 Press the ù or û button to set the desired recording then press the OK button Searching will flash on screen while the tape rewinds to the beginning of the selec...

Страница 27: ...Auto If the recorded program transmission carries title information it will automatically be entered Then when using the Rec List super function the title will be displayed up to 15 characters The program type is not set Other settings When using the Rec List super function the setting entered here will be displayed as the program type 3 Press the SET button to enter the settings NOTES œ To enter ...

Страница 28: ...hen replay and rewind over and over until you stop it 1 In the stop or playback mode press and hold the PLAY button on the front panel then while holding it down press the REW button on the front panel The tape rewinds to the beginning then endless playback starts 2 Press the STOP button or STOP EJECT on the front panel to cancel endless playback NOTE If an operation button is pressed during endle...

Страница 29: ... to the beginning of the current program or skip to the beginning of the next program and start playback œ EXAMPLE To skip to the next program 1 Press the INDEX button in the play or stop mode f Index Search e will be displayed on screen 2 Press the FF button The tape quickly advances to the beginning of the next program Playback begins NOTES œ There may be a slight discrepancy between the positio...

Страница 30: ...0 3 0 9 Daily Weekly setting Press Timer Recording Modes Daily M F Records a program at the same time Monday through Friday Weekly WK Records a program on the same day and time each week Each time the button is pressed a different recording mode Daily Weekly Once is selected Set the start and end time Start time 9 00 PM Press 0 9 0 0 End time 10 30 Press 1 0 3 0 The end time AM PM setting will be ...

Страница 31: ...weekly recording or the program type cannot be set using this method œ Once a program timer recording has been set it cannot be erased using the buttons on the VCR front panel Checking the Program Timer 1 Turn on the power TV and VCR 2 Set the TV to channel 3 or 4 3 Press the MENU button The main MENU appears 4 Press the OK button The programmed recordings are listed NOTE To display the program ty...

Страница 32: ... selecting a channel number œ 12 00 PM noon 12 00 AM midnight œ If the end of the tape is reached during timer recording the VCR stops and the power turns off automatically œ If the power fails or the VCR is unplugged from the AC outlet the correct clock time and timer settings are kept in memory for approximately 5 seconds After 5 seconds the clock and program timer must be reset when power is re...

Страница 33: ... 1 minute increments Auto Setting If an XDS encoded broadcast is being recorded Auto appears at step 1 above and blinks for 10 seconds on screen The VCR timer received the end time information from the XDS signal and recording will be made automatically to end of the program Notes on using the AUTO setting œ To set the recording end time manually press the REC button while Auto is blinking The dis...

Страница 34: ...active the message Blocked will appear on the TV screen NOTES œ Even when the child lock function is activated timer recording and other functions can still operate normally œ Since the child lock function can be activated or deactivated by remote control you may wish to store the remote control in a secure location while the child lock function is activated Ad JUMPTM The Ad JUMPTM feature allows ...

Страница 35: ...d the desired point press release PAUSE STILL on VCR 2 Recording begins F Press STOP or STOP EJECT on the front panel on both VCRs when finished MAINTENANCE Head Care and Cleaning œ This VCR has a built in automatic head cleaner Under normal conditions the heads should not require additional cleaning If you suspect a problem contact a factory authorized service center Cabinet Cleaning œ Clean the ...

Страница 36: ...is not possible œ The record safety tab on the cassette is missing œ Place vinyl tape over the safety tab hole in the cassette œ The channel selected on the VCR does not correspond to the cable converter decoder output channel œ Select the correct channel CH 02 07 The picture is poor during playback œ The TV channel selector is not set to the proper channel œ During playback set the TV s channel s...

Страница 37: ...er output Channel 3 or 4 selectable Time indication AM PM 12 hour system Timer 1 year 8 event programmable Terminals Antenna input VHF UHF F type Antenna output VHF UHF F type Video input output RCA jack Audio input output RCA jack Electrical Specifications Video output level impedance 1 V p p 75 ohms Audio output level impedance 316 mV 10 dBV less than 2 2 kohms Video input level impedance 500 mV...

Страница 38: ...SC4W NA VHR M340 GB Tue Jan 18 2000 ...

Отзывы: