3
Computer Input
Select
Digital zoom +
. The On-Screen Menu disappears and
D. zoom +
appears. Press the SELECT button to expand the
image size. Use the Point
▲▼◄►
buttons to pan the image.
The Panning function can work only when the image is larger
than the screen size.
A projected image can be also expanded by pressing the
D.ZOOM
▲
or the SELECT button on the remote control.
To exit the Digital zoom +/– mode, press any button except
the D.ZOOM
▲▼
buttons, SELECT and Point buttons.
Digital zoom +
Select
Digital zoom –
. The On-Screen Menu disappears and
D. zoom –
appears. Press the SELECT button to compress
image size.
The projected image can be also compressed by pressing the
D.ZOOM
▼
or the SELECT
button on the remote control.
Digital zoom –
To return to the previous screen size, select a screen size
from the Screen Size Adjustment Menu or select an input
source from the Input Source Selection Menu (see pages
27-28) again, or adjust the screen size with the D.ZOOM
▲▼
buttons.
For zooming in and out the images
Note:
• The panning function may not operate
properly if the stored Mode in the PC
adjust Menu is used (p.32).
• The minimum compression ratio is limited
depending on the input signal, when the
Keystone function is working or when the
custom is selected for the screen size.
•
True
,
Full
, and
Digital zoom +/–
cannot
be selected when
0i
,
i
,
0p
or
p
is selected in the PC System Menu
(p.29).
•
Digital zoom +/-
cannot be selected
when
Full
or
True
is selected.
• When
Custom
is selected, the Digital
zoom - function is disabled.
Remote Control
D.ZOOM + button
POINT buttons
SELECT button
D.ZOOM - button
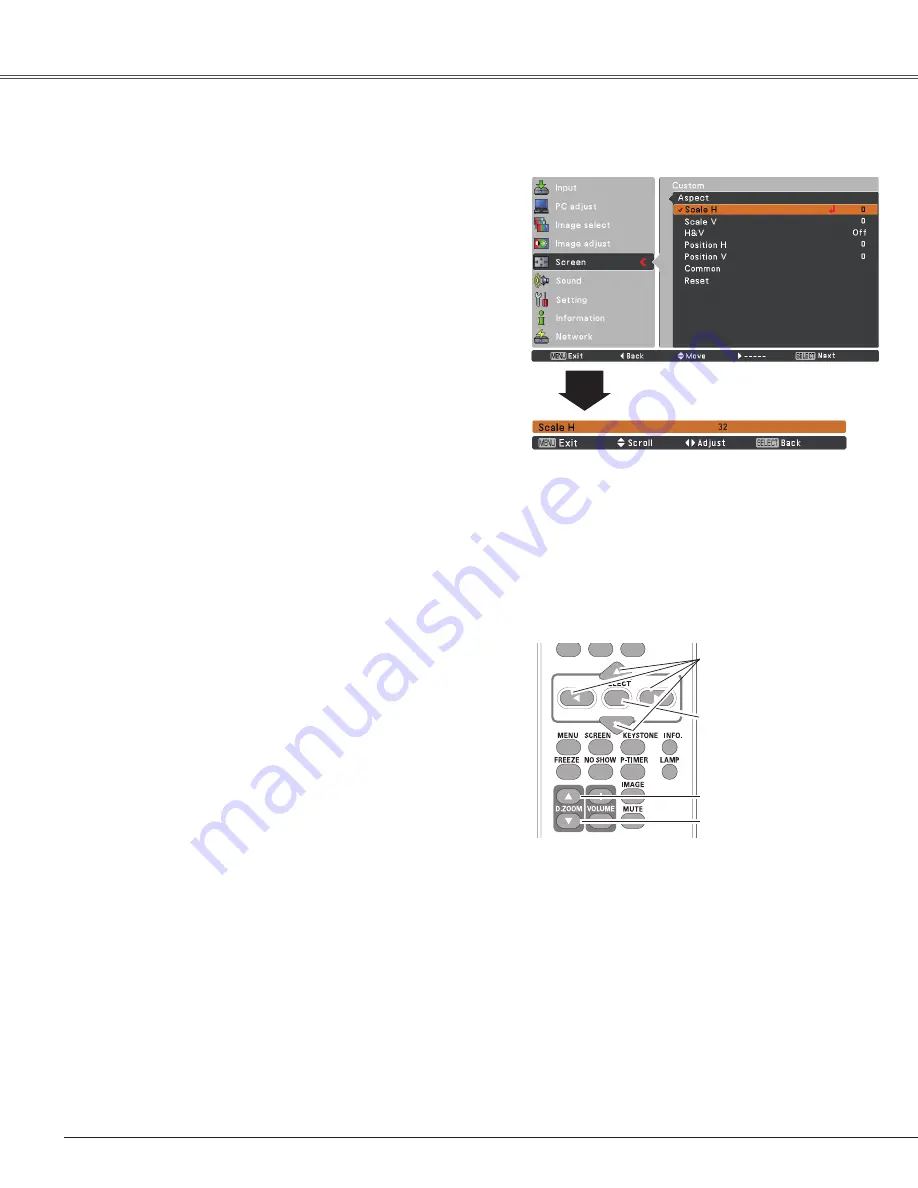
Adjust the screen scale and position manually with this
function.
Press the Point
►
button at
Custom
and the
Custom
is
displayed on the screen, you can use the Point
▲▼
buttons
to choose the item you want to adjust.
Scale H/V
.......... Adjust the Horizontal/Vertical screen
scale.
H&V
................... When set to
On
, the aspect ratio is
fixed. The
Scale V
appears dimmed and
becomes unavailable. Adjust
Scale H
,
then the screen scale is automatically
modified based on the aspect ratio.
Position H/V
..... Adjust the Horizontal/Vertical screen
position.
Common
........... Save the adjusted scale or position to all
the inputs. Press the SELECT button at
Common
to display a confirmation box.
To save the scale or position, press the
SELECT button at
yes
. When
Custom
is selected, the saved scale or position is
used.
Reset
................. Reset the all adjusted values. Press
the SELECT button at
Reset
to display
a confirmation box. To reset, press the
SELECT button at
yes
.
Custom
Note:
• When no signal is detected,
Normal
is set
automatically and the Aspect dialog box
disappears.
• The adjustable range for
Scale H/V
and
Position H/V
is limited depending on the
input signal.
Содержание PLC-XU301A
Страница 79: ...KD5AE SANyO Electric Co Ltd ...


