Safety Precautions:
1. Be sure to ask an authorized service personnel to carry out setup.
2. Thoroughly read this instruction before setup and follow the steps below precisely.
3.The wall to be mounted should be made from solid materials. Only use accessories supplied by the manufacturer.
4.Very carefully handle the unit during setup. We are not liable for any damage or injury caused by mishandling or improper installation.
5.Be sure to place the unit on a stable and soft platform which is strong enough to support the unit.
6.Do not uplift the speaker when moving the display. The appearance of the unit may different from the actual ones.
7.Design and specifications are subject to change without notice.
8. Retain these instructions for future reference.
WALL MOUNTING INSTRUCTIONS
Wall
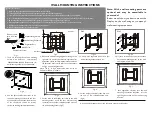
2. Due to the wall mounting fix-groove leaning to the
right side, the whole unit will lean to right side after
installation, please carefully measure the position of
the holes you want to drill, refer to the parameters
on Fig.2 when drilling the holes.
Note: The "X" in Fig.2 represents a data. It may be
200mm or 400mm or 600mm.
Fig.1
Fig.2
Fig.5
4. Use the 4pcs combination screws to fix
the wall mounting connector to the rear
of the display unit.(Caution:the direction
of the connectors should be strictly
confirm to the diagram illustrated above).
5. Put the back of the display unit close to the wall
mounting holder, insert the four wall mounting
connectors into the four calabash-shaped holes on
the wall mounting holder. (Fig.5)
Take out these
parts from the
box
Wall Mounting Holder
Expansion Bolt
Wood Screw
Combination Screw
Wall Mounting Connector
Fig.3a
Fig.4
Fig.6
Fig.7
3a. Screw 4pcs expansion bolts to fix the
wall mounting holder on the wall.
6. Let the display unit slowly slide down to
the end of the calabash-shaped hole.
(Fig.6)
7. Push rightwards carefully until the wall
mounting connectors fully slide into the
right fix-grooves and be sure the mounting
is secure.
8. If you want to dismount the unit do the above steps in reverse order.
(Unit:mm)
Rear wall mounting hole center
Wall mounting fix-hole center
2
0
0
2
7
X
8
1. There are three options of wall mounting
holder with different specifications
:200200,200400,200600. Please check your
wall mounting holder for its specification.
Wall
Fig.3b
3b. If your wall is a wooden structure, please
fix the wall mounting holder on the wall
with 16pcs wood screws.
Note: All the wall mounting parts are
optional and may be unavailable in
your model.
Below we will show you how to mount the
Display on the wall using our company’s
wall mounting components.
Содержание LCD-46XR11F
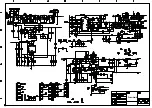
Страница 29: ...Power board ...
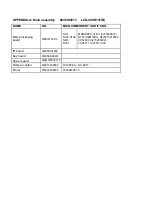
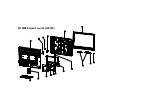
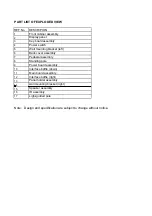
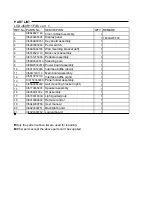
Страница 31: ...APPENDIX B Exploded view LCD 46XR11F B ...
Страница 36: ...September 2011 ...

