background image

INSTRUCTION MANUAL

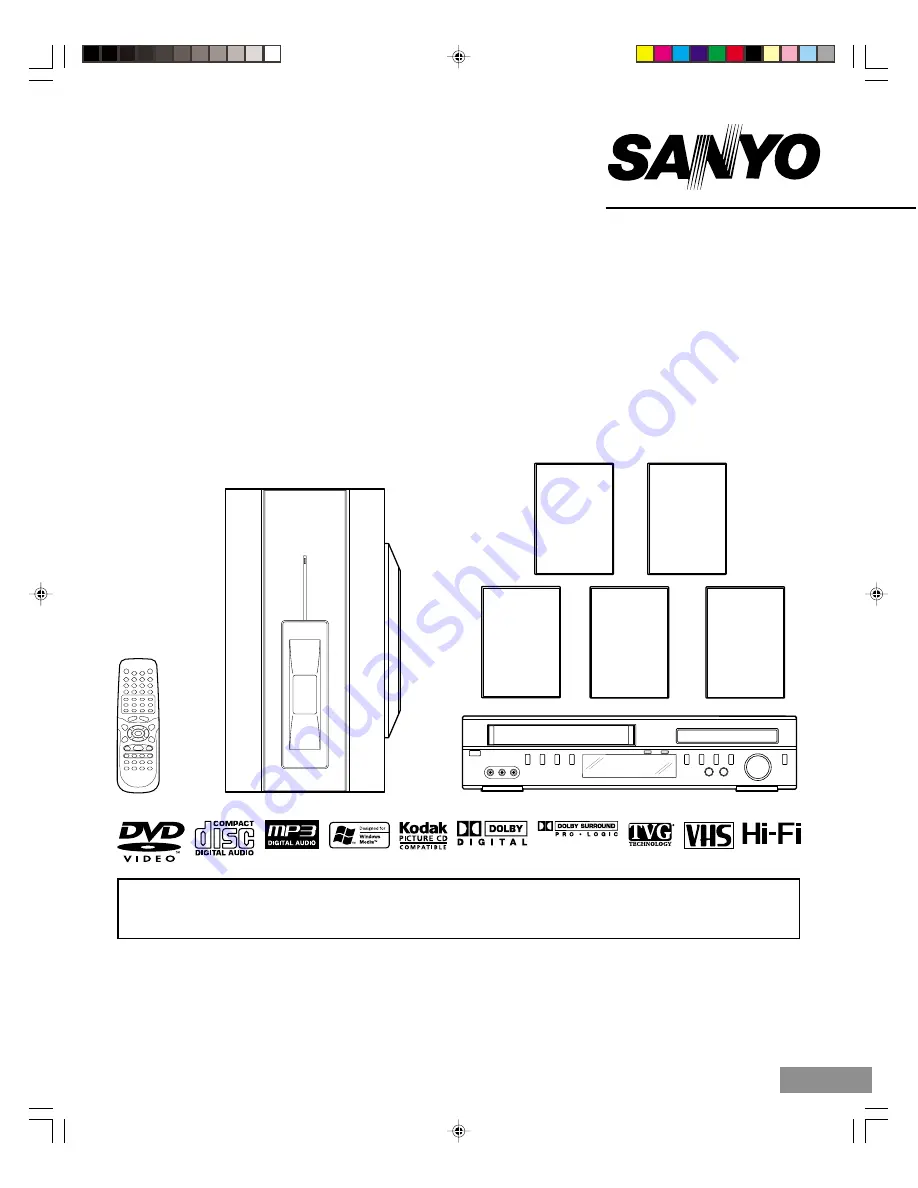
DVD & Hi-Fi VCR Home Theater System

1AD6P1P1855--
DWM-3500, Issue Number 1

DWM-3500

English

SANYO'S HELP-LINE
Call the toll-free number below if you have any difficulties operating this product.
1-800-813-3435 (Weekdays: 7:30 AM - 4:00 PM Central Time)

Please Read This Manual.

Because DVD is a new technology, we recommend that you read this manual carefully before connecting your DVD &
Hi-Fi VCR Home Theater System and operating it for the first time.
Keep the manual in a safe place for future reference.

 2B80201A [E] COVER

24/2/03, 7:12 PM

1

Содержание DWM-3500

Страница 1: ...difficulties operating this product 1 800 813 3435 Weekdays 7 30 AM 4 00 PM Central Time Please Read This Manual Because DVD is a new technology we recommend that you read this manual carefully before connecting your DVD Hi Fi VCR Home Theater System and operating it for the first time Keep the manual in a safe place for future reference 2B80201A E COVER 24 2 03 7 12 PM 1 ...

Страница 2: ...essly approved in the instruction manual The user could lose the authority to operate this equipment if an unauthorized change or modification is made REGULATORY INFORMATION FCC Part 15 This product has been tested and found to comply with the limits for a Class B digital device pursuant to Part 15 of the FCC Rules These limits are designed to provide reasonable protection against harmful interfer...

Страница 3: ... NATIONAL ELECTRICAL CODE Ground Clamp Electric Service Equipment 14 Lightning Unplug this apparatus during lightning storms or when unused for long periods of time This will prevent damage to the product due to lightning and power line surges 1 Read These Instructions All the safety and operating instructions should be read before the product is operated 2 Follow All Instructions All operating an...

Страница 4: ...eplacement parts are required be sure the service technician has used replacement parts specified by the manufacturer or have the same characteristics as the original part Unauthorized substitutions may result in fire electric shock or other hazards 22 Safety Check Upon completion of any service or repairs to this product ask the service technician to perform safety checks to determine that the pr...

Страница 5: ... Chapter Track Skip E40 Selecting a DVD Menu E41 Selecting a Title Menu DVD E41 Title Search DVD E42 Chapter Search DVD E42 Time Search DVD E42 Time Search CD E43 Track Search CD E43 Fast Playback E44 Slow Motion Playback DVD E44 Still Picture Pause E44 Frame by Frame Advance Playback DVD E45 Picture Zoom DVD E45 Viewing from a Desired Camera Angle Multi Angle DVD E45 Normal Repeat Playback E46 De...

Страница 6: ...oofer cable Din 9 pin cable Front right speaker cable Black and Red Front left speaker cable Black and White Center speaker cable Black and Green Surround right speaker cable Black and Gray Surround left speaker cable Black and Blue PRECAUTIONS CAUTION The main unit and powered subwoofer must be placed in a well ventilated area Do not place any object on the top of the unit Do not block ventilatio...

Страница 7: ... Systems Inc Manufactured under license from Dolby Laboratories Dolby Pro Logic and the double D symbol are trademarks of Dolby Laboratories 7 d c PRESET buttons 8 Disc tray 9 OPEN CLOSE button 10 VOLUME control 11 PLAY button 12 STOP button 13 FL display 14 Remote sensor IR 15 EJECT button 16 CHANNEL buttons 17 REC button 18 AUDIO L R VIDEO IN jacks Rear Panel 1 DVD S Video output jack S VIDEO 2 ...

Страница 8: ... button E30 CLOCK COUNTER button E30 REC OTR Recording One touch Timer Recording button E31 33 37 TAPE SPEED button E31 33 37 TV VCR button E17 24 32 9 CLEAR CANCEL button E19 34 35 42 43 47 49 59 10 SETUP MENU button E17 19 22 26 34 36 52 59 61 62 11 Directional arrow buttons 4 a 5 b E17 20 22 26 31 34 36 41 43 45 49 51 59 CH Channel buttons E31 33 Tracking buttons E29 12 SURROUND button E21 13 P...

Страница 9: ...ow the steps below 1 In the chart below find the code corresponding to your brand of TV 2 While holding down TV CONTROL POWER enter the 2 digit code using the number buttons 0 9 then release TV CONTROL POWER The remote control is now set to operate your TV TV brands Code ADMIRAL 05 10 13 EMERSON 17 FISHER 03 GE 07 GOLD STAR 01 HITACHI 02 JVC 15 MAGNAVOX 08 MATSUSHITA 12 18 MITSUBISHI 14 PANASONIC ...

Страница 10: ...lat wires use a combiner having two 300 ohm inputs and one 75 ohm output Notes A clear picture will not be obtained by the main unit unless the antenna signal is good Connect the antenna to the main unit properly For better quality recording an indoor antenna or a telescopic antenna is not recommended The use of an outdoor type antenna is required If you are not sure about the connection please re...

Страница 11: ...se this connection set the TV s source selector to VIDEO Audio cables not supplied Video cable supplied Main unit TV 75 ohm coaxial cable supplied Basic TV Connections After you have connected the antenna to the main unit you must connect the main unit to the TV Below are 3 common methods of connecting your main unit to a TV Find the type of TV you are using and follow the connection diagram This ...

Страница 12: ...onnections Note You can ONLY watch DVD playback through the connections shown below S Video connection 1 Connect the DVD OUTPUT S VIDEO jack on the main unit to the S video input jack on the TV using the S video cable not supplied 2 If you use your TV s speaker connect the DVD VCR OUTPUT AUDIO L R jacks of the main unit to the audio left right input jacks on the TV using an audio cables not suppli...

Страница 13: ...CH 4 CH VIDEO AM LOOP AUDIO AUDIO OUT 6 CHANNEL L R IN VHF UHF ANT OUT TV DVD VCROUTPUT FM 75Ω VHF UHF IN ANT 3 CH 4 CH VIDEO AM LOOP AUDIO AUDIO OUT 6 CHANNEL L R IN VHF UHF ANT OUT TV DVD VCROUTPUT FM 75Ω VHF UHF IN ANT Allows Recording of nonscrambled channels Use of the programmable timer Recording of one channel while watching another Allows Recording of channels through the converter box scr...

Страница 14: ...r scrambled or unscrambled channel Using the programmable timer to record only the channel selected at the converter box 3 CH 4 CH VIDEO AM LOOP AUDIO AUDIO OUT 6 CHANNEL L R IN VHF UHF ANT OUT TV DVD VCROUTPUT FM 75Ω VHF UHF IN ANT A B 3 CH 4 CH VIDEO AM LOOP AUDIO AUDIO OUT 6 CHANNEL L R IN VHF UHF ANT OUT TV DVD VCROUTPUT FM 75Ω VHF UHF IN ANT A B A B switch Converter Descrambler Main unit Inco...

Страница 15: ... Black and Red Front right speaker Black and Green Center speaker Black and Blue Surround left speaker Black and Gray Surround right speaker FRONT CENTER L R SURROUND SPEAKERS 8Ω L R Main unit AUDIO OUT 6 CHANNEL Center speaker Front left speaker Front right speaker Black Red Black Red Black Red Black Red Black Red Surround left speaker Surround right speaker Powered subwoofer Black White Black Bl...

Страница 16: ...eter higher than ear level The powered subwoofer can be placed near the front speaker and not too far from the TV Front left speaker Surround left speaker Powered subwoofer Place it near the Front speaker Center speaker Front right speaker Surround right speaker Example To hang the speaker on a wall Example To mount the speaker with a stand Approximately 3 32 inch 2 5 mm Round head screw not suppl...

Страница 17: ...ntion to Section 820 40 of the NEC which provides guidelines for proper grounding and in particular specifies that the cable ground shall be connected to the grounding system of the building as close to the point of cable entry as practical Power Supply Main Unit and Powered Subwoofer Connect the power cord to a 120V AC 60Hz outlet This unit is equipped with a polarized plug If you have difficulty...

Страница 18: ...TO CLOCK set To correct the situation Preparation Turn ON the TV When a TV is connected with an audio video cable select the video input mode on the TV When a TV is connected only with an antenna cable set to the video channel 3 or 4 Then select VCR position with TV VCR Press VCR to select the VCR mode The VCR indicator on the front panel will light 1 Press SETUP MENU The MENU screen appears on th...

Страница 19: ... then press ENTER 4 5 ENTER MENU DAYLIGHT SAVING TIME ON OFF AUTO ON for manual setting forward one hour OFF for manual setting back one hour AUTO for automatic setting read XDS in the signal When you want to set the Daylight Saving Time manually on the first Sunday in April you set to ON and on the last Sunday in October you set to OFF Notes When shipped from factory the DAYLIGHT SAVING TIME opti...

Страница 20: ...K STANDARD TIME DAYLIGHT SAVING TIME ON OFF ON OFF 4 Press 4 or 5 to set the month then press ENTER 4 5 ENTER CANCEL MENU MONTH DAY YEAR TIME 1 SAT 2003 12 00AM 3 5 Set the day year and time as in step 4 4 5 ENTER CANCEL MENU MONTH DAY YEAR TIME 3 26 WED 2003 8 30AM 6 After setting the clock the screen turns gray for a moment then the time and date display on the TV screen for approximately 4 seco...

Страница 21: ... panel operation Press VCR DVD repeatedly to select the VCR or DVD function Press AM FM to select the Tuner function Adjusting the volume Rotate VOLUME on the front panel or press VOLUME or on the remote control The volume level appears on the FL display Vol 0 Vol 40 Note Set the TV s built in speaker volume to minimum VCR ÐVOLUME BASSBOOST DVD 4 5 AM FM INPUT SOUND POWER ENTER Adjusting the bass ...

Страница 22: ...decoding system that was developed to enhance the soundtracks of theatrical motion pictures with Dolby Surround All speakers sound but the surround left and right speakers are monophonic sound Other PCM CD MP3 etc The surround mode is set to 2 1 channel Front left and right speakers and Subwoofer Surr All discs are set to Dolby Pro Logic mode HALL When playing a program source which is not encoded...

Страница 23: ...test tone level is not the same from each speaker press 4 or 5 to adjust it while the speaker is activating F L F R 0 10 CENTER SURR R SURR L 10 10 10 Repeat steps 8 9 for other settings 11 Press SETUP MENU until the menu screen is cleared Adjusting the Speaker and Subwoofer Level 1 10 ENTER 3 4 6 7 4 5 2 5 8 1 Press SETUP MENU When the unit is in DVD mode and in the stop mode or disc is not inser...

Страница 24: ... time to 0ms If D1 D2 set the delay time as follows Difference between D1 and D2 Delay time 1 foot Approx 30 5cm 1ms 2 feet Approx 61cm 2ms 3 feet Approx 91 5cm 3ms 4 feet Approx 122cm 4ms 5 feet Approx 152 5cm 5ms D1 The distance from the front speaker D2 The distance from the center speaker D3 The distance from the surround speaker 9 Press ENTER CENTER DELAY and the selected delay time remain 10...

Страница 25: ... to 3 CH or 4 CH play back a prerecorded tape and tune the TV to receive a sharp color picture from the video cassette recorder Refer to your TV owner s manual for details Setting the Language You can choose from three different languages English Spanish and French for the on screen displays 1 Press SETUP MENU If you use the unit for the first time and press SETUP MENU instead of the main menu scr...

Страница 26: ...PEAKER SETUP TVGuardian SETUP 2 Press 4 or 5 to select CH SETUP then press ENTER 4 5 ENTER MENU MENU TIMER REC SET AUTO REPEAT ON OFF ON OFF SAP CH SETUP SYSTEM SETUP SPEAKER SETUP TVGuardian SETUP 3 Press 4 or 5 to select TV CATV 4 5 ENTER MENU CH SETUP TV CATV AUTO CH MEMORY ADD DELETE 4 Press ENTER to select the TV or CATV 4 5 ENTER MENU CH SETUP TV CATV AUTO CH MEMORY ADD DELETE The arrow indi...

Страница 27: ...delete other channel 5 Press SETUP MENU until the menu screen is cleared Noise Elimination When you don t want to receive a weak signal broadcast the Blue back screen can be obtained by selecting the NO NOISE BACKGROUND ON 1 Press SETUP MENU The MENU screen appears on the TV screen 4 5 ENTER MENU MENU TIMER REC SET AUTO REPEAT ON OFF ON OFF SAP CH SETUP SYSTEM SETUP SPEAKER SETUP TVGuardian SETUP ...

Страница 28: ...JECT on the unit VIDEO IN L AUDIO IN R POWER VOLUME EJECT REC CHANNEL AM FM VCR DVD PRESET OPEN CLOSE STOP PLAY q EJECT 2 Remove the cassette tape Automatic tape eject The built in VCR will automatically rewind the tape when the tape has ended And when the tape is rewinded to its beginning the cassette tape will be ejected automatically To prevent accidental erasure Remove the erase prevention tab...

Страница 29: ...roximately 4 seconds To forward the tape press c c will appear on the TV screen for approximately 4 seconds 3 To stop the tape winding press n To switch to playback directly without STOP press a Forward Reverse picture search mode When the tape is being winded you can switch to picture search mode see next page To do this press d or c and hold it down The unit will resume the tape winding as soon ...

Страница 30: ...vate automatic tracking again AUTO TR will appear MANUAL TR AUTO TR Notes The audio output is muted during SPEED SEARCH STILL FRAME ADVANCE and SLOW MOTION During picture search mode there will be noise bars which are caused by the system The Special Playback will automatically change to playback after approx 5 minutes to protect the video tape against excessive wear Repeat playback The entire vid...

Страница 31: ...lank sections of the tape When you rewind fast forward or play tapes through blank sections the counter stops Video Index Search System This function enables you to locate the beginning of any recording made on the VCR Recording an INDEX mark The Index Search function automatically records an INDEX mark on the tape whenever a recording is initiated CH 001 INDEX Index Search n Stop e f Press e or f...

Страница 32: ...2 10 69 Press 2 digits in order Example Press 2 2 for 22 In the CATV mode 1 9 Press 0 twice and then 1 9 as required Example To select 2 press 0 0 2 10 12 Press 0 first and then the remaining 2 digits in order from left to right Example Press 0 1 2 for 12 13 99 Press 2 digits in order Example Press 2 2 for 22 100 125 Press the 3 digits in order Example Press 1 1 0 for 110 CH 110 VHF UHF CATV CHANN...

Страница 33: ...u want to watch by using the TV channel selector Note Some CATV hookups do not permit viewing one channel while recording another see pages E12 and E13 To display VCR operation status Press DISPLAY The clock day of the week and more information will be indicated While watching TV Example CH 125 8 47AM MON STEREO SAP 00 00 00 SP REAL TIME COUNTER DAY OF THE WEEK CLOCK TAPE SPEED CHANNEL STEREO AND ...

Страница 34: ...4 Press the number buttons 0 9 or CH to select the channel to be recorded CH 125 5 Press REC OTR 6 Press REC OTR again to stop recording after 30 minutes Each additional press of REC OTR will increase recording time as shown in the chart below up to a maximum of 5 hours The OTR and recording time will appear on the TV screen for approximately 4 seconds And REC will keep blinking on the FL display ...

Страница 35: ...5SLP 7 Press TIMER REC The clock symbol will appear on the FL display and the VCR stands by for recording At the same time VCR mode will change to DVD mode automatically You can use DVD even if the VCR is in the Timer recording mode If you do not use the DVD turn the power off The timer recording will start at 5 seconds before the time you predetermined Notes If the clock symbol does not appear on...

Страница 36: ...nuously until the recording is canceled or the tape reaches the end During timer recording the automatic rewinding mechanism does not function Confirmation Cancellation of the Timer recording 1 If the Timer has been activated press TIMER REC to deactivate the Timer The clock symbol on the FL display will disappear 2 Press VCR to change to VCR mode 3 To confirm Timer program On step 2 on the previo...

Страница 37: ... the chart below OUTPUT SOUND HEARD ON BOTH SELECTION SPEAKERS STEREO STEREO L ch LEFT CHANNEL AUDIO R ch RIGHT CHANNEL AUDIO MONO MONO AUDIO OUT Notes When playing back a tape that is not recorded in Hi Fi stereo mode the audio will automatically be monaural When listening to a VHS Hi Fi video tape or MTS broadcast through the VHF UHF jack Audio Video cord not connected the sound will be monaural...

Страница 38: ...cording standby mode k REC OTR TAPESPEED INPUT 5 Press the play button on the playback VCR or CAMCORDER then press the pause button Playback standby mode 6 Release the recording pause and the playback still simultaneously to begin the duplicating process Recording a DVD CD Disc You can record disc material in DVD Audio CD etc onto a Video tape with this VCR Preparation Turn ON the TV and select th...

Страница 39: ...Multiple languages Multi language subtitles Multi angle Multi aspect Region number Closed caption Handling Storing and Cleaning Discs Fingerprints and dust should be carefully wiped from the signal surface of the disc glossy side with a soft cloth Wipe in a straight motion from the center to the outside of the disc Never use chemicals such as record cleaning sprays antistatic sprays or fluids benz...

Страница 40: ...layback a appears Example Notes If the disc is loaded with the label side downward and it is a single sided disc or if a badly scratched disc is loaded Err Error appears on the FL display and Incorrect Disc appears on the TV screen If this occurs load the disc correctly or replace the disc In some discs even if 4 3 is selected the black bands may remain on the screen If a DVD disc menu screen appe...

Страница 41: ...hapter or track e appears on the TV screen A chapter or track is skipped each time the button is pressed Skipping backward Press f during playback to skip back to the beginning of the chapter or track currently play f appears on the TV screen Press the button again immediately to skip back to the beginning of the previous chapter or track Note You can skip only through the chapters not over the ti...

Страница 42: ...nu DVD Notes The operation may differ depending on the disc used Selecting a title may not be possible on some discs 1 Press TOP MENU while holding SHIFT down The title menu will appear if the disc contains a title menu 2 Press 4 5 b or a or the number buttons to select the desired title 3 Press ENTER or a The selected title playback starts Important Note may appear on the TV screen during operati...

Страница 43: ...ime Title Chapter Enter 0 9 Clear Jump 2 Press 4 or 5 to select the Chapter 3 Press the number button s to enter the chapter number Example To select Chapter No 3 press 3 To select Chapter No 10 press 1 then 0 To select Chapter No 24 press 2 then 4 Note If you make a mistake press CLEAR CANCEL 4 Press ENTER Playback starts from the selected chapter Time Search DVD 1 Press JUMP while holding SHIFT ...

Страница 44: ...rch CD 1 Press JUMP while holding SHIFT down during playback or in the stop mode The Jump screen appears on the TV screen Jump Time Track Enter 0 9 Clear Jump 2 Press 4 or 5 to select the Track 3 Press the number button s to enter the track Example To select Track No 3 press 3 To select Track No 10 press 1 then 0 To select Track No 24 press 2 then 4 Note If you make a mistake press CLEAR CANCEL 4 ...

Страница 45: ...he sound is muted during fast playback in DVD Slow Motion Playback DVD Forward slow playback Press SLOW repeatedly to select the forward slow speed playback Each time the button is pressed the speed is changed 1 2 v 1 4 v 1 6 v 1 7 4 steps Press a to return to normal playback Notes The sound is muted during slow motion playback Slow motion playback is operated forward only Important Note may appea...

Страница 46: ...oom point 2 Press ZOOM while holding SHIFT down to select Off to return to the original screen Note Picture Zoom may not work on some discs Viewing from a Desired Camera Angle Multi Angle DVD Some DVD video discs may contain scenes which have been shot simultaneously from a number of different camera angles The jacket or case of discs that are recorded with angles will be marked Example Note The r...

Страница 47: ... Track Repeat of track being played Repeat All Repeat all tracks Repeat Off Normal playback mode The selected repeat mode may work 4 Press PLAY MODE while holding SHIFT down again to close the screen Note In case of stop mode press a to start Repeat playback Designated Range Repeat Playback A B Repeat 1 Press A B REPEAT while holding SHIFT down during playback at the beginning of the section you w...

Страница 48: ...CANCEL To quit the Play Mode screen press PLAY MODE while holding SHIFT down 4 Press 5 to move the highlighted box down Example Play Mode Program Repeat 1 9 4 7 10 2 5 8 11 3 6 9 12 Off Enter 0 9 Clear Play Mode Clear Program Playback 5 Repeat steps 3 4 above to select another track 6 Press 4 5 b or a to select Program Playback on the TV screen 7 Press ENTER Program playback starts in the programm...

Страница 49: ... 2 3 Spa If Off appears press the button again Off 2 Press SUBTITLE while holding SHIFT down repeatedly until the desired subtitle language appears on the TV screen Example 1 3 Eng After few seconds disappears Selecting Audio Soundtrack Language Multi Language DVD This operation works only with discs on which multiple audio soundtrack languages are recorded 1 Press AUDIO while holding SHIFT down d...

Страница 50: ...er Clear Marker 2 Select the blank Marker using 4 or 5 then press ENTER at the desired scene Example Marker 2 Marker 1 00 27 54 Marker 3 Enter Clear Marker Up to 3 scenes can be selected Repeat this procedure to set the other 2 scenes 3 To quit the Marker screen press MARKER while holding SHIFT down Returning to the Scenes 1 Press MARKER while holding SHIFT down during playback or stop mode Exampl...

Страница 51: ...requency and the bit rate WMA version 7 and 8 32kHz 48kbps 44 1kHz 48kbps 192kbps 48kHz 128kbps 192kbps DRM files cannot be played back The file recorded by mono 48kHz 48 kbps is not avaiable to this unit Microsoft Windows Media and Windows Logo are trademarks or registered trademarks of Microsoft Corporation in both the United States and other countries LIMITATIONS ON DISPLAY The maximum number f...

Страница 52: ...k Repeat of track file being played Repeat All Repeat all tracks files Repeat Off Normal playback mode The selected repeat mode may work 4 Press PLAY MODE while holding SHIFT down again to close the screen The file list appears on the TV screen with operation display Repeat Track or Repeat All In case of stop mode press a to start Repeat Playback To resume normal playback select Repeat Off Note Re...

Страница 53: ...to the next or previous picture To stop the playback press n The thumbnail pictures appear on the TV screen Picture Zoom Please see page E45 KODAK and Picture CD are registered trademarks of Eastman Kodak Company To start the slide show Preparation 1 If the disc loaded remove the disc first 2 Set JPEG Interval setting to 5 Seconds 10 Seconds or 15 Seconds see page E57 1 Load the disc with the labe...

Страница 54: ...P MENU while holding SHIFT down the file list appears If the disc is mixed with MP3 WMA and JPEG files 1 Press o a p or b to move the highlighted box to the desired file 2 Press ENTER to start playback or slide show If you start from the MP3 or WMA file the unit plays both MP3 and WMA files But the unit skips the JPEG files automatically If you start from the JPEG file the unit plays the JPEG file...

Страница 55: ...ademarks of Principle Solutions Inc Set the TVG MODE to ON Mode TOLERANT MODERATE STRICT ENTER 3 5 7 8 9 4 5 2 4 6 8 9 1 10 1 Press SETUP MENU repeatedly until the MENU screen appears on the TV screen MENU TIMER REC SET AUTO REPEAT ON OFF ON OFF SAP CH SETUP SYSTEM SETUP SPEAKER SETUP TVGuardian SETUP 2 Press 4 or 5 to select TVGuardian SETUP 3 Press ENTER The TVGuardian SETUP screen appears on th...

Страница 56: ...are displayed with a suitable replacement word substituted for the foul language and audio is muted for the foul language CONTINUOUS You can see all captions whether or not any foul language was detected But like the ON MUTE mode captions are displayed with a suitable replacement word substituted for the foul language and audio is muted for the foul language OFF You cannot see captions Whenever Fo...

Страница 57: ...e in the AUDIO setting When the unit selects the same language as the AUDIO the subtitles will not appear during playback When you do not use the same language as the AUDIO the subtitles will appear during playback Off Subtitles do not appear 8 Press SETUP MENU or RETURN to close the screen INITIAL SETTINGS Notes In this instruction manual the language in on screen display is English If you change...

Страница 58: ...close the screen Cut off Cut off 4 3 Letterbox Select when a conventional TV set is connected When the wide screen disc is played back the black bands appear at the top and bottom of screen 4 3 Panscan Select when a conventional TV set is connected When the wide screen disc is played back it displays pictures cropped to fill to your TV screen The left and right edges are cut off 16 9 Wide screen S...

Страница 59: ...ontrol 4 Press a or ENTER The submenu Std and TV appears 5 Press 4 or 5 to select your desired sound type Language Picture Parental Other Sound DRC Std Std TV Std Normally set to this position TV When listen to the DVD disc sound using TV s speaker connecting the 75 ohm coaxial cable see page E10 select this submenu TV 6 Press ENTER 7 Press SETUP MENU or RETURN to close the screen Notes The DRC fu...

Страница 60: ...parental lock settings Make sure this function works with your DVD video discs Setting Parental Some discs are specified not suitable for children Such discs can be limited not to play back with the unit 1 Press SETUP MENU in the stop mode or No disc The setup screen appears Language Picture Parental Other Sound 2 Press a to select Parental 3 Press 5 or ENTER The Parental screen Password and Paren...

Страница 61: ...ian 2425 Thai 3018 Bihari 1218 Hungarian 1831 Oriya 2528 Tibetan 1225 Breton 1228 Icelandic 1929 Panjabi 2611 Tigrinya 3019 Bulgarian 1217 Indonesian 1924 Pashto Pushto 2629 Tonga 3025 Burmese 2335 Interlingua 1911 Persian 1611 Turkish 3028 Byelorussian 1215 Irish 1711 Polish 2622 Turkmen 3021 Cambodian 2123 Italian 1930 Portuguese 2630 Twi 3033 Catalan 1311 Japanese 2011 Quechua 2731 Ukrainian 31...

Страница 62: ...ns Up to 24 FM and 12 AM stations can be preset Automatic presetting APT 1 Press AM FM 2 Press SETUP MENU for at least 3 seconds and FM and AM blink The automatic tuning mode is set and automatic presetting begins from the low end of the FM band to the AM band When 24 FM or 12 AM stations have been preset or the high end of the band is reached automatic presetting stops disappears and the station ...

Страница 63: ...add more preset stations When presetting a new station the previous preset station is cleared Listening to Preset Stations 1 Press AM FM to select FM or AM 2 Press PRESET or briefly to select the desired channel If using the number buttons press the number button s then press ENTER Example To select preset number 3 press 0 3 then ENTER To select preset number 12 press 1 2 then ENTER Note Usually w...

Страница 64: ...ads See page E65 Use Tracking for manual tracking adjustment while tape is playing See page E29 Load a playable disc Check the disc logo type color system and regional code See page E38 Insert a tape or disc See page E27 or E39 Load a playable disc Check the disc type color system and regional code See page E38 Place the disc with the playback side down Place the disc on the disc tray correctly in...

Страница 65: ... Clock Setting on page E19 Press TIMER REC to enable timer Timer recording indicator appears on the FL display Reprogram timer See Timer Recording on pages E34 and E35 Reprogram timer and turn the unit off to enable timer This is the normal indication that the the unit is in timer mode 1 Disconnect the power cord See page E5 2 Reconnect the power cord 3 Resume operation POSSIBLE CAUSE The remote c...

Страница 66: ...tremely snowy If this is the case use a high quality head cleaning system or have them cleaned professionally Video head clogging Good Picture Snowy Picture Video head cleaning is needed when the playback picture becomes unclear This signifies that the heads are getting dirty and can occur when playing poor quality or damaged tapes If the heads require cleaning use a equivalent high quality chemic...

Страница 67: ...DIO INPUT RCA 8 dB 50 kΩ ANTENNA INPUT Antenna or CATV input 75 Ω Outputs S VIDEO OUT Y 1 0 Vp p 75 Ω C 0 286 Vp p 75 Ω COMPONENT VIDEO OUT Y 1 0 Vp p 75 Ω PB 0 7 Vp p 75 Ω PR 0 7 Vp p 75 Ω AUDIO OUT RCA 8 dB 1 kΩ VIDEO OUT RCA 1 0 Vp p 75 Ω AUDIO OUT 6 CHANNEL DIN 9 pin RF OUT Channel 3 or 4 Powered Subwoofer ASX 3500 Subwoofer Continuous minimum sine wave RMS power output into 6 ohms at 70 Hz wi...

Страница 68: ...2 This warranty shall not apply to the cabinet or cosmetic parts broken or damaged video heads batteries or routine maintenance 3 This warranty does not apply to uncrating setup installation removal of the product for repair or reinstallation of the product after repair 4 This warranty does not apply to repairs or replacements necessitated by any cause beyond the control of SANYO including but not...

Отзывы: