background image

25

26

SETTINGS MENU (Continued)

Setup

SETTINGS MENU (Continued)

Setup (continued)

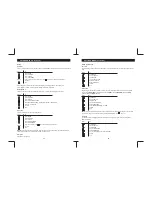
Flash Time

Depending on the telephone system, you may need to change the Flash time to match the system.
There are 3 

FLASH TIME

 built into this telephone: 

SHORT

 (100ms), 

MEDIUM

 (300ms), 

LONG


(600ms). Default is 

LONG

 (600ms).

Press

To

enter MENU
scroll to SETUP
enter SETUP
scroll to FLASH TIME
enter FLASH TIME
select SHORT, MEDIUM, or LONG
confirm
exit

MENU

MENU

MENU

MENU

Unit name

You may assign a name to your handset. Default is "HANDSET" and the number registered to the base.

Press

To

enter MENU
scroll to SETUP
enter SETUP
enter UNIT NAME
input a name (up to 8 characters), use        to delete a character if necessary
confirm
exit

After completion you will see the name in the display. For example ALICE. The display will
show “ALICE 1” where “1” is the handset number registered in the base.

key 2-9

MENU

MENU

MENU

MENU

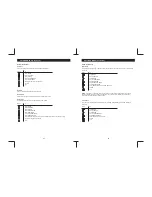
There are 3 display languages built into this telephone. They are English, French, and Spanish. 
Default is English.

Language

Press

To

enter MENU
scroll to SETUP
enter SETUP
scroll to LANGUAGE
enter LANGUAGE
scroll to the language you want to display
confirm
exit

MENU

MENU

MENU

MENU

Dial mode

Please refer to page 12.

NOTE:

 when area  code is programmed, the area code will not be included in the telephone number

shown in the display if the incoming call is from the same area.

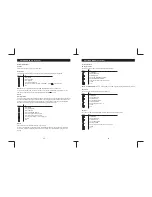
Backlight time

You may select how long the backlight will stay lit (5 - 20 seconds).


Default is 10 seconds.


Press

To

enter MENU
scroll to SETUP
enter SETUP
scroll to BACKLIGHT TIME
select BACKLIGHT TIME, the display will show “10 SECOND”
select 5 - 20 seconds
confirm
exit

MENU

MENU

MENU

MENU

Auto talk

You may choose if the handset will auto answer a call or not when you lift it from the base. Default is 
OFF. 

Press

To

enter MENU
scroll to SETUP
enter SETUP
scroll to AUTO TALK
enter AUTO TALK
select ON or OFF
confirm
exit

MENU

MENU

MENU

MENU

CLEAR

MUTE

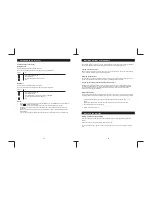
You may set the area code to your telephone.

Area code

Press

To

enter MENU
scroll to SETUP
enter SETUP
scroll to AREA CODE
select AREA CODE
input code number, use         to delete a number if necessary
confirm
exit

MENU

CLEAR

MUTE

MENU

key 0-9

MENU

MENU

NOTE:

 If you are too far away from the base or the base is off, the Set Flash Time may not succeed. 

You will hear an error tone and the display will show "ERROR". Press           to exit.

Содержание CLT-D6220

Страница 1: ...nced Cordless Telephone 6 0 www sanyo ca This picture depicts dual handset model CLT D6222 Dual Handset Model Triple Handset Model www sanyo ca SANYO Canada Inc PAGE VOL CID FLASH CLEAR BACK MENU OK MUTE 1 4 TONE 7 GHI PQRS 0 2 3 5 6 9 8 ABC DEF JKL MNO TUV WXYZ FORMAT PAUSE INT R VOL CID FLASH CLEAR BACK MENU OK MUTE 1 4 TONE 7 GHI PQRS 0 2 3 5 6 9 8 ABC DEF JKL MNO TUV WXYZ FORMAT PAUSE INT R ...

Страница 2: ...t the volume Page Handset locator Intercom Call transfer 3 Way conference Caller ID features Voice mail indicator New entry Edit record REPLACE THE BATTERY RECYCLING NICKEL METAL HYDRIDE BATTERIES POWER FAILURE HEADSET JACK DEFAULT SETTING TROUBLE SHOOTING MAINTENANCE TECHNICAL INFORMATION SANYO COMFORT WARRANTY SOS HELP LINE MAXIMIZE BATTERY PERFORMANCE 23 23 23 24 24 25 25 25 25 25 26 26 26 27 2...

Страница 3: ...t place light candles cigarettes cigars etc on the telephone 13 14 15 16 17 A B C D E 18 19 20 Never touch uninsulated telephone wires or terminals unless the telephone line has been disconnected at the network interface Never install or modify telephone wiring during a lightning storm Never install telephone jacks in wet locations unless the jack is specifically designed for wet locations Use cau...

Страница 4: ...ation and fading of the lettering on the handset keypad Discoloration or fading will have no effect on the telephone performance Connect the AC adaptor to a wall outlet that receives power continuously Do not connect it to a switched outlet Away from electrical appliances such as TV radio or personal computer In a HIGH and CENTRAL location with no obstructions 6 UNPACKING Base Station Handset Tele...

Страница 5: ...lace an outgoing call Microphone FLASH BACK Button Works like a temporary hook switch Use to access special telephone company services call waiting for example Press in menu mode will go back one step INTERCOM FORMAT Button Press to page or intercom another handset registered to the same base unit Press to format area code Long distance numbers when reviewing Caller ID numbers Base station Contact...

Страница 6: ...on the base station cradle the incoming ring will not sound CAUTION Use only the specified battery Do not remove the battery from the handset to charge Never throw the battery into a fire disassemble it or heat it Do not remove or damage the battery casing Remove the battery if would not use the phone for over 30 days Place the handset on the base station for 15 hours The indicator in base will li...

Страница 7: ...mplete the registration within 1 minute Dial mode Depending on the telephone system you may need to set the dial mode TONE or PULSE to match Default is TONE If you are not sure the dialing system contact your local telephone company Place the handset close to the base station The antenna icon in the display should appear 1 Press To enter MENU scroll to SETUP enter SETUP scroll to REGISTER enter RE...

Страница 8: ...ng in the menu After you get the dial tone dial the number The number you dialed will be shown in the display Press or place the handset back on the base station to hang up The indicator in the base station will light Or You may pre dial the number before you press or 1 Dial the number The number you dialed will be shown in the display 2 Press or 3 Press or place the handset back on the base stati...

Страница 9: ...use counts as one digit 2 3 5 Press to confirm If the input name already exists the display will show OVERWRITE If you want to overwrite press again Otherwise press to exit NOTE Press to confirm The display will show INPUT NUMBER CLEAR MUTE Back If you want to input a space press 0 once If you make an error inputting a name of number press to go to the previous digit You may then re enter the corr...

Страница 10: ... FLASH FLASH FLASH FLASH FLASH FLASH FEATURES Continued To insert a pause You may insert a 3 second pause between two digits for example after 9 to get an outside line in a PBX system Press after the digit To dial a number stored in the memory 1 2 3 Press Press to scroll to the location or input the first letter of the desire name and then press to go to the location start with the first letter Pr...

Страница 11: ... play the PAGE music If you don t want to wait for the other handset to answer press On the receiving handset to accept the transfer and talk to the outside caller press or Or simply pick up the handset from the cradle if the AUTO TALK is set to ON INT INT INT INT INT INT Handsfree speaker Your telephone is equipped with a handsfree speaker in the handset Press the to dial or receive a call via sp...

Страница 12: ...ation can be received If the number is too long to display press to see the rest of the numbers Check with your telephone company regarding name service availability Review Call log Please refer to page 32 for how to review Call Log Name matching If a caller number matches one of the numbers in the phonebook the display will show the name information in the stored memory even if the incoming call ...

Страница 13: ...m or press to exit exit key 0 9 MENU MENU MENU MENU MENU MENU MENU MENU MENU MENU You can define a telephone number to one of the 5 number groups They are DEFAULT VIP FAMILY FRIEND and COLLEAGUE Each group can be programmed to have their own ring music Music group If you do not define a group for a number it will belong to the DEFAULT Press To enter MENU enter PHONEBOOK the first phonebook number ...

Страница 14: ...ANGUAGE enter LANGUAGE scroll to the language you want to display confirm exit MENU MENU MENU MENU Dial mode Please refer to page 12 NOTE when area code is programmed the area code will not be included in the telephone number shown in the display if the incoming call is from the same area Backlight time You may select how long the backlight will stay lit 5 20 seconds Default is 10 seconds Press To...

Страница 15: ...scroll to SETUP enter SETUP scroll to REGISTER enter REGISTER scroll to SELECT BASE enter SELECT BASE select BASE 1 BASE 2 or AUTO SELECT confirm exit NOTE If the base you selected is off or out of range an error tone will sound from the handset and the antenna icon in the display will disappear You have to select another base with power Otherwise you cannot make or receive calls MENU MENU MENU ME...

Страница 16: ...l to PROFILE enter PROFILE scroll to PAGE TONE enter PAGE TONE scroll to select melody 1 4 confirm exit You can select KEY TONE KEY MUSIC or KEY TONE OFF Default is key tone Key tone Press To enter MENU scroll to PROFILE enter PROFILE scroll to KEY TONE enter KEY TONE scroll to select tone select music or select off confirm exit There are 6 ringer volume levels for the handset Default is 5 HS ring...

Страница 17: ...n the display will be ON when you select 1 16 hours MENU MENU MENU MENU MENU MENU MENU MENU MENU MENU MENU MENU MENU MENU MENU There is MISSED CALL RECEIVED CALL and DIALED CALL in the CALL LOG They share a total of 60 numbers in the memory You must subscribe to a Caller ID service provided by the telephone company Call log To check the CALL LOG Press To enter MENU scroll to CALL LOG enter CALL LO...

Страница 18: ...ore initial use of your new battery charge it for 15 hours continuously The proper initial charging is very important to maximize the battery performance Keep the contacts clean You can never fully recharge the battery if the contacts are dirty Clean all the contacts two at the bottom of the handset and two in the base cradle periodically using a soft cloth Do not replace the handset in the base a...

Страница 19: ...that recycles Ni MH batteries Call 1 800 822 8837 or go to www rbrc ca POWER FAILURE During the period that the power is off you will not be able to make or receive calls with the telephone HEADSET JACK Headset connection Headset not included For hands free conversation connect the headset not included to the HEADSET jack The handset earpiece and microphone are disabled when the headset is connect...

Страница 20: ... 12 to register the handset again AC adaptor may not be plugged into the wall outlet or base station Telephone line may not be connected Handset battery may be extremely low When the battery icon is empty recharge the battery Handset may be too far from the base station Move closer Base station may be too close to electrical equipment Try another location Handset may be too close to large metal ob...

Страница 21: ...ue to product set up and installation f Adjustments that are outlined in the Operating Manual g Accessory items including antenna and batteries 40 TECHNICAL INFORMATION REN Number The Ringer Equivalence Number REN assigned to each terminal s device provides an indication of the maximum number of terminals allowed to be connected to a telephone interface The REN number of this phone is located on t...

Страница 22: ...ortation i Damage due to improper maintenance accident abuse misuse or negligence j Damage caused by lightning and power surges ORIGINAL RETAIL PURCHASER S RESPONSIBILITY You the original retail purchaser must present your original dated bill of sale together with this warranty to SANYO Canada Inc or to an authorized SANYO Service Depot when you make a claim under this warranty You the original re...

Отзывы: