background image

5

5

General Operation

-/- -

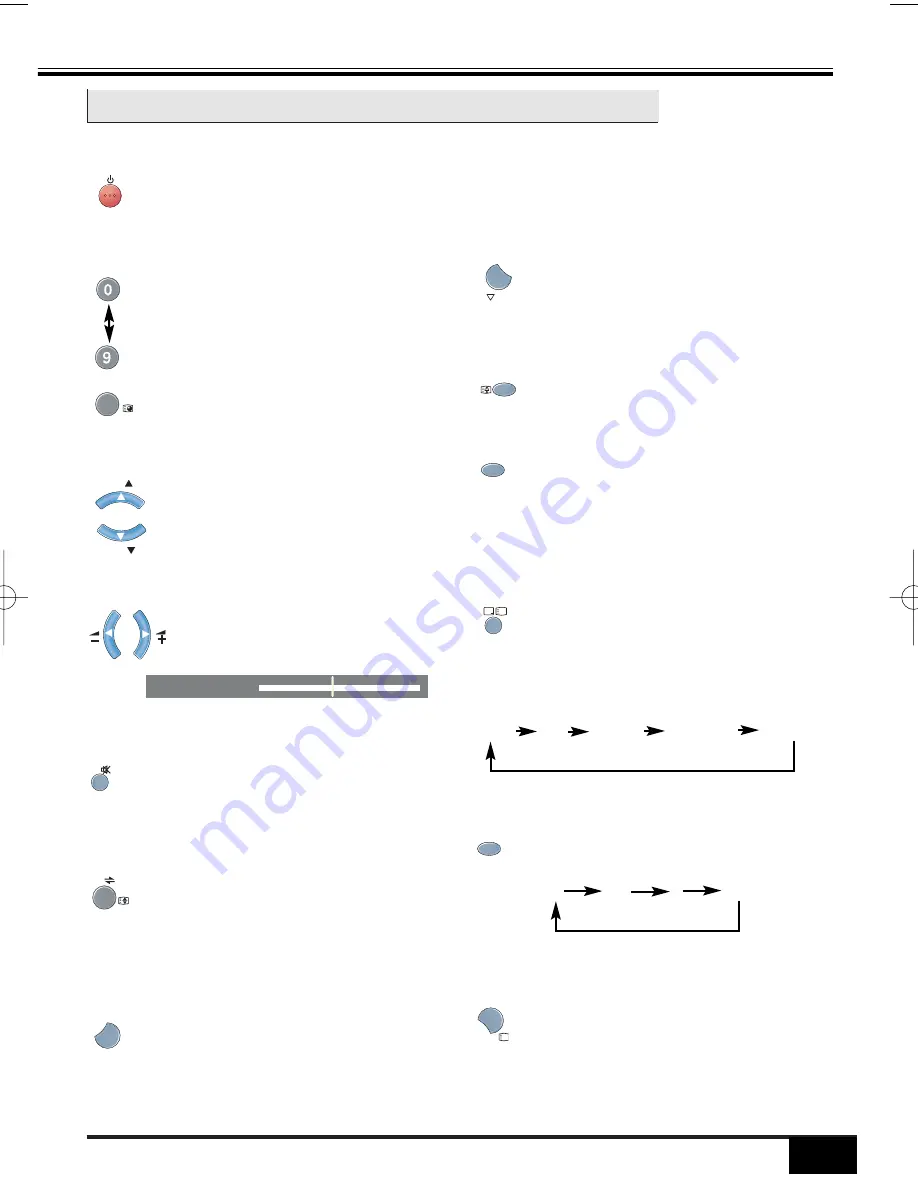
Press the 

Power ON/OFF

button to turn

on or off the TV set.  

General use

Power ON/OFF  (Stand by) 

Direct Programme Selector

■  

For direct access to select 
programmes using (0~9) 

NUMERIC 

button.

■ 

To select programmes position more 
than 9, press 

DIGIT 

button, and then 

insert programme position number one
by one. (Example programme position 
17, press digit, press 0, press 1, 
press 7.)  

-/- -

-/- -

-/- -

-/- -

Auto Shut Off Function

This TV set changes to the standby mode within
10 minutes after all broadcasts have ended.

To select next and previous pro-
gramme position and also operates as
up and down cursor. 

Programme Up  and Down

Volume Control

-/- -

CH

-/- -

CH

To increase and decrease Volume
Level, press 

or 

-

buttons.

-/- -

-/- -

Recall/Colour System

-/- -

?

To display the on screen indication, press

RECALL/COLOUR SYSTEM

button. 

This button also used to select colour sys-
tem mode, if the poor quality picture is
being received. 
By pressing the 

RECALL/COLOUR SYS-

TEM

button repeatedly, the colour system

mode will changed as follow; 

Sound Mute

-/- -

To mute the TV’s sound, press 

MUTE 

but-

ton, and to switch the sound back on,
press 

MUTE

button again, or press 

VOL-

UME +

or 

-

Alternate

-/- -

P

P

Press the ALTERNATE button, and the
programme position will alternately select
the previous position and the present
position.

Woofer/Bass Expander

-/- -

BASS

Press the 

Bass Expander/Woofer

but-

ton to switch this function ON or OFF.

Surround

-/- -

SURROUND

Press the 

SURROUND

button to switch

this function on SURROUND : 1, SUR-
ROUND : 2 or SURROUND : OFF posi-
tion.

AUTO

PAL

SECAM

NTSC4.43

NTSC3.58

Sound System

-/- -

S. SYS

If the sound that is being received is of poor
quality, change the sound system mode by
pressing 

SOUND SYSTEM

button.

BG

DK

I

M

STEREO (Nicam)/MONO 

By pressing the 

STEREO (NICAM)/MONO

button repeatedly, you can select the
sound track L/L (left), R/R (right), or L/R
from the equipment connected to the AV
terminal.

-/- -

A

B

VOLUME

VOLUME

30

30

Picture Mode

Select Picture Mode to suit picture type you
are watching, by pressing 

PICTURE MODE

button. Each time 

PICTURE MODE

button

is pressed, the picture setting changes as
follow; PERSONAL, DYNAMIC, NATURAL,
ECO, GAME.

-/- -

PICTURE

Sound Mode

Select Sound Mode to suit sound type you
are listening, by pressing 

SOUND MODE

button. Each time 

SOUND MODE

button is

pressed, the picture setting changes as
follow; PERSONAL, MUSIC, TALK, 
NORMAL.

-/- -

SOUND

i

Inst. Manual_C5GYC-C (MYS)  8/13/05  11:16 AM  Page 5

Содержание CA21KF3

Страница 1: ...Instruction Manual Colour Television FLAT SCREEN Multi System CATV Hyper band 251 Programmes With Automatic Tuning Surround Sound System Digital NICAM stereo CA21KF3 CA29KF31 CA29EF3D CP29EF3 ...

Страница 2: ...tem B G I D KK M M Channel Coverage VHF E2 E12 A2 A13 R1 R12 J1 J12 K1 K9 0 11 5A AUS 1 11 NZ UHF 21 69 A14 A69 J13 J62 28 69 AUS CATV S1 S41 X Y Z Z 1 Z 2 Aerial input impedance 75 Ω Audio output RMS Model CA29KF31 Main 5W 5W Woofer 10W max Model CA29EF3D CP29EF3 Main 10W 10W Model CA21KF3 Main 7W 7W Speakers Model CA21KF3 8 cm x 13 cm x 2 pcs Model CA29KF31 Main 8 cm x 13 cm x 2 pcs S Woofer ø 1...

Страница 3: ... AM SEARCHING ALL PROGRAMMES PLEASE WAIT ALL PROGRAMMES PLEASE WAIT AUTO SET UP COMPLETED HAPPY VIEWING THANK YOU FOR PURCHASING YOUR SANYO TV NOW I AM SEARCHING ALL PROGRAMMES PLEASE WAIT AUTO SET UP COMPLETED AUTO SET UP COMPLETED HAPPY VIEWING HAPPY VIEWING Model CA21KF3 CA29KF31 CH POWER TV AV MENU Programme UP DOWN CH TV AV MENU POWER L AUDIO R VIDEO AV2 INPUT MENU VOLUME L AUDIO R VIDEO MENU...

Страница 4: ...on PROGRAMME UP button VOLUME button TELETEXT TV button STEREO NICAM MONO button BASS EXPANDER WOOFER button Power ON OFF button MUTE button TIMER button ALTERNATE button SOUND MODE button VOLUME button PICTURE MODE button PROGRAMME DOWN button SURROUND button SOUND SYSTEM button MENU button Note When Remote Control doesn t work in normal or stable condition or it can t control operation of the TV...

Страница 5: ... to switch the sound back on press MUTE button again or press VOL UME or Alternate P P Press the ALTERNATE button and the programme position will alternately select the previous position and the present position Woofer Bass Expander BASS Press the Bass Expander Woofer but ton to switch this function ON or OFF Surround SURROUND Press the SURROUND button to switch this function on SURROUND 1 SUR ROU...

Страница 6: ...ur environ ment BRIGHTNESS brightness adjustment function 0 63 CONTRAST Contrast adjustment function 0 63 COLOUR Colour adjustment function 0 63 SHARPNESS Sharpness adjustment function 0 63 TINT Colour phase if NTSC equipment signal is detected 32 0 31 SKIN TONE The Skin Tone correction locally changes the hue of colours that match skin tones to the correct hue ON OFF PICTURE PRESET Enable to sele...

Страница 7: ...time whilst the TV is operating press the RECALL COLOUR SYSTEM button The OFF TIMER cancels when the TV set is turn off or if a power failure occurs TIMER TIMER OFF TIMER OFF TIMER OFF OFF ON TIMER ON TIMER 00 00 00 00 ON PROGRAM ON PROGRAM 27 27 3 3 Select a desired time by pressing VOLUME button On Timer The ON TIMER will switch on from the standby mode or change programme position when the sele...

Страница 8: ...CK CHILD LOCK OFF OFF AV3 AV3 DVD DVD TIMER TIMER 3 3 Press the MENU button repeatedly to return to the normal TV mode Child Lock This function is used to prevent small children from operating the TV with the front buttons of the TV set 1 1 Press the MENU button for main menu display Then press the PROGRAMME UP DOWN button to select SETTING 2 2 Press the VOLUME to enter to Setting Menu display The...

Страница 9: ...ess the MENU button After all receivable channels have been found and have been stored automatically the TV set automatically returns to programme position 1 SEMI tuning 2 2 Press the MENU button for main menu display Then press the PROGRAMME UP DOWN button to select PRESET 3 3 Press the VOLUME to enter to PRESET Menu display Press PROGRAMME UP DOWN button to select FREQUENCY PRESET PRESET FREQUEN...

Страница 10: ...Z 677 25 MHZ ON ON SKIP SKIP MEMORY MEMORY OFF OFF SIF IF 4 4 Select MEMORY to store your preferred channels by pressing PROGRAMME UP DOWN button and then press VOLUME button PRESET PRESET FREQUENCY FREQUENCY COLOUR SYSTEM COLOUR SYSTEM AUTO AUTO BG BG AFC AFC POSITION POSITION 7 AUTO TUNING AUTO TUNING 677 25 MHZ 677 25 MHZ ON ON SKIP SKIP MEMORY MEMORY OFF OFF OK OK SIF IF 5 5 Press the MENU but...

Страница 11: ... MENU SETTING SETTING PICTURE PICTURE SOUND SOUND PRESET PRESET SETTING SETTING TEXT TEXT LANGUAGE LANGUAGE ENGLISH ENGLISH OSD LANGUAGE OSD LANGUAGE ENGLISH ENGLISH CHILD LOCK CHILD LOCK OFF OFF AV3 AV3 DVD DVD TIMER TIMER 2 2 Press the VOLUME to enter Setting Menu display Press PROGRAMME UP DOWN button to select TEXT LANGUAGE Select the PERSIAN ENGLISH by pressing VOLUME button 3 3 Press the MEN...

Страница 12: ... To confirm the selected teletext brightness level switch to the teletext mode by pressing the TELETEXT TV button Sound Volume Control Only sound volume and muting can be controlled in the teletext mode However they are not displayed on the screen Operation Sub page access With a text page selected which has sub pages you may wish to read a known sub page number 1 1 Press the button in the teletex...

Страница 13: ...OLOUR SYSTEM button more than 2 seconds Cancelling of the Private Position 3 3 Then press MENU button HOTEL HOTEL START PROGRAM START PROGRAM MAX VOLUME MAX VOLUME HOTEL MODE HOTEL MODE ON ON 11 11 1 1 1 Press MENU button on the Remote Control and the PROGRAMME UP button on the Front Control in the same time to display HOTEL MODE 2 2 After complete all of the HOTEL MODE setting set the HOTEL MODE ...

Страница 14: ... product connect the audio output terminal of the video recorder to the L left audio input terminal of the TV set V I D E 0 R L Y CB CR MONITOR OUT AV1 INPUT AUDIO AUDIO S VIDEO MONO R L MONO AUDIO R L VIDEO AV3 DVD INPUT AUDIO input terminal right AV1 AUDIO input terminal left AV1 VIDEO input terminal AV1 S VIDEO input terminal AV1 AUDIO input terminal right AV3 AUDIO input terminal left AV3 COMP...

Страница 15: ...ft To Audio Output right DVD Player Connecting to a DVD player with S VIDEO terminal V I D E 0 R L AV1 INPUT AUDIO AUDIO S VIDEO MONO R L MON AV3 D INPUT To Audio Output right To Audio Output left S VIDEO cord DVD Player with S VIDEO terminal PLAY Connect it to the S VIDEO terminal you will enjoy high quality picture from the DVD player When watching a video program input from the S VIDEO terminal...

Страница 16: ...terminal on your DVD player to the component video input terminal of this product you will be able to enjoy higher quality picture than that received when common video terminal or S VIDEO terminal is used NOTE When a signal of Y Cb Cr Y Pb Pr is received the output signal from monitor output terminal will not be corresponding Y CB CR AUDIO R L MONO AU R L V PLAY Video DVD player DVD Player To watc...

Страница 17: ...gram select channel desired in TV mode To reproduce a video program input from the AV1 input terminal select AV1 Connecting to a AV Device with TV Antenna Jack AV device can be connected to the antenna jack of the TV set PLAY AV Device Antenna Jack To watch programs input from the antenna jack operate as follows 1 Start on the AV device to play the program 2 Select the channel position desired and...

Страница 18: ...ol Adjust FINE TUNING control Is the programme in colour WEAK PICTURE Check aerial connections on back of set Check aerial for broken wires Re orient aerial The following faults are not caused by the receiver GHOSTS Reflections of signals from mountains or high buildings will cause multiple images called Ghosts These abnormal conditions can be reduced to minimum by repositioning aerial or by insta...

Страница 19: ...Memo 19 19 ...

Страница 20: ...SANYO ELECTRIC Co Ltd Part No 1AA6P1P4851 C C5GYC C FB1 A ...

Отзывы: