


TowerSTOR TS4CT System Setup
Page 9
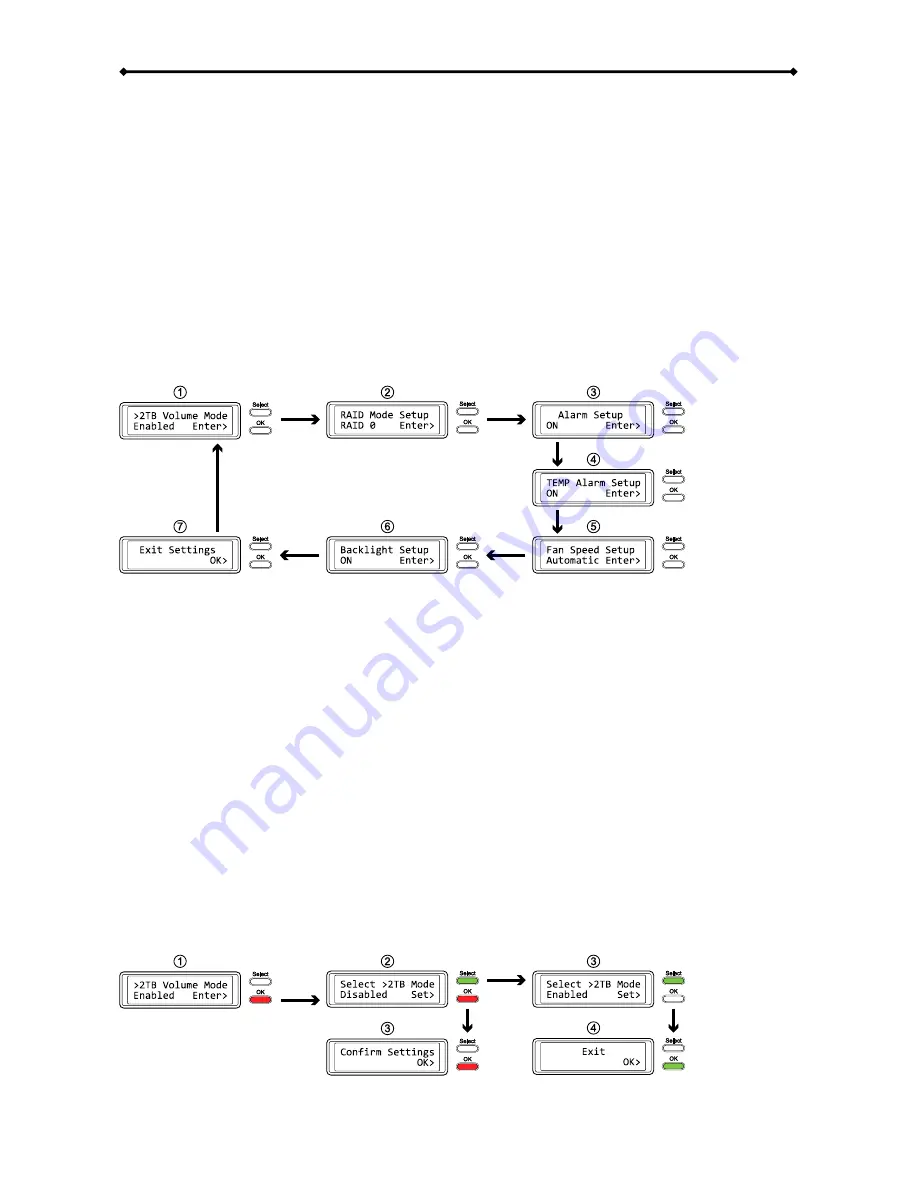
3.4 Settings
Press the [Select] button until the settings menu is selected and then press the [OK] button to enter
the configuration menu. You can now use the [Select] button to cycle through the different settings
and the [OK] button to further configure the device settings.
1. Option to enable or disable the support for large volumes in excess of 2TB.
2. Setup menu for the RAID settings.
3. Option to enable or disable the general alarm sound.
4. Option to enable or disable the temperature alarm sound.
5. Setup menu to define the fan speed of the smart fan.
6. Setup menu to define how long the backlight for the LCM display stays lit.
7. To exit the settings menu and return to the main menu.
3.4.1 >2TB
Volume
Mode
In order for the computer to access volumes larger than 2TB, both the hardware and Operating
System need to have the capacity to support large volumes (e.g.: WinVista 32bit/64bit or Mac OS
10.4 and above) or the >2TB option should be disabled.
x
[Enabled] Supports volumes in excess of 2TB. If the total storage capacity exceeds 2TB, older
Operating Systems will not be able to mount and access the drive.
x
[Disabled] Only supports volumes up to 2TB. If the total storage capacity exceeds 2TB, the
remaining storage space can not be accessed but on the other hand, older Operating Systems
are still able to use the drive.
Press the [OK] button to enter the setup menu and press the [Select] button to cycle through the
different options.
x
To exit the menu without changing any of the settings, press the [Select] button until you see
the Exit screen and then press the [OK] button.
x
To change the setting, press the [Select] button to choose your preferred mode, press the [OK]
button to select it and then press the [OK] button again to confirm the change.


