background image

    E

N


  S

P   


FR

USER GUIDE

Commercial Floor Machine
SC6010

SC6025

SC6030

SC6045

Safety instructions  . . . . . . . . . . . . . .2

Product view  . . . . . . . . . . . . . . . . . .3

Assembly  . . . . . . . . . . . . . . . . . . .4-5

Brush and pad driver installation  . . .5

General instructions . . . . . . . . . . . . .6

How to order replacement parts  . . .6

Operation . . . . . . . . . . . . . . . . . . . . .7

Maintenance  . . . . . . . . . . . . . . . . . .8

Troubleshooting . . . . . . . . . . . . . . . .9

Warranty  . . . . . . . . . . . . . . . . . . . .10

Service information  . . . . . . . . . . . .10

FlrMachineOG_1618912.qxp_FloorMachine  3/22/19  1:59 PM  Page 1

Содержание SC6010

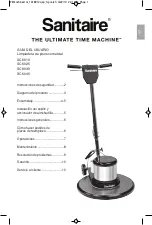
Страница 1: ...ety instructions 2 Product view 3 Assembly 4 5 Brush and pad driver installation 5 General instructions 6 How to order replacement parts 6 Operation 7 Maintenance 8 Troubleshooting 9 Warranty 10 Service information 10 FlrMachineOG_1618912 qxp_FloorMachine 3 22 19 1 59 PM Page 1 ...

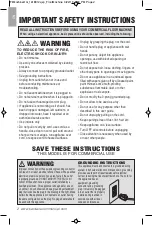
Страница 2: ...o not modify the 3 prong grounded plug Do not allow to be used as a toy Do not use for any purpose other than described in this user guide Do not unplug by pulling on the cord Keep openings free of dust lint hair etc Keep appliance on a level surface Turn OFF all controls before unplugging Close attention is necessary when used by or near other people WARNING SAVE THESE INSTRUCTIONS THIS MODEL IS ...

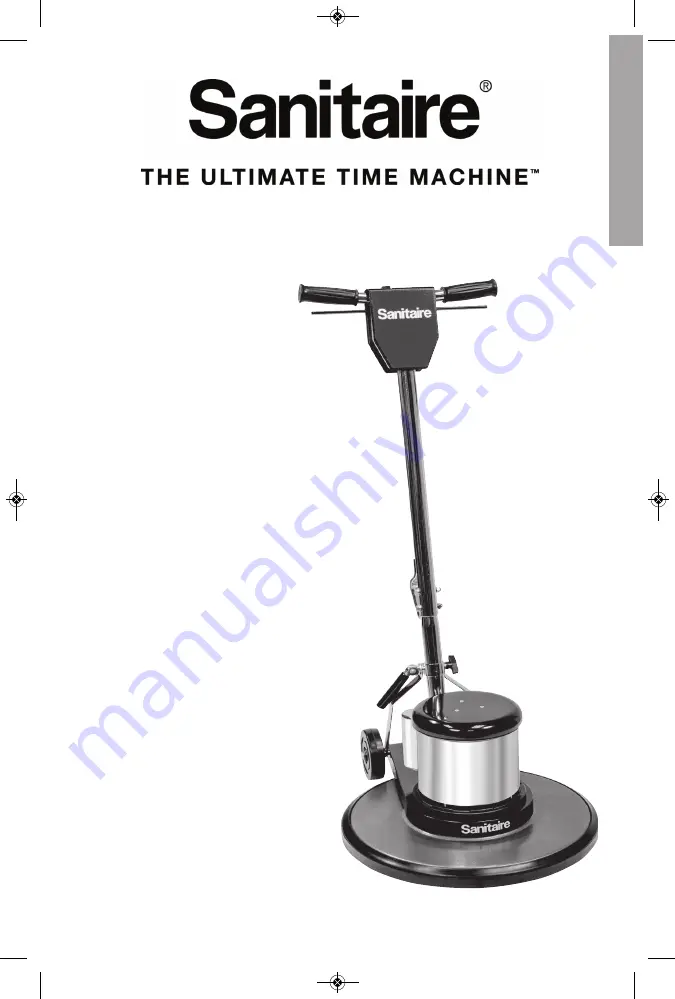
Страница 3: ...Switch trigger Lower handle Lock bolt Pad driver and pad brush or other attachments sold separately Bolts washers lock washers Motor cover Pad holder Cam release lever Cord wrap hook Power cord on rear Switch trigger Rear wheels 2 on rear FlrMachineOG_1618912 qxp_FloorMachine 3 22 19 1 59 PM Page 3 ...

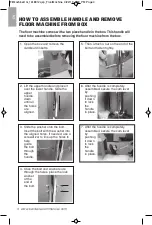
Страница 4: ...y pushing it down to lock the handle in place 2 Lift the upper handle and place it over the lower handle Slide the upper handle down until all the holes are aligned 7 After the handle is completely assembled secure the cam lever by pushing it down to lock the handle in place 3 Slide the washer onto the bolt Insert the bolt with the washer into the aligned holes If needed use a screwdriver to line ...

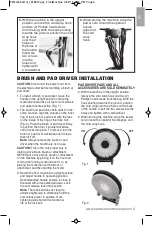
Страница 5: ...hen lift it off Note Always remove the brush or pad driver when the machine is not in use CAUTION This is the only proper way to install a drive block brush or attachment NEVER put a drive block brush or attachment on the machine by placing it on the floor and moving the running machine over it or by placing the machine over the block or attachment and then starting the motor 3 Return the floor ma...

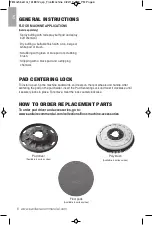
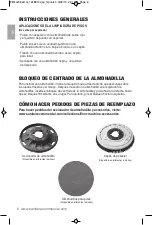
Страница 6: ...d a stripping chemical To install a pad tip the machine backwards so it rests on the rear wheels and handle After centering the pad on the pad holder insert the Pad Centering Lock and twist it clockwise until it securely locks in place To remove twist the lock counterclockwise To order pad driver and accessories go to www sanitairecommercial com collections floor machine accessories Floor pads Ava...

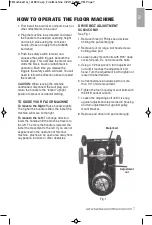
Страница 7: ...ht To move to the Left To change direction lower the handle until the machine travels to the left The more the handle is lowered the faster the movement to the left If you are not experienced in the operation of this floor machine practice in an open area away from any people furniture or other obstacles DRIVE BELT ADJUSTMENT SC6045 ONLY See Fig 1 1 Remove three 3 Phillips head screws holding the ...

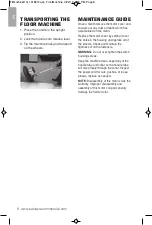
Страница 8: ...r tighten the switch housing screws Keep the machine clean especially at the handle tube and collar so the handle tube will move freely through the collar Inspect the power cord for cuts gashes or loose prongs replace as needed NOTE Disassembly of this motor voids the warranty Improper disassembly and assembly of this motor can permanently damage the field or rotor 1 Place the handle in the uprigh...

Страница 9: ... locate another circuit Machine will not start Circuit breaker is not reset Reset breaker Plug is broken or has a loose contact Replace Circuit breaker is defective or weak Replace Switch is defective Replace switch Rectifier is defective Replace rectifier Machine will not reach operating speed Unplug anything else other than the machine from the circuit or locate another circuit Motor runs but br...

Страница 10: ...r limitation of incidental or consequential damages so the above limitation or exclusion may not apply to you EXCEPTIONS AND EXCLUSIONS FROM THE TERMS OF THE LIMITED WARRANTY THIS WARRANTY IS EXCLUSIVE AND IN LIEU OF ANY OTHER WARRANTIES EITHER ORAL OR WRITTEN ANY IMPLIED WARRANTIES WHICH MAY ARISE BY OPERATION OF LAW INCLUDING THE IMPLIED WARRANTIES OF MERCHANTABILITY AND FITNESS FOR A PARTICULAR...

Страница 11: ...Diagrama del producto 3 Ensamblaje 4 5 Instalación del cepillo y accionador de almohadilla 5 Instrucciones generales 6 Cómo hacer pedidos de piezas de reemplazo 6 Operaciones 7 Mantenimiento 8 Resolución de problemas 9 Garantía 10 Servicio al cliente 10 FlrMachineOG_1618912 qxp_Spanish 3 22 19 2 01 PM Page 1 ...

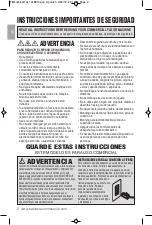
Страница 12: ...xicos o explosivos No modifique el enchufe conectado a tierra de 3 alambres No permita que se use como un juguete No lo utilice para ningún otro propósito distinto al descrito en esta guía del usuario No desconecte jalando el cable de alimentación Mantenga las aberturas libres de polvo pelusas cabello etc Mantenga el electrodoméstico sobre una superficie nivelada Apague todos los controles antes d...

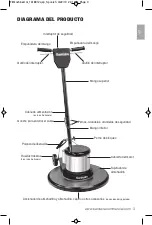
Страница 13: ...o Accionador de almohadilla y almohadilla cepillo u otros accesorios se venden por separado Pernos arandelas arandelas de seguridad Cubierta del motor Sujetador de almohadilla Palanca de liberación Gancho para enrollar el cable Cable de alimentación en la parte trasera Gatillo del interruptor Ruedas traseras 2 en la parte trasera SP FlrMachineOG_1618912 qxp_Spanish 3 22 19 2 01 PM Page 3 ...

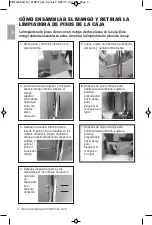
Страница 14: ...ear el mango en su lugar 2 Levante el mango superior y colóquelo sobre el mango inferior Deslice el mango superior hacia abajo hasta que todos los orificios estén alineados 7 Después de que el mango esté totalmente ensamblado sujete la palanca empujándola hacia abajo para bloquear el mango en su lugar 3 Deslice la arandela sobre el perno Inserte el perno con la arandela en los orificios alineados ...

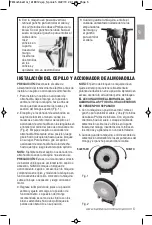
Страница 15: ...ta que tope luego levántelo para quitarlo NOTA Siempre retire el cepillo o accionador de almohadilla cuando la máquina no esté en uso PRECAUCIÓN Esta es la única manera correcta de instalar un bloque de accionamiento cepillo o accesorio NUNCA coloque un bloque de accionamiento cepillo o accesorio en la máquina colocándolo en el piso y moviendo la máquina en funcionamiento sobre él o colocando la m...

Страница 16: ...instalar una almohadilla incline la máquina hacia atrás de modo que descanse sobre las ruedas traseras y el mango Después de centrar la almohadilla en el sujetador de almohadillas inserte el bloqueo de centrado de la almohadilla y gírelo hacia la derecha hasta que se bloquee firmemente en su lugar Para quitarlo gire el bloqueo hacia la izquierda Para hacer pedidos del accionador de almohadilla y a...

Страница 17: ...o hasta que la máquina se mueva hacia la izquierda Entre más se baje el mango más rápido será el movimiento hacia la izquierda Si no tiene experiencia en la operación de esta máquina de pisos practique en un área abierta lejos de personas muebles u otros obstáculos AJUSTE DE LA BANDA DE ACCIONAMIENTO SOLO SC6045 Vea la Fig 1 1 Retire los tres 3 tornillos de cabeza Phillips que sujetan la empuñadur...

Страница 18: ...e la carcasa del interruptor Mantenga la máquina limpia especialmente en el tubo y collarín del mango de modo que el tubo del mango se mueva libremente por el collarín Inspeccione el cable de alimentación eléctrica para buscar cortes o alambres sueltos reemplace según sea necesario NOTA Desmontar este motor anulará la garantía El desmontaje y montaje incorrecto de este motor puede dañar permanente...

Страница 19: ...otro circuito La máquina no arranca El disyuntor de circuito no se ha restablecido Reestablezca el disyuntor El enchufe está roto o tiene un contacto suelto Reemplace El disyuntor de circuito está defectuoso o es débil Reemplace El interruptor está defectuoso Reemplace el interruptor El rectificador está defectuoso Reemplace el rectificador La máquina no alcanza la velocidad de operación Desconect...

Страница 20: ...producto y a su única discreción Sanitaire reparará o reemplazará gratuitamente con componentes o productos nuevos remanufacturados ligeramente usados o renovados a opción de Sanitaire durante un año a partir de la fecha de compra del comprador original cualquier pieza que esté defectuosa o que no funcione correctamente Consulte la información a continuación sobre Si su producto Sanitaire necesita...

Страница 21: ...urité 2 Vue du produit 3 Assemblage 4 5 Installation de la brosse et du disque d entraínement 5 Instructions générales 6 Comment commander des piéces de rechange 6 Fonctionnement 7 Entretien 8 Dépannage 9 Garantie 10 Service à la clientèle 10 FR FlrMachineOG_1618912 qxp_French 3 22 19 2 09 PM Page 1 ...

Страница 22: ...ant de peinture à l huile de diluant à peinture de produits antimites de poussières inflammables ou d autres vapeurs explosives ou toxiques Ne modifiez pas la fiche de mise à la terre à trois broches Ne permettez pas que l appareil soit utilisé comme s il s agissait d un jouet N utilisez pas cet appareil pour tout autre usage que ce qui est décrit dans ce manuel du propriétaire Ne débranchez pas e...

Страница 23: ...e Boulon de blocage Disque d entraînement et tampon brosse ou autres accessoires vendus séparément Boulons rondelles rondelles de blocage Couvercle du moteur Support de tampon Levier de dégagement du manche Crochet pour rembobiner le cordon Cordon d alimentation à l arrière Interrupteur à gâchette Roulettes arrière 2 à l arrière FR FlrMachineOG_1618912 qxp_French 3 22 19 2 09 PM Page 3 ...

Страница 24: ...rouiller le manche en place 2 Soulevez la partie supérieure du manche et positionnez la au dessus de la partie inférieure Glissez la partie supérieure du manche vers le bas jusqu à ce que les trous soient alignés 7 Une fois le manche assemblé poussez le levier du manche vers le bas pour verrouiller le manche en place 3 Glissez la rondelle sur le boulon Insérez le boulon avec la rondelle dans les t...

Страница 25: ...ontre puis soulevez les Remarque Retirez toujours la brosse ou le disque d entraînement lorsque l appareil n est pas utilisé ATTENTION C est la seule façon d installer adéquatement un bloc d entraînement une brosse ou un accessoire Ne mettez JAMAIS de bloc d entraînement de brosse ou d accessoire sur l appareil en le plaçant au sol et en passant l appareil sur celui ci ou en plaçant l appareil sur...

Страница 26: ...pon inclinez l appareil vers l arrière afin qu il repose sur les roulettes arrière et sur la poignée Après avoir centré le tampon sur le support de tampon insérez la goupille de centrage du tampon et tournez la dans le sens des aiguilles d une montre pour la verrouiller en place Tournez la goupille dans le sens inverse des aiguilles d une montre pour la retirer Pour commander un disque d entraînem...

Страница 27: ...la gauche Plus la poignée est abaissée et plus le déplacement sera rapide sur la gauche Si vous utilisez une machine à planchers pour la première fois nous vous invitons à vous pratiquer dans un endroit ouvert en vous tenant à l écart des gens des meubles et de tout autre obstacle AJUSTEMENT DE LA COURROIE D ENTRAÎNEMENT SC6045 SEULEMENT Reportez vous à la Figure 1 1 Retirez les trois 3 vis crucif...

Страница 28: ...pareil propre plus particulièrement au niveau du tube et de la bague du manche afin que le tube du manche puisse se déplacer librement dans la bague Inspectez le cordon d alimentation pour détecter les perforations les entailles ou les broches relâchées remplacez le au besoin REMARQUE Le désassemblage de ce moteur annule la garantie Un désassemblage et un assemblage inadéquat de ce moteur peuvent ...

Страница 29: ...s réinitialisé Réinitialisez le disjoncteur La fiche est brisée ou a un mauvais contact Remplacez Le disjoncteur est défectueux ou faible Remplacez Le commutateur est défectueux Remplacez la fiche Le rectificateur est défectueux Remplacez le redresseur L appareil n atteint pas sa vitesse de fonctionnement Débranchez tous les autres appareils se trouvant sur le même circuit ou utilisez un autre cir...

Страница 30: ...tions au sujet de la garantie de votre appareil communiquez avec le service à la clientèle de Sanitaire Site Web www sanitairecommercial com Numéro de téléphone Service à la clientèle de Sanitaire 1 800 800 8975 Lundi au vendredi de 9 h à 20 h 30 HNE FR GARANTIE Cette garantie vous confère des droits précis Il est possible que vous disposiez également d autres droits qui varient d un État ou d une...

Страница 31: ...FlrMachineOG_1618912 qxp_French 3 22 19 2 09 PM Page 11 ...

Страница 32: ... 2019 BISSELL Inc Part Number PN 1618912 4 2019 www sanitairecommercial com FlrMachineOG_1618912 qxp_French 3 22 19 2 09 PM Page 12 ...

Отзывы: