background image

23

GB

   Auxiliary input socket

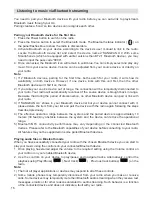
A 3.5mm Auxiliary Input socket is provided on the right side of your radio to permit an audio signal to 
be fed into the unit from an external audio device such as iPod, MP3 or CD player.
1. Press the Power button to switch on the radio.
2. Repeatedly press and release the Source button until “AUX” is shown on the display.

3.  Connect an external audio source (for example, iPod, MP3 or CD player) to the Auxiliary Input 

socket.

4.  Adjust the volume setting on your iPod, MP3 or CD player to ensure an adequate signal level from 

the player, and then rotate the Volume control on the radio as needed for comfortable listening.

Note: 

Never use the Aux-In socket in rainy or moist conditions to prevent moisture from entering the radio. 
Always keep the rubber cover on the back well closed under these conditions.

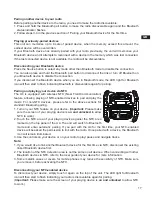
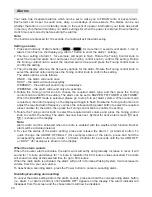
   Factory reset

If you wish to completely reset your radio to its initial state this may be performed by following this 
procedure. By performing a factory reset, all user entered settings will be erased.
1. Press the Info/Menu button until a beep sounds to enter the menu setting.
2.  Rotate the Tuning control knob until “FACTORY” shows on the display. Press the Tuning control 

knob to enter the setting.

3.  Rotate the Tuning control knob to select “RESET YES” or “RESET NO”. If you do not wish to carry 

out a system reset, select “RESET NO” and then press the Tuning control knob to confirm the 

setting.

4.  With “Yes” selected, press the Tuning control knob to confirm the setting. A full reset will be 

performed. The station presets will be erased. Alarms will be cancelled and sleep timer settings 
will be set to their default values.

   In case of malfunction due to electrostatic discharge, reset the product using the above procedure. 

In some circumstances it may be necessary to disconnect and then reconnect the main power 
supply in order to resume normal operation.

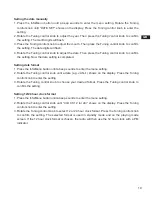
   Software version

The software display cannot be altered and is just for your reference.
1. Press the Info/Menu button until a beep sounds to enter the menu setting.

2.  Rotate the Tuning control knob until “VER XXX” (e.g.VER 015) appears. The software version 

shows on the display.

3. Press and release the Info/Menu button to exit the software version display.

Содержание U4 DBT+

Страница 1: ...Version 1 GB U4...

Страница 2: ...ECTRONICS INC is under license Sangean U4 powered by Qualcomm aptX audio Qualcomm is a trademark of Qualcomm Incorporated registered in the United States and other countries used with permission aptX...

Страница 3: ...p over 13 Unplug this apparatus during lightning storms or when unused for long periods of time 14 Refer all servicing to qualified service personnel Servicing is required when the apparatus has been...

Страница 4: ...le protection against harmful interference in a residential installation This equipment generates uses and can radiate radio frequency energy and if not installed and used in accordance with the instr...

Страница 5: ...4...
Страница 6: ...splay WX alert button Weather Alert button Info Menu button Bluetooth status indicator WX LED indicator Weather Alert LED indicator Battery charging indicator Tuning control knob Select Seek button So...

Страница 7: ...Weather Alert indicator PM time indicator Clock digits Sleep indicator Battery power status Alarm 1 and 2 indicator Text Frequency Date display FM mode indicator AM mode indicator Bluetooth mode indi...

Страница 8: ...ert back up battery 2 x UM 3 1 5V AA not supplied for memory back up even if you use AC power only Without the backup battery time and preset station will get lost if you remove the AC power cord from...

Страница 9: ...Duration for charging your batteries fully can vary depending on the mAh capacity of a battery Higher mAh batteries require longer charging time Important Under some conditions the charging LED indica...

Страница 10: ...y to full can take several hours even up to 10 hours or more 9 Do not charge batteries when the radio is hot or exposed to heat or heat sources 10 It is advised to clean the metal contacts of the batt...

Страница 11: ...rall battery charging status Then rotate the Tuning control knob to view the individual battery status if required When charging is in progress display is shown at right and the charging indicator fla...

Страница 12: ...batteries in the compartment or some of batteries are inserted with the incorrect polarity display is shown at right and it will enter standby screen after 10 seconds Note If a battery is removed whil...

Страница 13: ...ignal found If the signal is strong enough and there is RBDS data present then the radio will display the station name 5 When the end of the waveband is reached your radio will recommence tuning from...

Страница 14: ...mode The Radio Broadcast Data System RBDS is a system in which inaudible digital information is transmitted in addition to the normal FM radio program RBDS offers several useful features The following...

Страница 15: ...on the radio 2 Press and release the required waveband by pressing the Source button 3 Press and release the required Preset button to cause your radio to tune to the station stored in preset memory W...

Страница 16: ...t into weather alert standby mode Note When the siren is active pressing any button on the radio instantly turns the radio to the selected weather broadcasting and cancels the siren To stop playing th...

Страница 17: ...other Bluetooth device can pair or link with your radio 3 If SANGEAN U4 shows in your Bluetooth device list but your device cannot connect with it please delete the item from your list and pair the d...

Страница 18: ...mmunication feature allowing playing of NFC enabled devices to pair and play the music For non NFC devices please refer to the above sections for standard Bluetooth pairing 1 Turn on your NFC feature...

Страница 19: ...ess the Tuning control knob to confirm the setting Please refer to the later section Setting the clock manually and Setting the date manually to set the clock time and date Note 1 The radio clock time...

Страница 20: ...format 1 Press the Info Menu button until a beep sounds to enter the menu setting 2 Rotate the Tuning control knob until a date e g JAN 1 shows on the display Press the Tuning control knob to enter th...

Страница 21: ...s selected please go to step 5 to set alarm volume When radio mode is selected the radio frequency on the display will begin to flash Rotate the Tuning control knob to adjust the required radio freque...

Страница 22: ...and the options will increase in 5 minute increments from 5 to 120 minutes Alternatively rotate the Tuning control knob to adjust the timer in 1 minute increment Stop adjusting when the required Nap...

Страница 23: ...aste for the material that you are listening to You can set the treble and bass levels to your own preferences 1 First ensure your radio is switched on Press and release the Volume control button to e...

Страница 24: ...will be erased 1 Press the Info Menu button until a beep sounds to enter the menu setting 2 Rotate the Tuning control knob until FACTORY shows on the display Press the Tuning control knob to enter the...

Страница 25: ...charge the iPhone Smartphone before you can charge the batteries Important The charger may not supply power to some USB devices When not using or after charging remove the USB cable and close the cove...

Страница 26: ...LR6 DC IN 12V 1 2A center pin positive Max power consumption AC 120 V 60 Hz 24W Bluetooth Bluetooth specification Bluetooth Ver 4 0 Profile Support A2DP AVRCP1 4 Bluetooth Audio CODEC SBC APTX Transm...

Страница 27: ...erves the right to amend the specifications without notice If at any time in the future you should need to dispose of this product please note that Waste electrical products should not be disposed of...

Отзывы: