0
GB
Software version
The software display cannot be altered and is just for your reference.
. To view the software version on the display press and hold the Info button to enter the Advanced menu
of the current mode.
. Press the Tuning Up/Down button until ’SYSTEM’ shown on the display. Press the Select button to
enter the setting
3. Press the Tuning Up/Down until ‘SW VER’ shown on the display. Press the Select button to confirm
the option. The version number is then shown on the display. Press the Info button to revert to the upper
level menu.
System reset
If your radio fails to operate correctly, or some digits on the display are missing or incomplete carry out
the following procedure.
. Press and hold the Info button to enter the Advanced menu of the current mode.
. Press the Tuning Up/Down buttons until ‘SYSTEM’ shown on the display. Then press the Select button
to enter the setting.
3. Press the Tuning Up/Down button until ‘RESET’ shown on the display, then press the Select button to
enter the setting. If you wish to perform the reset operation, press the Tuning Up/ Down button to select
‘Y’ and press the Select button to confirm the selection. A full reset of your radio will be performed. All
presets and station lists will be erased.
4. After a system reset a scan of the DAB band will be performed. In case of malfunction due to electrostatic
discharge, reset the product (reconnection of power source may be required) to resume normal operation.
Software upgrade
Software updates for your radio may be available in the future. As software updates become available
software and information on how to update your radio can be found at:
http://sg.sangean.com.tw/first/first.asp
www.sangean.eu
www.sangean.com.au
For more information, please contact our Head Office by sending email to [email protected]
. Press and hold the Info/Menu button to enter the Advanced menu of the current waveband.
. Press the Tuning buttons until ‘SYSTEM’ shown on the display. Press the Select button to enter the
setting.
3. Press the Tuning up/down button until ‘UPGRADE’ shown on the display. Press the Select button to
enter the setting. The default setting is ‘N’. Otherwise, press the Tuning buttons to choose ‘Y’ and press
the Select button to select the option. The display will show ‘WAITING’.
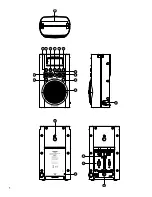
4. Using the micro USB cable (not supplied) to connect the USB socket in the battery compartment and
your PC. Follow the procedure stated on your PC screen and the unit will upgrade automatically.
Note:
Please use adapter (not supplied) as main power when upgrading software.
Содержание H205D
Страница 1: ...H205D Version 1 GB...
Страница 2: ......


