KBox A-150-SKL - User Guide Rev. 1.1
// 32
Installing and Removing a M.2 SSD Module
6.3.
Protection label
The KBox A-150-SKL is factory configured to meet customer requirements and then sealed
with a protection label. Opening the KBox A-150-SKL invalidates the warranty and may
cause damage to internal components.
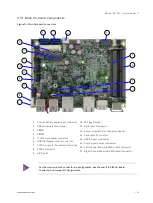
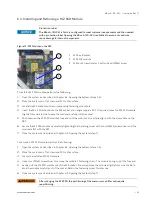
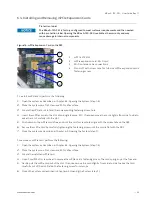
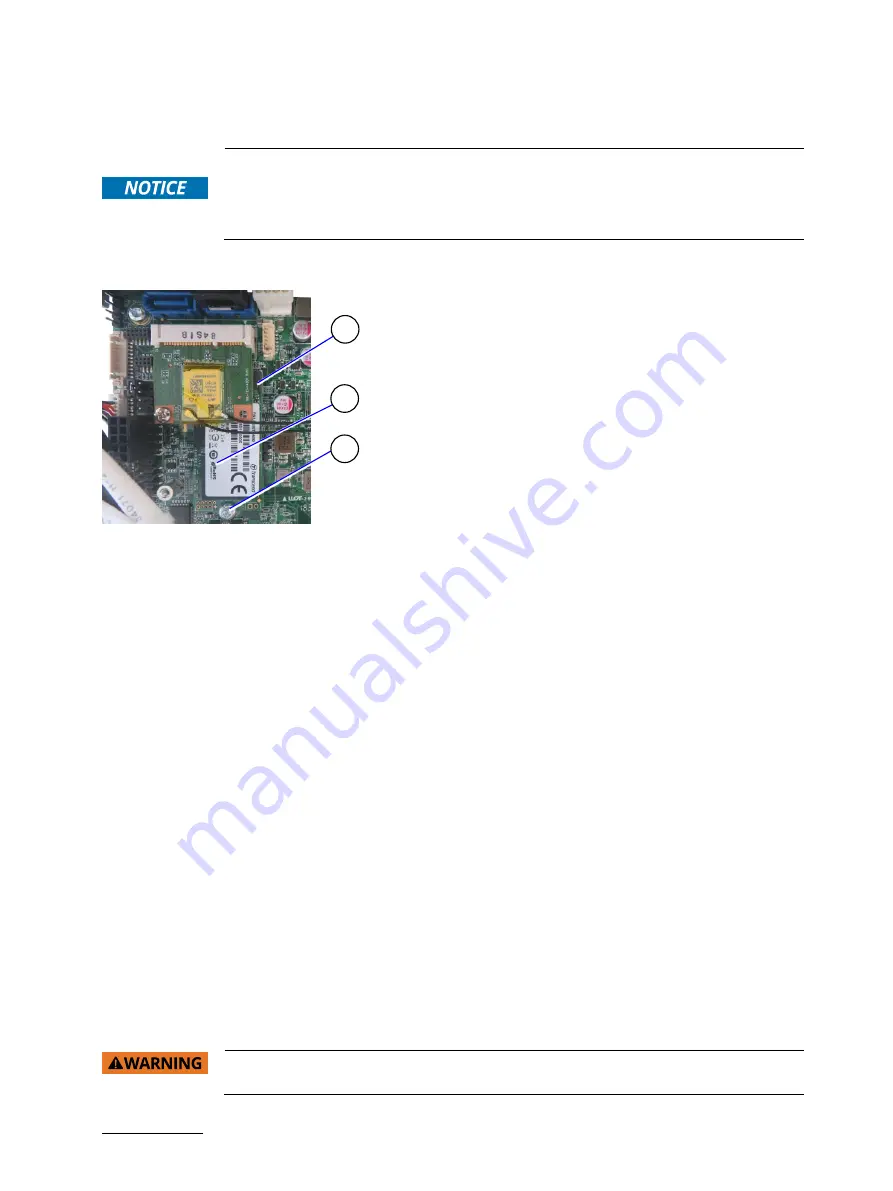
Figure 15: M.2 Module on the SBC
1
M.2 Key B socket
2
M.2 2242 module
3
M.2 card screw hole for a button head (M3x5) screw
To install a M.2 SSD module, perform the following:
1.
Open the system as described in Chapter 6.2: Opening the System (steps 1-6).
2.
Place the system on a flat, clean and ESD-safe surface.
3.
Locate the M.2 socket and the corresponding fastening screw hole.
4.
Insert the M.2. SSD module into the M.2 socket, at an angle (approx. 30°). If required move the M.2 SSD module
slightly from side to side to ease the module carefully into the socket.
5.
Push down on the M.2 SSD module’s free end until the module’s screw hole aligns with the screw hole on the
SBC.
6.
Secure the M.2 SSD module by carefully tightening the fastening screw with a torx (M3x5) screwdriver until the
module is flat with the SBC.
7.
Close the system as described in Chapter 6.2: Opening the System (step 7).
To remove a M.2 SSD module, perform the following:
1.
Open the system as described in Chapter 6.2: Opening the System (steps 1-6).
2.
Place the system on a flat, clean and ESD-safe surface.
3.
Locate the installed M.2 SSD module.
4.
Use a torx (M3x5) screwdriver to remove the module’s fastening screw. The module springs up at the free end.
5.
Gently pull the M.2 SSD module out of the M.2 socket. If required move the module slightly from side to side to
ease the module carefully out of the socket. Retain the fastening screw for later use.
6.
Close the system as described in Chapter 6.2: Opening the System (step 7).
After changing the M.2 SSD, the partitioning of the memory may differ and require
repartitioning.
2
3
1

