background image

42


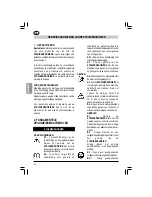
BEDIENUNGSANWEISUNGEN ZUM FREISCHNEIDER

D

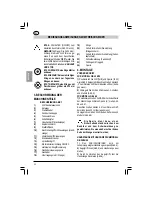
B10.4 - SCHALTER (ON/OFF) zum
Abstellen des Motors (Abb.1 Det.14).
GEFAHR!  Achtung! Die Schnittvor-
richtung dreht sich noch für eine ge-
wisse Zeit nach dem Ausschalten
(Schalter auf Position “OFF”) weiter. Die
zwei Griffe bis zum vollständigen Still-
stand festhalten. Siehe Kapitel ANLAUF
UND STOP.
B10.5 GEFAHR! Keine Sägeblätter
anbauen.
B10.6 GEFAHR! Keine mehrteiligen
Klingen, sondern nur fugenlose
Klingen anbauen.
B10.7 GEFAHR! Keine Klingen mit
Durchmesser größer als 230 mm
anbauen.

3. BESCHREIBUNG DER
MASCHINENTEILE

BESCHREIBUNG ABB.1

1)

Griff des Anlasserseils

2)

Anlasser

3)

Startlufthebel

4)

Zündkerzenkappe

5)

Tankverschluss

6)

Schalldämpfer

7)

Linkshandgriff (Handstange)

8)

Explosionsmotor

9)

Kraftstoffstank

10)

Rechtshandgriff mit Steuerungen (Hand-
stange)

11)

Hinterhandgriff Steuerungen

12)

Riemeneinsatzpunkt

13)

Vorderhandgriff

14)

Motorabstellvorrichtung ON/OFF.

15)

Halbtouren-Knopfblockierung

16)

Gashebelsteuerungsperre

17)

Gashebel

18)

Übertragungsrohr (Stange)

19)

Klinge

20)

Schutz für die Schnittvorrichtung
(Klingenschutz)

21)

Schutz für die Schnittvorrichtung (Faden
kopfschutz)

22)

Schneidwerkzeug (Fadenkopf)

23)

Schlinge mit Traggurt

24)

Sperre

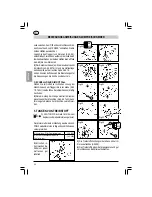
4. MONTAGE

VORDERER GRIFF
FÜR  MODELL GBL 26/34
1) 
Positionieren Sie Griff (Teil 1) und Sperre (Teil 2)
wie in Abb. 2 dargestellt. Beachten Sie den Abstand
„F“ zum hinteren Griff, der mindestens 20 cm (betra-
gen muss).
2) Verriegeln Sie mit den 4 Schrauben, Scheiben
und Muttern (Abb. 3).
FÜR MODELL GBL 40
1) 
Positionieren Sie den Griff mit der zur linken Seite
der Maschine gerichteten Sperre „B“, siehe Abb.
65 und 67.
Beachten Sie den Abstand „A“ vom hinteren Griff,
der mindestens 20 cm (betragen muss).
Verriegeln Sie mit den 4 Schrauben, Scheiben und
Muttern (Abb. 66)

D i e   S p e r r e   d i e n t   d a z u ,   e i n e n
Sicherheitsabstand zwischen dem

Benützer und dem Scheidwerkzeug zu
gewährleisten. Sie muss daher auf der linken
Seite der Stange montiert werden.

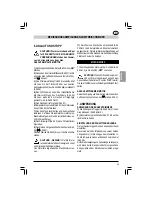
HANDSTANGE  MIT HANDGRIFF ZUM MODELL
GB 26/34/40
1) 

Das FREISCHNEIDER wird mit

zusammengelegter Handstange verpackt (Abb. 4).
2) Kugelgriff lösen (Abb.5) und Handstange quer
drehen.
3) Durch Festziehen des Kugelgriffs fest die
Handstange blockieren (Abb.6).

DEUTSCH

Содержание GB 26

Страница 1: ...dthisoperatorsmanualcarefully beforethefirstuse Lire avec attention ces instructions avant la première utilisation VorderAnwendungdievorliegenden Anweisungenaufmerksamlesen Lees aandachtig deze instructies dooralvorenshetapparaatvoorhet eerst in gebruik te nemen Leer con cuidado estas instrucciones antes de la primera utilización Leiacomatençãoestasinstruçõesantes deutilizarpelaprimeiravezoaparelh...

Страница 2: ...2 Fig 1 8 10 9 22 21 18 12 7 14 15 16 17 10 19 20 23 4 3 1 2 5 6 ...

Страница 3: ...3 Fig 1 23 14 15 16 17 11 22 9 18 8 13 11 21 12 24 19 20 4 3 1 2 5 6 ...

Страница 4: ...4 Fig 2 Fig 3 Fig 4 Fig 5 Fig 6 Fig 8 Fig 9 Fig 10 Fig 7 Fig 11 Fig 12 Fig 13 Fig 15 Fig 16 1 2 F é é é é Fig 14 é é é ...

Страница 5: ...5 Fig 17 Fig 18 Fig 19 Fig 20 Fig 21 Fig 22 1 Fig 23 Fig 24 Fig 39 é é 1 2 é 1 2 Fig 36 é Fig 38 Fig 37 é 1 2 ...

Страница 6: ...6 Fig 42 Fig 43 Fig 44 Fig 46 Fig 50 Fig 47 Fig 48 Fig 49 Fig 40 é é 30 Fig 41 Fig 45 é é é é é ...

Страница 7: ...7 Fig 51 Fig 52 Fig 55 Fig 56 Fig 57 Fig 58 Fig 59 Fig 54 é é 0 5 0 6 mm é é é é é Fig 53 ...

Страница 8: ...8 Fig 60 Fig 61 Fig 62 Fig 63 Fig 64 Fig 65 Fig 66 Fig 67 GB 40 GBL 40 é é B B A 1 ...

Страница 9: ...9 Fig 68 Fig 69 Fig 70 GB 40 GBL 40 é é é 1 1 é ...

Страница 10: ...ue utilizzi il DECESPUGLIATOREdeveprimaleg gere attentamente il manuale di istru zioni e manutenzione e familiarizzare completamente con i comandi per un usocorrettodell apparecchio A2 1 Conservare il presente manua leperconsultazionifuture A3 Non permettere l uso del DECESPUGLIATORE ai bambini e personechenonsianocompletamente aconoscenzadellepresentiistruzioni PERICOLO A4 Fare attenzione al mate...

Страница 11: ...ell operatore vedi fig 37 38 Tenere l impugnatura posteriore con i comandi con la mano destra e l impu gnaturaanterioreconlamanosinistra B9 ATTENZIONE la benzina e isuoivaporisonoestremamenteinfiam mabili PERICOLO DI USTIONI ED INCENDIO B9 1 Arrestare il motore prima del ri fornimento B9 2 Non fumare durante il riforni mentodicarburante B9 3 Asciugare il carburante even tualmenterovesciato Mettere...

Страница 12: ...URAANTERIORE PER MODELLO GBL 26 34 1 Posizionarecomeillustratonellafig 2 l impugnatu ra part 1 e la barriera part 2 ad una distanza F dall impugnaturaposterioredi20cm osuperiore 2 Bloccare con le n 4 viti rosette e dadi fig 3 PER MODELLO GBL 40 1 Posizionarecomeillustratonellafig 65e67 l im pugnaturacon labarriera B rivoltasullatosinistro dellamacchina Tenereunadistanza A dall impugnaturaposterio ...

Страница 13: ...o fisso come descritto nei punti 1 2 3 del paragrafo MONTAG GIO LAMA E PROTEZIONE 3 Infilareilpiattellorotante inplastica sull alberodi uscita fig 21 4 Avvitare insensoantiorario latestaafili fig 22 5 Inserireuncacciavitenell appositanicchia fig 22 part 1 per bloccare l albero durante il serraggio 6 Serrare la testa a fili PER MODELLI GB 40 e GBL 40 vedi fig 63 64 IMBRACATURA A CINGHIA E ANELLO DI...

Страница 14: ...nto Fig 27 Fig 28 Fig 29 Fig 30 Fig 31 Fig 32 Fig 33 Fig 34 Fig 35 é é é é é é é é é 1 2 1 Fig 26 é ON OFF ON OFF I ITALIANO Fig 25 2 Sollevare la levetta dell aria posta a destra del coperchio del carburatore fig 27 e portarla nella posizione 3 Pressareafondoripetutamenteilbulboprimer fig 28 fino a quando il carburante ritorna nel serbatoio attraversoilsecondotubettotrasparente fig 29 3 Preparare...

Страница 15: ...me per la sostituzione I ITALIANO 4 Afferrare l impugnatura premendo con il palmo il bloccoacceleratore fig 30 liberandoinquestomodo ilmovimentodellalevaacceleratore fig 30part 1 5 Premereafondolalevadell acceleratore fig 31 6 Mantenendo premute le leve fig 31 spingere a fondo il bottone del mezzo acceleratore fig 32 7 Mantenendo a fondo il bottone rilasciare la leva dell acceleratore Inquestomodo...

Страница 16: ...dela di accensione Attenderecheilmotoresiraffreddipri ma dell operazione 1 Sfilare il cappuccio e svitare la candela con la chiave in dotazione fig 54 In caso di eccessive incrostazioni e notevole usura degli elettrodi sostituire la candela con una di tipo equivalente fig 55 56 Un eccesso di incrostazioni può essere dovuta a Eccessiva percentuale di olio nel carburante e o qualità non appropriata ...

Страница 17: ..._____________ _____________________________________________ ___________________________________ ___________________________________ __________________________________ __________________________________ _________________________________ _ _ _ _ _ _ _ _ _ _ _ _ _ _ _ _ _ _ _ _ _ _ _ _ _ _ _ _ _ _ _ _ _ _ _ _ _ _ _ _ _ _ _ _ _ _ _ _ _ _ _ _ _ _ _ _ _ _ _ _ _ _ _ _ _ _ _ _ _ _ _ _ _ _ _ _ _ _ _ ______...

Страница 18: ... a fili 4 6 1 8m s2 ISO 7916 Livello vibrazioni max min lama 8 4 1 8m s2 ISO 7916 DATI TECNICI GBL 34 Massa 5 9 Kg senza carburante dispositivo di taglio protezione Capacitàserbatoio 830 cm3 Dispositivo di taglio testa a fili 420 mm Dispositivo di taglio lama 230 mm Cilindratamotore 33 6 cm3 Potenza massima 1 Kw Regime massimo del motore 9 500 1 min Regimemassimodeldispositivoditaglio 7 500 1 min ...

Страница 19: ...ivello di potenza acustica 110 dB A LwA av ISO 10884 Livello vibrazioni max min testa a fili 6 2 3 m s2 ISO 7916 Livello vibrazioni max min lama 8 3 m s2 ISO 7916 ATTESTAZIONE DI CONFORMITÀ ALLE NORME CEE La sottoscritta SANDRIGARDEN srl via Manzoni 22 36027 ROSÀ VI ITALIA dichiara che i seguenti prodotti DECESPUGLIATORI TAGLIAERBAPORTATILI CON MOTOREACOMBUSTIONE INTER NA GB 26 GBL 26 GB 34 GBL 34...

Страница 20: ...nual and familiarise themselves fully with all controls for correct operation of the device A2 1 Keep this manual for future reference A3 Do not let children and persons whoarenotcompletelyawareofthese instructions use the BRUSH CUTTERS DANGER A4 Beware of objects hurled by the line head A5 Do not start up and do not use the BRUSH CUTTER near people other animalsorobtrusiveobjects During operation...

Страница 21: ...ghlyflammable BURNING AND FIRE HAZARDS B9 1 Stoptheenginebeforerefuelling B9 2 Do not smoke while refuelling B9 3 Wipe off any fuel that may have spilled Start up the engine away from the place where it was refuelled B9 4 Make sure the tank cap is tightened properly Beware of any leaks B10 The device is supplied with a CUTTING ATTACHMENT GUARD Fig 1 item21 that must be mounted before operation see...

Страница 22: ... 4 screws washers and nuts fig 3 FOR MODEL GBL 40 1 Positionthegripwithbarrier B turnedontheleft side of the machine as shown in fig 65 and 67 Keepadistance A of20cmormore fromtherear grip Fasten in position with the 4 screws washers and nuts fig 66 The handle can be folded back for ease of transport or storage and can be adjusted for a more comfortable working position This must be fitted to the ...

Страница 23: ...ANUAL 4 Screw on the line head fig 22 anticlockwise 5 Insert a screwdriver in the relevant notch fig 22 item1 tolocktheshaftwhentighteningattachments 6 Tighten the line head FOR MODELS GB 40 and GBL 40 see fig 63 64 BELT HARNESS AND SUSPENSION RING fig 23 FOR MODELS GB GBL 26 and 34 1 Attachtheplasticringasillustratedinfig 23 2 Attach it with screws and nuts fig 24 Before starting the brush cutter...

Страница 24: ...rs fig 31 downandpushthethrottle lock button fig 32 right down 7 Hold the button down and release the throttle GB ENGLISH Fig 25 3 Prepare the fuel mixture and only refuel outdoors fig 25 4 Store the fuel in a container set aside for this purpose and with tightly sealed cap 6 STARTING AND STOPPING CAUTION Strictly heed the warnings outlined in the chapter 2 above titled ESSENTIAL SAFETY PRECAUTION...

Страница 25: ...RUSH CUTTERS 1 Couplethebeltharness fig 36item1 tothering fig 36item2 2 Hold the appliance on the right side as shown in fig 37 38 ADJUSTING THE LENGTH OF THE CUTTING LINE Thelineheadsuppliedrequiresmanualadjustment Before the cutting line has worn as far as halfway restore the length by pulling and then turning the spool fig 39 Iftoomuchlineispulledout thelengthisautomatically adjusted by the lim...

Страница 26: ...he engine to cool before operation 1 Remove the cap and unscrew the spark plug with the wrench provided fig 54 If the electrodes are excessively soiled or are very worn replacethesparkplugwithanequivalent fig 55 56 Excessive soiling may be due to Theoilratiousedinfuelistoohighand oroilisnot of an appropriate type Air filter is partly clogged 2 Screwthesparkplugmanuallyasfaraspossible to avoid dama...

Страница 27: ..._____________ ___________________________________ __________________________________ __________________________________ _________________________________ _ _ _ _ _ _ _ _ _ _ _ _ _ _ _ _ _ _ _ _ _ _ _ _ _ _ _ _ _ _ _ _ _ _ _ _ _ _ _ _ _ _ _ _ _ _ _ _ _ _ _ _ _ _ _ _ _ _ _ _ _ _ _ _ _ _ _ _ _ _ _ _ _ _ _ _ _ _ _ ___________________________________ ___________________________________ ________________...

Страница 28: ... head 4 6 1 8 m s2 ISO 7916 Vibration level max min blade 8 4 1 8 m s2 ISO 7916 TECHNICAL DATAGB 26 Mass 5 9 Kg without fuel cutting attacment and guard Fuel tank volume 830 cm3 Cuttingattacment stringhead 420 mm Cuttingattacment blade 230 mm Enginedispacement 33 6 cm3 Engineperformance 1 Kw Maximum engine speed 9 500 1 m Maximum speed of spindle 7 500 1 m Engine speed at idling 2 800 1 m Sound pr...

Страница 29: ... min max string head 6 2 3 m s2 ISO 7916 Vibration level min max blade 8 3 m s2 ISO 7916 TECHNICAL DATAGB 40 BRUSH CUTTERS OPERATING MANUAL GB EC DECLARATION OF CONFORMITY The under signed SANDRIGARDEN srl via Manzoni 22 36027 ROSÀ VI ITALIA declare that the following products PORTABLE HAND HELD COMBUSTION ENGINE DRIVEN BRUSH CUTTERS GEASS TRIMMERS GB 26 GBL 26 GB 34 GBL 34 GB 40 GBL 40 are in acc...

Страница 30: ...ments amples B3 Mettre des lunettes de protection ou une visière homologuées B3 1 Mettre un protège oreilles pour lesbruits homologué 1 FÉLICITATIONS Chère cliente Cher client Nous vous félicitons d avoir choisi un de nos produits pour le jardin La DEBROUSSAILLEUSE a été conçue en tenant compte des normes de sécurité en vigueur pour protégerleconsommateur Ce manuel contient des illustrations et de...

Страница 31: ...is sement nous conseillons de s adres ser à un médecin B8 1 Prendretoujoursl appareilavec les deux mains Prendre un position stable et sûre sur lesjambes B8 2 La DEBROUSSAILLEUSE est conçuepouruneutilisationducôtédroit de l opérateur voir fig 37 38 Tenir la poignée postérieure avec commandes avec la main droite et la poignée antérieure avec la main gau che B9 ATTENTION l essence et ses vapeurssont...

Страница 32: ...érieure 14 Dispositifd arrêtdumoteurON OFF 15 Blocageaccélérateur 16 Blocagecommandeaccélérateur 17 Levier de l accélérateur 18 Tube de transmission barre 19 Lame 20 Protectiondispositifdecoupe pourlame 21 Protectiondispositifdecoupe pourtêteà fils 22 Dispositifdecoupe têteàfils 23 Harnais de securite 24 Barrière 4 MONTAGE POIGNÉEAVANT POUR MODÈLE GBL 26 34 1 Positionner la poignée pièce 1 et la b...

Страница 33: ...elle ci sur la saillie du plateau prévue à cet effet et ensuite le plateau inférieur fig 16 bloque lame le godet fig 17 et la vis gauche 7 Serrer à gauche par la clé fournie avec l appa reil fig 18 POUR MODÈLES GB 40 et GBL 40 voir fig 60 61 62 MONTAGETETEAFILSETL EXTENSION PRO TECTION fig 19 20 POUR MODÈLES GB 26 34 et GBL 26 34 1 Unirlaprotection fig 20dét 1 àl extension fig 20 dét 2 et bloquer ...

Страница 34: ... 4 La position du point de fixation à la machine fig 65 pièce 1 monté d origine sur la barre est régla ble au moyen d une vis pour bien équilibrer la machine 5 RAVITAILLEMENT CARBURANT 1 ATTENTION L appareil est doté de moteur à explosion à 2 temps Le moteur doit être alimenté par un mélange d es senceethuilepourdesmoteursà2temps dansles pourcentagessuivants Avec huile normale pour moteur à 2 temp...

Страница 35: ...ble de démarrage fig 33 jusqu à la miseenmarche ATTENTION DANGER Le moteur dé marre accéléré à moitié donc le dispositif de coupe est en rotation Laisserlemoteurenmarchepourquelquessecon des 11 Presserpourquelquesinstantslelevieraccélé rateur fig 35 dét 1 le poussoir accélérateur est débranchéautomatiquement Lemoteurresteainsi enmarcheaurégimeralentietledispositifdecoupe s arrête après quelques se...

Страница 36: ...flèche imprimée sur la même bobine fig 48 4 Pour faciliter la réintroduction de la bobine dans le corps fixer les deux bouts de fil dans les deux rainures prévues à cet effet fig 49 D REMONTAGE BOBINE 1 Introduirelesdeuxboutsparlesguide fil fig 50 2 Introduire la bobine et tirer avec force les deux bouts de fil pour les extraire des rainures fig 51 3 Remonter le ressort fig 52 et serrer à nouveau ...

Страница 37: ... portée des enfants Au moment du transport vidanger le réservoir à carburant et protéger la lame si elle est installée par une protection spéciale _____________________________________________ ___________________________________ ___________________________________ __________________________________ __________________________________ _________________________________ _______________________________...

Страница 38: ... dB A LwA av ISO 19884 Niveau vibrations max min fil nylon 4 6 1 8 m s2 ISO 7916 Niveau vibrations max min lame 8 4 1 8 m s2 ISO 7916 DONNEES TECHNIQUES GBL 34 Masse 5 9 kg sanscarburant dispositifdecoupe protection Capacité réservoir 830 cm3 Dispositif de coupe tête à fils 420 mm Dispositif de coupe lame 230 mm Cylindrée moteur 33 6 cm3 Puissance maximum 1 KW Régime maximum du moteur 9 500 1 min ...

Страница 39: ...veau de pression acoustique 110 dB A LwA av ISO 19884 Niveau vibrations max min fil nylon 6 2 3 m s2 ISO 7916 Niveau vibrations max min lame 8 3 m s2 ISO 7916 ATTESTATION DE CONFORMITE AUX NORMES CEE La soussignée SANDRIGARDEN srl via Manzoni 22 36027 ROSÀ VI ITALIE déclare que ces produits DEBROUSSAILLEUSES COUPE HERBE PORTATIFS À MOTEUR THERMIQUE GB 26 GBL 26 GB 34 GBL 34 GB 40 GBL 40 2000 14 CE...

Страница 40: ...anleitung aufmerksamdurchlesenundsichmitden SteuerungenfüreinenrichtigenBetrieb des Geräts vertraut machen A2 1 Dieses Handbuch zum späte ren Nachschlagen aufbewahren A3 Kindern und Personen die die hierstehendenAnweisungennichtken nen ist die Anwendung des FREI SCHNEIDER untersagt GEFAHR A4 AufdasvonderSchnittvorrichtung projizierteMaterialaufpassen A5 In der Nähe von Personen Tie renoderGegenstä...

Страница 41: ...feste und sichere Positioneinnehmen B8 2 Der FREISCHNEIDER ist so ausgelegt um vom Bediener auf der rechten Seite verwendet zu werden siehe Abb 37 38 Den hinteren Griff mit Steuerungen mit der rechten Hand und den Vorder griffmitderlinkenHandfesthalten B9 ACHTUNG Das Benzin und sei neDämpfesindleichtentzündlich BRANDWUNDEN UND BRANDGE FAHR B9 1 Den Motor vor dem Nachtan kenabstellen B9 2 Während d...

Страница 42: ...hebel 18 Übertragungsrohr Stange 19 Klinge 20 SchutzfürdieSchnittvorrichtung Klingenschutz 21 Schutz für die Schnittvorrichtung Faden kopfschutz 22 Schneidwerkzeug Fadenkopf 23 SchlingemitTraggurt 24 Sperre 4 MONTAGE VORDERER GRIFF FÜR MODELL GBL 26 34 1 Positionieren Sie Griff Teil 1 und Sperre Teil 2 wieinAbb 2dargestellt BeachtenSiedenAbstand F zumhinterenGriff dermindestens20cm betra gen muss ...

Страница 43: ...eren sie auf dem dafür vorgesehenen Überstand des Tellers mittig einstellen und danach den unteren Teller zur Klingensperre Abb 16 die Kappe Abb 17 und die linke Schraube anbringen 7 Mit dem mitgelieferten Schlüssel gegen den Uhrzeigersinn festziehen Abb 18 FÜR MODELLE GB 40 und GBL 40 siehe Abb 60 61 62 ANBAU FADENKOPF UND ERSTRE CKUNGSSTÜCK SCHUTZ Abb 19 20 FÜR MODELLE GB 26 34 und GBL 26 34 1 D...

Страница 44: ... Abb 70 Teil 1 oberhalb des Karabinerhakens kräftig nach oben 4 Der am Anfang der Stange montierte Riemen einsatzpunkt der Maschine Abb 65 Teil 1 kann für eine gute Balance der Maschine verstellt wer den 5 TANKEN VON TREIBSTOFF 1 ACHTUNG Das Gerät ist mit einem Explosions Zweitaktmotorausgerüstet DerMotormußmiteinerMischungausBenzinund Öl für Zweitaktmotoren in folgenden Verhältnissen versorgt wer...

Страница 45: ...HR Der Motor star tet und bleibt halb beschleunigt und somit mitrotierenderSchnittvorrichtung Den Motor für einige Sekunden funktionieren las sen DEUTSCH 11 Durch kurzes Drücken des Gashebels Abb 35 Det 1 wird der Halbtouren Knopf automatisch ausgeschaltet DerMotorbleibtaufdieseWeiseauf MindesttoureninBetriebunddieSchnittvorrichtung bleibt nach kurzer Zeit stehen MOTOR STOPP 1 Zum Stoppen des Moto...

Страница 46: ...keln und die auf der Spule eingeprägte Pfeilrichtungbeachten Abb 48 4 Um die Wiedereinführung der Spule in den Kör per zu erleichtern die beiden Fadenenden in den beiden dafür vorgesehenen Schlitzen befestigen Abb 49 D WIEDEREINBAU DER SPULE 1 Die zwei Enden durch den Fadendurchgang führen Abb 50 2 Die Spule einführen und die Fadenenden fest ziehen damit sie sich von den Schlitzen abziehen Abb 51 ...

Страница 47: ... Gerät für länger als 2 Monate nicht ver wendet mußderTreibstoffbehälterentleertwerden Keine aggressiven Reinigungsmittel verwenden Das Gerät ist auf einer trockenen und sicheren Kindern unzugänglichen Stelle zu lagern BeimTransportdenTreibstofftankausleerenund die Klinge wenn angebaut mittels einer dazu ge eignetenSchutzvorrichtungschützen _____________________________________________ ___________...

Страница 48: ...11 dB A LwA av ISO 10884 Max Min Vibrationspegel 4 6 1 8 m s2 ISO 7916 Max Min Vibrationspegel der Klinge 8 4 1 8 m s2 ISO 7916 TECHNISCHE DATEN GBL 34 Gewicht 5 9 kg ohneTreibstoff Schnittvorrichtung Schutz Behältervolumen 830 cm3 Schnittvorrichtung Fadenkopf 420 mm Schnittvorrichtung Klinge 230 mm Motorhubraum 33 6 cm3 Höchstleistung 1 KW Max Motortouren 9 500 1 min Max TourenvonderSchnittvvorri...

Страница 49: ...n Vibrationspegel 6 2 3 m s2 ISO 7916 Max Min Vibrationspegel der Klinge 8 3 m s2 ISO 7916 KONFORMITÄTBESCHEINIGUNG ZU EWG REGELUNGEN GB 26 GBL 26 Garantierter Schallleistungspegel Lwa 112 dB A Ermittelter Schallleistungspegel Lwa 111 dB A GB 34 Garantierter Schallleistungspegel Lwa 111 dB A Ermittelter Schallleistungspegel Lwa 110 dB A GBL 34 Garantierter Schallleistungspegel Lwa 111 dB A Ermitte...

Страница 50: ...onen veroorzaken en levensgevaarlijk zijn A2 Lees eerst zorgvuldig de handleiding voor gebruik en onderhoud om geheel vertrouwd te rakenmetdebedieningselementen dit ten behoeve van een correct gebruik van het apparaat A2 1 Bewaar deze handleiding voor toekomstigeraadpleging A3 Sta het gebruik van de STRUIKENSNOEIERS niet toe aan kinderen en personen die niet geheel op de hoogte zijn van deze instr...

Страница 51: ...nbevoleneenartsteraadplegen B8 1 Houd het apparaat altijd met beidehandenvast Neemeenstabiele en zekere houding aan B8 2 De STRUIKENSNOEIER is ontworpen voor het gebruik op de rechterheup van de gebruiker zie afb 37 38 Houd de achterste handgreep met de bedieningen in de rechterhand en de voorste handgreep in de linkerhand B9 ATTENTIE De benzine en de benzinedampen zijn uiterst ontvlambaar dus gev...

Страница 52: ...Bevestigingspunt voor riem 13 Voorste handgreep 14 Stopinrichting van de motor ON OFF 15 Blokkering halve versneller 16 Blokkering van de bediening van de versnellingshendel 17 Versnellingshendel 18 Transmissieleiding stang 19 Maaiblad 20 Beschermkapmaai inrichting voormaai blad 21 Beschermkap maai inrichting voor kop met draden 22 Maai inrichting kop met draden 23 Draagstelmetriem 24 Barrière 4 M...

Страница 53: ...p afb 9 2 Plaats de beschermkap onder de aluminium transmissiekast afb 10 3 Plaatshetbovensteklemmetjeenzethetvastmet de schroeven afb 11 4 Schroef metdedrieschroeven hetvasteplaatje vastopdetransmissiekast afb 12 13 5 Steek het bovenste plaatje van aluminium afb 14 dathetmaaibladblokkeert indeuittredendeas 6 Monteer achtereenvolgens het maaiblad afb 15 centreer het op de daarvoor bestemde uitste ...

Страница 54: ...AN NOOD In geval van nood moet u het rode lipje afb 70 detail1 datbovendehaaksluitingaangebrachtis stevig naar boven trekken waardoor het apparaat meteenloskomtvanhetdraagstel 4 Het bevestigingspunt aan het apparaat afb 65 detail 1 dat oorspronkelijk op de stang gemon teerd is is door middel van een schroef verstel baar voor een goede uitbalancering van het appa raat 5 BRANDSTOFTOEVOER 1 ATTENTIE ...

Страница 55: ...8 Trek tot 3 keer toe de handgreep van de startkabelhelemaaluit afb 33 9 Duw het luchthendeltje van de carburateur omlaag afb 34 10 Trek aan de startkabel afb 33 tot de motor aanslaat ATTENTIE GEVAAR De motor gaat van start en draait op halve snelheid De maai inrichtingdraaitdus Laat de motor enkele seconden draaien 11 Drukkortopdeversnellingshendel afb 35detail 1 De knop voor halve snelheid wordt...

Страница 56: ...e werk als bij een vervanging 8 VERVANGING VAN DE DRAAD Om een nieuwe draad om de originele spoel te wikkelen A gebruik plastic draad met een diameter van 2 mm datspeciaalbestemdisvoor grasmaaiersmet draden ATTENTIE GEVAAR GEBRUIKABSO LUUTGEENMETAALDRAAD VERRICHT DE HANDELING BIJ STILSTAANDE MOTOR B DEMONTAGE SPOEL 1 Draai de vleugelmoer los met de wijzers van de klok mee afb 42 2 Trek de spoel na...

Страница 57: ... filter door het met een haak door de vulopening van de tank naar buiten te halen NL GEBRUIKSAANWIJZING VAN DE STRUIKENSNOEIER NEDERLANDS ANTI VONKNET VAN DE GELUIDDEMPER Alleen voor de modellen GB 26 en GBL 26 In het uitlaatgat voor het gas is een ring gestoken met een net het gedeelte dat het meestnaarbuitensteekt Dit net vertoont de neiging om door aanslag verstopt te raken waardoor de prestati...

Страница 58: ...ruk 111 dB A LwA av ISO 10884 Max min niveau trillingen 4 6 1 8 m s ISO 7916 Max min niveau trillingen maaiblad 8 4 1 8 m s2 ISO 7916 TECHNISCHE GEGEVENS GBL 34 Massa 5 9 Kg zonderbrandstof maai inrichting beschermkap I nhoud tank 830 cm Maai inrichting kop met draden 420 mm Maai inrichting maaiblad 230 mm Cilinderinhoud motor 33 6 cm Maximum vermogen 1 KW Maximum toerental motor 9 500 1 min Maxim...

Страница 59: ...av EN 27917 Niveau akoestische druk 110 dB A LwA av ISO 10884 Max min niveau trillingen 6 2 3 m s ISO 7916 Max min niveau trillingen maaiblad 8 3 m s2 ISO 7916 GB 26 GBL 26 Gegarandeerd geluidsvermogenniveau Lwa 112 dB A Gemeten geluidsvermogenniveau Lwa 111 dB A GB 34 Gegarandeerd geluidsvermogenniveau Lwa 111 dB A Gemeten geluidsvermogenniveau Lwa 110 dB A GBL 34 Gegarandeerd geluidsvermogennive...

Страница 60: ... utilizar el DESBROZADORAS sedebeleercon cuidado el manual de instrucciones y mantenimiento y familiarizarse perfec tamente con los mandos para poder emplear el aparato de forma correcta A2 1 Guardar este manual para poderlo utilizar en el futuro A3 Impedir la utilización del DESBROZADORAS por los niños y las personas que no conozcan com pletamenteestasinstrucciones PELIGRO A4 Prestar atención al ...

Страница 61: ...r utilizado en el lado derecho del operador véase fig 37 38 Tener la empuñadura trasera con mandos con la mano derecha y la empuñadura delantera con la mano izquierda B9 ATENCIÓN La gasolina y sus vaporessonextremadamenteinflama bles PELIGRO DE QUEMADURAS E IN CENDIO B9 1 Parar el motor antes de repos tarcombustible B9 2 No fumar durante el repostaje decombustible B9 3 Secar el combustible que se ...

Страница 62: ...os MANUAL DE INSTRUCCIONES DE LA DESBROZADORA E 22 Dispositivo de corte cabeza de hilos 23 Embrague de correa 24 Barrera 4 INSTALACIÓN EMPUÑADURA ANTERIOR PARAMODELO GBL 26 34 1 Posicionarcomoilustradoenlafig 2laempuña dura part 1 y la barrera part 2 a una distancia F de la empuñadura posterior de 20 cm o supe rior 2 Bloquear con los n 4 tornillos arandelas y tuercas fig 3 PARAMODELO GBL40 1 Posic...

Страница 63: ... llave que forma parte del equipo base fig 18 PARA MODELOS GB 40 y GBL 40 ver fig 60 61 62 INSTALACIÓNDELACABEZADEHILOSYDEL PROLONGADOR PROTECCIÓN fig 19 20 PARA MODELOS GB 26 34 y GBL 26 34 1 Unir la protección fig 20 pieza 1 al prolongador fig 20 pieza 2 y bloquear con los 3 tornillos y las tuercas 2 Instalarlaprotecciónyelplatofijodelmododes critoenlospuntos1 2 3delpárrafoINSTALACIÓN DE LA HOJA...

Страница 64: ...n equilibrio de la máquina 5 REPOSTAJE DE COMBUSTIBLE 1 ATENCIÓN El aparato está equipa do con un motor de explosión de 2 tiempos El motor debe ser alimentado con una mezcla de gasolinayaceiteparamotoresde2tiempos enlos porcentajessiguientes Con aceite normal para motor de 2 tiempos 1 25 4 Con aceite a base sintética para motor de 2 tiempos 1 40 2 5 2 Mezclar agitando abundantemente el contene dor...

Страница 65: ...xcesiva lalongitudseregulaautomáticamentepor la especial hoja durante la rotación ESPAÑOL 6 PUESTAEN MARCHAY PARADA ATENCIÓN Observar con cuidado las advertencias contenidas en el Cap 2 PRECAUCIONES FUNDAMENTALES DE SEGURIDAD anterior PUESTAEN MARCHA CON MOTOR FRÍO 1 Pulsar el interruptor de parada fig 26 en posi ción ON 2 Levantarlapalancadelairesituadaaladerecha de la tapa del carburador fig 27 ...

Страница 66: ...tremidades del hilo en las dos ranuras correspondientes fig 49 D INSTALACIÓN DEL CARRETE 1 Introducir las dos extremidades a través de los guiahilos fig 50 2 Introducir el carrete y tirar con fuerza de las dos extremidades del hilo para extraerlas de las ranu ras fig 51 3 Volver a instalar el muelle fig 52 y enroscar la tuerca de mariposa en sentido antihorario fig 53 9 MANTENIMIENTO BUJÍA Porlome...

Страница 67: ...rdar el aparato en un lugar seco y seguro inaccesible a los niños Antesdeefectuareltransporte vaciareldepósito decombustibleyprotegerlahoja siestáinstalada conunaprotecciónespecífica _____________________________________________ ___________________________________ ___________________________________ __________________________________ __________________________________ _____________________________...

Страница 68: ...ica 111 dB A LwA av ISO 10884 Nivel vibraciones máx min 4 6 1 8 m s ISO 7916 Nivel de vibraciones máx min hoja 8 4 1 8 m s2 ISO 7916 DATOS TÉCNICOS GBL 34 Masa 5 9 kg sin combustible dispositivo de corte protección Capacidaddepósito 830 cm Dispositivo de corte cabeza de hilos 420 mm Dispositivo de corte hoja 230 mm Cilindrada motor 33 6 cm Potencia máxima 1 kW Régimen máximo de la cabeza de hilos ...

Страница 69: ...27917 Nivel de potencia acústica 110 dB A LwA av ISO 10884 Nivel vibraciones máx min 6 2 3 m s ISO 7916 Nivel de vibraciones máx min hoja 8 3 m s2 ISO 7916 CERTIFICACIÓN DE CONFORMIDAD CON LAS NORMAS CEE GB 26 GBL 26 Nivel de potencia sonora garantizado Lwa 112 dB A Nivel de potencia sonora medido Lwa 111 dB A GB 34 Nivel de potencia sonora garantizado Lwa 111 dB A Nivel de potencia sonora medido ...

Страница 70: ...Utilizeocapacetedeprotecção em caso de risco de queda de objec tos B4 Calce sapatos robustos com so las anti derrapantes B5 Utilize luvas grossas 1 PARABÉNS Prezado Cliente parabéns por ter escolhido um nosso produto para o jardim O ROÇADORAS foi construído no respeito das normas de segurança em vigor em defesa do consumidor Neste manual são descritas e ilustradas as várias operações de montagem d...

Страница 71: ...reita e a pega ante rior com a mão esquerda B9 ATENÇÃO a gasolina e os seus vaporessãoextremamenteinflamáveis PERIGO DE QUEIMADURAS E IN CÊNDIO B9 1 Pare o motor antes do abaste cimento B9 2 Não fume enquanto estiver a abastecer de carburante B9 3 Seque o carburante eventual mente derramado Ponha em funcio namento o motor longe do lugar de abastecimento B9 4 Assegure sedequeobujãodo reservatório e...

Страница 72: ...ODELO GBL 26 34 1 Posicionecomoilustradonafig 2aempunhadura part 1 e a barreira part 2 a uma distância F da empunhadura traseira de 20 cm ou superior 2 Bloquear com os n 4 parafusos anilhas e por cas fig 3 PARAO MODELO GBL 40 1 Posicione como ilustrado na fig 65 e 67 a empunhadura com a barreira B virada no lado esquerdo da máquina Manterumadistância A daempunhaduratraseira de 20 cm ou superior Bl...

Страница 73: ... a extensão fig 20 det 2 e bloqueie com os 3 parafusos e as MANUAL DE INSTRUÇÕES DA ROÇADORA P porcas 2 Monte a protecção e o disco fixo como descrito nos pontos 1 2 3 do parágrafo MONTAGEM DE LÂMINA E PROTECÇÃO 3 Insira o disco rotativo em plástico no veio de saída fig 21 4 Atarraxe em sentido anti horário a cabeça de fios fig 22 5 Introduza uma chave de fendas na cavidade especial fig 22 det 1 p...

Страница 74: ...ve ser alimentado com uma mistura de gasolina e óleo para motores a 2 tempos nas per centagensqueseguem Com óleo normal para motor a 2 tempos 1 25 4 Com óleo à base sintética para motor a 2 tempos 1 40 2 5 2 Misture agitandoabundantementeorecipiente antesdecadaabastecimento Fig 27 Fig 28 Fig 29 Fig 30 Fig 31 Fig 32 Fig 33 Fig 34 Fig 35 é é é é é é é é é 1 2 1 Fig 26 é ON OFF ON OFF PORTUGUÊS Fig 2...

Страница 75: ...tação Deixe funcionar o motor por alguns segundos 11 Premindo brevemente a alavanca do acelera dor fig 35 det 1 o botão do meio acelerador desactiva seautomaticamente Omotorficaassim emfuncionamentoaoregimemínimoeodispositivo de corte pára após um breve tempo PORTUGUÊS PARAGEMDOMOTOR 1 Para parar o motor coloque o interruptor fig 35 det 2 na posição OFF ATENÇÃO odispositivodecortecontinua agirarpo...

Страница 76: ... fig 49 D REMONTAGEM DO CARRETEL 1 Insira as duas extremidades através do passa fio fig 50 2 Insira o carretel e puxe com força as duas extre midades do fio para que saiam das fendas fig 51 3 Volte a posicionar a mola fig 52 e atarraxe a porcaemborboletaemsentidoanti horário fig 53 9 MANUTENÇÃO VELA Pelomenosumavezporanoouemcasodedificul dade de arranque verifique o estado da vela de ignição Aguar...

Страница 77: ..._________________________________ ___________________________________ __________________________________ __________________________________ _________________________________ __________________________________ _____________________________________________ ___________________________________ ___________________________________ __________________________________ __________________________________ ___...

Страница 78: ...a 111 dB A LwA av ISO 10884 Nível máx min de vibrações 4 6 1 8 m s ISO 7916 Nível vibraçðes máx min lâmina 8 4 1 8 m s2 ISO 7916 DADOS TÉCNICOS GBL 34 Peso 5 9 Kg semcarburante dispositivodecorte protecção Capacidade do reservatório 830 cm Dispositivo de corte cabeça de fios 420 mm Dispositivo de corte lâmina 230 mm Cilindrada motor 33 6 cm Potência máxima 1 KW Regime máximo da cabeça de fios 9 50...

Страница 79: ...ca 94 dB A LpA av EN 27917 Nível de potência acústica 110 dB A LwA av ISO 10884 Nível máx min de vibrações 6 2 3 m s ISO 7916 Nível vibraçðes máx min lâmina 8 3 m s2 ISO 7916 ATESTADO DE CONFORMIDADE COM AS NORMAS CEE GB 26 GBL 26 Nível de potência sonora garantido Lwa 112 dB A Nível de potência sonora medido Lwa 111 dB A GB 34 Nível de potência sonora garantido Lwa 111 dB A Nível de potência sono...

Страница 80: ...waæ powa ne obra enia u osób oraz naraziæ je na œmiertelneniebezpieczeñstwo A2 Ka dy kto u ywa KOSIARKÊ powinien uwa nie przeczytaæ instrukcje u ytkowania i czynno ci konserwacyjnych Musi zapoznaæ siê dok adnie ze sterowaniami w celu prawid owej obs ugi kosiarki A2 1 Nale y starannie przechowywaæ instrukcjê do ewentualnych przysz ych konsultacji A3 Nie jest dozwolone u ywanie KOSIARKI przez dzieci...

Страница 81: ...o kr enia r k U ytkowanie urz dzenia przy niskich temperaturach zalecamy noszenie grubych rêkawic Zbyt d ugi czas u ytkowania zalecamy robienie przerw w pracy W przypadku gdy rêce cierpn lub sztywniej nale y skonsultowaæ siê z lekarzem B8 1 Trzymywaæ kosiarkê dwoma rêkoma Pozycja operatora musi byæ sta a i pewna B8 2 Kosiarka zosta a zaprojektowana do u ytku po prawej stronie operatora patrz figur...

Страница 82: ...rza monolityczne B10 7NIEBEZPIECZEÑSTWO Nie montowaæ ostrzy ze rednic wiêksz od 3 OPIS CZÊŒCI MASZYNY OPIS Fig 1 1 Uchwyt liny rozruchu 2 Rozrusznik 3 Ma a d wignia powietrza 4 Pokrywka wiecy 5 Korek zbiornika na benzynê 6 T umik 7 Uchwyt lewy kierownica 8 Silnik iskrowy 9 Zbiornik na benzynê 10 Uchwyt prawy ze sterowaniami kierownica 11 Uchwyt tylny 12 Punkt zaczepienia pasa 13 Uchwyt przedni 14 ...

Страница 83: ... 20 B do ciêcia trawy po zamontowaniu g owicy y owej i rozszerzenia fig 1 part 21 22 co jest uaktywnione do stworzenia zabezpieczenia UWAGA Bezpieczne warunki przewidziane w normach bezpieczeñstwa istniej wówczas gdy zostan zamontowane zabezpieczenia jak wy ej opisano MONTA OSTRZA I ZABEZPIECZENIE fig 7 8 UWAGA Nosiæ rêkawice zabezpieczaj ce w trakcie i n t e r w e n c j i m o n t a u i czynno ci ...

Страница 84: ... w umieszczone z przodu zatrzaskowe zapiêcie rys 68 szczegó 1 Otwarcie zapiêcia nastêpuje poprzez naci niêcie przycisku PRESS i poci gniêcie dwóch elementów zapiêcia w przeciwnych kierunkach Pasy nale y zak adaæ od ty u rys 69 Zapiêcie pasów nastêpuje poprzez po czenie i doci niêcie dwóch elementów zapiêcia zobacz strza ki rys 68 a do us yszenia klikniêcia 2 Zaczep sprê ynowy do zahaczenia na masz...

Страница 85: ...awiæ wy cznik fig 26 na pozycji ON 2 Podnie æ d wigniê powietrza umieszczon po prawej stronie pokrywki ga nika fig 27 i ustawiæ na w a ciwej pozycji 3 Przycisn æ kilkakrotnie do oporu bañkê primer fig 28 do momentu a benzyna wróci do zbiornika poprzez prze roczyst rurkê fig 29 4 Za apaæ uchwyt wraz z przyci niêciem d oni blokady przyspieszenia fig 30 zwalnia siê w ten sposób ruch d wigni przyspies...

Страница 86: ...zymania ROZRUCH GOR CEGO SILNIKA Postêpowaæ tak jak w przypadku zimnego silnika ale z d wign powietrza obni on patrz fig34 7 U YTKOWANIE JAK U YWAÆKOSIARKÊ 1 Przyczepiæ zawieszenie pasa fig 36 part 1 do pier cienia fig 36 szczegó 2 2 trzymaæ kosiarkê po prawej stronie tak jak wskazano na fig 34 REGULACJA D UGO CI Y KI DO CIECIA G owica y owa posiada regulacjê rêczn Przed zu yciem siê do po owy y k...

Страница 87: ...ym od ruchu wskazówek zegara fig 53 INSTRUKCJA KOSIARKI PL POLSKI 9 CZYNNOŒCIKONSERWACYJNE WIECA Przynajmniej raz w rok lub w przypadku trudno ci rozruchu sprawdziæ stan wiecy zap onowej Przed wymian odczekaæ w celu sch odzenia silnika 1 ci gn æ pokrywkê i odkrêciæ wiecê dostarczonym z kosiark kluczem fig 54 W przypadku nadmiernej skorupy lub znacznego zu ycia elektrod nale y wiecê wymieniæ na now...

Страница 88: ...____________ __________________________________ __________________________________ _________________________________ __________________________________ _____________________________________________ ___________________________________ ___________________________________ __________________________________ __________________________________ _________________________________ _ _ _ _ _ _ _ _ _ _ _ _ _ ...

Страница 89: ..._____________ __________________________________ _________________________________ __________________________________ _____________________________________________ ___________________________________ ___________________________________ __________________________________ __________________________________ _________________________________ __________________________________ _________________________...

Страница 90: ...1 dB A LwA av ISO 10884 Max min poziom wibracji 4 6 1 8 m s ISO 7916 Max min poziom wibracji ostrza 8 4 1 8 m s ISO 7916 DANETECHNICZNEGBL34 Ciê ar 5 9 kg bez paliwa urz dzenia do ciêcia zabezpieczenie Pojemno æ zbiornika 830 cm Zespó do ciêcia g owica y owa 420 mm Urz dzenie tn ce ostrze 230 mm Pojemno æ silnika 33 6 cm Moc maksymalna 1 kW Maksymalne obroty g owicy y owej 9 500 1 min Maksymalneob...

Страница 91: ... av EN 27917 Poziom mocy akustycznej 110 dB A LwA av ISO 10884 Max min poziom wibracji 6 2 3 m s ISO 7916 Max min poziom wibracji ostrza 8 3 m s ISO 7916 PORTUGUÊS GB 26 GBL 26 Gwarantowanypoziommocyakustycznej Lwa 112 dB A Zmierzony di poziom mocy akustycznej Lwa 111 dB A GB 34 Gwarantowanypoziommocyakustycznej Lwa 111 dB A Zmierzony di poziom mocy akustycznej Lwa 110 dB A GBL 34 Gwarantowanypozi...

Страница 92: ..._______________________________ _________________________________ __________________________________ _____________________________________________ ___________________________________ ___________________________________ __________________________________ __________________________________ _________________________________ __________________________________ __________________________________________...

Страница 93: ..._______________________________ _________________________________ __________________________________ _____________________________________________ ___________________________________ ___________________________________ __________________________________ __________________________________ _________________________________ __________________________________ __________________________________________...

Страница 94: ..._______________________________ _________________________________ __________________________________ _____________________________________________ ___________________________________ ___________________________________ __________________________________ __________________________________ _________________________________ __________________________________ __________________________________________...

Страница 95: ......
Страница 96: ...rter toute modification technique ou esthétique sans avertir au préalable De firma SANDRIGARDEN behoudt zich het recht voor onaangekondigd zowel technische wijzigingen als esthetische veranderingen aan te brengen SANDRIGARDEN s r l se reserva el derecho de hacer modificaciones técnicas y estéticas sin aviso previo A Sandrigarden s r l reserva se o direito de produzir modificações quer técnicas que...

Отзывы: