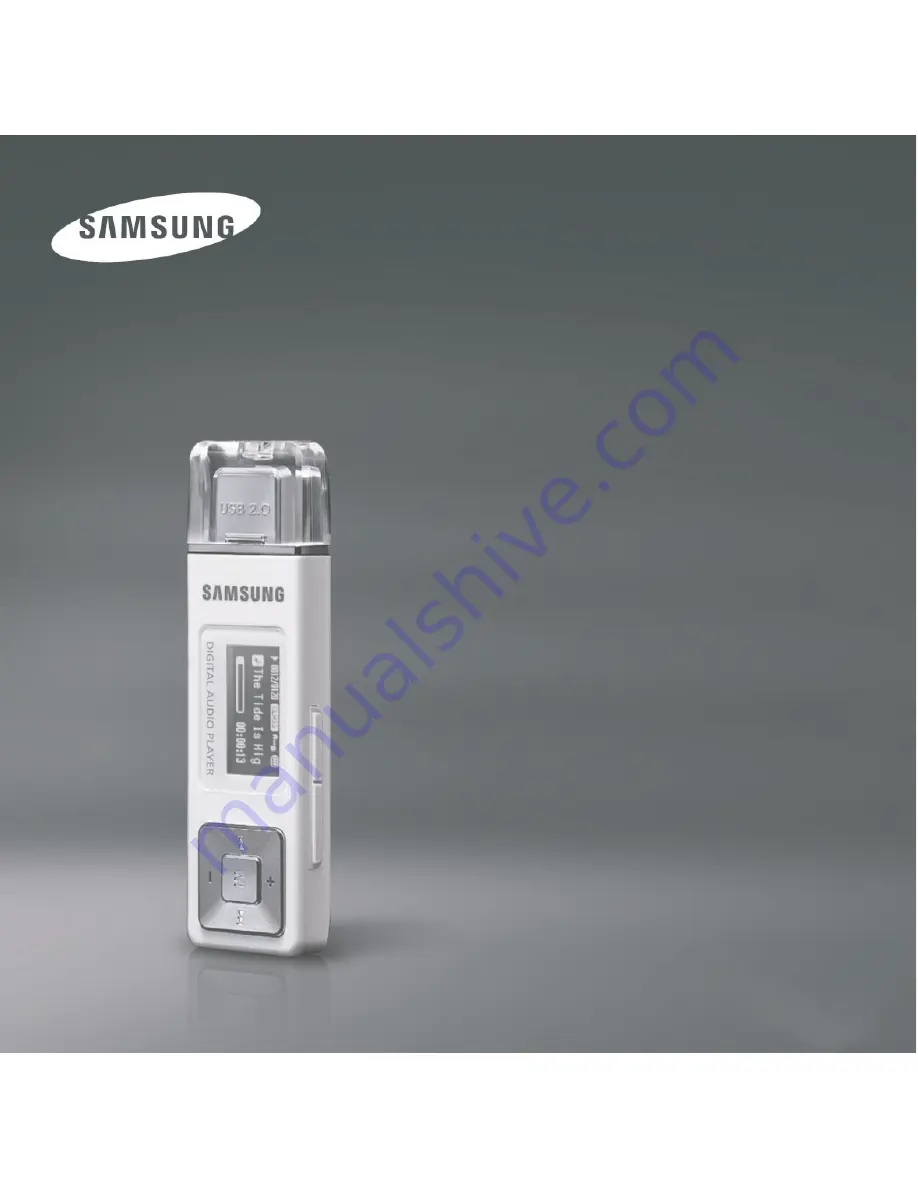
На нашем сайте вы можете бесплатно скачать инструкцию по эксплуатации для продукта Samsung YP-U2JQB/XAA. Руководство доступно для загрузки на manualshive.com. На сосредотачивайтесь на продукте, а не на сайте.
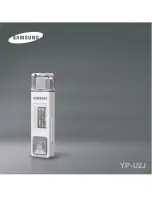
YP-U2J
Страница 1: ...YP U2J ...
Страница 2: ...an cause serious damage to your hearing If you are exposed to sound louder than 85db for an extended time you may adversely affect your hearing The louder the sound is the more seriously damaged your hearing may be an ordinary conversation is 50 to 60 db and the noise level on a busy road is approximately 80 db You are strongly advised to set the volume level to medium the medium level is usually ...
Страница 3: ...ar magnetic objects as it may cause a malfunction Failure to follow all instructions lead to physical injuries or damage to the product CAUTION Product Use Take care to avoid product malfunc tion and physical damage When wearing the product around your neck take care not to exert excessive force on the neck string Management of Important Data Be sure to backup important data Please be aware that w...
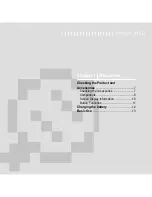
Страница 4: ... 18 Installing Windows Media Player10 19 Transferring Music to your Player 20 Chapter 3 Listening to Music FM Radio Listening to Music 23 Listening to Music 23 Transferring Playlists from WMP10 26 To Play a Playlist 28 To Play a Favorite 29 User Button Custom Function 31 Listening to FM Radio 34 Listening to FM Radio 34 Searching for Frequencies 35 Setting a Frequency 36 To Delete Presets 39 Setti...
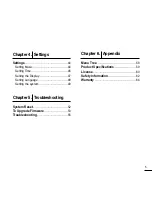
Страница 5: ...Time 46 Setting the Display 47 Setting Language 48 Setting the system 49 Chapter 5 Troubleshooting System Reset 52 To Upgrade Firmware 53 Troubleshooting 55 Chapter 6 Appendix Menu Tree 58 Product Specifications 59 License 60 Safety Information 62 Warranty 64 ...
Страница 6: ...Chapter 1 Preparation Checking the Product and Accessories 7 Checking the Accessories 7 Components 8 Screen Display Information 10 Button Functions 11 Charging the battery 12 Basic Use 13 ...
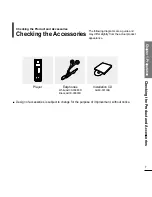
Страница 7: ...ories Checking the Accessories The following diagrams are a guide and may differ slightly from the actual product appearance Player Earphones White AH30 00089D Black AH30 00090D Installation CD AH80 00130B Design of accessories is subject to change for the purpose of improvement without notice ...
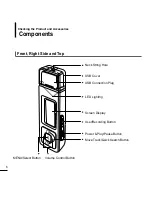
Страница 8: ...ories Components Neck String Hole USB Cover USB Connection Plug LED Lighting Screen Display Move Track Quick Search Button MENU Select Button Volume Control Button User Recording Button Power Play Pause Button Front Right Side and Top ...
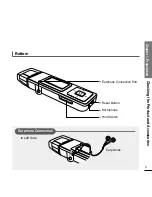
Страница 9: ...9 Chapter 1 Preparation Checking the Product and Accessories Bottom Hold Switch Reset Button Microphone Earphone Connection Port Earphone Connection Left Side Earphones ...
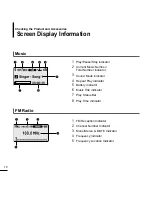
Страница 10: ...t Music Number Total Number indicator 6 Music Title indicator 3 Sound Mode indicator 4 Repeat Play indicator 7 Play Status Bar 8 Play Time indicator 5 Battery indicator 1 FM Reception Indicator 2 Channel Number Indicator 3 Mono Stereo MUTE Indicator 4 Frequency Indicator 5 Frequency Location Indicator FM Radio ...
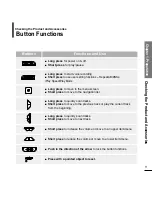
Страница 11: ...ay Mode Long press to quickly scan tracks Short press to move to the previous track or play the current track from the beginning Long press to quickly scan tracks Short press to move to next track Push in the direction of the arrow to lock the button functions Long press to move to the menu screen Short press to move to the navigation list Press with a pointed object to reset Short press to increa...
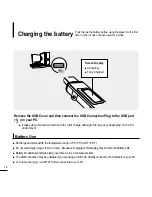
Страница 12: ...for a full charge although this may vary depending on the PC environment Battery Use Recharge and store within the temperature range of 5 C 35 C 40 F 95 F Do not overcharge longer than 12 hours Excessive charging or discharging may shorten the battery s life Battery life naturally shortens slowly over time as it is a consumable item The USB connection may be unstable if you are using a USB hub Dir...
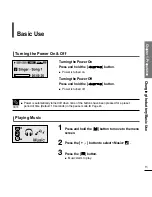
Страница 13: ... On Press and hold the button Power is turned on Turning the Power Off Press and hold the button Power is turned off Playing Music 1 Press the button Music starts to play 3 2 Press the button to select Music Power is automatically turned off when none of the buttons have been pressed for a preset period of time Default 10 seconds in the pause mode Page 46 NOTE ...
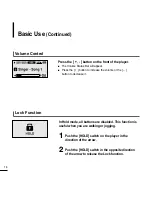
Страница 14: ...e button to increase the volume or the button to decrease it Lock Function In Hold mode all buttons are disabled This function is useful when you are walking or jogging 1 Push the HOLD switch on the player in the direction of the arrow 2 Push the HOLD switch in the opposite direction of the arrow to release the Lock function ...
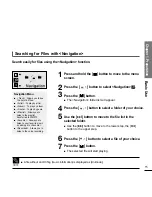
Страница 15: ... the button to move to the menu screen 1 Press the button The Navigation folder list will appear 3 Press the button to select a file of your choice 6 2 Press the button to select Navigation Navigation Menu Track Allows you to see the list of all files Artist To play by artist Album To play by album Genre To play by genre Playlist Allows you to listen to the playlist transferred to WMP10 Favorite A...
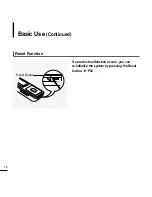
Страница 16: ...16 Basic Use Continued Reset Function If a product malfunction occurs you can re initialize the system by pressing the Reset button P52 Reset Button ...
Страница 17: ...Chapter 2 Importing Music Files Importing Music Files 18 Connecting to your PC 18 Installing Windows Media Player10 19 Transferring Music to your Player 20 ...
Страница 18: ...ng connection Connecting to your PC Importing Music Files PC Requirements Pentium 300MHz or higher Windows XP Service Pack 1 or higher 100MB of free hard disc space CD Rom Drive 2X or higher USB Port 2 0 DirectX 9 0 or higher Windows Media Player 10 0 or higher For use in conjunction with a PC the following is required ...
Страница 19: ...edia Player10 Installing Windows Media Player10 You cannot transfer files to the player when Windows Media Player 10 is not installed on your PC To install Windows Media Player 10 on your PC insert the installation CD into the CD ROM drive of your PC and select the System Check ...
Страница 20: ...WMA files using Windows Media Player 10 The files downloaded from WMP10 to the player will be automatically saved in the Navigation 4 When the Sync window appears select the file you want to transfer to the player drag and drop it to the left Sync List window 3 Select Sync at the top of the screen Transferring Music to your Player Importing Music Files ...
Страница 21: ...re checked and then press Start Sync at the top of the screen Synchronized to Device message will appear on the left window The downloaded files will appear in the right window under Music folder 6 You can check the transferred file in the right window Transferring Music to your Player ...
Страница 22: ...y a Playlist 28 To Play a Favorite 29 User Button Custom Function 31 Listening to FM Radio 34 Listening to FM Radio 34 Searching for Frequencies 35 Setting a Frequency 36 To Delete Presets 39 Setting FM Radio 40 Recording 42 Voice Recording 42 Before you start Transfer the music file of your choice from your PC to the player ...
Страница 23: ...lay from the point where it stopped Power is automatically turned off when none of the buttons have been pressed for a preset period of time Default 10 seconds in the pause mode Page 46 NOTE To Pause Press and hold the button to move to the menu screen 1 Press the button Music starts to play 3 2 Press the button to select Music The music files compatible with the player are MP3 WMA secure WMA MP1 ...
Страница 24: ...rent track starts playing from the beginning To Play from the beginning of the current track Press the lœœ button within 5 seconds of play The previous track will start playing Press the l button The next track will start playing To play the previous next track When playing VBR files the previous track may not play even if you press the lœœ button within 5 seconds of the play CAUTION Press the lœœ...
Страница 25: ...ton to select Artist and then press the button The albums for the artist will appear Press the button to select Navigation and then press the button The Navigation folder list will appear 2 Navigation Menu Track Allows you to see the list of all files Artist To play by artist Album To play by album Genre To play by genre Playlist Allows you to listen to the playlist transferred to WMP10 Favorite A...
Страница 26: ...ts from WMP10 Listening to Music 1 To transfer playlists from WMP10 click on Sync Settings in the WMP10 menu on your PC 2 Select Synchronize device automatically 3 Select the playlists you want to sync transfer to your player ...
Страница 27: ...Chapter 3 Listening to Music FM Radio 27 Transferring Playlists from WMP10 4 Click on Start Sync in the WMP10 menu The Playlists will be transferred to your player and will appear in the Playlist menu ...
Страница 28: ...lder list will appear 4 Press the button to select a music file to play and then press the button The music will start playing Press the button to select a folder of your choice and then press the button 3 Listening to Music To Play a Playlist Playlists transmitted from Windows Media Player 10 are displayed in the Playlist menu Please refer to WMP10 for transferring Playlists ...
Страница 29: ...o Favorite To add files to Favorite To delete files from Favorite select the files to delete and press the USER button again NOTE 1 Press the button while a music is playing The file list of the folder will appear 2 Press the lœœ l buttons to add files to Favorite and then press the USER button is displayed in front of the selected files and the files are added to Favorite ...
Страница 30: ... select Navigation and then press the button The Navigation folder list will appear 3 Press the button to select Favorite and then press the button 4 Press the button to select a music file to play and then press the button The music will start playing Listening to Music To Play Favorite Continued ...
Страница 31: ... for simple mode change 2 Press the button to select Settings and then Press the button The Settings menu will appear To set desired User Button Mode 3 Press the button to select User Button Mode and then press the button The User Button Mode menu will appear 4 Press the button to select the desired user button mode and then press the button Repeat AB Sets section repeat DNSe Selects the sound mod...
Страница 32: ... the ending of the section you want to repeat A B will appear on the screen and the specified section starts to play repeatedly To set Section Repeat Press the USER button again during Section Repeat Section Repeat will be canceled To cancel Section Repeat Section Repeat will be automatically canceled in the following cases When the lœœ or l button is pressed moving to the previous or next track T...
Страница 33: ...see page 45 To use the DNSe button Set the User Button Mode to Play Speed and press the USER button Playback speed changes in the following order each time the button is pressed x0 7 x0 8 x0 9 x1 0 Normal speed x1 1 x1 2 x1 3 The higher the number is the faster the playback speed is To use the Play Speed button Set the User Button Mode to Play Mode and press the USER button Playback mode changes i...
Страница 34: ...ption will start Press the button while listening to FM radio The MUTE message will appear and no sound is emitted To turn the sound back on press the button again To use the mute function Before you start Connect your earphones to the player and turn the power on and check the battery status Listening to FM Radio Listening to FM Radio ...
Страница 35: ...ill disappear from the screen display and go into manual mode 2 Press and hold the lœœ or l button and then release The frequencies are automatically searched To stop the search when you reach a desired frequency press the lœœ or l button again To manually search for frequencies 1 Press the button to select Manual tuning Mode The PRESET message will disappear from the screen display and go into ma...
Страница 36: ...n The Settings menu appears 3 Press the button to select FM Radio and then press the button The FM Radio menu appears 4 Press the button to select Auto Preset and then press the button The Auto Preset Confirm window will appear 5 Press the button to select Yes and then press the button The AUTO message appears and the first 20 frequencies are automatically preset To automatically set frequencies ...
Страница 37: ...canceled and frequencies set up to then are stored To cancel during setting To set Auto Preset again after setting preset existing frequencies are deleted entirely and you can reset from start NOTE Always connect your earphones to the player when searching or setting frequencies The earphones are used as antennas to receive FM radio reception CAUTION ...
Страница 38: ...search for frequencies to preset 1 Press the button and select Preset Mode The PRESET message will appear on the screen display and go into preset mode 2 Press the lœœ or l button The preset number is selected and you can listen to the stored radio frequency 3 Press the USER button The Save message will appear 4 Press the lœœ or l button to specify preset numbers and then press the button The SAVE...
Страница 39: ...go into the preset mode 2 Press the lœœ or l button to search for preset frequencies to delete 3 Press the USER button The Delete message will appear 4 Press the lœœ or l button to select Y and then press the button The DELETED message will appear and the selected preset number is deleted To cancel preset number delete select N Before you start Follow the steps below to delete frequencies while li...
Страница 40: ...utton The FM Region menu appears 5 Press the button to select the FM region and then press the button You can select from Korea USA Japan Other Countries To set FM region Frequency range by region Korea USA Search for FM frequencies in 100 kHz increments between 87 5 MHz 108 0 MHz Japan Search for FM frequencies in 100 kHz increments between 76 0 MHz 108 0 MHz Other Countries Search for FM frequen...
Страница 41: ...ears 3 Press the button to select FM Radio and then press the button The FM Radio menu appears 4 Press the button to select FM Search Level and then press the button The FM Search Level menu appears 5 Press the button to select the search level and then press the button You can select from High Middle and Low The higher FM search level is the more frequencies can be received To set FM sensitivity ...
Страница 42: ... the recording number and WAV is the file format For example file name V003 WAV is the third voice recording file to be saved To listen to saved recording files use the Navigation Search function Page 15 FM radio stations cannot be recorded NOTE Do not place the microphone too close or too far away during recording as this can affect the recording quality Voice recording does not perform properly ...
Страница 43: ...Chapter 4 Settings Settings 44 Setting Music 44 Setting Time 46 Setting the Display 47 Setting Language 48 Setting the system 49 ...
Страница 44: ...button The Music menu appears 4 Use the and buttons to set necessary functions Button functions to use during setting Press the lœœ button to move to the previous item Press the l button to move to the next item Press the button to move up or down through the current menu Press the button to select or save the menu If there is no button operation for about 30 seconds in the Settings screen setting...
Страница 45: ...cording Select either x0 7 x0 8 x0 9 x1 0 Normal speed x1 1 x1 2 or x1 3 The higher the number is the faster the playback speed is Skip Interval Set the playback interval when you press the lœœ or l button during playback Select either 1 Track 03 Sec 05 Sec 07 Sec 10 Sec 30 Sec or 01 Min Search Speed Set the search speed when you press and hold the lœœ or l button during playback Select either 01 ...
Страница 46: ...pears 3 Press the button to select Time and then press the button The Time menu appears 4 Use the and buttons to set necessary functions Sleep Turns off power automatically after the preset time Select either Off 15 Min 30 Min 60 Min 90 Min or 120 Min Auto Power Off Automatically turns power off when there is no button operation after the preset time in the pause mode Select either Off 05 Sec 10 S...
Страница 47: ...r screen displays Scroll Speed Sets the scroll speed to adjust the speed of the track title movement Select from Slow Normal and Fast Backlight Time Sets to automatically turn off the backlight after there is no button operation during the preset time Select either 05 Sec 15 Sec 30 Sec 60 Sec or Always On Contrast Adjusts the brightness of the screen display window Select from 00 to 10 Display Tim...
Страница 48: ... relevant to the file such as the title artist album year genre and a comment field When you have made a change of ID Tag language setting turn off the product and restart it so the change can be applied NOTE Menu Set the menu language Select from Chinese S Chinese T Dutch English French German Hungarian Italian Japanese Korean Polish Portuguese Russian Spanish and Swedish ID3 Tag Set the track in...
Страница 49: ...ume Resume and Beep Sound functions 1 Press and hold the button to move to the menu screen 2 Press the button to select Settings and then press the button The Settings menu appears 3 Press the button to select System and then press the button The Sytem menu appears 4 Use the and buttons to set necessary functions ...
Страница 50: ... from 00 to 30 Max If the power is turned on again after adjusting the volume above the default volume music is played at default volume If the power is turned on again after the volume was set within the default volume the music is played at the previously played volume Default Set Returns all settings to the default value About Checks the firmware version number of stored files remaining memory ...
Страница 51: ...Chapter 5 Troubleshooting System Reset 52 To Upgrade Firmware 53 Troubleshooting 55 ...
Страница 52: ...tialize the system by pressing the Reset button Press the Reset Button at the bottom of the product with a pointed object such as a safety clip The system will be initialized The Reset function will not delete data stored in the built in memory Reset Button 52 ...
Страница 53: ...latest firmware 3 Uncompress the downloaded file in a folder 4 Run Setup exe and follow the instructions on the screen for installation If previous version of firmware updater has been installed on your PC overwrite the firmware files bootmanager sb resource bin StmpSys sb UsbMsc sb in C Program Files Samsung YP U2J folder 5 Double click YP U2J Updater icon on the Desktop Select Install Player USB...
Страница 54: ...de the Firmware If you select Format data area and start the update all the data saved in YP U2J will be deleted Please backup your important data on your PC If you do not want your data to be deleted do not select Format data area 8 Confirm the version of the current firmware To Upgrade Firmware Continued 9 Click the Close button ...
Страница 55: ...the Reset Button If set to Backlight Time in Settings Display the screen may be turned off Press any button to turn the screen back on The screen may not be visible under direct sunlight The power is automatically turned off when the battery is fully discharged Recharge the battery Battery life differs from the Manual The battery life may vary depending on the settings of EQ and LED effects Produc...
Страница 56: ... Variable Bit Rate format Abnormal Display of File Name Move to Settings Language ID3 Tag in the Menu screen and set an appropriate language Program Malfunction Connection to a PC is disabled The backlight does not turn on The product is hot Please check if the PC requirements are met Press Start on the desktop and run Windows Update Select critical updates and service packs and start update Resta...
Страница 57: ...Chapter 6 Appendix Menu Tree 58 Product Specifications 59 License 60 Safety Information 62 Warranty 64 ...
Страница 58: ...ay Mode User Button Mode FM Search Level FM Region Auto Preset FM Radio Auto Power Off Sleep Time Contrast Backlight Time Scroll Speed Display Time LED Effect Display ID3 Tag Menu Language Beep Resume Bit Rate Default Vol About Default Set System Music Navigation Playlist FM Radio Settings Menu Tree You can quickly view the menu structure 58 ...
Страница 59: ...NumberoffoldersandFiles Earphone Output Output Frequency Range Noise Ratio Play Time TemperatureRangeforOperation Case Weight Dimensions WxHxD FM Frequency FM Signal to Noise Ratio FM T H D FM Useable Sensitiivity MPEG1 2 2 5 Layer3 8kbps 320kbps 8kHz 48kHz WMA 20mW 16Ω Folder Max 200 File Max 2000 20Hz 20KHz 88dB with 20KHz LPF based on 1KHz 0dB 13 hours of music play MP3 128kbps Volume 20 Normal...
Страница 60: ...mited to private non commercial use by end user consumers for licensed contents No rights are granted for commercial use The license does not cover any product unit other than this product unit and the license does not extend to any unlicensed product unit or process conforming to ISO IEC 11172 3 or ISO IEC 13818 3 used or sold in combination with this product unit The license only covers the use ...
Страница 61: ...Memo 61 ...
Страница 62: ... harmful interference and 2 this device must accept any interference received including interference that may cause undesired operation Caution Any changes or modifications in construction of this device which are not expressly approved by the party responsible for compliance could void the user s authority to operate the equipment Note This equipment has been tested and found to comply with the l...
Страница 63: ...ectronics Co Ltd Model Number YP U2J has been tested according to the FCC CISPR22 95 requirements for Class B devices and found compliant with the following standards EMI EMC AnSI C63 4 1992 FCC Part 15 Subpart B This device complies with part 15 of the FCC Rules Operation is subject to the following two conditions 1 This device may not cause harmful interference and 2 This device must accept any ...
Страница 64: ...rranty is only valid when the warranty card is properly completed and upon presentation of the proof of purchase consisting of original invoice or sales slip confirmation indicating the date of pur chase dealer s name model serial No and product number Samsung reserves the right to refuse warranty ser vice if this information has been removed or changed after the original purchase of the product f...
Страница 65: ...safety standardsin current force or failure to comply with productmanual instructions Accidents Acts of God or any cause beyond the control of Samsung caused by lightning water fire public disturbances and improper ventilation Unauthorized modifications carried out for the product to comply with local or national technical standards in countries for which the Samsung product was not originally des...
Страница 66: ...SUNG AND CAUSING THE ALLEGED DAMAGE WITHOUT LIMITING THE FOREGOING PURCHASER ASSUMES ALL RISK AND LIABILITY FOR LOSS DAMAGE OR INJURY TO PURCHASER AND PURCHASER S PROPERTY AND TO OTHERS AND THEIR PROPERTY ARISING OUT OF THE USE MISUSE OR INABILITY TO USE THIS PRODUCT SOLD BY SAMSUNG NOT CAUSED DIRECTLY BY THE NEGLIGENCE OF SAMSUNG THIS LIMITED WARRANTY SHALL NOT EXTEND TO ANYONE OTHER THAN THE ORI...
Страница 67: ...REV 0 0 If you have any questions or comments relating to Samsung products please contact the SAMSUNG customer care center Samsung Electronics America Inc 1 800 SAMSUNG 7267864 www samsung com ...