


22 _ Disassembly and Reassembly
Part
Figure
Description
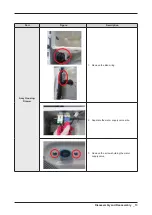
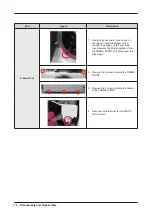
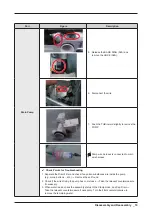
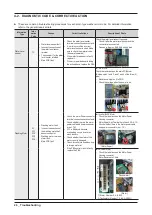
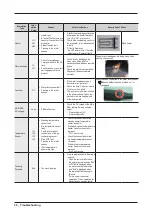
Heater
6. Remove the Heater from the Tub
Caution
Insert the Heater into the correct position
inside the Tub when reassembling it. Risk
of a fire.
Make sure to push it inwards until the
packing part comes into the Tub completely
when reassembling it so that the packing
part is completely stuck to the Tub.Fasten
the holding nut with a force of 5Kgf/cm
2
.If
the nut is not fastened properly, water could
leak.
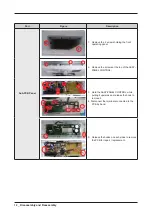
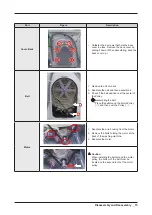
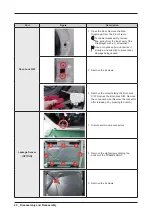
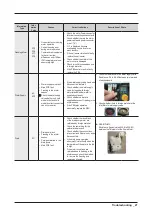
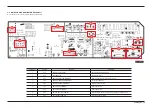
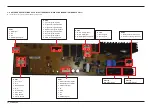
Assy Kit
● Replace the Assy KIT - Main and Sub PCB
both.
Main and Sub will be supplied as one
Assy Kit, not seperately.
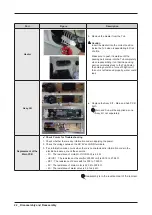
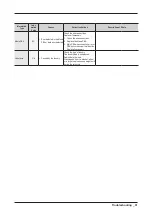
Replacement of the
Main PCB
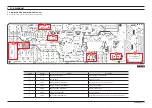
4
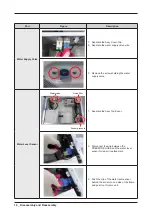
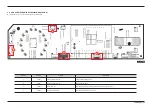
Check Points for Troubleshooting
1.
Check whether there is any information code in applying the power.
2.
Check the voltage between the DC 5V and GND terminals.
3.
If an information code occurs when there is no characteristic information code in the
electric harnesses, check these points. :
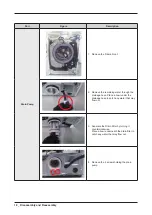
-
3C : The resistance of motor(U-V/V-W/W-U) is 4.8 Ω.
-
HC/HC1 : The resistance of heater(for 2000W unit) is 25.19 to 27.84 Ω.
-
DC1 : The resistance of door switch is 500 to 1,500 Ω.
-
5C : The resistance of drain motor is 225.8 to 229.8 Ω.
-
4C : The resistance of water valve is 3.6 to 4.4 kΩ.
Reassembly is in the reverse order of the removal.


