4
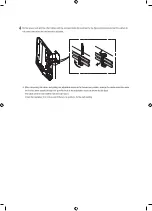
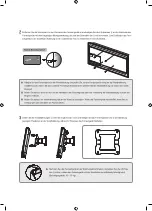
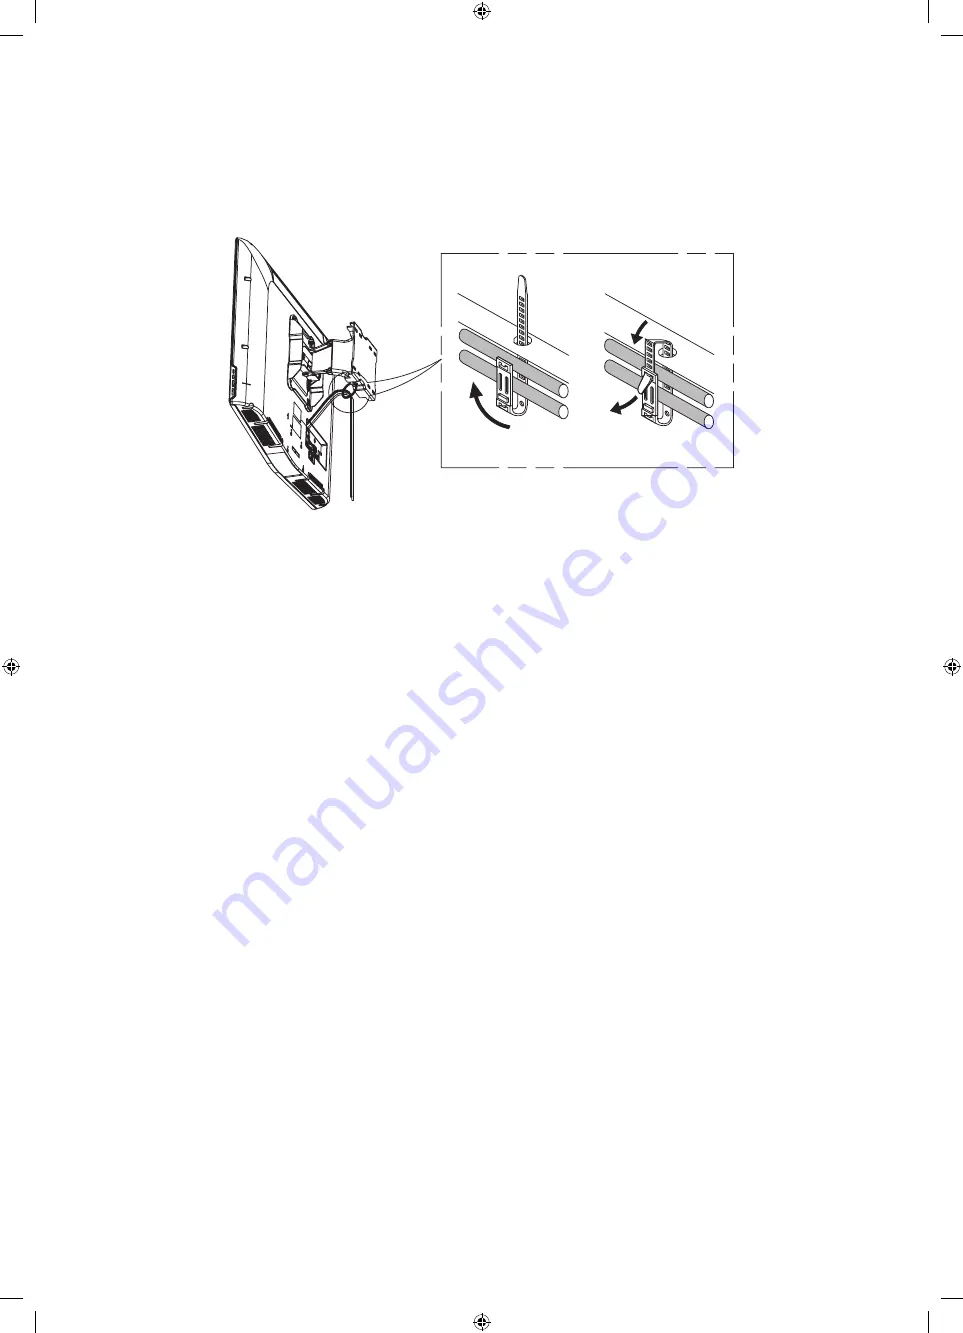
Tie the power cord and the other cables with the enclosed cable tie as shown by the figure and make sure that the cables do
not come loose when the wall mount is adjusted.
After connecting the cables and pulling the adjustable mount as far forward as possible, arrange the cables using the cable
tie that has been passed through the specified hole in the adjustable mount as shown by the figure.
The cable will then not interfere with the wall mount.
Check the operation 2 or 3 times and if there is no problem, fix the wall molding.
Содержание WMN4070TT
Страница 36: ...WMN4270S WMN4270S 1 2 4 3 4 5 WMN4070TT 1 7 7 4 1...
Страница 37: ...50 10 10 10 30 30 25 25 50 MDF PW 0 24 1 9X70 WMN 2370 4X25...
Страница 38: ...2 4 5 5 3 2 4 10 15 TV...
Страница 39: ...4 2 3...
Страница 56: ...WMN4270S WMN4270S 1 2 4 3 4 5 WMN4070TT 1 7 7 4 1...
Страница 58: ...2 4 5mm 5 mm 3 4 10 15 Kg TV...
Страница 59: ...4 2 3...
Страница 61: ...WMN4270S WMN4270S 1 2 4 3 4 5 WMN4070TT 1 7 7 4 1...
Страница 63: ...2 4 5 5 3 2 4 10 15 TV...
Страница 64: ...4 2 3...
Страница 66: ...1 2 4 3 4 TV 5 TV TV WMN4070TT 1 7 7 4 1...
Страница 68: ...3 TV 2 TV 4 TV 5 mm 5 mm TV 4 10 15 Kg TV...
Страница 69: ...4 2 3...
Страница 71: ......
Страница 72: ......

