background image

Camera-Camcorder

95

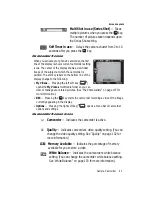
Camera Options

2.

Press the 

Options

 (right) soft key (

). The following sub-menus 

appear in the display: 

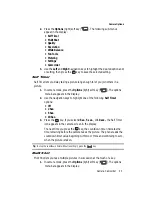
• Self Timer


• Multi Shot


• Quality


• Resolution


• White Balance
• Fun Tools


• Metering


• Settings


• Camcorder


3.

Use the 

Left

 and 

Right

 navigation keys to highlight the desired option and/

or setting, then press the 

 key to save the selected setting. 

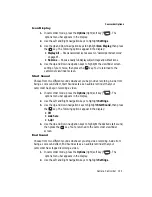
Self Timer

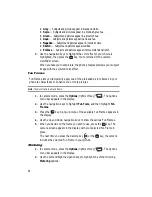
Self Timer lets you delay taking a picture long enough to let you join others in a 
picture. 

1.

In camera mode, press the 

Options

 (right) soft key (

). The options 

menu bar appears in the display. 

2.

Use the navigation keys to highlight one of the following 

Self Timer


options: 

• Off


• 2 Sec.


• 5 Sec.


• 10 Sec.


3.

Press the 

 key. If you select 

2 Sec.

5 sec.

, or 

10 sec.

, the Self Timer 

icon appears in the camera screen in the display. 

The next time you press the 

 key, the countdown timer indicates the 

time remaining before the camera takes the picture. The phone reads the 
countdown timer value beginning with two or three and continuing to zero, 
when the picture is taken. 

Tip: 

To stop the countdown timer without resetting it, press the 

 key. 

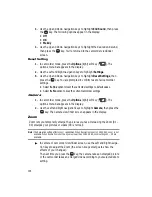
Multi Shot

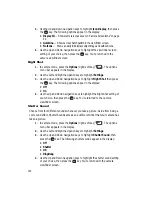
Multi Shot lets you take multiple pictures in succession at the touch of a key. 

1.

In camera mode, press the 

Options

 (right) soft key (

). The options 

menu bar appears in the display. 

OK

OK

OK

Содержание Wafer SCH-R510

Страница 1: ...r510_AB21_cb_030707_F6_rev_1 The WaferTM P O R T A B L E D u a l M o d e T E L E P H O N E User Guide Please read this manual before operating your phone and keep it for future reference...

Страница 2: ...modify prepare derivative works of reverse engineer decompile disassemble or otherwise attempt to create source code from the software No title to or ownership in the Intellectual Property is transfe...

Страница 3: ...QUALITY OF THE PRODUCT THE PERFORMANCE OF THE PRODUCT THE WORKMANSHIP OF THE PRODUCT OR THE COMPONENTS CONTAINED THEREIN OR COMPLIANCE OF THE PRODUCT WITH THE REQUIREMENTS OF ANY LAW RULE SPECIFICATIO...

Страница 4: ...s 17 Understanding the Display Screen 19 Your Phone s Modes 20 Call Functions 23 Making a Call Number Entry Dialing 24 Making a Call Speed Dialing 25 Making a Call Voice Dialing 26 Answering a Call 28...

Страница 5: ...79 Finding Applications 80 Managing Applications 80 Axcess Web 82 Axcess Web 83 Launching Axcess Web 83 Using Axcess Web 84 Using Links 84 How Axcess Web Keys Work 84 Celltop 86 Celltop 87 Launching...

Страница 6: ...h and Safety Information 159 UL Certified Travel Adapter 160 Consumer Information on Wireless Phones 160 Road Safety 166 Operating Environment 168 Using Your Phone Near Other Electronic Devices 168 Po...

Страница 7: ...is User Manual Activating Your Phone Charging the Battery Setting Up Your Voice Mail Memory Card Optional This section explains how to start using your phone by activating your service setting up your...

Страница 8: ...menu or sub menu Tips Provide quick or innovative methods for performing functions related to the subject at hand Important Points out important information about the current feature that could affect...

Страница 9: ...d receive calls Note If you are outside of your carrier s coverage or roaming area the No Service icon appears at the top of the phone s display If you cannot place or receive calls try later when ser...

Страница 10: ...The travel adapter included with your phone is a convenient light weight charger that rapidly charges your phone from any 120 220 VAC outlet 1 Plug the large end of the Travel Adapter into a standard...

Страница 11: ...messages which can be retrieved any time Note Once your voice mail account has been set up you can use the Voice Mail folder under the Message menu to view details of voice messages in your voice mai...

Страница 12: ...s into place 4 Install the battery and battery cover See Install the Battery on page 8 for more information Remove a Memory Card 1 Remove the battery cover and battery See Remove the Battery on page 9...

Страница 13: ...res of Your Phone Domestic and international voice and text messaging service available on participating networks High speed data CDMA 1x EVDO Technology Global Positioning GPS Technology Personal Inf...

Страница 14: ...ft Soft Key Used to navigate through menus and applications and to select the choice available in the Left Soft key option 5 Send Key Lets you place or receive a call In standby mode press the key onc...

Страница 15: ...ode Press this key to return to the previous menu or screen when navigating features on your phone 11 End Key Ends a call If you press and hold the END key the power goes On or Off When you receive an...

Страница 16: ...adjusts the ring volume When receiving a call mutes the ringer 17 Power Accessory Connector Used to plug in the charging accessories and also connect any available accessory cables to your phone Lets...

Страница 17: ...the Message right soft key to open the Messages menu When the right soft key function is Back press the Back right soft key to back up one menu level When the right soft key function is Options press...

Страница 18: ...e a call 3 Briefly press in standby mode to display a list of recent calls to and from your phone 4 Press twice in standby mode to call the most recent number 5 Press to pick up a waiting call Press a...

Страница 19: ...n Menu and pressing the Right soft key will show the Messages menu Display Screen Icons Your Wafer phone can show you definitions of the icons that appear on the top lines of the front and main displa...

Страница 20: ...ttings and s for Call Answer The following call answer options appear in the display Any Key Pressing any key except the key or key answers a call Send Key Only pressing answers a call Tip Tip You can...

Страница 21: ...ne in Keypad Lock Mode Keypad is locked appears in the display While in standby mode press the Unlock left soft key then press the key to unlock the keypad and side keys Keypad is unlocked appears in...

Страница 22: ...s and replace them with vibrations In standby mode repeatedly press and the Down volume key until Vibrate appears in the display The volume key is on the upper left side of phone near the upper left s...

Страница 23: ...ing Making a Call Speed Dialing Making a Call Voice Dialing Answering a Call Ignoring a Call Adjusting the Call Volume Calls Log Roaming This section explains how to make or answer a call This section...

Страница 24: ...lete a call from your wireless phone a connection cannot always be guaranteed Therefore emergency calling may not be available on all wireless networks at all times Important DO NOT depend on this pho...

Страница 25: ...ress the Options right soft key A pop up menu containing the following options appears in the display P pause a hard pause awaits input from you T pause a two second pause 3 Use the navigation keys to...

Страница 26: ...the appropriate prompt s from the number you are calling credit card number bank account number and so on and enter the appropriate response s Making a Call Voice Dialing Your Wafer mobile phone inclu...

Страница 27: ...re information Press the Repeat right soft key to say the name again Press the Settings left soft key then press the Exit right soft key to exit Voice Dial without dialing If the recognized name has m...

Страница 28: ...te prompt s from the number you are calling credit card number bank account number and so on and enter the appropriate response s Answering a Call Your phone notifies you of a call in the following wa...

Страница 29: ...s on the left side of phone Calls Log The Calls log retains information about Outgoing Incoming and Missed calls You can also view times for your last call and the time totals for all calls Review the...

Страница 30: ...e the number to your Contacts Details Calls to Contacts Only Shows the entry for the called Contact Erase Erase the selected call from your Outgoing call log Lock Unlock Protect the selected call from...

Страница 31: ...from your Incoming calls log View Timer Shows the number of calls and or the total time spent on the Last Call All Calls Received Outgoing Roaming Calls Lifetime Calls 4 Press the Msgs left soft key T...

Страница 32: ...ssage to the selected called number Video Message Lets you send a video message to the selected number called Note See Creating and Sending New Messages on page 66 for more information 5 Use the navig...

Страница 33: ...You can review the Data call log for the time and date of the call as well as other information 1 In standby mode press the MENU key then press for Calls and for Data Call A list of your missed calls...

Страница 34: ...since the last erasure Last Reset View the time and date all timers were last reset Lifetime Calls View the duration of all calls since your phone was activated 2 Press the Reset left soft key to rese...

Страница 35: ...your Wafer phone when you travel outside of your Wireless Provider s coverage area The Roaming icon appears in the top line of the display when Roaming is active and extra charges may apply when makin...

Страница 36: ...36 Section 4 Menu Navigation Topics Covered Menu Navigation Menu Outline This section explains the menu navigation for your phone It also includes an outline of the menus available with your phone...

Страница 37: ...avigate Using Shortcuts You can also access menus and sub menus using menu numbers This method is often called a shortcut To shortcut to a menu or sub menu press the MENU key then enter the menu and o...

Страница 38: ...38 for more information Speakerphone Enables Speakerphone mode to share the call with others nearby 2 Do one of the following Use the navigation key to highlight a menu or feature Press the key to ope...

Страница 39: ...side of the conversation the voice of the originator recipient of the call 1 While in a call press the Options right soft key 2 Press for Voice Memo or use the Up and Down navigation keys to high Voic...

Страница 40: ...sound files Erase All Voice Memos at One Time 1 In standby mode press the MENU key then press for Multimedia and for My Sounds A list of sound files appears in the display 2 Use the navigation keys t...

Страница 41: ...ox 1 6 2 Outbox 1 6 3 Drafts 1 6 4 All Messages 1 7 Msg Settings 1 7 1 General 1 7 1 1 Auto Save 1 7 1 2 Auto Erase 1 7 1 3 Quick Text 1 7 1 4 Voicemail 1 7 1 5 Entry Mode 1 7 1 6 Callback 1 7 1 7 Sig...

Страница 42: ...2 Business 4 4 3 Colleague 4 4 4 Family 4 4 5 Friends 4 5 Memory Info 5 Calls 5 1 Outgoing Calls 5 2 Incoming Calls 5 3 Missed Calls 5 4 All Calls 5 5 Data Call 5 6 Call Timer 5 7 Data Counter 6 Cell...

Страница 43: ...1 Adapt Digits 8 1 2 3 2 Reset Digits 8 1 2 4 Sound 8 1 2 4 1 Prompts 8 1 2 4 2 Digits 8 1 2 4 3 Names 8 1 2 4 4 Name Settings 8 1 2 5 Voice Launch 8 1 2 6 About 8 2 Bluetooth 8 2 1 Add New Device 8...

Страница 44: ...2 1 1 My Images 9 2 1 2 My Videos 9 2 1 3 Preset Images 9 2 1 4 Image Shuffle 9 2 2 Clock Format 9 2 3 Theme 9 2 4 Dialing Font 9 2 4 1 Style 9 2 4 2 Size 9 2 5 Banner 9 2 6 Backlight 9 2 6 1 Main Di...

Страница 45: ...4 7 DTMF Tones 9 5 Phone Settings 9 5 1 Airplane Mode 9 5 2 Language 9 5 3 Security 9 5 3 1 Lock Phone 9 5 3 2 Change Lock 9 5 3 3 Emergency 9 5 3 3 1 911 9 5 3 3 2 911 9 5 3 3 3 911 9 5 3 4 Reset Ph...

Страница 46: ...2 2 My Images 9 6 2 3 My Videos 9 6 2 4 My Ringtones 9 6 2 5 My Sounds 9 6 3 Card Memory 9 6 3 1 Memory Usage 9 6 3 2 My Images 9 6 3 3 My Videos 9 6 3 4 My Music 9 6 3 5 Format Card 9 7 Phone Info 9...

Страница 47: ...g Text in T9 Word Mode Entering Upper and Lower Case Letters Entering Numbers Entering Symbols This section outlines how to select the desired text input mode when entering characters into your phone...

Страница 48: ...of text entry Abc 123 or T9 Word is indicated in the lower left part of the display when composing a text message Changing the Text Entry Mode 1 While composing a text message press the Left soft key...

Страница 49: ...text 3 If the word is not the one you meant to enter press the key to show the next word that matches the sequence of keys that you pressed For example when you press the key sequence the word And app...

Страница 50: ...he beginning of the word and before entering the T The capitalization setting will automatically change to abc after you enter each upper case letter Entering Numbers Enter numbers into a text message...

Страница 51: ...and the Next right soft key to page through the other symbols if necessary 6 Press the key that corresponds with the symbol that you wish to enter For example press for an exclamation point Note You c...

Страница 52: ...Finding a Contacts Entry Editing an Existing Contact Entry Speed Dial Numbers Renaming a Contacts Group Deleting a Contacts Entry Memory Info This section explains how to manage your daily contacts b...

Страница 53: ...our Contacts Speed Dial Assign speed dial numbers to your Contacts Group Rename one of your five Contacts groups Memory Info View available memory for dial entries 2 Use the navigation keys to highlig...

Страница 54: ...e right soft key The following options appear in the display Create New Lets you create a new Contacts entry Update Existing Lets you add the number or email address you just entered to an existing Co...

Страница 55: ...to your Contacts list Details Calls to from Contacts Only Shows the entry for the called Contact Erase Deletes the selected number from the selected Calls log Lock Unlock Prevents allows deletion of t...

Страница 56: ...1 In standby mode press and hold the key to launch VoiceSignal Say a Command appears in the display and is pronounced through the speaker 2 Say Lookup VoiceSignal prompts you to Say the name 3 Speak...

Страница 57: ...he desired Contacts entry is listed in the display highlight the contact using the navigation keys if necessary Then do one of the following Press the key to dial the number associated with the named...

Страница 58: ...n the current group Send PIC Msg Lets you send a picture message to selected contact s in the current group Send Video Msg Lets you send a video message to selected contact s in the current group 4 Us...

Страница 59: ...3 Use the navigation keys to highlight a number stored in this contact entry 4 Press to backspace and delete numbers 5 Press and hold to clear all numbers in the highlighted field Note You can also a...

Страница 60: ...you re finished entering the number and pauses press the Save left soft key to store the number in your Contacts Add Pauses to an Existing Contacts Entry 1 Find the desired entry in the Contacts list...

Страница 61: ...contact entry Note If a contact has more than one stored number such as Home and Office you can select which of these numbers your phone will dial when you speed dial that contact 4 Press the Options...

Страница 62: ...ghlighted 3 Use the navigation keys to highlight the Email 1 or Email 2 field labeled with the symbol 4 Use the keypad to edit the Email address See Entering Text on page 47 for more information To in...

Страница 63: ...e or use the navigation keys to highlight a Contact entry 5 Press the key You are prompted to confirm the new Speed Dial setting 6 Press the Yes left soft key to save the new setting Press the No righ...

Страница 64: ...e Finding a Contacts Entry on page 56 for more information 2 Press the Options right soft key A pop up menu containing the following options appears in the display New Contact Lets you add an entry to...

Страница 65: ...end Options Receiving New Messages Voicemail Message Folders Erasing Messages Message Settings General Message Settings This section explains how to create send receive and view different types of mes...

Страница 66: ...pears in the display See Finding a Contacts Entry on page 56 for more information on finding a contact Use the navigation keys to highlight a contact and press the key to mark your selection To add th...

Страница 67: ...your message by selecting contacts and or entering number s or email address es of message recipient s See Step 2 of Creating and Sending a Text Message on page 66 for more information on addressing y...

Страница 68: ...the selected photo in the PIC field The Sound field becomes highlighted 10 Press the Sounds left soft key The Record New option and a list of sound files appear in the display with the Record New opt...

Страница 69: ...nter the Subject text using the keypad See Step 4 of Creating and Sending a Text Message on page 66 for more information on choosing a text entry method also see Entering Text on page 47 for more info...

Страница 70: ...h options appear depends on what type of message you composed and what message field you have highlighted Edit Send To Lets you add delete or change numbers or Email addresses in a Text message Send T...

Страница 71: ...ur inbox where you can view it later Use the navigation keys to highlight the desired option and press the key Receive Messages While in a Call When you receive a message while in a call a New Message...

Страница 72: ...ghted message then proceed to Step 3 Press the Options right soft key The following options appear in the display Reply Lets you reply to a message Reply With Copy Text Message only Lets you reply to...

Страница 73: ...s list Message Info Lets you display status information about a message Use the navigation keys to highlight an option Press the key to perform the function for the highlighted option Press the key to...

Страница 74: ...Options right soft key The following options appear in the display Play Again Picture Messages only Replay a sound file included with a message Forward Send the message to another addressee Lock Unloc...

Страница 75: ...ys to highlight an option Press the key to perform the function for the highlighted option Press the key to return to the Messages menu 3 If you press the EDIT key in the Text screen field do one of t...

Страница 76: ...This function erases all messages in a selected message folder or in all message folders To delete a single message from the Messages menu open the message folder where the message to be deleted is s...

Страница 77: ...lowing general message options appear in the display Auto Save Lets you set whether to automatically save to the Outbox folder to discard or to prompt you to save unsent messages when you exit them Au...

Страница 78: ...Press the key to enter the sub menu and change the selected message settings Picture Video Message Settings 1 In standby mode press the Message right soft key then press for Msg Settings and for Pictu...

Страница 79: ...Shop 79 Section 8 Axcess Shop Topics Covered Finding Applications Managing Applications ThissectionexplainstheAxcessShopfeatureswhereuserscandownloadmultimedia applications games and check news and s...

Страница 80: ...s Use the navigation keys to select an application on your phone that you wish to launch Use the navigation keys to highlight highlight the Manage Apps icon see Managing Applications on page 80 for mo...

Страница 81: ...lected application Move Lets you move the selected application between available folders View Download Log Shows information about recent activity using Axcess Shop 4 Use the navigation keys to highli...

Страница 82: ...ng Axcess Web Using Axcess Web Using Links How Axcess Web Keys Work ThissectionoutlineshowtolaunchAxcessWeb howtonavigatetootherpagesonthe web and how thekeysonthe keypadareusedwith theweb application...

Страница 83: ...t was not accessed in your last session you automatically re connect to the Internet Launching Axcess Web 1 In standby mode do one of the following to launch Axcess Web Press the Down navigation key P...

Страница 84: ...their function changes depending on the application Using Links Links have several purposes such as jumping to a different page to a different site or even initiating a phone call Links are shown ins...

Страница 85: ...9 Use the number keys to select items in a menu if they are numbered End Key Press to exit the Axcess Web and return the phone to standby mode Left Soft Key Press to activate the command that appears...

Страница 86: ...ltel application and service displays cells on your phone to provide you with information you choose instantly anytime anywhere This section outlines how to launch Celltop on your phone Note For more...

Страница 87: ...1 1 800 255 8351 Launching Celltop You can launch Celltop by doing either of the following Soft Key Method In standby mode press the Celltop left soft key One of the fol lowing appears in the display...

Страница 88: ...themonyour phone s vivid color display and instantly share them with family and friends It s fun and as easy to use as a traditional point and click camera or camcorder This section explains how you c...

Страница 89: ...ppears in the display 4 Press the Save left soft key to save the picture to memory 5 Press the Erase right soft key to erase the photo Tip You can change a number of the camera s settings to suit part...

Страница 90: ...ou select Divided Shot and press the key the following options appear in the display Off 4 9 5 Use the Up and Down navigation keys to highlight 3 or 5 Series Shot or 4 or 9 Divided Shot then press the...

Страница 91: ...ng the display as a viewfinder point the camera lens at your subject 4 Press the REC key when the image that you wish to capture appears in the display Recording continues until you press the Stop key...

Страница 92: ...cates the available number of photos you can take Depending on the camera resolution setting White Balance Indicates camera s white balance setting You can change the camera white balance setting See...

Страница 93: ...t key opens the My Videos multimedia folder so you can view or manage your stored pictures See The Photo Gallery on page 107 for more information REC Pressing the key starts the camcorder recording a...

Страница 94: ...ft key A picture is stored in the My Images folder A video is stored in the My Videos folder These folders are part of the phone s memory and or part of an optional Memory Card devoted to storing brow...

Страница 95: ...n the display 2 Use the navigation keys to highlight one of the following Self Timer options Off 2 Sec 5 Sec 10 Sec 3 Press the key If you select 2 Sec 5 sec or 10 sec the Self Timer icon appears in t...

Страница 96: ...You can affect how much your photo is compressed thereby reducing it s overall size not to be confused with resolution 1 In camera mode press the Options right soft key The options menu bar appears in...

Страница 97: ...when taking pictures under fluorescent lights Manual Lets you manually adjust the setting to match available light Each option as you highlight it shows the effects it has on a picture 3 When you deci...

Страница 98: ...e preloaded picture frames in your phone to characterize or enhance one or more pictures Note The None frame is a blank frame 1 In camera mode press the Options right soft key The options menu bar app...

Страница 99: ...ons appear in the display Phone Stores pictures in phone memory Card Stores pictures on an optional microSD Memory Card 4 Use the Up and Down navigation keys to highlight the memory location setting o...

Страница 100: ...ght Shot then press the key The following options appear in the display Off On 4 Use the Up and Down navigation keys to highlight the Night Shot setting of your choice then press the key You re return...

Страница 101: ...vigation keys to highlight Camcorder then press the key The Camcorder view finder screen appears in the display Camcorder Options The Camcorder Options let you adjust the default camcorder settings to...

Страница 102: ...soft key The options menu bar appears in the display 2 Use the Left and Right navigation keys to highlight Self Timer The following options appear in the display Off 2 Sec 5 Sec 10 Sec 3 Use the Up a...

Страница 103: ...y conditions Tungsten Use this setting when recording videos under incandescent lights Fluorescent Use this setting when recording videos under fluorescent lights Manual Use this setting to manually a...

Страница 104: ...ns menu bar appears in the display 2 Use the Left and Right navigation keys to highlight Settings 3 Use the Up and Down navigation keys to highlight Memory then press the key The following Memory opti...

Страница 105: ...om being a cool sound effect Start Sound acts as an audible reminder that your camcorder has begun recording a video 1 In camcorder mode press the Options right soft key The options menu bar appears i...

Страница 106: ...amcorder settings Camera 1 In camcorder mode press the Options right soft key The options menu bar appears in the display 2 Use the Left and Right navigation keys to highlight Camera then press the ke...

Страница 107: ...the display Send Send the currently displayed or highlighted picture as a Picture message Online Album Send the currently displayed or highlighted picture to the Online Album Set As Assign the curren...

Страница 108: ...ate the camcorder 2 Using the display as a viewfinder take the desired picture or record the desired video by pressing the key Press the key a second time to stop video recording 3 Press the Send key...

Страница 109: ...ection 12 Multimedia Topics Covered Accessing Multimedia My Images My Videos My Music My Ringtones My Sounds Shuffle This section outlines your phone s multimedia functions and key features associated...

Страница 110: ...tones for calls alarms and calendar 2 Use the navigation keys to highlight a sub menu 3 Press to enter the highlighted sub menu The following sections describe the above listed sub menus in greater de...

Страница 111: ...ch as the picture Name creation Date and Time Resolution and the data Size 4 Use the navigation keys to highlight an option then press the key to invoke the selected option 5 Press the key to return t...

Страница 112: ...creation Date and Time Resolution data Size and the Duration 5 Use the navigation keys to highlight an option then press the key to invoke the selected option 6 Press the key to return to the previou...

Страница 113: ...Lets you assign the selected ringtone to All Messages Text Message Picture Video Message or Voicemail Msg Use the navigation keys to highlight an option then press the key 4 When using a downloaded ri...

Страница 114: ...vider Rename Lets you rename the sound file Lock Unlock Lets you protect the sound file from being deleted Erase All Erases all sound files Sound Info Displays information about the sound file such as...

Страница 115: ...andomly as the ringer for incoming calls Use the navigation keys to highlight Image Shuffle and press the key The Image Shuffle screen appears in the display showing the message No Image Shuffle 2 To...

Страница 116: ...es selected randomly as the ringer for incoming calls Use the navigation keys to highlight Melody Shuffle and press the key The Melody Shuffle screen appears in the display showing the message No Melo...

Страница 117: ...ss the Set As left soft key The following options appear in the display On Off Use the navigation keys to highlight the On option and press the key Melody shuffle set appears in the display then you a...

Страница 118: ...ervice Bluetooth Calendar Memo Pad Alarm Clock World Time Calculator Stop Watch Converter Tip Calculator Thissectionexplainshowtouseyourphone sdigitalassistantfunctionalitytoschedule events set remind...

Страница 119: ...ion subtraction multiplication and division Stop Watch Lets you view the amount of time Converter Lets you convert currencies according to the latest rates and weights measures and temperatures from o...

Страница 120: ...contacts even if you have hundreds of them stored on your phone You can also dial any telephone number even if it is not stored in your contact list by saying the digits in the number See Making a Cal...

Страница 121: ...rrectly recognized a name or number In this case it can display a list of up to three possible choices and prompt you to confirm the correct one You can change the way that VoiceSignal uses choice lis...

Страница 122: ...reset the phone to factory defaults Adaptation involves recording several sequences of four digits each The recording process takes about a minute Tips for Adapting Digit Dialing Use Adapt Digits in...

Страница 123: ...r you want to do more adaptation Answer Yes 6 Repeat steps 4 and 5 for another six sets of digits After the second group of six sets of digits Adaptation complete plays through the speaker and you are...

Страница 124: ...call Key Ear Mic Attach a headset to your phone Press and hold to activate VoiceSignal Now you can make and end calls using VoiceSignal by pushing the button on the headset Press to release VoiceSigna...

Страница 125: ...New Device To search for available Bluetooth devices 1 In standby mode press the MENU key then press for Tools and for Bluetooth The following options appear in the display Add New Device Registered L...

Страница 126: ...es soft key to retry Bluetooth Settings Enable Disable Selecting this option turns Bluetooth on or off Discovery Mode Allows other users to see your accessibility Select On for other devices to see yo...

Страница 127: ...on and perform the related process Add a New Event 1 In standby mode press the MENU key then press for Tools and for Calendar A calendar appears in the display with the current date highlighted The mo...

Страница 128: ...es Add a Memo 1 In standby mode press the MENU key then press for Tools and for Memo Pad 2 If you have any stored memos they appear as a list in the display If this is your first time in Memo Pad No m...

Страница 129: ...light an Alarm selection then press the key A Set Alarm screen appears in the display containing the following options Alarm Time Repeat Ringer Use the Up and Down navigation keys to select options an...

Страница 130: ...ey Select alarm is turned off World Time World Time lets you view the time of day or night in another part of the world World Time displays time in any of 45 different cities and or time zones around...

Страница 131: ...r in your equation using the keypad numbers can be up to nine digits long Press to enter a decimal point Calculator only accepts 2 digits after a decimal point Press to change the sign for a number to...

Страница 132: ...erature To convert a currency length weight volume area or temperature do the following 1 In standby mode press the MENU key then press for Tools and for Converter 2 Use the navigation keys to highlig...

Страница 133: ...the Currency Converter do the following 1 In standby mode press the MENU key then press for Tools for Converter and for Currency 2 Press the Rate left soft key The Exchange Rate list for the From cur...

Страница 134: ...eturn to the Exchange Rate list Tip Calculator Tip Calculator automatically calculates the following amounts Gratuity tip Individual payment for groups Calculations are based on the total amount of th...

Страница 135: ...ection 14 Changing Your Settings Topics Covered Location Display Settings Sound Settings Call Settings Phone Settings Memory Info Phone Info Software Update Thissectionexplainshowtocustomizeyourphonet...

Страница 136: ...ettings Using the Display menu you can set the menu style set the standby mode animation customize the backlight settings and more 1 In standby mode press the MENU key then press for Settings and for...

Страница 137: ...y For My Images Preset Images and My Videos up to six pictures images or videos appears in the display Use the navigation keys to highlight a picture image or video Press the key to set the highlighte...

Страница 138: ...pear in the display Style Sets font Normal Quill Pen Sticky or Rainbow used to show dialed numbers Size Sets size Enable Zoom out or Disable Zoom out of the Style font used to show dialed numbers 2 Us...

Страница 139: ...Off Brightness Use the Left and Right soft keys to select between any of 5 optional settings 2 Use the navigation keys to highlight an option 3 Press the key to enter the highlighted option s sub men...

Страница 140: ...age and or Voicemail message 2 Use the navigation keys to highlight the desired sub menu then press the key For Voice Calls the following options appear in the display My Ringtones My Sounds Melody Sh...

Страница 141: ...swer sub menu with the following options appears in the display Any Key Press any key except the or left soft key to answer an incoming call Send Key Press to answer an incoming call Tip You can set y...

Страница 142: ...s fully TTY compatible TTY equipment is connected to your phone through the headset connector on the left side of the phone TTY must be enabled before you can use your phone with a TTY device 1 In sta...

Страница 143: ...ess the MENU key then press for Settings and for Call Settings and for Data Settings 2 The following options appear in the display Data Off No incoming data calls accepted Data For Next Call Wait for...

Страница 144: ...enus and key input 1 In standby mode press the MENU key then press for Settings and for Phone Settings and for Language The following options appear in the display English Spanish 2 Use the navigation...

Страница 145: ...ck code to a secret code for security purposes 1 In standby mode press the MENU key then press for Settings and for Phone Settings and for Security You re prompted to enter the lock code Note The defa...

Страница 146: ...al strength before placing a call Store Emergency Numbers 1 In standby mode press the MENU key then press for Settings and for Phone Settings and for Security You re prompted to enter the lock code No...

Страница 147: ...e All Entry You are prompted to enter the lock code a second time Note The default lock code is the last four digits of your telephone number 3 You are prompted to confirm erasure of all entries 4 Pre...

Страница 148: ...press the key to save your setting The phone powers itself off and back on System Select The System Select menu allows you to select the roaming setting for your phone 1 In standby mode press the MENU...

Страница 149: ...s Press to save your date setting For Set Time the Set Time screen appears in the display Enter the current time using your keypad The hour and minute must be entered using two digits each and in 12 2...

Страница 150: ...enter 2 Press the Up navigation key The Find screen appears in the display with the first contact name matching your entry highlighted 3 Press the key to call the contact PC Connection PC Connection a...

Страница 151: ...light the desired PC Connection option then press the key to save your setting Memory Info Memory Info lets you quickly and easily review and manage your phone memory usage To access Memory Info do th...

Страница 152: ...ry 1 In standby mode press the MENU key then press for Settings for Memory Info for Phone Memory and for Memory Usage The Memory Usage screen appears in the display showing the following information T...

Страница 153: ...oft key You are prompted to confirm erasure of the selected file s Press the Yes left soft key to erase all marked files or press the No right soft key to return to the Erase screen 4 To move files to...

Страница 154: ...eing Memory Card Memory sub menus let you list files in your multimedia folders and let you erase or move files as needed to free up space on your Memory Card for reuse 1 In standby mode press the MEN...

Страница 155: ...ey to erase all marked files or press the No right soft key to return to the Erase screen 5 To move image and video files to the phone do the following Press the Options right soft key The following o...

Страница 156: ...hone Number The phone number assigned by your Wireless Provider appears in the display 2 Press to return to the Phone Info menu Icon Glossary This option causes the ICON GLOSSARY list to appear in the...

Страница 157: ...following option appears in the display Check For Update Checks your Wireless Provider s server for software updates for your phone 2 Press the key You are prompted to confirm the software update chec...

Страница 158: ...ices Potentially Explosive Environments Emergency Calls FCC Notice and Cautions Other Important Safety Information Product Performance Availability of Various Features Ring Tones Battery Standby and T...

Страница 159: ...rporates a substantial margin of safety to give additional protection to the public and to account for any variations in measurements SAR tests are conducted using standard operating positions accepte...

Страница 160: ...at www fcc gov cgb sar UL Certified Travel Adapter The Travel Adapter for this phone has met UL 1310 safety requirements Please adhere to the following safety instructions per UL guidelines FAILURE TO...

Страница 161: ...s phones emit low levels of radio frequency energy RF in the microwave range while being used They also emit very low levels of RF when in the stand by mode Whereas high levels of RF can produce healt...

Страница 162: ...delines that limit RF exposure FCC relies on FDA and other health agencies for safety questions about wireless phones FCC also regulates the base stations that the wireless phone networks rely upon Wh...

Страница 163: ...umbers of animals would be needed to provide reliable proof of a cancer promoting effect if one exists Epidemiological studies can provide data that is directly applicable to human populations but ten...

Страница 164: ...mount of time spent using a wireless phone will reduce RF exposure If you must conduct extended conversations by wireless phone every day you could place more distance between your body and the source...

Страница 165: ...y limit Do wireless phone accessories that claim to shield the head from RF radiation work Since there are no known risks from exposure to RF emissions from wireless phones there is no reason to belie...

Страница 166: ...rmful interference be found to occur FDA will conduct testing to assess the interference and work to resolve the problem Additional information on the safety of RF exposures from various sources can b...

Страница 167: ...even heavy traffic can be hazardous 5 Do not take notes or look up phone numbers while driving Jotting down a to do list or flipping through your address book takes attention away from your primary r...

Страница 168: ...ng equipment users are advised that for the satisfactory operation of the equipment and for the safety of personnel it is recommended that the equipment should only be used in the normal operating pos...

Страница 169: ...best way to evaluate it for your personal needs M Ratings Phones rated M3 or M4 meet FCC requirements and are likely to generate less interference to hearing devices than phones that are not labeled...

Страница 170: ...always clearly marked They include below deck on boats chemical transfer or storage facilities vehicles using liquefied petroleum gas such as propane or butane areas where the air contains chemicals...

Страница 171: ...cannot be eliminated Vehicles using liquefied petroleum gas such as propane or butane must comply with the National Fire Protection Standard NFPA 58 For a copy of this standard contact the National Fi...

Страница 172: ...of bars next to the signal strength icon The more bars displayed the stronger the signal If you re inside a building being near a window may give you better reception Understanding the Power Save Feat...

Страница 173: ...n phone usage patterns and conditions Battery power consumption depends on factors such as network configuration signal strength operating temperature features selected frequency of calls and voice da...

Страница 174: ...es below 0 C 32 F Do not place the phone in areas that may get very hot such as on or near a cooking surface cooking appliance iron or radiator Do not get your phone or battery wet Even though they wi...

Страница 175: ...tain plastics Do not store the phone in cold areas When the phone warms up to its normal operating temperature moisture can form inside the phone which may damage the phone s electronic circuit boards...

Страница 176: ...176 Section 16 Warranty Information Topics Covered Standard Limited Warranty...

Страница 177: ...aged due to normal use d malfunctions resulting from the use of Product in conjunction with accessories products or ancillary peripheral equipment not furnished or approved by SAMSUNG e defects or dam...

Страница 178: ...WARRANTY LIABILITY EXCEPT AS SET FORTH IN THE EXPRESS WARRANTY CONTAINED HEREIN PURCHASER TAKES THE PRODUCT AS IS AND SAMSUNG MAKES NO WARRANTY OR REPRESENTATION AND THERE ARE NO CONDITIONS EXPRESS OR...

Страница 179: ...MAINDER OF THIS LIMITED WARRANTY WHICH PURCHASER ACKNOWLEDGES IS AND WILL ALWAYS BE CONSTRUED TO BE LIMITED BY ITS TERMS OR AS LIMITED AS THE LAW PERMITS THE PARTIES UNDERSTAND THAT THE PURCHASER MAY...

Страница 180: ...ions America LLC 1000 Klein Street Plano Texas 75074 Phone 1 800 SAMSUNG Phone 1 888 987 HELP 4357 2007 Samsung Telecommunications America LLC All rights reserved No reproduction in whole or in part a...

Страница 181: ...Making a Call Speed Dialing 25 26 Call Options Auto Answer 141 Auto Retry 142 Call Answer 141 Data 143 TTY 142 Call Settings 141 Camcorder 88 Options 101 Screen Icons 93 Taking Videos 89 Camera 88 Br...

Страница 182: ...d 7 Activating Your Phone 8 Understanding this User Manual 8 Voicemail 11 H Health and Safety Information 158 I Icon Glossary 156 Input mode 20 International Calls 24 In use menu 38 L Language 144 Lef...

Страница 183: ...ber 156 Version 156 Phone Memory Freeing 152 154 Usage Info 152 154 Phone Number 156 Photo gallery 107 Photos Sending 108 Picture Pic message 67 Q Quality pictures 96 102 R Receiving New Messages 71 W...

Страница 184: ...Adding a New Contact Entry 53 Deleting a Contact Entry 64 Editing an Existing Contact Entry 59 Finding a Contact Entry 56 Memory 64 Pauses 59 Understanding Your Phone 13 Command Keys 17 Display Scree...

Отзывы: