Samsung TL9 Скачать руководство пользователя страница 58

Playback/Editing

  57

  Deleting files  

Delete single files or all files at once. You cannot delete protected 
files. 

To delete a single file:

1

  In Playback mode, press [

Fn

].

2

 Press [

w

] or [

r

] to select 

Yes

.

3

 Press [

MENU/OK

].

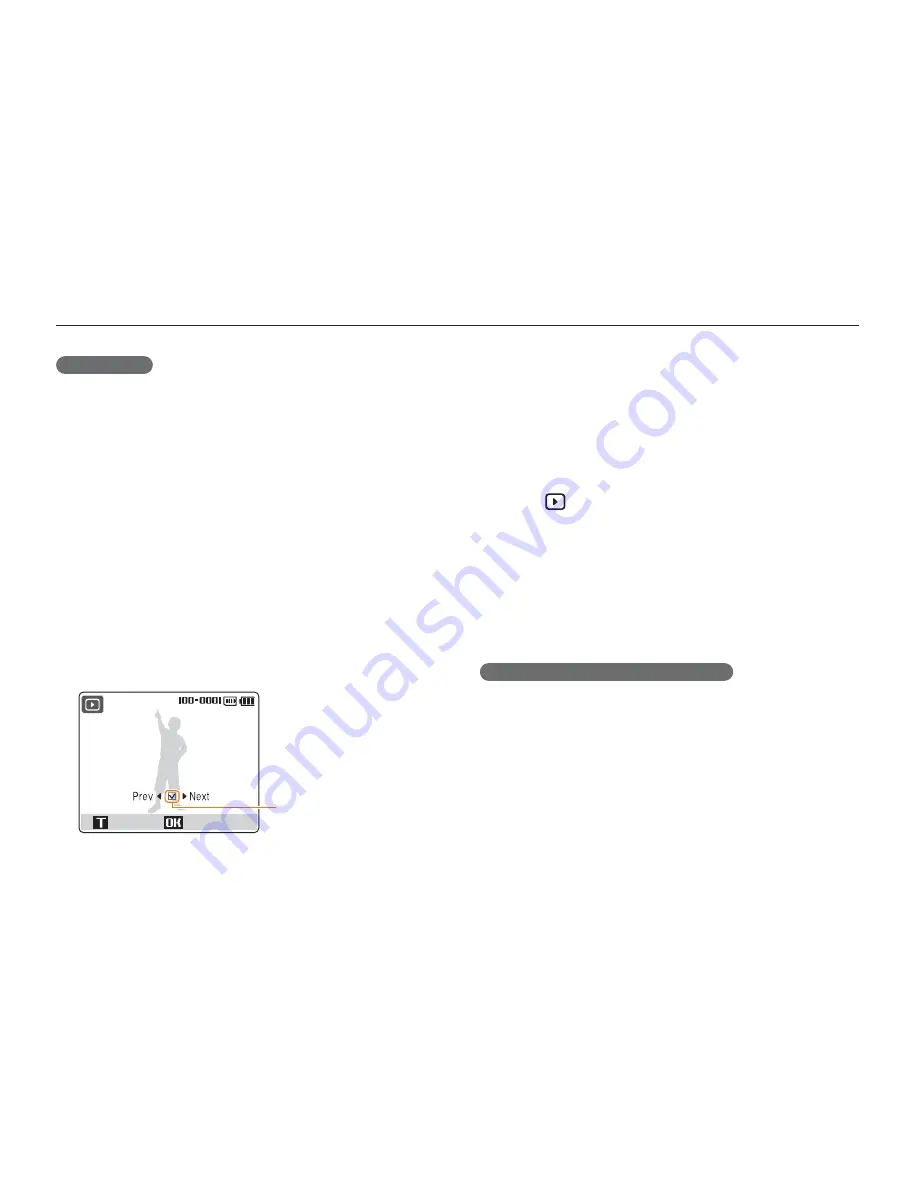
To delete selected files:

1

  In Playback mode, press [

Fn

].

2

 Push [

Zoom

] up to select the current file.

3

 Press [

e

] or [

t

] and push [

Zoom

] up again to select 

other files.

Seleted

Seleted

Select  

Delete

Select  

Delete

4

 Press [

MENU/OK

] and select 

Yes

.

5

 Press [

MENU/OK

].

To delete all files:

1

  In Playback mode, press [

MENU/OK

].

2

 Select   

“


Delete

.

3

 Press [

t

]. 

4

 Select 

All

, and press [

MENU/OK

].

To delete selected files, select 

Select

.

5

 Select 

Yes

 and press [

MENU/OK

].

  Restoring photos from the recycle bin  

If you activate the recycle bin, files you delete will be sent to the 
recycle bin instead of being deleted permanently. (p. 79) This applies 
to single files or selected files only–if you choose to delete all files, 
those files will not be sent to the recycle bin. The recycle bin will hold 
up to 10 MB of files. Once you exceed the 10 MB limit, files will be 
automatically deleted (the oldest file in the recycle bin will be deleted 
first).

1

  In Playback mode, press [

MENU/OK

].

Playing back 

Содержание TL9

Страница 1: ...instructions for your camera Please read this manual thoroughly Click a button below for more information TL9 Quick search Contents 1 Basic functions 2 Extended functions 3 Shooting options 4 Playbac...

Страница 2: ...ment as the camera or its accessories Keep your camera away from small children and pets Keep your camera and all accessories out of the reach of small children and animals Small parts may cause choki...

Страница 3: ...damage Exercise caution when connecting cables or adapters and installing batteries and memory cards Forcing the connectors improperly connecting cables or improperly installing batteries and memory...

Страница 4: ...mera or attempt to service the camera yourself Any damage that results from unquali ed service is not covered by your warranty Ensure maximum battery and charger life Overcharging batteries may shorte...

Страница 5: ...1 Basic functions 10 Learn about your camera s layout icons and basic functions for shooting and how to transfer les to and from your computer 2 Extended functions 27 Learn how to take a photo by sel...

Страница 6: ...and some Scene modes Icons used in this manual Icon Function Additional information Situations where you need to be careful Camera buttons for example Shutter represents the Shutter button Page numbe...

Страница 7: ...on Subject the main object of a scene such as a person animal or still life Background the objects around the subject Composition the combination of a subject and background Subject Subject Compositio...

Страница 8: ...to adjust exposure f 47 ACB to compensate for subjects against bright backgrounds f 47 Metering f 48 AEB to take three photos of the same scene with different exposures f 50 Applying a different effe...

Страница 9: ...es to the camera 26 2 Extended functions 27 Shooting modes 28 2 Using the Auto mode 28 4 Using the Scene mode 28 7 Using the Dual IS mode 29 5 Using the Beauty Shot mode 30 1 Using the Program mode 31...

Страница 10: ...or 61 Correcting exposure problems 62 Creating a print order 63 Setting a start image 65 Viewing les on a TV 66 Printing photos with a photo printer 67 5 Multimedia 68 Using Multimedia mode 69 Using t...

Страница 11: ...ng photos 16 Zooming 16 Reducing camera shake 17 Using the Photo Help Guide mode 18 Changing the display type 19 Transferring les for Windows 20 Installing programs 20 Connecting the camera to your PC...

Страница 12: ...ing Icon Mode Description 5 Beauty Shot Take a photo of a person with options to hide facial imperfections 4 Scene Take a photo with options for a preset scene 3 Movie Record a video 6 Multimedia List...

Страница 13: ...or Multimedia mode E Apply effect on your le Fn Access options in Shooting mode Delete les in Playback mode Button Function Navigation Left e Right t Up w Down r In Shooting mode While setting e Chang...

Страница 14: ...ilization OIS C Icons on the right Icon Description Photo resolution Video resolution Photo quality Frame rate Metering option Burst type ISO speed White balance Exposure Long time shutter A Informati...

Страница 15: ...ni dashboard While the camera is turned on Mini dashboard shows you the remaining capacity of the battery and memory card When exposing the camera to a hot and humid environment condensation can form...

Страница 16: ...t To move up or down press w or r SIZE SIZE 3 Press MENU OK to con rm the highlighted option or menu Going back to the previous menu Press E Fn or MENU OK again to go back to the previous menu Press...

Страница 17: ...Green In focus Red Out of focus 4 Press Shutter to take a photo Zooming You can shoot close up photos by adjusting the zoom Your camera has a 5X optical zoom and 5X digital zoom By using both you can...

Страница 18: ...s area will be set to Center AF when using the digital zoom Reducing camera shake Reduce camera shake optically by pressing OIS in Shooting mode When you use the OIS function the OIS icon is displayed...

Страница 19: ...se when adjusting brightness Features to use when adjusting colours Move Next Move Next 3 Press t and select a submenu Using the Photo Help Guide mode This mode provides various shooting tips Learn to...

Страница 20: ...twice to display all information about shooting hide information about shooting except the available number of photos Press w once or twice to display or hide the description for the selected shootin...

Страница 21: ...nded Others USB port CD ROM drive 1024x768 pixels 16 bit color display compatible monitor 24 bit color display recommended Microsoft Direct X 9 0 or later Using a self assembled PC or a PC and OS that...

Страница 22: ...r PC Once you connect your camera to your PC the camera will be recognized as a removable disk The battery will be charged while the camera is connected to a PC with the USB cable 1 Plug the USB cable...

Страница 23: ...mera will support the following le types Multimedia mode Supported type MP3 File type MP3 MPEG 1 2 2 5 Layer 3 Bit rate 48 320Kbps including VBR PMP File type PMP SDC Text Viewer File type TXT smaller...

Страница 24: ...ltimedia les cannot be played or viewed if the folder names are incorrect Subfolders nested directly within the MP3 PMP and TEXT folders can be created Files saved in deeply nested subfolders may not...

Страница 25: ...menu Transferring les for Windows Add video les AVI WMV ASF MPG MPEG1 Add subtitles Specify the folder path and le name for the converted le Start converting Preview Cropping slider Move to the point...

Страница 26: ...lect a folder to save downloaded les The thumbnails of les Click les to download The thumbnails of les Click les to download Using the Samsung Master Interface View mode Toolbar Toolbar Menus Menus Cl...

Страница 27: ...ter 1 Connect your camera to a Macintosh computer with the USB cable 2 Turn on your camera The computer recognizes the camera automatically and a removable disk icon will be displayed 3 Double click t...

Страница 28: ...g modes 28 2 Using the Auto mode 28 4 Using the Scene mode 28 7 Using the Dual IS mode 29 5 Using the Beauty Shot mode 30 1 Using the Program mode 31 3 Recording a video 32 Tips for getting a clearer...

Страница 29: ...ode dial to 4 2 Press MENU OK 3 Select Scene 4 Press t 5 Press w or r to select a scene If you select Nightscene you can adjust the aperture value and shutter speed 6 Press MENU OK 7 Press Shutter to...

Страница 30: ...shake and prevent blurred photos with Optical and Digital Image Stabilization functions Before correction Before correction After correction After correction 1 Rotate the mode dial to 7 2 Align your...

Страница 31: ...hutter to focus 4 Press Shutter to take the photo Adjusting the brightness of the face 1 Press MENU OK 2 Select Face Tone 3 Press t 4 Press w or r to select a brightness level As the number increases...

Страница 32: ...el 1 Level 2 Level 3 RECORDING Face Detection Face Tone Face Retouch Foucs Area Voice Memo Voice Record Level 1 Level 2 Level 3 Back Set Back Set 5 Press MENU OK 6 Press Shutter to return to Shooting...

Страница 33: ...is increased 1 Press Fn 2 Press w or r to select FRAME RATE 3 Press e or t to select a frame rate 4 Press MENU OK Setting sound options 1 Press MENU OK 2 Select Voice Mute 3 Press t 4 Press w or r to...

Страница 34: ...o take the photo if displayed in green Change the frame and half press Shutter again if displayed in red Reducing camera shake When is displayed Press OIS to reduce camera shake optically p 17 Select...

Страница 35: ...that is similar to the background the light source behind the subject is too bright your subject is shiny your subject includes horizontal patterns such as blinds the subject is not positioned in the...

Страница 36: ...ecord Stop Pause Stop Pause Press r to pause or resume recording You can record a voice memo up to 10 hours 5 Press Shutter to stop 6 Press MENU OK to switch to Shooting mode Adding a voice memo to a...

Страница 37: ...ash 41 Adjusting the ISO speed 42 Changing the camera s focus 43 Using macro 43 Using auto focus 43 Adjusting the focus area 44 Using face detection 45 Adjusting brightness and color 47 Adjusting the...

Страница 38: ...Fn 2 Press w or r to select SIZE 3 Press e or t to select an option Option Description 3648x2736 Print on A2 paper 3648x2432 Print on A2 paper in wide ratio 3 2 3584x2016 Print on A3 paper in panorama...

Страница 39: ...aved in a JPG format The higher quality you select the better photos you will get but the le size will also increase 1 In Shooting mode press Fn 2 Press w or r to select QUALITY 3 Press e or t to sele...

Страница 40: ...another in 2 seconds Motion Timer Detect your movement and then take a photo To turn off the timer press t repeatedly until no timer icon is displayed 2 Press Shutter to start the timer The AF assist...

Страница 41: ...sist light Timer lamp will start to blink rapidly when the camera detects you The detection range of Motion Timer Using the timer 5 Pose for your photo while the AF assist light Timer lamp is blinking...

Страница 42: ...ect Red Eye or Red Eye Fix Using the ash 2 1 5 4 Use the ash when taking photos in the dark In Shooting mode press e repeatedly to change the ash option Option Description Auto The ash res when the su...

Страница 43: ...rtrait or Blink Detection Make sure that your subjects are within the recommended distance from the ash p 87 If there is re ected light or much dust in the air tiny spots may appear on your photo Adju...

Страница 44: ...ppropriate focus according to your distance from the subject In Shooting mode press r repeatedly to change the focus distance option Option Description Auto Macro Focus on a subject farther than 8 cm...

Страница 45: ...to your subject s location in the scene 1 In Shooting mode press MENU OK 2 Select Focus Area 3 Press t 4 Press w or r to select an option Option Description Center AF Focus on the center suitable whe...

Страница 46: ...aces up to ten human faces The closest face appears in a white focus frame and the rest of the faces appear in grey focus frames The closer you are to the subject the quicker your camera will detect f...

Страница 47: ...MENU OK Press Shutter to return to Shooting mode Face detection may not be effective when the subject is far from the camera The focus frame will appear orange for Smile Shot and Blink Detection it is...

Страница 48: ...or underexposure If you cannot decide on an appropriate exposure select AEB Auto Exposure Bracket The camera takes photos with different exposures normal underexposed overexposed p 50 Compensating fo...

Страница 49: ...is not in the center of the scene your photo may come out too bright or dark Suitable for a subject with backlighting Center Weighted Your camera averages the meter reading of the entire frame with em...

Страница 50: ...Select when shooting under a daylight uorescent or three way uorescent light Fluorescent_L Select when shooting under white uorescent light Tungsten Select when taking indoor photos under incandescen...

Страница 51: ...n the capacity of your memory card Motion Capture While Shutter is fully pressed down the camera takes VGA photos 5 photos per second maximum of 30 photos The camera automatically shows you the photos...

Страница 52: ...t Forest 1 In Shooting mode press E 2 Press e t w or r to select 3 Press e or t to select an option 4 Press MENU OK or E Applying color 1 4 3 Apply different effects to your photos such as B W Sepia o...

Страница 53: ...ct a photo style except for this feature is not available Adjusting your photos 1 Adjust the sharpness saturation and contrast of your photos 1 In Shooting mode press E 2 Select 3 Press w or r to sele...

Страница 54: ...suitable for editing the photos on your PC Sharpen the edges to improve the clarity of your photos This may also increase the noise on your photos Select the central point if you do not want to apply...

Страница 55: ...your photo printer or TV Playing back 55 Starting Playback mode 55 Viewing photos 58 Playing a video 60 Playing voice memos 60 Editing a photo 61 Resizing photos 61 Rotating a photo 61 Editing color 6...

Страница 56: ...to includes a voice memo For videos Protected le Protected le Play Capture Play Capture Starting Playback mode View photos or play videos and voice memos stored in your camera 1 In Playback mode press...

Страница 57: ...lected Selected To Do this Scan through les Press w r e or t Delete the selected le Press Fn and select Yes Protecting les Protect your les from accidential deletion 1 In Playback mode press MENU OK 2...

Страница 58: ...1 In Playback mode press MENU OK 2 Select Delete 3 Press t 4 Select All and press MENU OK To delete selected les select Select 5 Select Yes and press MENU OK Restoring photos from the recycle bin If...

Страница 59: ...rd and press t 3 Select Yes and press MENU OK Playing back Viewing photos Zoom in on part of a photo or view photos in a slide show Enlarging a photo In Playback mode push or push and hold Zoom up to...

Страница 60: ...y and press MENU OK Press r to pause or resume the slide show Starting a slide show You can apply effects and audio to your slide show 1 In Playback mode press MENU OK 2 Select 3 Select a slide show e...

Страница 61: ...ured image will have the same le size as the original video le and will be saved as a new le Playing voice memos Playing a voice memo 1 In Playback mode select a voice memo and press r Pause Stop Paus...

Страница 62: ...w or r to select a resolution To save as a start image select p 65 To save as a skin of the MP3 player select p 75 4 Press MENU OK Rotating a photo 1 In Playback mode select a photo and press E 2 Sel...

Страница 63: ...the selected color 4 Press MENU OK Correcting exposure problems Adjust ACB Auto Contrast Balance brightness contrast or saturation remove red eye or hide facial imperfections Edited photos will be sav...

Страница 64: ...ion about the number of copies or paper size The memory card can be taken to a print shop that supports DPOF Digital Print Order Format or you can print out photos directly through a PictBridge compat...

Страница 65: ...cify the print size for the selected photo All Pics specify the print size for all photos You can print multiple photos with DPOF on one sheet 5 Press w or r to select an option 6 Press MENU OK You ca...

Страница 66: ...3 Press MENU OK 4 Press MENU OK again 5 Select Start Image 6 Press t 7 Press w or r to select the start image you have set 8 Press MENU OK Only one start image will be saved in the internal memory If...

Страница 67: ...your camera to your TV using the A V cable 4 Turn on your TV and select the video output mode using the TV remote control 5 Turn on your camera and press y 6 View photos or play videos using the butto...

Страница 68: ...ss POWER or y to turn on your camera 3 Select Printer and press MENU OK 4 Press e or t to select a photo Press MENU OK to print all photos or set print options Option Description Images Select whether...

Страница 69: ...n to use Multimedia modes MP3 mode PMP mode and Text Viewer mode Using Multimedia mode 69 Using the MP3 mode 71 Playing music les 71 Using the PMP mode 73 Using the Text Viewer mode 74 Multimedia mode...

Страница 70: ...le to play Select Resume to open the last le played in the MP3 mode or resume the last video or text le 6 Press w or r to select a le to play 7 Press MENU OK Files will be listed by date they were sa...

Страница 71: ...Switching to another Multimedia mode 1 Press MENU OK while a video or MP3 le is being played or text le is being viewed 2 Select 6 3 Press w or r to select a mode Multimedia MP3 PMP Textviewer Multim...

Страница 72: ...e Muted 2 Use the following buttons to control playback Press To Zoom up or down Adjust volume E Change the equalizer type w Mute or unmute sound e Skip backward t Skip forward MENU OK Change the MP3...

Страница 73: ...Focus Auto Macro Your MP3 player will not function normally when taking photos Using the MP3 mode Starting a slide show while listening to music 1 Press MENU OK during playback 2 Select INTERVAL SLID...

Страница 74: ...or unmute sound e Skip backward Scan backward while playing t Skip forward Scan forward while playing MENU OK Change the PMP mode settings r Stop or resume playback y Open the playlist Return to the...

Страница 75: ...to match that of the text le p 75 UNI Unicode type you do not have to set the language to match that of text le 2 Use the following buttons to control playback Press To w Go to the previous page Skip...

Страница 76: ...lt image stored in the internal memory User Skin 1 User Skin 2 Display an image saved as a Start Image or MP3 Skin in the edit menu p 61 Menu Available mode Description Start a slide show while listen...

Страница 77: ...Camera settings menu 77 Accessing the settings menu 77 SOUND 78 DISPLAY 78 SETTINGS 79 Error messages 81 Camera maintenance 82 Cleaning your camera 82 About memory cards 83 About the battery 84 Before...

Страница 78: ...und AF Sound Self Portrait Off Off Sound1 Sound1 On On Volume Start Sound Shutter Sound Beep Sound AF Sound Self Portrait Off Off Sound1 Sound1 On On SOUND SOUND Icon Description Adjust volume or set...

Страница 79: ...ay text Date Time Select a region set the time and date and set the date format yyyy mm dd Off dd mm yyyy mm dd yyyy Select a city to set the local time when using the camera in a different country St...

Страница 80: ...ting all les Series Set the le number to follow the previous le number when inserting a new memory card formatting a memory card or deleting all les The default name of the rst folder is 100SSCAM and...

Страница 81: ...videos you record a voice memo Video Out Set the video signal output according to the TV color system of the connected video equipment NTSC USA Canada Japan Korea Taiwan Mexico etc PAL supports only B...

Страница 82: ...ormat the card p 79 Error message Suggested remedies Card Error Turn off your camera and turn it on again Remove your memory card and insert it again Format your memory card p 79 Low Battery Insert a...

Страница 83: ...he device These may cause damage or malfunctions Do not press the lens cover or use a blower brush on the cover Cleaning your camera Camera lens and display Use a blower brush to remove dust and wipe...

Страница 84: ...D or SDHC card Slide the switch down to lock or slide it up to unlock Unlock the card when shooting Camera maintenance Memory card capacity The memory capacity may differ depending on shooting conditi...

Страница 85: ...es with the screen turned off PMP Approx 230 min Play les with normal playback The gures above are measured by Samsung s standards and may differ depending on usage Notes about charging the battery If...

Страница 86: ...nnot use the ash in the 7 3 or some of 4 modes The camera res the ash suddenly The ash may re due to static electricity This is not a malfunction of the camera The date and time are incorrect Set the...

Страница 87: ...battery and insert it again The memory card has an error The memory card has not been reset Format the card p 79 Cannot play back les If you change the name of a le your camera may not play the le th...

Страница 88: ...ffect B W Sepia Red Green Blue Negative Custom Color Image adjust ACB Red Eye Fix Face Retouch Brightness Contrast Saturation White Balance Auto WB Daylight Cloudy Fluorescent_H Fluorescent_L Tungsten...

Страница 89: ...e format Still image JPEG DCF EXIF 2 21 DPOF 1 1 PictBridge 1 0 Video AVI MJPEG Audio WAV Storage Image size For 1 GB SD Super ne Fine Normal 3648x2736 188 357 412 3648x2432 206 391 557 3584x2016 248...

Страница 90: ...le Language English Korean French German Spanish Italian Chinese Taiwanese Japanese Russian Portuguese Dutch Danish Swedish Finnish Bahasa Polish Hungarian Czech Turkish Supported languages are subjec...

Страница 91: ...e instructions may cause harmful interference to radio communications However there is no guarantee that interference will not occur in a particular installation If this equipment does cause harmful i...

Страница 92: ...uous 50 Motion capture 50 C Camera shake 17 Capturing an image 60 Cleaning Camera body 82 Display 82 Lens 82 Color effects 51 61 D Date and time 78 Deleting les in Multimedia mode 70 in Playback mode...

Страница 93: ...1 Multimedia mode 75 MP3 mdoe 71 PMP mode 73 Text Viewer mode 74 Muting sound Camera 14 Video 32 N Navigation buttons 12 O Optical Image Stabilization OIS 33 P Photo Help Guide mode 18 Photo styles 51...

Страница 94: ...29 Movie mode 32 Program mode 31 Scene mode 28 Shutter button 11 Shutter speed 28 Smile Shot 45 Start image 78 User image 65 Status lamp 12 T Text Viewer mode 74 Timer 39 10 Sec 39 2 Sec 39 Double 39...

Страница 95: ...se refer to the warranty that came with your product or go to our website http www samsung com for after sales service or inquiries The CE Mark is a Directive conformity mark of the European Community...

Отзывы: