background image

 To ease eye strain, take at least a five-minute break after every hour

of using the monitor.

 Do not install the product on an unstable, uneven surface or a location

prone to vibrations.

• Dropping the product may cause damage to the product or the person

carrying it. Using the product in a location prone to vibrations may

shorten the lifetime of the product or may cause the product to catch

fire.

 When moving the monitor, turn off and unplug the power cord. Make

sure that all cables, including the antenna cable and cables connected to

other devices, are disconnected before moving the monitor.

• Failure to disconnect cables may damage it and cause fire or electric

shock.

 Place the product out of children’s reach, as they could damage by

hanging onto it.

• A falling product may cause injury to the person or even fatality.

 When not using the product for an extended period of time, keep the

product unplugged.

• Otherwise, this may cause heat emission from the accumulated dirt

or degraded insulation, causing electric shock or fire.

 Do not place your children's favorite toys or any other objects of in-

terest on the product.

• Children may try to climb on the product to retrieve an object. The

product could fall, causing injury or even fatality.

 When lifting up or moving the monitor, do not lift the monitor upside

down while holding only the stand.

• This may cause your monitor to fall, and become damaged or cause

personal injury.

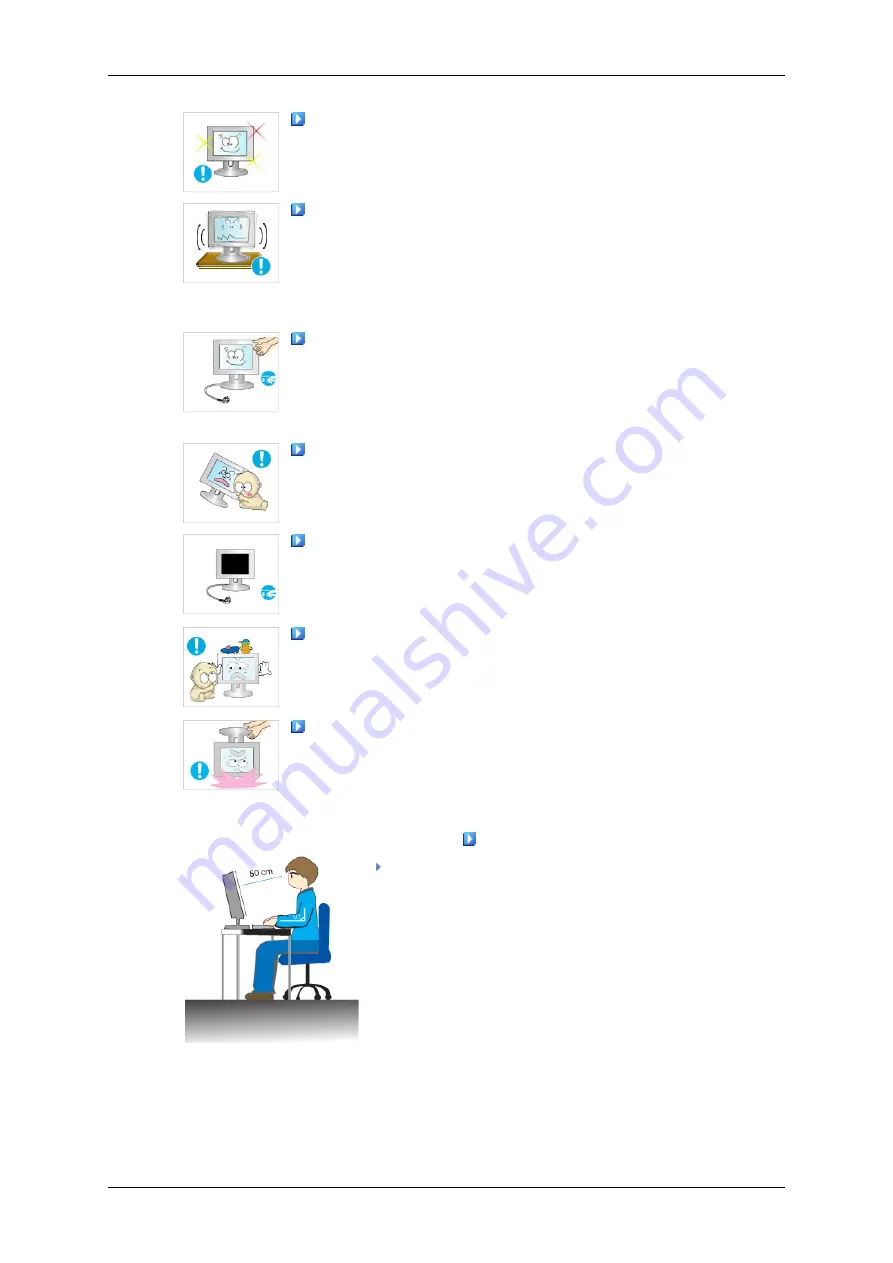
 Good Postures When Using the Monitor

 Try to maintain a good posture when using the monitor.

• Keep your back straight.

• Keep a distance of about 45 ~ 50 cm between your eyes

and the monitor screen. Look at the screen from slightly

above it, and have the monitor directly in front of you.

• Tilt the monitor upwards by 10 ~ 20 degrees. Adjust the

monitor height so that the top of the monitor is slightly

below eye level.

• Adjust the monitor angle so that there is no reflected

light on the screen. Try to maintain your arms perpen-

dicular to your armpits.

• Keep your arms level with the back of your hands.

Safety Instructions

6

Содержание SyncMaster 932BE PLUS

Страница 1: ...SyncMaster 732NE PLUS 932BE PLUS LCD Monitor User Manual imagine the possibilities...

Страница 2: ...ower When not used for extended period of time set your computer to DPM If using screen saver set it to active screen mode The images here are for reference only and are not applicable in all cases or...

Страница 3: ...Be sure to contact an authorized Service Center when installing your monitor in a location with heavy dust high or low temperatures high humidity and exposed to chemical substances and where it operat...

Страница 4: ...a qualified professional Installing the bracket by unqualified personnel may result in injury Always use the mounting device specified in the owner s manual When installing the product make sure to ke...

Страница 5: ...qualified servicing company If your monitor does not operate normally in particular if there is any unusual sound or smell coming from the monitor unplug it imme diately and contact an authorized dea...

Страница 6: ...r fire Never insert anything metallic into the monitor openings This may cause electric shock fire or injury Do not insert metal objects such as chopsticks wire and tools or in flammable objects such...

Страница 7: ...is may cause heat emission from the accumulated dirt or degraded insulation causing electric shock or fire Do not place your children s favorite toys or any other objects of in terest on the product C...

Страница 8: ...he angle of the elbow perpendicular Keep the angle of the knees at more than 90 degree Do not let your feet fall up from the floor Adjust the arm position so that it is below the heart Safety Instruct...

Страница 9: ...cluded with your monitor If any items are missing contact your dealer Contact a local dealer to buy optional items Unpacking Type 1 Monitor Manuals Quick Setup Guide Warranty Card Not available in all...

Страница 10: ...ents of the image you are watching Currently seven different modes are available Custom Text Internet Game Sport Movie and Dynamic Con trast Each mode has its own pre configured brightness value You c...

Страница 11: ...ness Click here to see an animation clip Adjust buttons These buttons allow you to adjust items in the menu Enter button Activates a highlighted menu item AUTO button Use this button for auto adjustme...

Страница 12: ...lly fix the system when using it in a public place The locking device has to be purchased separately For using a locking device contact where you purchase it Note See Connecting Cables for further inf...

Страница 13: ...arranty Card Not available in all loca tions User s Guide Cables D Sub Cable Power Cord Others Cleaning Cloth Note This is only provided for highly polished black products as a product feature Sold se...

Страница 14: ...vailable Custom Text Internet Game Sport Movie and Dynamic Con trast Each mode has its own pre configured brightness value You can easily select one of seven settings by simply pressing MagicBright co...

Страница 15: ...Push the SOURCE then selects the video signal while the OSD is off When the SOURCE button is pressed to change the input mode a message appears in the upper left of the screen displaying the current m...

Страница 16: ...t on the back of your monitor RGB IN port Connect the D sub cable to the 15 pin RGB IN port on the back of your monitor Kensington Lock The Kensington lock is a device used to physically fix the syste...

Страница 17: ...se a connection appropriate for your computer Using the D sub Analog connector on the video card Connect the signal cable to the 15 pin D sub port on the back of your monitor RGB IN Connected to a Mac...

Страница 18: ...he monitor Plug the power cord for the monitor into a nearby outlet Use a connection appropriate for your computer Using the D sub Analog connector on the video card Connect the signal cable to the 15...

Страница 19: ...to the Macintosh computer using the D sub connection cable Note If the monitor and the computer are connected you can turn them on and use them Using the Stand Folding the base Note You can tilt the...

Страница 20: ...ting system you have Prepare a blank disk and download the driver program file at the Internet web site shown here Internet web site http www samsung com Worldwide Installing the Monitor Driver Automa...

Страница 21: ...t your Manual CD into your CD ROM drive 2 Click Start and Control Panel Then double click on Appearance and Personalization 3 Click Personalization and then Display Settings 4 Click Advanced Settings...

Страница 22: ...sted on Samsung Monitor homepage 6 Click Update Driver in the Driver tab 7 Check the Browse my computer for driver software checkbox and click Let me pick from a list of device drivers on my computer...

Страница 23: ...hat matches your monitor from the list of monitor models on the screen and click Next 10 Click Close Close OK OK on the following screens displayed in sequence Microsoft Windows XP Operating System Us...

Страница 24: ...lick Display icon and choose the Settings tab then click Advanced 4 Click the Properties button on the Monitor tab and select Driver tab 5 Click Update Driver and select Install from a list or then cl...

Страница 25: ...wing message window then click the Continue Anyway button Then click OK button Note This monitor driver is under certifying MS logo and this installation doesn t damage your system The certified drive...

Страница 26: ...is active click the Properties button then follow next steps continually 5 Click Driver and then click on Update Driver then click on the Next button 6 Choose Display a list of the known drivers for t...

Страница 27: ...licking Test If the screen is not normal change to a different mode lower mode of resolution colors or frequency Note If there is no Mode at All Display Modes select the level of resolution and vertic...

Страница 28: ...er to Help F1 in the software program How to install the Natural Color software Insert the CD included with the Samsung monitor into the CD ROM Drive Then the initial screen of the program Natural Col...

Страница 29: ...llation Status window appears 9 Click Finish 10 When the installation is complete the MagicTune executable icon appears on your desktop Double click the icon to start the program MagicTune execution i...

Страница 30: ...Control Panel in the Start menu 2 Click the Add or Remove Programs icon in Control Panel 3 In the Add or Remove Programs screen scroll down to find MagicTune Click on it to highlight it 4 Click the Ch...

Страница 31: ...The values of Fine Coarse and Position are adjusted automatically To make the automatic adjustment function sharper execute the AUTO function while the AUTO PATTERN is on If auto adjustment does not...

Страница 32: ...rent states of settings or prevent others from adjusting the current settings Lock Hold down the MENU button for more than five 5 seconds to activate the OSD adjustment lock function Unlock Hold down...

Страница 33: ...just the brightness and contrast and adjust MagicBright using the Direct button MagicBright Push the MagicBright button to circle through available preconfigured modes Seven different modes Custom Tex...

Страница 34: ...tness Contrast Color MagicColor Color Tone Color Con trol Gamma Image Coarse Fine Sharpness H Position V Position OSD Language H Position V Position Transparen cy Display Time Setup Image Reset Color...

Страница 35: ...ersonal preference MENU MENU Contrast Not available in MagicBright mode of Dynamic Contrast You can use the on screen menus to change the contrast according to personal preference Not available in Mag...

Страница 36: ...more clearly without disturbing image quality Off Returns to the original mode Demo The screen before applying MagicColor appears on the right and the screen after applying MagicColor appears on the l...

Страница 37: ...an be selected Cool Makes whites bluish Normal Keeps whites white Warm Makes whites reddish Custom Select this mode when you want to adjust the image according to your preferences Not available in Mag...

Страница 38: ...s individual Red Green Blue color balance Not available in MagicColor mode of Full and Intelligent MENU MENU Gamma Gamma correction changes the luminance of the colors with intermediate luminance Adju...

Страница 39: ...e 3 MENU MENU Image Coarse Removes noise such as vertical stripes Coarse adjustment may move the screen image area You may relocate it to the center using the horizontal control menu MENU MENU Adjusti...

Страница 40: ...stripes If the noise persists even after Fine tuning repeat it after adjusting the frequency clock speed MENU MENU Sharpness Changes the clearance of image Not available in MagicColor mode of Full and...

Страница 41: ...ENU MENU H Position Changes the horizontal position of the monitor s entire display MENU MENU V Position Changes the vertical position of the monitor s entire display MENU MENU Adjusting the Monitor 4...

Страница 42: ...D Language You can choose one of nine languages Note The language chosen affects only the language of the OSD It has no effect on any software running on the computer MENU MENU Adjusting the Monitor 4...

Страница 43: ...can change the horizontal position where the OSD menu appears on your monitor MENU MENU V Position You can change the vertical position where the OSD menu appears on your monitor MENU MENU Adjusting...

Страница 44: ...ackground of the OSD Off On MENU MENU Display Time The menu will be automatically turned off if no adjustments are made for a certain time period You can set the amount of time the menu will wait befo...

Страница 45: ...5 sec 10 sec 20 sec 200 sec MENU MENU Setup Image Reset Image parameters are replaced with the factory default values MENU MENU Adjusting the Monitor 44...

Страница 46: ...Color Reset You can change the size of the screen displayed on your monitor MENU MENU Information Shows a video source display mode on the OSD screen MENU MENU Adjusting the Monitor 45...

Страница 47: ...arse and Position are adjusted automatically To make the automatic adjustment function sharper execute the AUTO function while the AUTO PATTERN is on If auto adjustment does not work properly press AU...

Страница 48: ...rent states of settings or prevent others from adjusting the current settings Lock Hold down the MENU button for more than five 5 seconds to activate the OSD adjustment lock function Unlock Hold down...

Страница 49: ...just the brightness and contrast and adjust MagicBright using the Direct button MagicBright Push the MagicBright button to circle through available preconfigured modes Seven different modes Custom Tex...

Страница 50: ...Contrast Color MagicColor Color Tone Color Con trol Gamma Image Coarse Fine Sharpness H Position V Position OSD Language H Position V Position Transparen cy Display Time Setup Auto Source Image Reset...

Страница 51: ...ersonal preference MENU MENU Contrast Not available in MagicBright mode of Dynamic Contrast You can use the on screen menus to change the contrast according to personal preference Not available in Mag...

Страница 52: ...more clearly without disturbing image quality Off Returns to the original mode Demo The screen before applying MagicColor appears on the right and the screen after applying MagicColor appears on the l...

Страница 53: ...an be selected Cool Makes whites bluish Normal Keeps whites white Warm Makes whites reddish Custom Select this mode when you want to adjust the image according to your preferences Not available in Mag...

Страница 54: ...s individual Red Green Blue color balance Not available in MagicColor mode of Full and Intelligent MENU MENU Gamma Gamma correction changes the luminance of the colors with intermediate luminance Adju...

Страница 55: ...e 3 MENU MENU Image Coarse Removes noise such as vertical stripes Coarse adjustment may move the screen image area You may relocate it to the center using the horizontal control menu MENU MENU Adjusti...

Страница 56: ...stripes If the noise persists even after Fine tuning repeat it after adjusting the frequency clock speed MENU MENU Sharpness Changes the clearance of image Not available in MagicColor mode of Full and...

Страница 57: ...ENU MENU H Position Changes the horizontal position of the monitor s entire display MENU MENU V Position Changes the vertical position of the monitor s entire display MENU MENU Adjusting the Monitor 5...

Страница 58: ...D Language You can choose one of nine languages Note The language chosen affects only the language of the OSD It has no effect on any software running on the computer MENU MENU Adjusting the Monitor 5...

Страница 59: ...can change the horizontal position where the OSD menu appears on your monitor MENU MENU V Position You can change the vertical position where the OSD menu appears on your monitor MENU MENU Adjusting...

Страница 60: ...ackground of the OSD Off On MENU MENU Display Time The menu will be automatically turned off if no adjustments are made for a certain time period You can set the amount of time the menu will wait befo...

Страница 61: ...5 sec 10 sec 20 sec 200 sec MENU MENU Setup Auto Source Select Auto Source for the monitor to automatically select the signal source MENU MENU Adjusting the Monitor 60...

Страница 62: ...Image Reset Image parameters are replaced with the factory default values MENU MENU Color Reset Color parameters are replaced with the factory default values MENU MENU Adjusting the Monitor 61...

Страница 63: ...Information Shows a video source display mode on the OSD screen MENU MENU Adjusting the Monitor 62...

Страница 64: ...es If there is something wrong with the input signal a message appears on the screen or the screen goes blank although the power indicator LED is still on The message may indicate that the monitor is...

Страница 65: ...A If the initial screen the login screen appears boot the computer in the applicable mode the safe mode for Windows ME XP 2000 and then change the frequency of the video card Refer to the Preset Timin...

Страница 66: ...set properly A Set the video card by referring to the video card manual The screen suddenly has become unbalanced Q Have you changed the video card or the driver A Adjust screen image position and si...

Страница 67: ...heck whether your PC is available for MagicTune feature follow the steps below When Windows is XP Control Panel Performance and Maintenance System Hardware Device Manager Monitors After deleting Plug...

Страница 68: ...ly occur contact an authorized service center Q A Q How can I change the frequency A The frequency can be changed by reconfiguring the video card A Note that video card support can vary depending on t...

Страница 69: ...leave any detergent or scratches on the case Do not let any water enter the monitor Note Before calling for assistance check the information in this section to see if you can remedy any prob lems your...

Страница 70: ...tion 1280 x 1024 75 Hz Input Signal Terminated RGB Analog 0 7 Vp p 5 TTL level V high 2 0 V V low 0 8 V Maximum Pixel Clock 135 MHz Analog Power Supply AC 100 240 V 10 50 60 Hz 3 Hz Signal Cable 15pin...

Страница 71: ...er This monitor has a built in power management system called PowerSaver This system saves energy by switching your monitor to low power mode when it has not been used for a certain amount of time The...

Страница 72: ...VESA 1152 x 864 67 500 75 000 108 000 VESA 1280 x 1024 60 000 60 000 108 000 VESA 1280 x 1024 62 981 60 020 108 000 VESA 1280 x 1024 79 796 75 025 135 000 Horizontal Frequency The time to scan one lin...

Страница 73: ...non condensing Storage Temperature 4 F 113 F 20 C 45 C Humidity 5 95 non condensing Plug and Play Capability This monitor can be installed on any Plug Play compatible system The interaction of the mon...

Страница 74: ...off Power button EPA ENERGY 2000 Power Indicator Blue Blue blinking Off Power Consump tion Less than 38 watts Less than 1 watts Less than 1 watts This monitor is EPA ENERGY STAR compliant and EN ERGY...

Страница 75: ...81 60 020 108 000 VESA 1280 x 1024 79 796 75 025 135 000 Horizontal Frequency The time to scan one line connecting the right edge to the left edge of the screen horizontally is called the Horizontal C...

Страница 76: ...ture by performing the Auto Adjustment function in display screen that is appeared as window termination button is pressed If there s still noise after the automatic adjustment use the Fine Coarse adj...

Страница 77: ...Ex Airports Transit Stations Stock Markets Banks and Controlling Systems We recom mend that you follow set up of your display system program as below Display Information together with Logo or Moving i...

Страница 78: ...tions are defined as continuously changing video patterns When the LCD panel is operated for a long time with a fixed pattern over 12 hours there may be slight difference in voltage between electrodes...

Страница 79: ...Our LCD Monitor satisfies ISO13406 2 Pixel fault Class II Information 78...

Страница 80: ...COSTA RICA 0 800 507 7267 http www samsung com latin ECUADOR 1 800 10 7267 http www samsung com latin EL SALVADOR 800 6225 http www samsung com latin GUATEMALA 1 800 299 0013 http www samsung com lat...

Страница 81: ...ttp www samsung com LUXEMBURG 0035 0 2 261 03 710 http www samsung com be NETHERLANDS 0900 SAMSUNG 726 7864 http www samsung com nl NORWAY 815 56 480 http www samsung com no POLAND 0 801 801 881 022 6...

Страница 82: ...ALAND 0800 SAMSUNG 726 7864 http www samsung com nz PHILIPPINES 1800 10 SAMSUNG 726 7864 http www samsung com ph SINGAPORE 1800 SAMSUNG 726 7864 http www samsung com THAILAND 1800 29 3232 02 689 3232...

Страница 83: ...ming multiple tasks as more image information can be shown on the screen Example If the resolution is 1280 x 1024 this means the screen is composed of 1680 horizontal dots horizontal resolution and 10...

Страница 84: ...ectronics Co Ltd Microsoft Windows and Win dows NT are registered trademarks of Microsoft Corporation VESA DPM and DDC are registered trademarks of Video Electronics Standard Association the ENERGY ST...

Отзывы: