background image

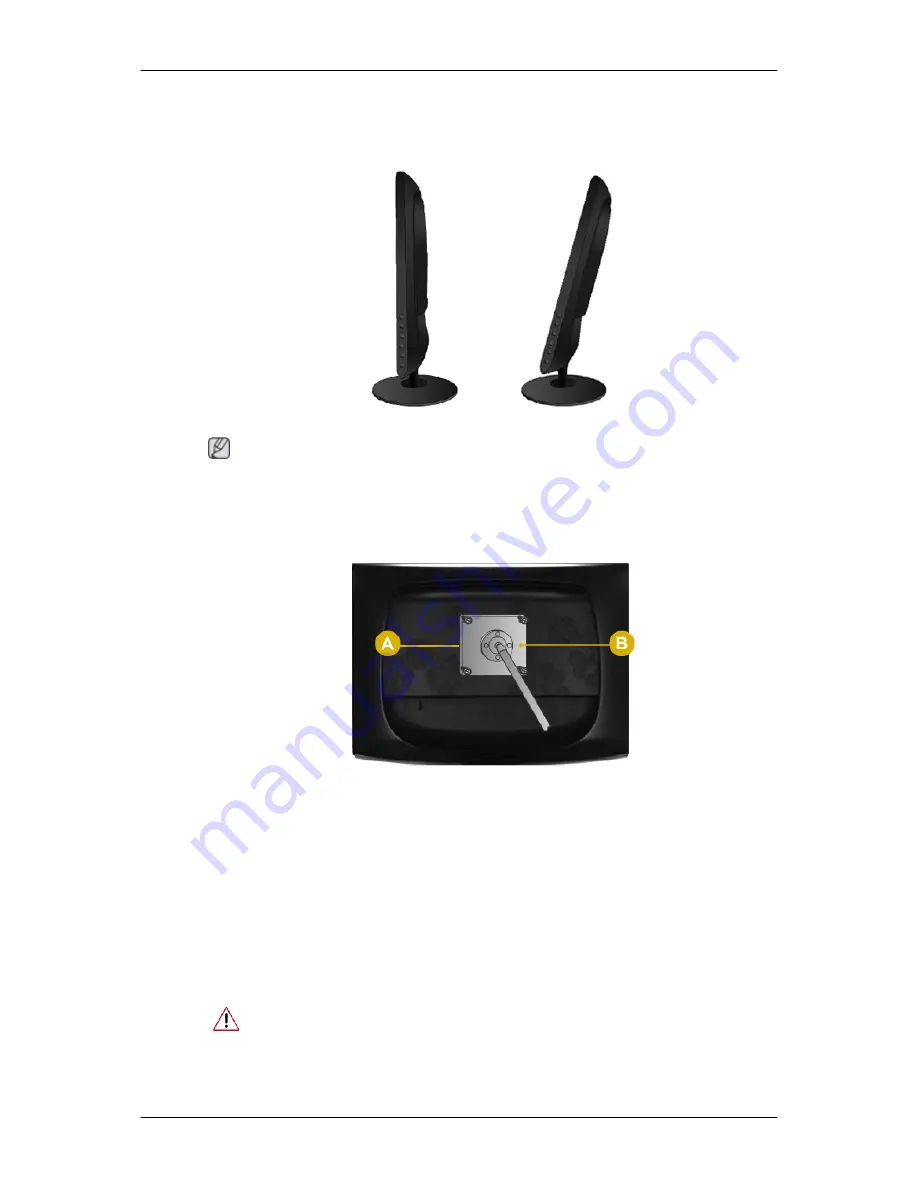
Using the Stand

Folding the base

 Note

You can tilt the monitor upwards at an angle of -1° to 20°(±1.0°).

Attaching a Base

This monitor accepts a 100 mm x 100 mm VESA-compliant mounting interface pad.

A. Monitor
B. Mounting interface pad (Sold separately)

1. Turn off your monitor and unplug its power cord.

2. Lay the LCD monitor face-down on a flat surface with a cushion beneath it to protect the

screen.

3. Remove four screws and then remove the stand from the LCD monitor.

4. Align the mounting interface pad with the holes in the rear cover mounting pad and secure

it with four screws that came with the arm-type base, wall mount hanger or other base.

• Do not use screws longer than the standard dimension, as they may dam-

age the inside of the Monitor.

• For wall mounts that do not comply with VESA standard screw specifica-

tions, the length of the screws may differ depending on their specifications.

Connections

Содержание SyncMaster 2033SN

Страница 1: ...ii LCD MONITOR quick start guide 2033SN 2233SN...

Страница 2: ...r Contact a local dealer to buy optional items Unpacking Monitor Manuals Quick Setup Guide Warranty Card Not available in all loca tions User s Guide Not available in all loca tions Cables D Sub Cable...

Страница 3: ...n displayed on the screen is the optimal resolution for this product Adjust your PC resolution so that it is the same as the optimal resolution for this product Front MENU button MENU Opens the on scr...

Страница 4: ...n operating normally and blinks once when your ad justments are saved Note See PowerSaver described in the manual for further information regarding power saving functions For energy conservation turn...

Страница 5: ...be different depending on its model Using the Anti Theft Kensington Lock 1 Insert the locking device into the Kensington slot on the Monitor and turn it in the locking direction 2 Connect the Kensingt...

Страница 6: ...Use a connection appropriate for your computer Using the D sub Analog connector on the video card Connect the signal cable to the 15 pin D sub port on the back of your monitor RGB IN Connected to a Ma...

Страница 7: ...h a cushion beneath it to protect the screen 3 Remove four screws and then remove the stand from the LCD monitor 4 Align the mounting interface pad with the holes in the rear cover mounting pad and se...

Страница 8: ...hen a non VESA or non specified wall mount is used or the consumer fails to follow the product installation instructions To mount the monitor on a wall you should purchase the wall mounting kit that a...

Страница 9: ...e monitor If your monitor screen remains blank after using the previous procedure check your video controller and computer system your monitor is functioning properly Warning Messages If there is some...

Страница 10: ...r contact your dealer No images on the screen I cannot turn on the monitor Q Is the power cord connected properly A Check the power cord connection and supply Q Can you see Check Signal Cable on the s...

Страница 11: ...just black and white Q Is the screen displaying only one color as if looking at the screen through a cellophane paper A Check the signal cable connection A Make sure the video card is fully inserted...

Страница 12: ...ug Play VESA DDC monitor found Q Have you installed the monitor driver A Install the monitor driver according to the Driver Installation Instructions Q See the video card manual to see if the Plug Pla...

Страница 13: ...he computer If you installed a new video card or if you assembled the PC check if the installed the adapter video driver and the monitor driver Check if the scanning ratio of the video screen is set t...

Страница 14: ...Do not leave any detergent or scratches on the case Do not let any water enter the monitor Note Before calling for assistance check the information in this section to see if you can remedy any proble...

Страница 15: ...s visual signals received from the computer Therefore if there is a problem with the computer or the video card this can cause the monitor to become blank have poor coloring become noisy and video mod...

Страница 16: ...essage is displayed If the display exceeds 85 Hz the display will work properly but the Not Optimum Mode Recommended Mode 1920 x 1080 60 Hz message appears for one minute and then disappears Please ch...

Страница 17: ...ted Q Have you adjusted the resolution or frequency on the monitor A Adjust the resolution and frequency of the video card Refer to the Preset Timing Modes LED is blinking but no images on the screen...

Страница 18: ...compatible graphic card list provided http www samsung com monitor magictune MagicTune doesn t work properly Q Have you changed your PC or video graphic card A Download the latest program The program...

Страница 19: ...resolution in the Control Panel Appearance and Themes Display Set tings A Windows ME 2000 Set the resolution in the Control Panel Display Settings Contact the video card manufacturer for details Q How...

Страница 20: ...or assistance check the information in this section to see if you can remedy any problems yourself If you do need assistance please call the phone number on the In formation section or contact your de...

Отзывы: