6
5
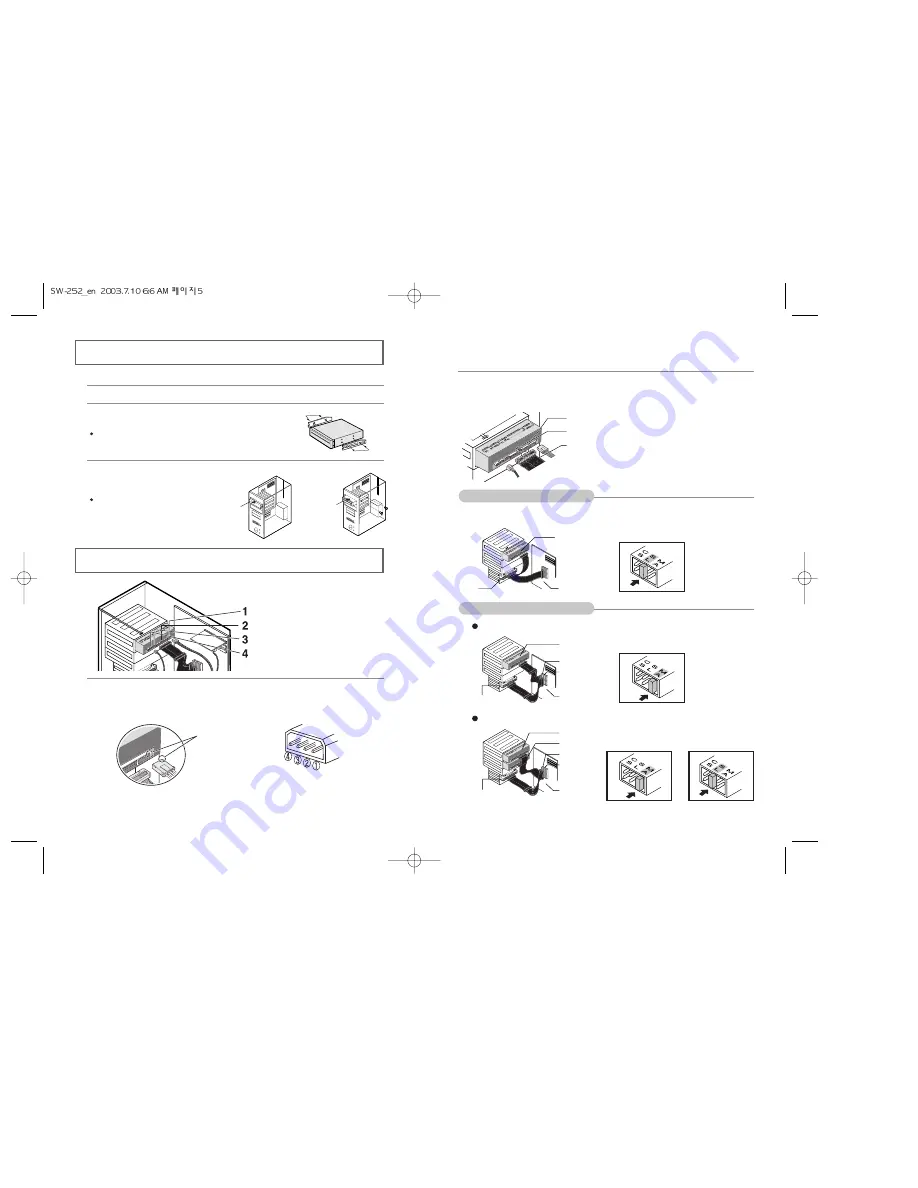
Installing the CD-R/RW Drive
Connecting the Cables
To install your CD-R/RW drive in the PC, proceed as follows.
1
Make sure that the PC is powered off and disconnected from any power source.
1
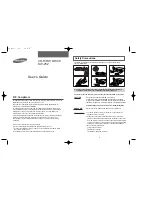
Connecting the power cable
The 4-pin power cable from the internal power unit of your computer must be
connected to the power terminal on the rear of the CD-R/RW drive.
Note
:An improperly connected power cable may cause trouble. Check the direction of
the power connector and the incline side of the CD-R/RW drive before connecting.
Cut side
2
Connecting the E-IDE cable
Insert the IDE cable (40-pin), which is connected to the hard disk to the interface
terminal. (Place the red line of the cable close to the Pin 1.)
Connect the cable to the SL (Slave) of the Master/Slave Select Terminal at
the rear of the CD-R/RW drive.
When using one E-IDE cable
When using two E-IDE cable
2
If necessary, attach a horizontal bracket to
both sides of the drive.
Use of the brackets depends on your computer model;
you can purchase these accessories separately from
your computer dealer.
3
Remove the cover from a free expansion slot
and install the CD-R/RW drive,
as shown in the illustration.
If you have no free expansion slot,
install the drive in place of the
diskette drive.
Power cable
E-IDE cable
Master/slave select terminal
Audio cable
Pin 1
Key Slot
Red Line
HDD
Slave Drive (Choose the SL Jumper)
Motherboard
CD-R/RW
drive
Horizontal
Supporting
Structure
cover
If there is only one CD-R/RW drive, select MA (Master).
HDD
Master Drive (Choose the MA Jumper)
Master Drive (Choose the MA Jumper)
Slave Drive (Choose the SL Jumper)
SEC 1
PRI1
Motherboard
If there are two CD-R/RW drive, select MA (Master) / SL (Slave).
HDD
(Choose the MA jumper) (Choose the SL jumper)
SEC 1
PRI1
Motherboard
+12V DC
Ground
5V DC


