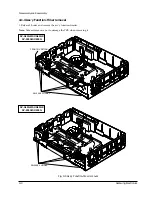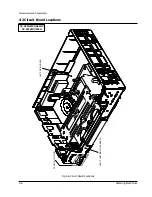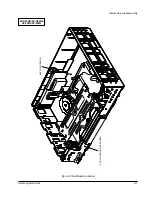
Alignment and Adjustment
5-4
Samsung Electronics
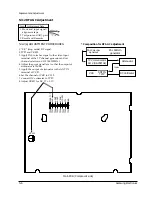
5-2-2 (b) IF THE NORMAL REMOTE CONTROL
ASS’Y OF X-7/X-8(DX7-R/DX7-RC/
DX8-R/DX8-RC) CHASSIS IS
AVAILABLE
Note 1 :
Two kinds of remote control assÕy are used
for X-7/X-8(DX7-R/DX7-RC/DX8-R/
DX8-RC) chassis.
1. One is a normal remote control assÕy, the other is a
multi remote control assÕy
2. All adjustments are adjusted by normal remote
control assÕy only.
3. For the identification of normal remote control
assÕy and multi remote control assÕy, See page 5-1.
Note 2 :
How to use the Ò
TEST
Ó button.
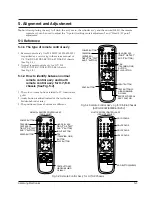
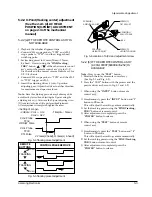
1. Disattach the inlay of remote control assÕy.
(See Fig. 5-1 and Fig. 5-2)
2. Press the ÒTESTÓ button with the pincers and the
precise driver as shown in Fig. 5-1 and 5-2)
1. When using the Ò
INPUT
Ó button of remote
control assÕy;
1) Simultaneously press the Ò
INPUT
Ó button and Ò
1
Ó
button in PB mode.
This will adjust the tracking center automatically.
2) Set the tracking preset using the Ò
FINE
(
Tracking,
TRK
)Ó button of remote control.
3) After adjustment is completed, press the
Ò
POWER
Ó button to release.
2. When using the Ò
TEST
Ó button of remote
control assÕy ;
1) Simultaneously press the Ò
TEST
Ó button and Ò
5
Ó
button in PB mode.
This will adjust the tracking center automatically.
2) Set the tracking preset using the Ò
FINE
(
Tracking
,
TRK
) button of remote control.
3) After adjustment is completed, press the
Ò
POWER
Ó button to release.
Содержание SV-A20GK
Страница 7: ...Reference Information 2 4 Samsung Electronics MEMO ...
Страница 17: ...Disassembly and Reassembly 4 8 Samsung Electronics MEMO ...
Страница 25: ...Alignment and Adjustment 5 8 Samsung Electronics MEMO ...
Страница 35: ...Exploded View and Parts List 6 10 Samsung Electronics MEMO ...
Страница 43: ...7 8 Samsung Electronics Electrical Parts List MEMO ...
Страница 45: ...Block Diagrams 8 2 Samsung Electronics 8 1 Overall Block Diagram ...
Страница 46: ...Block Diagrams Samsung Electronics 8 3 8 2 System Control ...
Страница 47: ...Block Diagrams 8 4 Samsung Electronics 8 3 Video ...
Страница 48: ...Samsung Electronics 10 1 10 Wiring Diagram ...
Страница 51: ...Schematic Diagrams Samsung Electronics 11 3 11 1 S M P S POWER OPTION OPTION ...
Страница 52: ...Schematic Diagrams 11 4 Samsung Electronics 11 2 System Control Servo ...
Страница 53: ...Schematic Diagrams Samsung Electronics 11 5 IC601 HD6433977 RA10F ...
Страница 55: ...Schematic Diagrams Samsung Electronics 11 7 IC301 SS11511M IC302 LA7411 IC303 SS23377M ...
Страница 57: ...Schematic Diagrams Samsung Electronics 11 9 IC301 SS11511M IC302 LA7416 IC303 SS23377M ...
Страница 58: ...Schematic Diagrams 11 10 Samsung Electronics 11 5 IF SYSCON SERVO SMPS POWER ...
Страница 59: ...Schematic Diagrams Samsung Electronics 11 11 IC401 TDA9800 ...
Страница 60: ...Schematic Diagrams 11 12 Samsung Electronics 11 6 I O ...
Страница 61: ...Schematic Diagrams Samsung Electronics 11 13 11 7 VPS ...
Страница 64: ...Schematic Diagrams 11 16 Samsung Electronics 11 11 Remote Control ...


