Alignment and Adjustment
Samsung Electronics
5-5
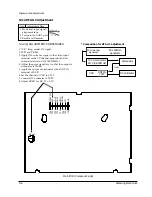
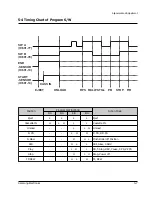
5-3 Electrical Adjustment
5-3-1 Head S/W Adjustment
Note :
Only remote control assÕy can adjust.
5-3-1 (a) IF REMOTE CONTROL ASS’Y
(AC93-10039Y/69099-633-252) IS
AVAILABLE
1. When using the Ò
INPUT
Ó button of remote control
assÕy ;
1) Insert an SP tape into the housing assÕy.
2) Set the unit to stop mode.
3) Press the Ò
INPUT
Ó button and Ò
3
Ó button simulta-
neously.
4) Press the Ò
PLAY
Ó button.
5) This will adjust the head S/W point adjustment
automatically.
6) After the adjustment is completed, press
Ò
POWER
Ó button to release.
2. When using the Ò
TEST
Ó button of remote control
assÕy ;
1) Insert an SP tape into the housing assÕy.
2) Set the unit to stop mode.
3) Press the Ò
TEST
Ó button and Ò
SP/LP
Ó button
simultaneously.
4) Press the Ò
PLAY
Ó button.
5) This will adjust the head S/W point adjustment
automatically.
6) After adjustment is completed, press the
Ò
POWER
Ó button to release.
5-3-1 (b) IF NORMAL REMOTE CONTROL
ASS’Y FOR X-7/X-8(DX7-R/DX7-RC/
DX8-R/DX8-RC) CHASSIS IS
AVAILABLE
1. When using the Ò
INPUT
Ó button of remote control
assÕy ;
1) Insert an SP tape into the housing assÕy.
2) Press the Ò
PLAY
Ó button.
3) Press the Ò
INPUT
Ó button and Ò
3
Ó button
simultaneously.
4) This will adjust the head S/W point adjustment
automatically.
5) After the adjustment is completed, press
Ò
POWER
Ó button to release.
2. When using the Ò
TEST
Ó button of remote control
assÕy ;
1) Insert an SP tape into the housing assÕy.
2) Press the Ò
PLAY
Ó button.
3) Press the Ò
TEST
Ó button and Ò
SPEED
Ó button
simultaneously.
4) This will adjust the head S/W point adjustment
automatically.
5) After adjustment is completed, press the
Ò
POWER
Ó button to release.
Содержание SV-200X
Страница 7: ...Reference Information 2 4 Samsung Electronics 2 2 IC BLOCK 2 2 1 IC601 HD6473977 ...
Страница 8: ...Reference Information Samsung Electronics 2 5 2 2 2 IC301 SS11501M ...
Страница 9: ...Reference Information 2 6 Samsung Electronics 2 2 3 IC302 LA7411 ...
Страница 10: ...Reference Information Samsung Electronics 2 7 2 2 4 IC303 SS23478M ...
Страница 11: ...Reference Information 2 8 Samsung Electronics 2 2 5 IC401 TDA9800 ...
Страница 12: ...Reference Information Samsung Electronics 2 9 2 2 6 IC801 KA8119 ...
Страница 13: ...Reference Information 2 10 Samsung Electronics MEMO ...
Страница 23: ...Disassembly and Reassembly 4 8 Samsung Electronics MEMO ...
Страница 31: ...Alignment and Adjustment 5 8 Samsung Electronics MEMO ...
Страница 41: ...Exploded View and Parts List 6 10 Samsung Electronics MEMO ...
Страница 59: ...Electrical Parts List 7 18 Samsung Electronics MEMO ...
Страница 61: ...Block Diagrams 8 2 Samsung Electronics 8 1 Overall Block Diagram ...
Страница 62: ...Block Diagrams Samsung Electronics 8 3 8 2 System Control ...
Страница 63: ...Block Diagrams 8 4 Samsung Electronics 8 3 Video ...
Страница 64: ...Samsung Electronics 10 1 10 Wiring Diagram ...
Страница 67: ...Schematic Diagrams Samsung Electronics 11 3 11 1 S M P S POWER ...
Страница 68: ...Schematic Diagrams 11 4 Samsung Electronics 11 2 System Control Servo ...
Страница 70: ...Schematic Diagrams 11 6 Samsung Electronics 11 4 IF ...
Страница 71: ...Schematic Diagrams Samsung Electronics 11 7 11 5 I O 1 Scart ...
Страница 72: ...Schematic Diagrams 11 8 Samsung Electronics 11 6 I O 2 Scart ...
Страница 73: ...Schematic Diagrams Samsung Electronics 11 9 11 7 VPS ...
Страница 74: ...Schematic Diagrams 11 10 Samsung Electronics 11 8 PDC ...
Страница 76: ...Schematic Diagrams 11 12 Samsung Electronics SYSCON SERVO CN601 11 10 Function Timer SV A40XK SV 205X ...
Страница 77: ...Schematic Diagrams Samsung Electronics 11 13 11 11 Remote Control ...

