background image

English

 _3

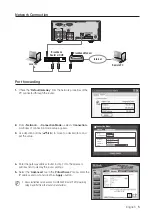
Wiring diagram for external devices

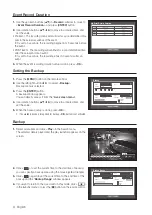
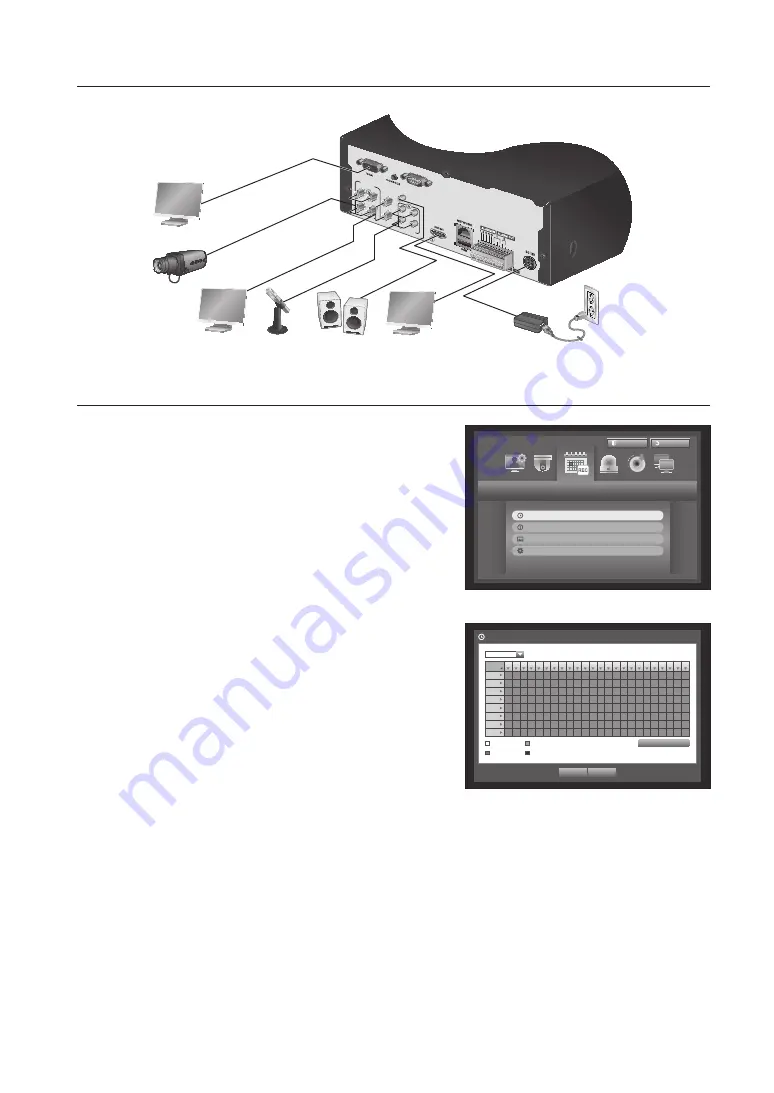
Recording Schedule

1. 

Press the [

MENU

] button on the remote control.

2. 

Use the left/right button (

_ +

) to select <

Record

>. 

Record menu is selected.

3. 

Use the up/down buttons (

▲▼

) to move to <

Recording 

Schedule

>, and press [

ENTER

] button.

4. 

Select <

Recording Schedule

>. 

A window of scheduled recording setup appears.

5. 

Use direction buttons (

▲▼_ +

) to move to a desired item, and 

set the value.

• 

Apply to All CH : If selected <

Apply to All CH

>, “

Apply to All CH

” 

window appears. 

Press <

OK

> to apply the setup to all channels.

6. 

When the recording schedule setup is done, press <

OK

>.

Record

Logout

Return

Recording Schedule
Event Record Duration
REC Quality & Resolution
Record Option

  All  00 01 02 03 04 05 06 07 08 09 10  11 12 13 14 15 16 17 18 19 20 21 22 23

 Sun
 Mon
 Tue
 Wed
 Thu
 Fri
 Sat
 Hol

No Recording 

Continuous

Event Both(Cont&Evnt)

Apply to All CH

 OK 

Cancel

Recording Schedule

CH1

VIDEO IN

1

2

3

4

CH1

CH2

CH3

CH4

AUDIO IN

+ -

AUDIO OUT

SERLAL

COM

NO

NO

NC COM

SPOT1

SPOT2

RS485

VIDEO OUT (VGA)

VIDEO IN

SPOT

AUDIO OUT

AUDIO IN

HDMI

AC 100-240V~IN

Содержание SRD-473D

Страница 1: ...4 CHANNEL DVR Quick Manual English SRD 473D...

Страница 2: ...ted input output range Use a certified power cord only For the product with an input ground use a grounded power plug Package Contents Please unwrap the product and place the product on a flat place o...

Страница 3: ...H If selected Apply to All CH Apply to All CH window appears Press OK to apply the setup to all channels 6 When the recording schedule setup is done press OK Record Logout Return Recording Schedule Ev...

Страница 4: ...tem and set the value 5 When the backup setup is done press OK If no available device is recognized for backup OK button is not activated Backup 1 Select a data item and click Play in the Search menu...

Страница 5: ...the browser s address field to display the router settings 5 Select the Advanced tab in the Virtual Server menu enter the IP address and port and click the Apply button M M Above instructions are base...

Страница 6: ...d should be set when logging in for the first time Set password for your wireless network if you use the product with a wireless router Being not protected with password or using the default wireless...

Страница 7: ...e battery return systems This marking on the battery manual or packaging indicates that the batteries in this product should not be disposed of with other household waste at the end of their working l...

Страница 8: ...IN AMERICA Inc 100 Challenger Rd Suite 700 Ridgefield Park NJ 07660 Toll Free 1 877 213 1222 Direct 1 201 325 6920 Fax 1 201 373 0124 www samsungcctvusa com SAMSUNG TECHWIN EUROPE LTD Samsung House 10...

Отзывы: