background image

ŝ

72

Ş

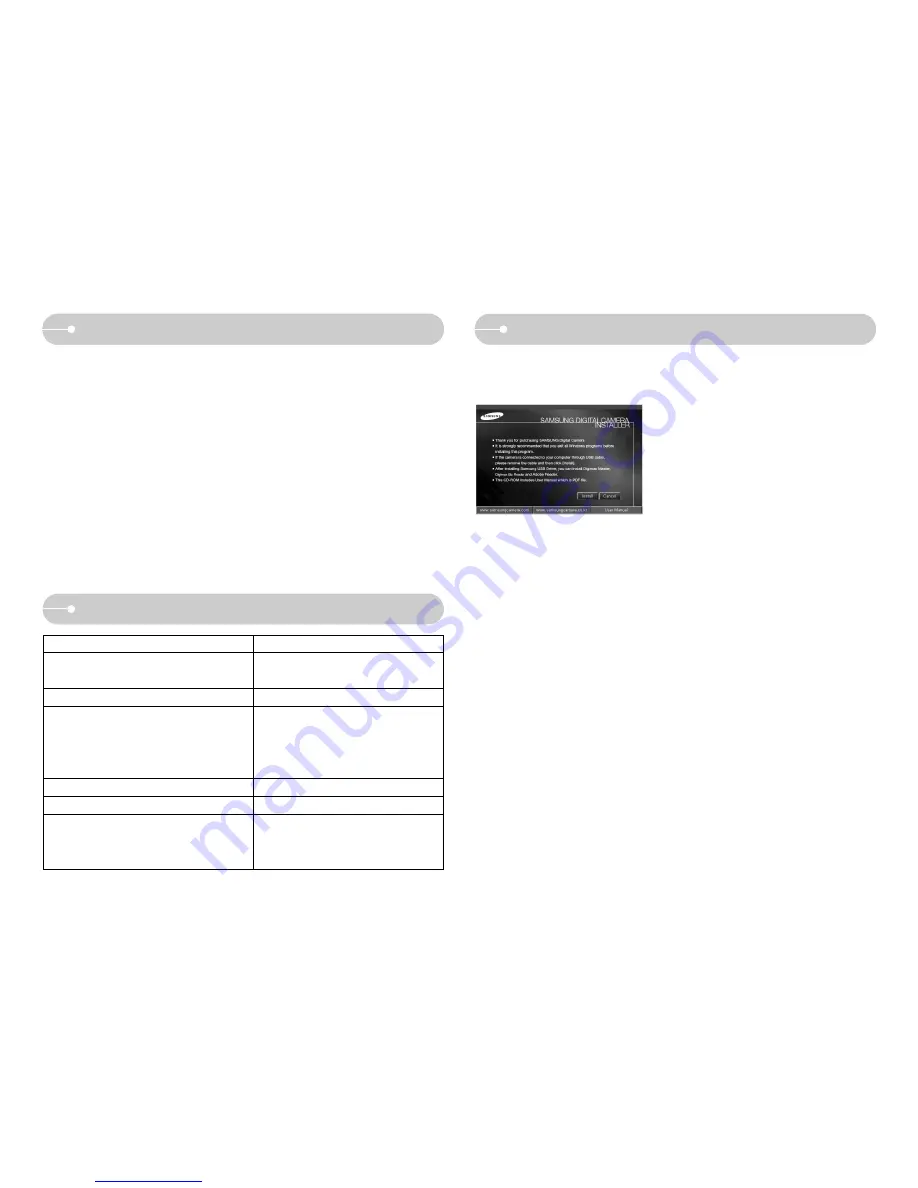
After inserting the CD-ROM provided with this camera into the CD-ROM drive, the
following window should automatically run.

Before connecting the camera to the PC, you
should first install the camera driver.

ſ

Screen Captures illustrated on this manual is
based on English Edition of Windows.

ƈ

Camera driver : This enables images to transfer between the camera and

PC.

This camera uses the USB Storage Driver as the camera driver. You can use
the camera as a USB card reader. After installing the driver and connecting this
camera to the PC, you can find [Removable Disk] in [Windows Explorer] or [My
Computer]. A USB Storage Driver is provided only for Windows. A USB Driver
for MAC is not included with the Application CD. You can use the camera with
Mac OS 9.0 ~ 10.4.

ƈ

XviD codec : This allows movie clips (MPEG-4) recorded with this camera

to be played back on a PC.

To play back a movie clip recorded with this camera, you must install the XviD
codec. If a movie clip recorded with this camera does not play well, install this
codec. This software is only compatible with Windows.

ƈ

ƈ

Digimax Master : This is the all-in-one multi media software solution.

You can download, view, edit and save your digital images and movie files with
this software. This software is only compatible with Windows.

Software Notes

System Requirements

Please ensure that you read this instruction manual carefully before use.

Ү

The attached software is a camera driver and image editing software tool for
Windows.

Ү

Under no circumstances should all or part of either the software or the user
manual be reproduced.

Ү

Copyrights for software are licensed only for use with a camera.

Ү

In the unlikely event of a manufacturing fault, we will repair or exchange your
camera. 
We cannot, however, be held responsible in any way for damage caused by
inappropriate use.

Ү

Using a Hand-made (self assembled) PC or a PC and OS that has not been
guaranteed by the manufacturer is not covered by the Samsung warranty.

Ү

Before using this manual, you should have a basic knowledge of computers
and O/S (Operating Systems).

For Windows

For Macintosh

Windows 98SE/2000/ME/XP/Vista

Mac OS 9.0~10.4

USB port

USB port

CD-ROM drive

CD-ROM drive

PC with processor better than Pentium 450MHz

(Pentium 800MHz recommended)

Minimum 128MB RAM (512MB
recommended) 
200MB of available hard disk space 
(1GB recommended)

1024x768 pixels, 16-bit color display compatible
monitor (24-bit color display recommended),
Microsoft DirectX 9.0

Minimum 64MB RAM

(256MB recommended)

Power Mac G3 or later

About the software

Downloaded from 

www.Manualslib.com


manuals search engine


Содержание SRC-A3 - Genuine Digital Camera NV11

Страница 1: ... guide you through using the camera including capturing images downloading images and using the application software Please read this manual carefully before using your new camera User Manual ENGLISH Downloaded from www Manualslib com manuals search engine ...

Страница 2: ...erating properly before you intend to use it e g for a trip or an important event to avoid disappointment Samsung camera takes no responsibility for any loss or damages that may result from camera malfunction ƃ Keep this manual in a safe place ƃ If you use a card reader to copy the images on the memory card to your PC the images could be damaged When transferring the images taken with the camera t...

Страница 3: ...he camera or Charger This may cause heat to build up and distort the camera body or cause a fire Always use the camera and its accessories in a well ventilated area DANGER indicates an imminently hazardous situation which if not avoided will result in death or serious injury ƈ Do not attempt to modify this camera in any way To do so may result in fire injury electric shock or severe damage to you ...

Страница 4: ...cause breakage of cable or camera ƈ Credit cards may be demagnetized if left near a camera case Avoid leaving magnetic strip cards near the case READY ƃSystem chart ōōōōōōōōō5 ƃIdentification of features ōōōōō6 ƈFront Topōōōōōōōōōō6 ƈBack Bottom ōōōōōōōō7 ƈBottomōōōōōōōōōōōō8 ƈSelf timer lamp ōōōōōōōō8 ƈCamera Status Lamp ōōōōō8 ƈMode dial ōōōōōōōōōō9 ƈMode iconōōōōōōōōōō10 ƃConnecting to a Power ...

Страница 5: ...ōōōōōōō50 ƈDPOF STANDARD ōōōōō51 ƈDPOF Print sizeōōōōōōō51 ƈDPOF Index ōōōōōōōō52 ƈRotating an image ōōōōōō52 ƈResize ōōōōōōōōōōō53 ƈTrimming ōōōōōōōōōō54 ƈEffectōōōōōōōōōōōō54 ƈMotion GIF ōōōōōōōōō55 ƈRed eye fix ōōōōōōōōō55 ƈPictBridgeōōōōōōōōōō56 ƃSetup menu ōōōōōōōōō58 ƈOSD set ōōōōōōōōōō60 ƈFile name ōōōōōōōōōō60 ƈLanguage ōōōōōōōōōō61 ƈSetting up the Date Time Date typeō61 ƈImprinting the re...

Страница 6: ...or Samsung service centre Software CD see p 72 Camera strap User manual Product warranty DPOF compatible printer see p 50 Remote control AC adapter SAC 45 USB cable SUC C2 PictBridge compatible printer see p 56 Computer see p 75 AV cable External monitor see p 65 Included items Rechargeable battery SLB 1137D Camera case SD SDHC memory card MMC see p 14 Downloaded from www Manualslib com manuals se...

Страница 7: ...tter button down half way Do not open the flash by force It may break the camera Close the flash when you are not using it to prevent breakage Mode dial Self timer lamp Remote control sensor Auto focus lamp Shutter button Built in flash Lens Lens cover Microphone Power button Downloaded from www Manualslib com manuals search engine ...

Страница 8: ...t USB AV connection terminal LCD monitor Camera status lamp Eyelet for camera strap Zoom W button Thumbnail Zoom T button Digital zoom BACK button FR button Play mode button Smart button Smart button Downloaded from www Manualslib com manuals search engine ...

Страница 9: ... blinks while saving the image and then turns off when ready to take another picture The lamp blinks The lamp lights up LCD monitor turns off after initializing the device The lamp turns on LCD monitor turns off The lamp lights The subject is in focus The lamp blinks The lamp is off The lamp blinks The subject is not in focus While voice memo recording When the USB cable is inserted to a PC Transm...

Страница 10: ... except the aperture value and shutter speed ƃ ASM mode You can manually configure all functions including the aperture value and shutter speed ƃ ASR mode Advanced Shake Reduction ASR mode This mode will reduce camera shake and help you get a clearer image Identification of features ŝ9Ş ƃ SPECIAL EFFECT mode It is possible to add special effects to your images by using this mode ƃ SCENE mode Use t...

Страница 11: ...d may vary depending on the user s methods Identification of features ƃ MOVIE CLIP mode A movie clip can be recorded for as long as the available recording time of the memory capacity allows ƃ PHOTO GALLERY mode The saved images can be reviewed with music or various effects in this mode ŝ10Ş Connecting to a Power Source ƈ You should use the rechargeable battery SLB 1137D supplied with the camera B...

Страница 12: ...he USB cable are assembled it can be used as an AC cable ƃ Using the SAC 45 as an AC charger Insert the AC adapter into the USB connector When the AC adapter is inserted it can be used as an AC charger ƃ Using the SAC 45 as an USB cable Remove the AC adapter from the USB connector You can transmit data with a PC p 75 or charge the battery In the following cases the battery may not be charged ƃ Whe...

Страница 13: ...battery with the camera power on the battery can t charge fully Turn the camera off while charging the battery ƃ If you insert the fully discharged battery to charge it do not turn on the camera at the same time The camera may not be turned on because of the low battery capacity Charge the battery for more than 10 minutes before using the camera ƃ Do not use the flash frequently or take a movie cl...

Страница 14: ...ended use you may notice that the memory card is warm This is perfectly normal ƃ Do not use a memory card that is used in another digital camera To use the memory card in this camera format the memory card using this camera ƃ Do not use a memory card formatted by another digital camera or memory card reader Inserting the memory card Battery status Battery indicator The battery is fully charged Low...

Страница 15: ...ed incorrectly If the power is switched off or the memory card is removed while recording deleting formatting or reading ƃ Samsung cannot be held responsible for lost data ƃ It is advisable to copy important data onto other media as back up e g floppy disks hard disks CD etc ƃ If there is insufficient memory available A Memory Full message will appear and the camera will not operate To optimise th...

Страница 16: ...on is used for shifting the menu cursor to select or for confirming the selected menu ƈ To select a sub menu in some menus touch the button and slide your finger to the left right Selecting the main menu Touching the button SIZE Confirming the main menu Pressing the button Confirming the sub menu Pressing the button Selecting the sub menu Touching the button e g Selecting the shutter speed Slow Fa...

Страница 17: ...vertical smart button 3 To change the date select the 2007 02 01 menu and press the vertical smart button 4 To select Year Month Day and Hour Minute press the horizontal smart button To change the numbers press the vertical smart button ƃ You can select any one of 22 languages These are listed below English Korean French German Spanish Italian S Chinese T Chinese Japanese Russian Portuguese Dutch ...

Страница 18: ...Icons Page 4 Card inserted indicator p 13 5 Battery p 13 7 Focus mode p 28 29 8 Flash 9 Image size p 31 10 Shooting mode p 32 11 Metering p 32 12 Sharpness p 33 13 Special Effect p 33 14 Image quality Frame rate p 34 15 Self timer p 34 35 16 Voice Recording Without Sound p 35 36 p 21 17 Setup menu 18 Extension menu p 15 19 Exposure compensation p 36 20 ISO p 36 21 White Balance 22 Auto focus frame...

Страница 19: ... you press the shutter button down half way it means that the camera cannot focus on the subject Should this be the case the camera is unable to capture an image clearly INFORMATION 1 Insert the battery p 13 taking note of the correct polarity 2 Insert the memory card p 13 As this camera has a 20MB internal memory it is not essential to insert the memory card If the memory card is not inserted an ...

Страница 20: ...L mode by using the smart button p 40 41 3 Select the desired shutter speed and aperture value by using the smart button 4 Point the camera towards the subject and compose the image by using the LCD monitor 5 Press the shutter button to capture an image ƃ How to use the APERTURE PRIORITY mode This mode will set the aperture value for automatic exposure depends on the brightness of the object by au...

Страница 21: ...This mode will reduce the effect of camera shake and help you get a well exposed image in dim conditions ƃ Things to watch out for using the ASR mode 1 The digital zoom will not operate in the ASR mode 2 If the lighting conditions are brighter than fluorescent lighting condition the ASR doesn t activate 3 If the subject is moving the final image captured may be blurred 4 Avoid moving the camera wh...

Страница 22: ... use the MOVIE CLIP mode A movie clip can be recorded for as long as the available recording time of the memory capacity allows 1 Select the MOVIE CLIP mode by rotating the mode dial Available recording time will display on the LCD monitor 2 Point the camera towards the subject and compose the image by using the LCD monitor Press the shutter button and movie clips are recorded for as long as the a...

Страница 23: ...ructing the lens or the flash when you capture an image ƈ Compose the image by using the LCD monitor ƈ In some of the following conditions the auto focus system may not perform as expected When photographing a subject that has little contrast If the subject is highly reflective or shiny If the subject is moving at high speed When there is strong reflected light or when the background is very brigh...

Страница 24: ...CLIP mode Pressing the shutter button down fully starts the process for recording a movie clip Press the shutter button once and the movie clip is recorded for as long as the available recording time in the memory allows If you wish to stop recording press the shutter button again ƃ In STILL IMAGE mode Pressing the shutter button down halfway activates the autofocus and checks the condition of the...

Страница 25: ...AL ZOOM button ƃ This camera has a 5X optical zoom and a 5X digital zoom function Using both will offer a total zoom ratio of 25X ƃ TELE Zoom Optical zoom TELE Pressing the ZOOM T button will zoom into the subject i e the subject will appear nearer Digital zoom TELE When the maximum 5X optical zoom is selected pressing the ZOOM T button activates the digital zoom software Releasing ZOOM T button s...

Страница 26: ...n to modify the lens position ƃ Take care not to press the lens as this may cause a camera malfunction ƃ When the camera is turned on take care not to touch the camera s moving lens parts as this may cause the resulting image to be dim and unclear ƃ You can operate the Wide and Tele zoom by using the remote control INFORMATION 3 Press the shutter button halfway The focus frame turns to green when ...

Страница 27: ...en the person being taken does not look at the camera Camera doesn t detect a face as the brightness is too dark or too bright The distance between the camera and object are far ƃ The maximum available Face Recognition range is 2 1m Wide ƃ The nearer the subject the faster the camera can recognize the subject INFORMATION MENU page COLOR O X X X X X X p 27 BRIGHT O X X X X X X p 28 MANUAL X O O X X...

Страница 28: ...ANUAL mode Using the LCD monitor to set the camera MENU page VOICE O O O O O O O p 35 36 W B X O O X X X O p 37 ISO X O O X X X X p 36 EV X O O X X X O p 36 MULTI O O O O O O SPOT X O O X O O CENTER X O O X O O X O O X O X X p 33 X X X X O X X p 38 X X X X O X X p 39 X X X X O X X p 39 40 NORMAL O O O O O O B W X O O X O O SEPIA X O O X O O B X O O X O O R X O O X O O G X O O X O O NEGATIVE X O O ...

Страница 29: ...w below Brightness ƈ You can change the brightness of the image ƃ Changing the brightness To select the brightness touch the button and slide your finger to the left or right BRIGHT Dark Bright SUPRE MACRO MACRO NORMAL AF MANUAL Auto Super Macro Macro Manual Auto Macro Downloaded from www Manualslib com manuals search engine ...

Страница 30: ... the manual focus in the program mode and ASM mode ƃ How to set the manual focus To set to manual focus touch the button and slide your finger to the left or right 1cm 40cm 80cm 1 5m 4 5m MF Farther focus Closer focus 1cm 40cm 80cm 1 5m 4 5m MF ſ Touching the ڹ ں button will move the cursor continuously when you change the manual focus 1cm 40cm 80cm 1 5m 4 5m MF ڹ ں ƃ Types of focus modes and focu...

Страница 31: ...sychro flash the first flash fires to check the shooting condition Flash range and Power ratio of flash Do not move the camera until the second flash fires ƃ Using the flash frequently will reduce the life of the battery ƃ Under normal operating conditions the charging time for the flash is usually less than 5 seconds If the battery is weak the charging time will be longer ƃ Take photographs withi...

Страница 32: ...shutter speed to obtain a balanced correct exposure In poor lighting conditions the camera shake warning indicator will display on the LCD monitor The flash does not fire Select this mode when capturing images in a place or situation where flash photography is prohibited When you capture an image in a poorly lit condition the camera shake warning indicator will display on the LCD monitor When a sh...

Страница 33: ...ne picture only CONTINUOUS Images will be taken continuously until the shutter button is released The shooting capacity depends on the memory HIGH SPEED This takes 3 shots continuously 2 5 shots per second when the shutter is pressed and held down M CAPTURE This takes 7 shots per second when the shutter is pressed and held down After completing the continuous shooting images are saved and the imag...

Страница 34: ... is suitable for editing images on your PC ƈ By using the cameraŖ s digital processor it is possible to add special effects to your images No effect is added to the image Captured images will be stored in black and white Captured images will be stored in a sepia tone a range of yellowish brown colours Captured images will be stored in a blue tone Captured images will be stored in a red tone Captur...

Страница 35: ...an interval of 10 seconds before the image is taken Off You do not use the self timer function ƃ This file format complies with the DCF Design rule for Camera File system ƃ JPEG Joint Photographic Experts Group JPEG is the image compression standard developed by the Joint Photographic Experts Group This type of compression is most commonly used for compressing photos and graphics because it can co...

Страница 36: ...y card 4 Voice memo will be recorded for ten seconds from the moment the picture is stored In the middle of the sound recording pressing the shutter button will stop the voice memo ƃ Voice recording 1 Select a recording mode with the exception of the Movie clip mode by rotating the mode dial 2 Select the Voice recording menu by using the smart button 3 Press the shutter button to record a voice Pr...

Страница 37: ...alue 3 Press the exposure compensation menu button again The value you set will be saved and the Exposure Compensation setup mode will close AUTO The camera s sensitivity is automatically changed by variables such as lighting value or subject brightness 80 100 200 400 800 1600 You can increase the shutter speed while the same amount of light is present by increasing the ISO sensitivity However the...

Страница 38: ...lance ٌ White paper AUTO The camera automatically selects the appropriate white balance settings depending on the prevailing lighting conditions DAYLIGHT For taking images outside CLOUDY For taking images under a cloudy and overcast sky Fluorescent H For shooting under daylight fluorescent types of three way fluorescent lighting Fluorescent L Shooting under white fluorescent lighting TUNGSTEN For ...

Страница 39: ...ng objects for example children LANDSCAPE To take pictures of distant scenery BIZ To take pictures of a visiting card CLOSE UP Close up shooting for small objects such as plants and insects TEXT Use this mode to shoot a document SUNSET For taking pictures of sunsets DAWN Daybreak scenes BACKLIGHT For portraits without shadows caused by backlighting FIREWORK Firework scenes BEACH SNOW For ocean lak...

Страница 40: ...omposite shooting 2 different shots are combined in a still image 3 different shots are combined in a still image 4 different shots are combined in a still image 2 different panorama shots are combined in a still image ƃ If you press the Play mode button or rotate the mode dial during the composite shots each camera working mode is executed The images captured before will be deleted ƃ After taking...

Страница 41: ...ots press the BACK button 2 A previous image will be deleted and new frame will display If there is an image taken before press the BACK button again and a previous image will be deleted again 3 Press the shutter button to capture a new image ƃ Changing a part of composite shot after taking the last shot 1 After taking the last shot a menu will display as shown 2 Select an image to delete by using...

Страница 42: ... button and slide your finger to the left or right You can set up the Aperture value in the APERTURE PRIORITY mode and the MANUAL mode ƈ When the images play back you can add play back effect and listen to a B G M Only still images can be played back Movie Voice files are not played back ƈ Selecting a play back mode 1 Select the Photo Gallery mode by rotating the mode dial 2 Press the Play mode bu...

Страница 43: ...lay back Images saved in the Friends album play back Images saved in the Events album play back ƃ Adding images in an album Press the Album menu button and the menus shown below will display Moving cursor Selecting an image Smart button Horizontal Selecting images Pressing the smart button Horizontal Images you want can be selected one at a time Selecting Cancellingl an album Each album button Add...

Страница 44: ...mage to a direction you want Press the horizontal smart button Touch the smart button and the selected image is rotated Press the smart button and the rotated image information will be saved rotates the image clockwise rotates the image anticlockwise ƈ Date mode When an image is taken date information is also recorded In date mode images play back by the date ƃ Selecting a date You can select a da...

Страница 45: ...Manner mode press the Playback mode button for more than 3 seconds In the Manner mode Shutter sound Operating sound Start up sound and Effect sound will not be generated To cancel the Manner mode turn on the camera by pressing the Power button INFORMATION ƃ Playing back a movie clip 1 Select the recorded movie clip that you want to play back by using the smart button 2 Press the Play button and me...

Страница 46: ...recorded voice that you want to play back by using the smart button 2 Press the Play button menus for voice will display 3 Press the Ȟ button to play back a voice clip file To pause a voice file while playing it back press the II button again Pressing the Ȟ button again will cause the voice file to restart To rewind the voice while it is playing press the ȜȜ button To fast forward the voice press ...

Страница 47: ...ame and Stored image number 100 0001 ƃ Playing back a recorded voice memo 1 Select the still image that includes the voice memo by using the smart button 2 Press the Edit button and menus will display 3 Press the icon to play back a voice memo To pause a voice file while playing it back press the II button Pressing the Ȟ button again will cause the voice file to restart To stop playback of the voi...

Страница 48: ...d on the camera by pressing the POWER button you can press the PLAY MODE button once to switch to Play mode and press it again to switch to Recording mode ƈ You can turn the power on with the play mode button The camera is turned on in play mode Press the play mode button again to turn off the camera BACK button ƈ When the menus are displayed the BACK button allows you to return to the previous sc...

Страница 49: ...utton 2 Different parts of the image can be viewed by using the smart button 3 Pressing the thumbnail button will zoom back to the original full sized image You can tell whether the image displayed is an enlarged view by checking the image enlargement indicator shown at the top left of the LCD monitor If the image is not an enlarged view the indicator will not be displayed You can also check the a...

Страница 50: ...An image in LOCK mode will be protected from the delete function but will NOT be protected from the format function Protecting images ƃ Setting play interval Set the slide show play interval to the number of seconds preferred ƃ Repeat Option Selecting the repeat option for the slide show ONE PLAY The slide show is closed after one cycle REPEAT PLAY The slide show is repeated until cancelled OFF 10...

Страница 51: ...not available for Movie clips and Voice recording files ƈ If a memory card is not inserted the menus are still displayed in the LCD but are not selectable ƈ This is used to delete the displayed image YES deletes displayed or checked image NO cancels deleting displayed image or checked image The protected images can t be deleted If you wish to delete multi image check to delete the image by using t...

Страница 52: ... Setting the Print Size 1 Select the SIZE menu by pressing the smart button 2 Select a desired sub menu by pressing the smart button ONE PIC Select a print size of displayed image ALL PICS Change print size of all saved images CANCEL Cancel all of the print size settings 3 Press the OK button to confirm the setting If an image carries DPOF instructions the DPOF indicator will show ſ DPOF SIZE seco...

Страница 53: ... 180 Before rotating the image 4 If you display the rotated image on the LCD monitor empty spaces may appear to the left and right of the image DPOF Index Rotating an image ƈ Images except for movie clips and voice file are printed as index type 1 Select the INDEX menu by pressing the smart button 2 Select a desired sub menu by pressing the smart button If NO is selected Cancel the index print set...

Страница 54: ...9M 3 2 O O O O Size 3264X2176 2752X1832 2176X1456 1280X856 7M 16 9 O O O Size 2688X1512 1920X1080 1344X760 ƃ You can change the resolution of only those files compressed in the JPEG 4 2 2 format ƃ The resized image will have a new file name The START IMAGE image is stored not on the memory card but on the internal memory ƃ Only one START IMAGE image can be saved If you save a new START IMAGE the e...

Страница 55: ...ave the trimmed image the image can t be trimmed Captured images will be stored in black and white Captured images will be stored in a sepia tone a range of yellowish brown colours Captured images will be stored in a blue tone Captured images will be stored in a red tone Captured images will be stored in a green tone Save the image in negative mode ƈ By using the camera s digital processor it is p...

Страница 56: ...OK button the red eye fixed image will save as a new file name ƃ How to make the Motion GIF 3 Select the image size and FPS Frame Per Second 4 Select desired images by using the smart button 5 Press the OK button and a Motion GIF file is saved 1 Press the Edit button 2 Press the Motion GIF menu button ƃ How to play back the Motion GIF file 1 Select a Motion GIF file by using the smart button 2 Pre...

Страница 57: ... connection will not be established Select Printer menu when you connect the camera to your printer But the camera may not connect to the printer depending on the manufacturer and model of the printer ƈ Easy printing When you connect the camera to printer in the Play back mode you can print a picture easily with the default print settings 1 In the play back mode connect the camera and the printer ...

Страница 58: ...per Setting the quality of the picture to be printed Setting whether to print the file name Auto PostCard Card 4x6 L 2L Letter A4 A3 Auto Full 1 2 4 8 9 16 Index Auto Plain Photo FastPhoto Auto Draft Normal Fine Auto Off On Setting the size of the printing paper ƈ Printing images Custom mode Images will be printed with changed printer setting 1 In custom printing mode press the Print menu button ſ...

Страница 59: ...ub menu Secondary menu Page Full Basic Hide LCD Save Full Basic Hide File Series Reset Off Date Date Time Dark Normal Bright AF Lamp Off On p 62 Power Off 1 3 5 10 min p 62 Quick View Off 0 5 1 3 sec p 62 OSD set Recording mode OSD set Playback mode Language Imprint LCD Date Time p 60 p 60 p 60 p 61 p 61 p 61 p 61 ENGLISH FRANÇAIS DEUTSCH ESPAÑOL ITALIANO PORTUGUÊS DUTCH DANSK SVENSKA SUOMI BAHASA...

Страница 60: ...LOGO User image Off Low Medium High Off Sound1 Sound2 Sound3 Off Sound1 Sound2 Sound3 Off Sound1 Sound2 Sound3 Format No Yes Delete All No Yes Copy to Card No Yes Video Out NTSC PAL Reset No Yes Start Image Sound Volume Beep Sound Start Sound Shutter Sound p 62 p 63 p 63 p 63 p 63 p 65 p 65 p 64 p 64 p 63 ſ Menus are subject to change without prior notice Full Basic Hide LCD Save OSDSet OSDSet Fil...

Страница 61: ...when a new memory card is used or after formatting or after deleting all pictures Reset After using the reset function the next file name will be set from 0001 even after formatting deleting all or inserting a new memory card The first stored folder name is 100SSCAM and the first file name is SNV10001 File names are assigned sequentially from SNV10001 ƍ SNV10002 ƍ ƍ SNV19999 The folder number is a...

Страница 62: ...ger are removed and inserted again the language setting will be preserved LANGUAGE sub menu English Korean French German Spanish Italian S Chinese T Chinese Japanese Russian Portuguese Dutch Danish Swedish Finnish Thai BAHASA MALAY INDONESIAN Arabic Polish Hungarian Czech and Turkish ENGLISH FRANÇAIS DEUTSCH ह OSDSet OSDSet File Language Date Time Ȝ Exit BACK Setting up the Date Time Date type ƈ Y...

Страница 63: ...le recording a movie clip or taking a composite shot Exit BACK Exit BACK Quick view ƈ If you enable Quick View before capturing an image you can view the image you just captured on the LCD monitor for the duration set in the Quick View setup Quick view is possible only with still images ƃ Sub menus Off The quick view function can t be activated 0 5 1 3 sec The captured image is briefly displayed d...

Страница 64: ...rt Sound ShutterSound Ȝ Shutter sound ƈ You can select the shutter sound ƃ Shutter sound Off Sound 1 Sound 2 Sound 3 Formatting a memory ƈ This is used for formatting the memory If you run Format on the memory all images including the protected images will be deleted Be sure to download important images to your PC before formatting the memory ƃ Sub menus No The memory will not be formatted Yes A c...

Страница 65: ...t number of file names will be created in the card to avoid duplication of the file name When the Reset of the File setup menu is set The copied file names start from after the last stored file name When the Series of the File setup menu is set The copied file names start from after the last captured file name After completing Copy To Card the last stored image of the last copied folder is display...

Страница 66: ... CopytoCard Video Out Reset Ȝ Initialisation ƈ All camera menu and function settings will be restored to their default values However values for DATE TIME LANGUAGE and VIDEO OUT will not be changed ƃ Sub menus No Settings will not be restored to their defaults Yes A confirmation window will display Select the Yes menu by pressing the smart button All settings will be restored to their defaults Exi...

Страница 67: ...ges in temperature and humidity Areas exposed to dust and dirt Areas exposed to direct sunlight or the inside of a vehicle in hot weather Environments where there is high magnetism or excessive vibration Areas with high explosives or highly flammable materials ƈ Do not leave this camera in places subject to dust chemicals like naphthalene and mothball high temperatures or high humidity Keep this c...

Страница 68: ...efore trying the transfer again ƈ Always check the condition of the camera before an important event or going on a trip Take a picture to check that the camera is working correctly and ensure you have a fully charged spare battery Samsung cannot be held responsible for camera malfunctions Important notes Warning indicator ƈ There are several warnings that may appear on the LCD display Memory Error...

Страница 69: ...k the following Warning indicator Battery power quickly drains ϛThe Camera is being used in low temperatures ƍ Keep the camera in warm conditions i e inside a coat or jacket and only remove it in order to take images Camera does not take images when pressing the Shutter button ϛThere is insufficient memory capacity ƍ Delete unnecessary image files ϛThe memory card has not been formatted ƍ Format t...

Страница 70: ...a driver is not installed ƍ Install a USB Storage Driver The images are unclear ϛA picture was taken the subject without setting an appropriate macro mode ƍ Select an appropriate macro mode to take a clear image ϛTaking a picture beyond the flash range ƍ Take a picture within the flash range ϛThe lens is smudged or dirty ƍ Clean the lens The flash does not fire ϛFlash off mode has been selected ƍ ...

Страница 71: ...ne Night Portrait Children Landscape Biz Close up Text Sunset Dawn Backlight Fireworks Beach Snow Continuous Single Continuous High Speed AEB Motion Capture 7fps up to 20 shots Self timer 2 sec Double 10 sec Remocon optional ƈ Image Sensor Type 1 1 8ů CCD Effective Pixel Approx 10 1 Mega pixel Total Pixel Approx 10 3 Mega pixel ƈ Lens Focal Length Schneider Lens f 7 8 39mm 35mm film equivalent 38 ...

Страница 72: ...Color Effect GIF Animation Red eye Fix ƈ Interface Digital output connector USB 2 0 Audio Mono Video output NTSC PAL user selectable DC power input connector 24pin Connector ƈ Power Source Rechargeable battery 3 7V Li ion battery SLB 1137D Adaptor SAC 45 Included battery may depending on sales region ƈ Dimensions WxHxD 106 6x64 2x21 9mm ƈ Weight 195 3g without batteries and card ƈ Operating Temper...

Страница 73: ...l images and movie files with this software This software is only compatible with Windows Software Notes System Requirements Please ensure that you read this instruction manual carefully before use ҮThe attached software is a camera driver and image editing software tool for Windows ҮUnder no circumstances should all or part of either the software or the user manual be reproduced ҮCopyrights for s...

Страница 74: ... with this camera on the computer DirectX 9 0 must be installed ƃ You should allow 5 10 seconds for running the automatic setup program according to the capability of your computer If the frame does not show run the Windows Explorer and select Installer exe in the CD ROM Drive ƃ PDF documents of user manual are included in the Software CD ROM supplied with this camera Search the PDF files with Win...

Страница 75: ...eral Public License and anyone can copy modifiy and distribute this codec freely but WITHOUT ANY WARRANTY IMPLIED OR EXPRESSED OF MERCHANTABILITY OR FITNESS FOR A PARTICULAR PURPOSE provided however that you have to follow the GNU General Public License whenever you are distributing this codec or modification thereof For more information see the GNU General Publice License documents http www gnu o...

Страница 76: ...power The Found New Hardware Wizard will open and the computer will recognise the camera ſ If your OS is Windows XP an image viewer program will open If the download window of Digmax Master opens after starting Digimax Master the camera driver was set up successfully ƃ If you have installed the camera driver The Found New Hardware Wizard may not open ƃ On a Windows 98SE system the Found New Hardwa...

Страница 77: ...or Copy menu Cut cuts selected files Copy copies selected files 5 Click a folder where you want to paste the file ƈ Disconnecting the camera and PC Refer to page 77 Removing the removable disk ſ If you selected Printer in Step 2 when you connect the camera to your printer the Connecting Printer message will display and the connection will not be established In this case disconnect the USB cable an...

Страница 78: ...n 2 Double click the Unplug or Eject Hardware icon on the task bar 5 A Safe to Remove Hardware window will open Click the OK button Double click Removing the removable disk Starting PC mode ƃ We recommend that you should copy the images to the PC to view them Opening images directly from the removable disk may be subject to unexpected disconnection ƃ When you upload a file that is not taken by thi...

Страница 79: ...iver for MAC is not included with the software CD as MAC OS supports the camera driver 2 Check the MAC OS version during start up This camera is compatible with MAC OS 9 0 10 4 3 Connect the camera to the Macintosh and turn the camera power on 4 A new icon will be displayed on the desktop after connecting the camera to the MAC Setting up the USB Driver for MAC Using the USB Driver for MAC 6 A Unpl...

Страница 80: ...ges will be displayed Digimax Master ƈ You can download view edit and save your images and movies with this software This software is only compatible with Windows ƈ To start the program click Start ƍ Programs ƍ Samsung ƍ Digimax Master ƍ Digimax Master 3 Click Next button ƃ Downloading images 1 Connect the camera to your PC 2 A window for downloading images will display after connecting the camera...

Страница 81: ...x Master for further information ƃ Image viewer You can view the stored images Image viewer functions are listed below ڹ Menu bar You can select menus File Edit View Tools Change functions Auto download help etc ں Image selection window You can select the desired images in this window ڻ Media type selection menu You can select image viewer image edit and movie edit functions in this menu ڼ Preview...

Страница 82: ...mation on business card like name company telephone number e mail and so on It offers the more effective businesss information management solution with digital camera This software is only compatible with Windows Digimax Biz Reader recognizes English and Korean business namecard only ƈ Auto recognizing when camera connected with computer BizChecker After installing Biz Reader if you connect the SA...

Страница 83: ... displayed File names assigned in the Biz mode will be set SB1ZXXXX 3 Downloading camera s namecard images Refer to page 76 Downloading stored images 2 Click the Open button 3 Select the namecard image files and click the Open button To select several image files use Shift key or Ctrl key with your mouse 4 Namecard images are recognized automatically ƃ Recognizing namecard image file 1 Run the Dig...

Страница 84: ...er for further information ڹ ڿ ں ڻ ۀ ڼ ھ ڽ ƃ Partial recognizing Partial recognition function can be used when mis recognition 1 Select the namecard to partial editing 2 Drag the area to partial editing in namecard image window choose the proper field in pop up window and then the recognized result is entered to the field automatically ſ Drag only the character area without margin ſ Refer to the H...

Страница 85: ...n the back of the computer ƈ When the movie clip doesn t play back on the PC ſ When the movie clip recorded by the camera doesn t play back on the PC the causes are most likely due to the codec installed on the PC ƈ Please check the following if the USB connection malfunctions Case 1 USB cable is not connected or it is not the supplied USB cable ƍ Connect the supplied USB cable Case 2 The camera i...

Страница 86: ...y clicking the Digimax Master icon on the Taskbar Install all the application programs included in the software CD ƃ When a codec for playing back the movie clip isn t installed or isn t compatible ƍ Install the codec as listed below Installing codec for Windows 1 Insert the CD provided with the camera 2 Run the Windows Explorer and select CD ROM drive XviD folder and click the XviD 1 1 0 30122005...

Страница 87: ...us NJ 07094 Telephone No 201 902 0347 This device complies with Part 15 of the FCC Rules Operation is subject to the following two conditions 1 This device may not cause harmful interference and 2 this device must accept any interference received including interference that may cause undesired operation Correct Disposal of This Product Waste Electrical Electronic Equipment Applicable in the Europe...

Страница 88: ...ŝ87Ş MEMO MEMO Downloaded from www Manualslib com manuals search engine ...

Страница 89: ...ŝ88Ş MEMO MEMO Downloaded from www Manualslib com manuals search engine ...

Страница 90: ...LECTRONICSGMBH AMKRONBERGERHANG6 D 65824SCHWALBACH TS GERMANY TEL 49 0 6196665303 FAX 49 0 6196665366 www samsungcamera de TIANJINSAMSUNGOPTO ELECTRONICSCO LTD No 9zhanghengStreet Micro Electronic IndustrialParkJingangRoadTianjinChina POSTCODE 300385 TEL 86 22 2761 4599 FAX 86 22 2769 7558 www samsungcamera com cn SAMSUNGOPTO ELECTRONICSUKLIMITED SAMSUNGHOUSE1000HILLSWOODDRIVE HILLSWOODBUSINESSPAR...

Отзывы: