background image

SR8980

English

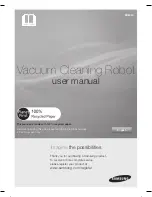
Vacuum Cleaning Robot

user manual

imagine

 the possibilities

Thank you for purchasing a Samsung product.
To receive a more complete service, 
please register your product at

www.samsung.com/register

This manual is made with 100% recycled paper.

 Before operating this unit, please read the instructions carefully.

 For indoor use only.

DJ68-00632B.indb   01

DJ68-00632B.indb   01

2012.1.19   11:52:17 AM

2012.1.19   11:52:17 AM

Содержание SR8980

Страница 1: ...azie per aver acquistato un prodotto Samsung Per ricevere un servizio pi completo Registra il tuo prodotto su www samsung com register Questo manuale realizzato interamente con carta riciclata Prima d...

Страница 2: ...prodotto le caratteristiche dell aspirapolvere acquistato potrebbero differire leggermente da quanto descritto in questo manuale SIMBOLI DI AVVERTENZA ATTENZIONE UTILIZZATI ATTENZIONE Indica che sussi...

Страница 3: ...adeguata supervisione e istruzioni relativamente all uso Prestare attenzione al ne di evitare che i bambini giochino con l apparecchio BASE DI RICARICA Non modi care la spina polarizzata per adattarla...

Страница 4: ...nte idraulico e cos via Non aspirare oggetti in amme o che possano causare fumo quali sigarette ammiferi o braci Non utilizzare per aspirare liquidi in ammabili o combustibili come la benzina n usare...

Страница 5: ...x 33 Pulizia Manuale 34 Programmazione del timer 35 Programma settimanale 37 Funzioni aggiuntive 37 Uso delle funzioni aggiuntive MANUTENZIONE STRUMENTI E FILTRI 38 38 Pulizia del robot aspirapolvere...

Страница 6: ...o scosse elettriche ATTENZIONE Non estrarre la spina di alimentazione tirandola per il cavo n toccare la spina con le mani bagnate La mancata osservanza di questa precauzione pu causare incendi o sco...

Страница 7: ...seri danni malfunzionamenti o rotture AVVERTENZA Aprire tutte le porte delle stanze per effettuarne la pulizia Quando una porta chiusa il robot aspirapolvere non in grado di accedere alla stanza Tutta...

Страница 8: ...I bambini potrebbero cadere provocandosi lesioni o danneggiare seriamente il prodotto AVVERTENZA Se un bambino o un animale domestico viene lasciato da solo all interno della casa accertarsi che l in...

Страница 9: ...atti della base di ricarica con oggetti metallici quali bastoncini cacciaviti eccetera In caso contrario potrebbero veri carsi gravi danni alla base di ricarica ATTENZIONE Accertarsi che non vi siano...

Страница 10: ...lunghi e sottili ecc Per accelerare e ottimizzare il processo di pulizia sollevare le sedie da terra posizionandole sopra i tavoli AVVERTENZA Non posizionare oggetti sopra il robot aspirapolvere In ca...

Страница 11: ...pulire tali aree manualmente NOTA Talvolta il robot aspirapolvere non riesce ad aspirare le matasse di polvere che si formano durante la pulizia In tal caso raccogliere la polvere utilizzando un altro...

Страница 12: ...ei bordi pulizia dei bordi Spazzola principale Spazzola principale ATTENZIONE Se il cavo di alimentazione danneggiato richiederne la sostituzione a un tecnico quali cato presso un centro assistenza La...

Страница 13: ...5 m Circa 1 5 m 2 2 3 3 4 4 5 5 6 6 7 7 Lun LunMart Mart Merc Merc Giov Giov Ven VenSab Sab Dom Dom 8 8 Modalit Auto 1 Pulisce tutte le stanze in modo automatico Modalit Spot 2 Pulisce in modo accurat...

Страница 14: ...porte con un altezza di circa 1 cm e di pulire tutte le stanze A seconda della forma della soglia il robot aspirapolvere potrebbe non essere in grado di superare soglie di 1 cm OSTACOLI Quando il rob...

Страница 15: ...nti Batterie tipo AAA Batterie tipo AAA Manuale dell utente 2 batterie VIRTUAL GUARD Filtro di ricambio Spazzola per pulizia Guida di avvio rapido Spazzola per tappeti montaggio dell aspirapolvere Uni...

Страница 16: ...guida Interruttore di Interruttore di alimentazione alimentazione Spazzola principale Spazzola principale Coperchio spazzola Coperchio spazzola principale principale Copribatteria Copribatteria Ruote...

Страница 17: ...alimentazione rossa Coperchio cassetta ciclonica Coperchio cassetta ciclonica Contatti di ricarica Contatti di ricarica Sensore di rilevamento distanza Sensore di rilevamento distanza Spia modalit Sp...

Страница 18: ...tante Se le batterie vengono installate con la polarit errata il telecomando non funzioner Una volta inserita la punta del coperchio nell apposita fessura premere l altra estremit per chiuderla facend...

Страница 19: ...e 5 Questa icona si accende quando la modalit Dust Sensor Sensore polvere abilitata Modalit Turbo 6 Questa icona si accende quando la modalit Turbo abilitata Visualizzazione della modalit di pulizia 7...

Страница 20: ...ossibile restringere il raggio d azione del robot aspirapolvere a una zona delimitata usando la modalit Fence barriera virtuale Accensione e spegnimento Per utilizzare il robot aspirapolvere necessari...

Страница 21: ...avimento in legno installare la base di ricarica nella 5 stessa direzione dei listelli di legno NOTA Mantenere sempre il cavo di alimentazione della base di ricarica collegato alla presa elettrica Se...

Страница 22: ...a 4 polvere piena si accende la spia di livello pieno Svuotare la vaschetta Pulire l ingresso dell aria nella parte inferiore Pulire il ltro Il robot aspirapolvere non in grado di svuotare la polvere...

Страница 23: ...della batteria lampeggia durante il funzionamento il robot aspirapolvere interrompe la pulizia e si ricarica automaticamente nella base di ricarica Se il robot aspirapolvere inizia il ciclo di pulizi...

Страница 24: ...base di ricarica Informazioni sulla batteria Il robot aspirapolvere alimentato da una batteria ricaricabile agli ioni di litio Li ion ed dotato di una funzione di protezione dal sovraccarico al ne di...

Страница 25: ...a settimana Lampeggia Lampeggia Diminuisce Diminuisce Aumenta Aumenta Premere il pulsante Clock 3 Orologio Premere il pulsante Y o Z per impostare l ora Lampeggia Lampeggia Diminuisce Diminuisce Aumen...

Страница 26: ...a un barriera invisibile che il robot aspirapolvere non pu superare Ad esempio di fronte a vasi mobili porte d ingresso e cos via Selezionare la modalit Fence barriera virtuale 1 utilizzando il pulsan...

Страница 27: ...o il segnale del telecomando ha una priorit superiore rispetto a quello della VIRTUAL GUARD In caso di utilizzo del robot aspirapolvere in un ambiente piccolo o a una distanza ridotta l unit potrebbe...

Страница 28: ...chio si spegne automaticamente per preservare la batteria Per riaccenderlo tenere premuto il pulsante di accensione Start Stop Avvia Arresta sul corpo principale Avvio o arresto della pulizia Avvio Te...

Страница 29: ...dei problemi nel caso il robot aspirapolvere non ritorni alla base di ricarica Veri care l installazione della base di ricarica Quando la base di ricarica si trova in una posizione in cui non riesce...

Страница 30: ...telecomando Sequenza di con gurazione Modalit Normale Modalit Normale Modalit Turbo Modalit Turbo Modalit Dust Sensor Modalit Dust Sensor Sensore polvere Sensore polvere Pulizia completata Pulizia com...

Страница 31: ...t il robot aspirapolvere esegue la pulizia di un area di 1 5 m x 1 5 m Una volta terminata la pulizia il robot aspirapolvere visualizzer sul display i messaggi End Fine Stop Arresto e Stand by Quando...

Страница 32: ...Modalit Turbo Modalit Dust Sensor Modalit Dust Sensor Sensore polvere Sensore polvere 3volte 3volte 2 volte in modalit ricarica 2 volte in modalit ricarica Impostare la 1 modalit Annullare la 2 modali...

Страница 33: ...omarcia non disponibile disponibile Impostare la modalit 1 Annullare la modalit 2 Quando il robot aspirapolvere inserito nella base di ricarica la funzione di pulizia manuale non supportata Trascorso...

Страница 34: ...Settimanale L ora aumenta diminuisce di 5 minuti Premere il pulsante Y o Z per impostare i minuti Lampeggia Lampeggia Lampeggia Lampeggia Diminuisce Diminuisce Aumenta Aumenta Premere il pulsante Tim...

Страница 35: ...ondi Premere i pulsanti Y o Z per impostare il giorno della settimana Se non stata impostata alcuna programmazione precedente viene visualizzato il giorno della settimana corrente Se non stato imposta...

Страница 36: ...a Una volta completate le impostazioni il giorno della settimana impostato lampeggia A questo punto possibile passare alla fase 2 e aggiungere un altro giorno della settimana Annullamento delle impost...

Страница 37: ...Dust Sensor Sensore polvere attivata In modalit di pulizia Auto quando l aspirapolvere rileva la presenza di polvere in una determinata area ruota e modi ca la propria direzione per aspirarla quindi r...

Страница 38: ...a di pulire il robot aspirapolvere Il robot aspirapolvere potrebbe accendersi improvvisamente e causare lesioni Pulizia della spia del sensore e della telecamera Spegnere l unit mediante l interruttor...

Страница 39: ...2 freccia illustrata nella gura Rimuovere il ltro e il ltro a rete dalla vaschetta di 3 raccolta polvere Pulire il ltro la rete e la vaschetta di raccolta polvere 4 possibile utilizzare acqua corrent...

Страница 40: ...erchio della vaschetta di raccolta polvere Svuotare la vaschetta di raccolta polvere 3 Chiudere il coperchio della vaschetta di raccolta polvere no a 4 farlo scattare in posizione quindi rimontare la...

Страница 41: ...ta polvere 4 4 5 5 6 6 Una volta estratta la vaschetta di raccolta polvere scuotere il ltro per rimuovere la polvere Pulire il ltro con acqua Lasciar asciugare il ltro all ombra 7 7 8 8 9 9 Reinstalla...

Страница 42: ...i ssaggio utilizzando una moneta come mostrato nella gura Rimuovere il coperchio inferiore 2 utilizzando una moneta e pulirlo Pulire il coperchio inferiore con acqua 3 Lasciar asciugare il coperchio i...

Страница 43: ...apolvere Dal momento che la polvere raccolta nella vaschetta potrebbe fuoriuscire estrarre la vaschetta di raccolta prima di pulire la spazzola Dopo avere controllato l eventuale presenza di corpi est...

Страница 44: ...e verso il basso no a farla scattare in posizione Onde evitare l ostruzione del robot aspirapolvere prestare attenzione a non aspirare stuzzicadenti o cotton oc Se la rimozione degli oggetti complicat...

Страница 45: ...terale ripetere le procedure 3 descritte al punto 2 Se si sono incastrati capelli o lamenti tra la spazzola rotativa 4 laterale e l unit principale con un cacciavite a croce svitare ed estrarre la vit...

Страница 46: ...lvere improvvisamente inizia a procedere a zig zag veri care che non vi siano corpi estranei incastrati fra le ruote di guida Durante la pulizia delle ruote di guida posizionare un panno morbido 1 sul...

Страница 47: ...ay viene visualizzato Lo Sollevare il robot aspirapolvere e inserirlo manualmente nella base di ricarica per ricaricarlo Il robot aspirapolvere si impigliato in qualche cavo sul pavimento Spegnerlo me...

Страница 48: ...la modalit spenta Veri care che la VIRTUAL GUARD sia spenta quindi impostarla nella modalit desiderata La durata della batteria della VIRTUAL GUARD troppo breve Si stanno utilizzando batterie drycell...

Страница 49: ...tta Controllare se la vaschetta di raccolta polvere separata da quella di svuotamento automatico Disattivare la funzione di svuotamento automatico e inserire a fondo la vaschetta di raccolta polvere C...

Страница 50: ...ul fondo del robot e rimuovere il corpo estraneo impigliato nella ruota di guida destra Veri care il sensore paracolpi Spegnere premendo il pulsante nella parte inferiore dell unit e rimuovere l ostac...

Страница 51: ...per la ricarica 40 W Consumo elettrico dell unit principale 40 W Consumo elettrico svuotamento automatico 600 W Speci che delle batterie 14 4 V 31 68Wh Speci che di pulizia Tipo di ricarica Ricarica...

Страница 52: ...ary or consequential damages including but not limited to procurement of substitute goods or services loss of use data or pro ts or business interruption however caused and on any theory of liability...

Страница 53: ...memo...

Страница 54: ...Se avete commenti o domande sui prodotti Samsung contattate il Servizio Clienti Samsung 800 SAMSUNG 726 7864 www samsung com...

Страница 55: ...ich f r ein Samsung Produkt entschieden haben Produkt registrieren und gewinnen unter www samsung com register Dieses Handbuch ist zu 100 auf Recyclingpapier gedruckt Lesen Sie die Anweisungen sorgf l...

Страница 56: ...genschaften Ihres Staubsaugers sich leicht von den in diesem Handbuch beschriebenen unterscheiden SYMBOLE DER GEFAHREN WARNHINWEISE WARNUNG Dieses Zeichen weist darauf hin dass Lebensgefahr oder ein e...

Страница 57: ...it bez glich der Benutzung des Ger tes von einer verantwortlichen Person entsprechend unterwiesen Kleine Kinder m ssen beaufsichtigt werden um sicher zu stellen dass sie nicht mit dem Ger t spielen AK...

Страница 58: ...niger usw auf Saugen Sie keine brennenden oder gl henden Objekte z B Zigaretten Streichh lzer oder hei e Asche auf Verwenden Sie das Ger t nicht um leicht entz ndliche oder brennbare Fl ssigkeiten wie...

Страница 59: ...Au aden 30 Automatisches Saugen 31 Punktsaugen 32 Maximalsaugen 33 Manuelles Saugen 34 Startzeitvorwahl 35 Wocheneinstellung 37 Spezialfunktionen 37 Verwenden von Spezialfunktionen WARTUNG VON ZUBEH R...

Страница 60: ...WARNUNG Ziehen Sie niemals am Kabel um den Netzstecker aus der Steckdose zu ziehen und ber hren Sie den Netzstecker nicht mit nassen H nden Andernfalls besteht die Gefahr von Stromschl gen oder Brand...

Страница 61: ...en schwerste Sch den Betriebsst rungen und Bruch auftreten VORSICHT ffnen Sie alle T ren damit alle Zimmer gesaugt werden Wenn eine T r geschlossen ist kann der Robo Sauger nicht in dieses Zimmer gela...

Страница 62: ...er nicht auf den Robo Sauger treten oder sich daraufsetzen Kinder k nnten hinfallen und sich verletzen oder es k nnten schwerste Sch den am Ger t auftreten VORSICHT Wenn ein Kind oder Haustier alleine...

Страница 63: ...m WARNUNG Schlie en Sie die Ladekontakte nicht mit Metallobjekten wie Dr hten Schraubendrehern usw kurz Dies f hrt zu schwersten Sch den an der Ladestation WARNUNG Vergewissern Sie sich dass sich kein...

Страница 64: ...Stuhlbeine Tischbeine d nne und lange M bel usw sto en F r schnellere und bessere S uberung stellen Sie St hle auf den Tisch VORSICHT Stellen Sie keine Gegenst nde auf den Robo Sauger Andernfalls bes...

Страница 65: ...h selbst HINWEIS Staubansammlungen die sich beim Saugen gebildet haben k nnen nach dem Saugen zur ckbleiben wenn der Robo Sauger es nicht schafft sie aufzusaugen Entfernen Sie den Staub in diesem Fall...

Страница 66: ...ste f r Kanten Kanten Hauptb rste Hauptb rste WARNUNG Wenn das Netzkabel besch digt ist lassen Sie es durch einen quali zierten Servicetechniker in einem Kundendienstcenter ersetzen Andernfalls besteh...

Страница 67: ...Ungef hr 1 5 m 2 2 3 3 4 4 5 5 6 6 7 7 Mo Mo Di Di Mi Mi Do Do Fr Fr Sa Sa So So 8 8 Automatikbetrieb 1 Reinigt alle Zimmer automatisch Punktsaugen 2 Reinigt einen abgegrenzten Bereich intensiv Diese...

Страница 68: ...m berquert und die Zimmer dahinter reinigt Je nach Form der T rschwelle kann es vorkommen dass der Robo Sauger eine 1 cm hohe Schwelle nicht berqueren kann KOLLISIONSSCHUTZ Trifft der Robo Sauger beim...

Страница 69: ...GER TS Weiteres Zubeh r Batterien Typ AAA Batterien Typ AAA Benutzerhandbuch 2 Batterien VIRTUAL GUARD Ersatz lter Reinigungsb rste Kurzanleitung Spezialzubeh r f r Teppichreinigung bersicht ber das G...

Страница 70: ...Antriebsrad Antriebsrad Hauptschalter Hauptschalter Hauptb rste Hauptb rste Hauptb rstenabdeckung Hauptb rstenabdeckung Akkufachabdeckung Akkufachabdeckung Antriebsrad Antriebsrad Fernbedienungssenso...

Страница 71: ...Zyklonabscheiders Ladekontakte Ladekontakte Abstandserkennungssensor Abstandserkennungssensor Modusanzeige Modusanzeige Modus Netztaste Modus Netztaste Erkennungssensor f r Robo Sauger Erkennungssens...

Страница 72: ...eingesetzt werden funktioniert die Fernbedienung nicht Nachdem Sie die eine Seite der Abdeckung in den Schlitz eingesetzt haben dr cken Sie am anderen Ende der Abdeckung bis diese h rbar einrastet Tec...

Страница 73: ...s Symbol leuchtet wenn Betrieb mit Staubsensor ausgew hlt wurde Turbomodus 6 Dieses Symbol leuchtet wenn Turbobetrieb ausgew hlt wurde Anzeige des Reinigungsmodus 7 Bei jedem Dr cken der Taste f r den...

Страница 74: ...eich beschr nken Ein und Ausschalten am Hauptschalter Um den Robo Sauger zu verwenden m ssen Sie das Ger t mit dem Hauptschalter einschalten Wenn das Ger t ber den Hauptschalter abgeschaltet wird werd...

Страница 75: ...an der Wand entlang 4 Bei Holzfu b den stellen Sie die Ladestation in Richtung der 5 Holzmaserung auf HINWEIS Lassen Sie den Netzstecker der Ladestation immer in der Steckdose Wenn die Ladestation ni...

Страница 76: ...erseits voll 4 leuchtet die entsprechende Anzeige Entleeren Sie den Staubbeh lter der automatischen Entleerstation S ubern Sie den Lufteinlass am Boden S ubern Sie den Filter Der Robosauger kann schwe...

Страница 77: ...beim Saugen blinkt schaltet das Ger t automatisch den Saugvorgang ab und dockt zum Au aden an die Ladestation an Beginnt der Robo Sauger den Saugvorgang nicht direkt an der Ladestation und ndet die La...

Страница 78: ...r einen umweltfreundlichen Lithium Ionen Akku Li ion mit Strom versorgt Der berladungsschutz garantiert eine lange Lebensdauer Die Garantiezeit f r den Akku bel uft sich auf 6 Monate ab dem Kaufdatum...

Страница 79: ...stellen Blinkt Blinkt Weniger Weniger Mehr Mehr Dr cken Sie die Taste Clock 3 Dr cken Sie die TasteY oderZ um die Stunden der Uhrzeit einzustellen Blinkt Blinkt Weniger Weniger Mehr Mehr Dr cken Sie d...

Страница 80: ...and Der VIRTUAL GUARD schafft eine unsichtbare Barriere die der Robo Sauger nicht berqueren kann z B vor Blument pfen M beln der Haust r usw W hlen Sie mit der Modus Netztaste den Zaunmodus 1 virtuell...

Страница 81: ...ernbedienungssignal eine h here Priorit t als das Signal des VIRTUAL GUARD hat Wenn Sie den Robo Sauger in einem kleinen Raum oder auf kurze Distanz steuern kann es aufgrund von Interferenzen der Infr...

Страница 82: ...schalter keine Taste gedr ckt wird schaltet sich das Ger t automatisch ab um ein Entladen des Akkus zu vermeiden Zum erneuten Einschalten halten Sie die Taste Start Stop am Ger t oder auf der Fernbedi...

Страница 83: ...fernung von der Ladestation be ndet Fehlerbehebung wenn der Robo Sauger nicht zur Ladestation zur ckkehrt Pr fen Sie ob die Ladestation korrekt installiert ist Be ndet sich die Ladestation an einer St...

Страница 84: ...rieb Normalbetrieb Turbomodus Turbomodus Betrieb mit Staubsensor Betrieb mit Staubsensor Reinigung abgeschlossen Reinigung abgeschlossen 1 Mal 1 Mal Modus einstellen 1 Modus beenden 2 Informationen zu...

Страница 85: ...Bereich mit einer L nge und Breite von 1 5 m Wenn das Saugen beendet ist zeigt der Robo Sauger End Stop und Standby an Wenn der Robo Sauger an die Ladestation angedockt ist kann eine Punktreinigung ni...

Страница 86: ...sor Betrieb mit Staubsensor 3 Mal 3 Mal Zweimal bei Ladebetrieb Zweimal bei Ladebetrieb Modus einstellen 1 Modus beenden 2 Informationen zum Fortsetzen des Saugprozesses Wenn der Robo Sauger feststell...

Страница 87: ...t ausgef hrt Modus einstellen 1 Modus beenden 2 Wenn der Robo Sauger an die Ladestation angedockt ist kann der manuelle Saugmodus nicht aktiviert werden Erfolgt 1 Minute lang keine Eingabe schaltet da...

Страница 88: ...Sie die Taste Timer 2 Weekly Die Zeit wird in 5 Minuten Schritten ge ndert Dr cken Sie die Taste Y oder Z um die Minuten der Uhrzeit einzustellen Blinkt Blinkt Blinkt Blinkt Weniger Weniger Mehr Mehr...

Страница 89: ...en Sie die Taste Y oder Z um den Wochentag einzustellen Sind keine Voreinstellungen registriert wird der aktuelle Wochentag angezeigt Liegt keine Voreinstellung f r die Startzeit vor wird angezeigt Bl...

Страница 90: ...die Einstellung beendet Sind die Einstellungen beendet blinkt der entsprechende Wochentag Jetzt k nnen Sie mit den Tasten oder einen anderen Wochentag einstellen Einstellungen l schen Wenn Sie bei de...

Страница 91: ...fft der Robo Sauger im Automatikmodus auf besonders verschmutzte Bereiche unterbricht der Sauger sein urspr ngliches Bewegungsmuster und rotiert und ndert die Richtung um diesen Bereich zu reinigen Da...

Страница 92: ...reinigen Der Robo Sauger k nnte pl tzlich angehen und eine Verletzung verursachen Reinigen der Sensorfenster und der Kamera Schalten Sie stets den Hauptschalter an der Ger teunterseite aus ehe Sie den...

Страница 93: ...ter vom 3 Staubbeh lter ab Entfernen Sie den Staub von Filter Gewebe lter und Staubbeh lter 4 Sie k nnen diese Teile mit Wasser abwaschen Nach dem Reinigen mit Wasser Staubbeh lter Wischen Sie den Sta...

Страница 94: ...en Sie den Inhalt des Staubbeh lters 3 Schlie en Sie den Staubbeh lter dabei muss die Abdeckung 4 h rbar einrasten Setzen Sie den Staubbeh lter wieder in den Robo Sauger ein REINIGEN DES ZYKLONABSCHEI...

Страница 95: ...n Sie den Staub der sich am Filter angesammelt hat Reinigen Sie den Filter mit Wasser Lassen Sie den Filter vor der Sonne gesch tzt trocknen 7 7 8 8 9 9 Setzen Sie zuerst die Oberseite des Filters dan...

Страница 96: ...Hilfe einer M nze heraus Nehmen Sie dieBodenabdeckung 2 der Entleerstation mit Hilfe einer M nze ab Reinigen Sie die Abdeckung Reinigen Sie die Abdeckung mit Wasser 3 Lassen Sie die Abdeckung vor der...

Страница 97: ...ter herausfallen kann entfernen Sie den Staubbeh lter ehe Sie die Hauptb rste reinigen Nachdem Sie berpr ft haben ob Fremdstoffe vorhanden sind 1 dr cken Sie den Haken mit dem die B rstenabdeckung xie...

Страница 98: ...en ein Dr cken Sie es dann vorsichtig nach unten bis es einrastet Um zu verhindern dass der Robo Sauger verstopft achten Sie darauf keine Fremdk rper aufzusaugen Wenn sich die Fremdstoffe nur mit Schw...

Страница 99: ...rsten und wiederholen Sie den Vorgang 3 aus Schritt 2 Wenn sich Haare oder F den zwischen dem Robo Sauger und 4 den Seitenb rsten verfangen haben l sen Sie die Schrauben der Seitenb rsten mit Hilfe ei...

Страница 100: ...h im Zickzack zu fahren beginnt kann es sein dass Fremdstoffe an den Antriebsr dern haften Zum Reinigen der Antriebsr der legen Sie ein weiches Tuch auf den 1 Boden und legen Sie den Sauger vorsichtig...

Страница 101: ...an und docken Sie ihn manuell an die Ladestation an um ihn aufzuladen Hat sich der Robo Sauger in einem Kabel auf dem Boden verfangen Schalten Sie das Ger t ber den Hauptschalter aus und entfernen Si...

Страница 102: ...der VIRTUAL GUARD ausgeschaltet ist und stellen Sie den VIRTUAL GUARD dann in den gew nschten Modus Die Laufzeit der Batterien des VIRTUALGUARD ist zu kurz Verwenden Sie Mangan Trockenzellen Ersetzen...

Страница 103: ...tzt ist Schalten Sie die Entleerstation ab und setzen Sie dann den vollst ndigen Staubbeh lter korrekt ein Pr fen Sie ob die Filter im Staubbeh lter der Entleerstation vorhanden sind Schalten Sie die...

Страница 104: ...Sie das Ger t am Hauptschalter an der Ger teunterseite aus R umen Sie das Hindernis aus dem Weg oder bringen Sie den Robo Sauger an eine andere Stelle Fremdstoffe Staub Schmutz usw be nden sich auf d...

Страница 105: ...ngsaufnahme der Ladestation 40 W Leistungsaufnahme des Robo Sauger 40 W Leistungsaufnahme der Entleerstation 600 W Akku 14 4 V 31 68Wh Reinigung Ladeverfahren Automatisch manuell laden Reinigungsmodi...

Страница 106: ...ary or consequential damages including but not limited to procurement of substitute goods or services loss of use data or pro ts or business interruption however caused and on any theory of liability...

Страница 107: ...memo...

Страница 108: ...ls Sie Fragen oder Anregungen zu Samsung Produkten haben wenden Sie sich bitte an den Samsung Kundendienst 01805 SAMSUNG 726 7864 0 14 Min aus dem dt Festnetz max 0 42 Min aus Mobilnetzen www samsung...

Страница 109: ...ties Thank you for purchasing a Samsung product To receive a more complete service please register your product at www samsung com register This manual is made with 100 recycled paper Before operating...

Страница 110: ...ions cover various models the characteristics of your vacuum cleaner may differ slightly from those described in this manual CAUTION WARNING SYMBOLS USED WARNING Indicates that a danger of death or se...

Страница 111: ...ruction concerning use of the appliance by a person responsible for their safety Children should be supervised to ensure that they do not play with the appliance BATTERY CHARGER Do not modify the pola...

Страница 112: ...ain cleaner etc Do not pick up anything that is burning or smoke such as cigarettes matches or hot ashes Do not use to pick up ammable or combustible liquids such as gasoline nor use on areas where th...

Страница 113: ...aning 31 Spot Cleaning 32 Max Cleaning 33 Manual Cleaning 34 Timer Reservation 35 Weekly Reservation 37 Additional Functions 37 Using additional functions MAINTAIN TOOLS AND FILTERS 38 38 Cleaning the...

Страница 114: ...g to do so may result in a malfunction or electric shock WARNING Do not pull the power plug by the cord or touch the plug with wet hands This may result in re or electric shock WARNING Do not use mult...

Страница 115: ...r shelves Critical damage abnormal operation and breakage may occur when used in these locations CAUTION Open all doors to clean all rooms When a door is closed the vacuum cleaning robot will not be a...

Страница 116: ...children do not step or sit on the vacuum cleaning robot Children may fall and injure themselves or critical damage may occur to the product CAUTION When a child or pet is left alone make sure to tur...

Страница 117: ...out 1m WARNING Do not short circuit the charge pins with metal objects such as chopsticks screwdrivers and etc This will result in critical damage to the charger WARNING Make sure that there is no tra...

Страница 118: ...e legs thin and long furniture etc while operating For a quicker and cleaner performance place the chairs on top of the table CAUTION Do not place any objects on top of the vacuum cleaning robot This...

Страница 119: ...nally NOTE Dust clusters may remain after cleaning when the vacuum cleaning robot fails to pick up dust clusters that were formed while cleaning In this case sweep up the dust with another cleaning to...

Страница 120: ...de Edge cleaning side brush brush Power brush Power brush WARNING If the power cord is damaged have it replaced by a quali ed service engineer from the customer care center Failing to do so may result...

Страница 121: ...t 1 5m About 1 5m About 1 5m 2 2 3 3 4 4 5 5 6 6 7 7 Mon MonTue Tue Wed Wed Thu Thu Fri Fri Sat Sat Sun Sun 8 8 Auto Mode 1 Cleans all rooms automatically Spot Mode 2 Cleans a localized area intensely...

Страница 122: ...oss over doorsills with a height of about 1cm and clean all rooms The vacuum cleaning robot may not be able to pass a 1cm doorsill depending on the shape of the doorsill AVOIDING OBSTACLES When the va...

Страница 123: ...MPONENTS Others Components AAA Type Batteries AAA Type Batteries User Manual 2 Battery VIRTUAL GUARD Spare Filter Cleaning Brush Quick Start Guide Accessory for Carpet assembling the cleaner Main Body...

Страница 124: ...witch Power Switch Power Brush Power Brush Power Brush Cover Power Brush Cover Battery Cover Battery Cover Driving Wheel Driving Wheel Remote Control Sensor Remote Control Sensor Obstacle Sensor Obsta...

Страница 125: ...ls Distance Detection Sensor Distance Detection Sensor Lamp Lamp Power Button Power Button Main Body Detection Sensor Main Body Detection Sensor Installing the batteries Batteries are not supplied wit...

Страница 126: ...as shown by the gure below If the batteries are installed with the wrong polarity the remote control will not work After inserting the tip of the cover into the slot push the other end to close it unt...

Страница 127: ...ed the Timer icon is lit Dust Sensor Mode 5 This icon turns on when Dust Sensor mode is enabled Turbo Mode 6 This icon turns on when Turbo mode is enabled Cleaning Mode Display 7 Each time the Cleanin...

Страница 128: ...vacuum cleaning robot to a particular section by using Fence virtual wall mode Turning the Power Switch on or off To use the vacuum cleaning robot you must turn the Power Switch on If you turn off th...

Страница 129: ...the oor is made of wood install the charger in the same 5 direction as the grain of the wood NOTE Always keep the power cord of the charger plugged into the power outlet If no power is supplied to th...

Страница 130: ...uto emptier dustbin is full of dust the Full lamp 4 turns on Empty the auto emptier dustbin Clean the air inlet of bottom Clean the lter The cleaning robot can not empty the heavy dust Empty the clean...

Страница 131: ...en the battery level display ashes while cleaning the vacuum cleaning robot stops vacuuming and automatically charges itself at the charger If the vacuum cleaning robot starts the current cleaning run...

Страница 132: ...by an environment friendly Lithuim ion Li ion rechargeable battery and an over charge prevention function guarantees an extended life time The battery warranty period is 6 months from the date of purc...

Страница 133: ...ss the Y or Z button to set the day of the week Blinks Blinks Decrease Decrease Increase Increase Press the Clock button Press 3 the Y or Z button to set the hour Blinks Blinks Decrease Decrease Incre...

Страница 134: ...ual wall VIRTUAL GUARD creates an invisible barrier that the vacuum cleaning robot cannot cross E g in front of pots furniture the front door and so on Turn the Fence virtual wall mode on using the Po...

Страница 135: ...run against an obstacle because the remote control signal has a higher priority than the VIRTUAL GUARD signal When using the vacuum cleaning robot in a small location or at a close distance it may ma...

Страница 136: ...1 minute after turning the power on the power is automatically cut to prevent the battery discharging To turn the power on again press and hold the power Start Stop button on the main body Starting o...

Страница 137: ...ger Troubleshooting when the vacuum cleaning robot does not return to the charger Check the installation of the charger When the charger is in a location where the charger cannot guide the vacuum clea...

Страница 138: ...nit button Remote control button Con guration Sequence Normal Mode Normal Mode Turbo Mode Turbo Mode Dust Sensor Mode Dust Sensor Mode Cleaning Complete Cleaning Complete 1time 1time Set the mode 1 Ca...

Страница 139: ...robot cleans an area with a length of 1 5m and a width of 1 5m When cleaning is completed the vacuum cleaning robot will display End Stop and Stand by When the vacuum cleaning robot is docked with the...

Страница 140: ...Normal Mode Normal Mode Turbo Mode Turbo Mode Dust Sensor Mode Dust Sensor Mode 3time 3time 2 times in charging mode 2 times in charging mode Set the mode 1 Cancel the mode 2 About the Resume Cleaning...

Страница 141: ...not A backwards function is not supported supported Set the mode 1 Cancel the mode 2 When the vacuum cleaning robot is docked with the charger station manual cleaning is not supported If there is no...

Страница 142: ...Press the Timer Weekly 2 button The time increases decreases by 5 minutes Press the Y or Z button to set the minutes Blinks Blinks Blinks Blinks Decrease Decrease Increase Increase Press the Timer Wee...

Страница 143: ...er Weekly 1 button for more than 3 seconds Press the Y or Z buttons to set the day of the week If there is no reservation set previously the current day of the week is displayed If there is no schedul...

Страница 144: ...the settings are completed After the settings are completed the day of week you have set blinks At this time you can move to step 2 and add another day of the week Canceling the Settings If you press...

Страница 145: ...ay panel is turned off or on sequentially Dust Sensor Mode On In Auto cleaning mode when the vacuum cleaner senses that dust has entered a speci c area the cleaner rotates and changes direction to cle...

Страница 146: ...the bottom of the main unit before cleaning the vacuum cleaning robot The vacuum cleaning robot could operate suddenly and cause an injury Cleaning the Sensor Window and the Camera You must turn off...

Страница 147: ...on of the arrow 2 in the gure Remove the lter and the mesh lter from the dustbin 3 Shake the dust from the lter Mesh lter and dustbin 4 You can clean it with water After cleaning it with water Dustbin...

Страница 148: ...en the dustbin cover Shake the dust from the dustbin 3 Close the dustbin cover until it clicks into place and then 4 reassemble the dustbin on the main body CLEANING THE CYCLONE OF THE AUTO EMPTIER DU...

Страница 149: ...the lter from the dustbin 4 4 5 5 6 6 After removing the dustbin shake the dust from the lter Clean the lter with water Dry the lter in the shade 7 7 8 8 9 9 First assemble the top of the lter and th...

Страница 150: ...a coin as shown in the gure Remove the bottom cover from the 2 auto emptier using a coin and then clean the bottom cover Clean the bottom cover with water 3 Dry the bottom cover in the shade 4 After a...

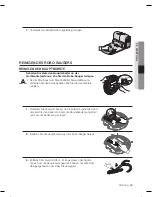
Страница 151: ...acuum cleaning robot Because the dust in the dust bin may come out separate the dust bin rst before cleaning the power brush After checking whether there are any foreign substances press 1 the hook th...

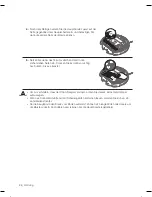
Страница 152: ...liding it down until it clicks into place To prevent the vacuum cleaning robot from becoming clogged be careful not to vacuum tooth picks or cotton swabs When removing foreign substances becomes dif c...

Страница 153: ...ng the side rotating brush repeat the procedures in Step 2 3 If hair or string is wrapped between the main unit and the side 4 rotating brush undo the screw of the side rotating brush using a driver t...

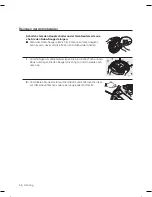
Страница 154: ...ot If the vacuum cleaning robot suddenly starts to zigzag there may be foreign substances stuck on the driving wheel When cleaning the driving wheel place a soft cloth on the oor and 1 ip the main uni...

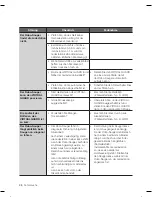
Страница 155: ...displayed in the display panel Lift up the vacuum cleaning robot manually dock the robot onto the charger to charge it Has the vacuum cleaning robot become hooked on wires on the oor Turn off the Pow...

Страница 156: ...ed off Check if the VIRTUAL GUARD is turned off and then turn the VIRTUAL GUARD on The battery usage time of the VIRTUAL GUARD is too short Are you using manganese drycell batteries Replace the batter...

Страница 157: ...parated from the autoemptier Turn off the auto emptier and then insert the dustbin fully until it is mounted completely Check whether the lter is separated from the autoemptier dustbin Turn off the au...

Страница 158: ...nce from the right driving wheel Check the Bumper sensor Turn off the at the bottom and then remove the obstacle from the front of the vacuum cleaning robot or move it to a different location A foreig...

Страница 159: ...240V 50 60Hz Charge power consumption 40 W Main unit power consumption 40 W Auto emptying power consumption 600 W Battery speci cations 14 4V 31 68Wh Cleaning Speci cations Charging type Auto Charging...

Страница 160: ...ary or consequential damages including but not limited to procurement of substitute goods or services loss of use data or pro ts or business interruption however caused and on any theory of liability...

Страница 161: ...memo...

Страница 162: ...memo...

Страница 163: ...memo...

Страница 164: ......

Страница 165: ...ti Zahvaljujemo se vam za nakup Samsungovega izdelka e elite popolnej o ponudbo storitev izdelek registrirajte na www samsung com register Ta priro nik je izdelan iz 100 recikliranega papirja Pred upo...

Страница 166: ...la namenjena razli nim modelom bodo zna ilnosti va ega sesalnika morda druga ne od tistih v tem priro niku UPORABLJENA SIMBOLA ZA OPOZORILO POZOR OPOZORILO Ozna uje nevarnost smrtnih ali hudih po kodb...

Страница 167: ...dgovorna za njihovo varnost Otroke je treba nadzorovati in tako zagotoviti da se ne igrajo z aparatom POLNILNIK BATERIJE Ne spreminjajte polariziranega vti a tako da se bo prilegal nepolarizirani vti...

Страница 168: ...odtoke itd Izdelka ne uporabljajte za sesanje predmetov ki gorijo ali se kadijo kot so cigarete v igalice in vro pepel Ne vsesavajte vnetljivih ali gorljivih teko in kot je bencin in izdelka ne upora...

Страница 169: ...34 Sesanje po urniku 35 Tedenski urnik 37 Dodatne funkcije 37 Uporaba dodatnih funkcij VZDR EVANJE NASTAVKOV IN FILTRA 38 38 i enje robotskega sesalnika 38 Upo tevajte na ine i enja in vzdr evanja 38...

Страница 170: ...hko pride do okvare ali elektri nega udara OPOZORILO Napajalnega vti a ne vlecite za kabel ali ga prijemajte z mokrimi rokami To lahko povzro i po ar ali elektri ni udar OPOZORILO V eni vti nici ne up...

Страница 171: ...ozkih in visokih mestih kot so mize ali police Pri uporabi na tak nih mestih lahko pride do nepravilnega delovanja in resnih po kodb izdelka POZOR Odprite vsa vrata da posesate vse prostore e so vrat...

Страница 172: ...ti v otroke lahko padejo POZOR Poskrbite da otroci robotskega sesalnika ne bodo pohodili ali se nanj usedli Otroci lahko padejo in se po kodujejo tudi izdelek se lahko mo no po koduje POZOR Ko je otro...

Страница 173: ...ibl 0 5m pribl 0 5m pribl 0 5m pribl 1m pribl 1m OPOZORILO V vti e za polnjenje ne vstavljajte kovinskih predmetov kot so kitajske pali ice izvija i itd To lahko resno po koduje polnilnik OPOZORILO Po...

Страница 174: ...tvo denimo noge stolov ali mize tanko in dolgo pohi tvo ipd Da bi bilo i enje hitrej e in u inkovitej e dvignite stole na mizo POZOR Na robotski sesalnik ne postavljajte predmetov To lahko povzro i ok...

Страница 175: ...jajte za sesanje miz ali drugih visokih mest Sesalnik lahko pade in se po koduje OPOMBA Po sesanju lahko ostanejo kepice prahu e so te nastale med sesanjem in jih robotski sesalnik ni uspel vsesati V...

Страница 176: ...a krta a za sesanje robov sesanje robov Zmogljiva krta a Zmogljiva krta a OPOZORILO e je napajalni kabel po kodovan naj ga zamenja usposobljen serviser iz centra za pomo strankam V nasprotnem lahko pr...

Страница 177: ...2 3 3 4 4 5 5 6 6 7 7 Pon PonTor Tor Sre Sre et et Pet PetSob Sob Ned Ned 8 8 Na in samodejnega sesanja 1 Samodejno sesanje vseh prostorov Na in sesanja obmo ja 2 Temeljito sesanje dolo enega obmo ja...

Страница 178: ...ogonski sistem robotskega sesalnika omogo a pre kanje pragov v vi ini 1 cm in tako sesanje vseh prostorov Robotski sesalnik morda ne bo mogel pre kati 1 cm praga odvisno od oblike praga PREPRE EVANJE...

Страница 179: ...gi sestavni deli bateriji vrste AAA bateriji vrste AAA Uporabni ki priro nik 2 bateriji NAVIDEZNI UVAJ Dodatni lter istilna krta a Navodila za hitro uporabo Dodatek za preproge sestava sesalnika Osred...

Страница 180: ...je Zmogljiva krta a Zmogljiva krta a Pokrov zmogljive Pokrov zmogljive krta e krta e Pokrov baterij Pokrov baterij Pogonsko kolesce Pogonsko kolesce Senzor daljinskega Senzor daljinskega upravljalnika...

Страница 181: ...zelena Lu ka za napajanje rde a Lu ka za napajanje rde a Pokrov ciklonske enote Pokrov ciklonske enote Priklju ki polnilnika Priklju ki polnilnika Senzor za zaznavanje Senzor za zaznavanje oddaljenost...

Страница 182: ...eriji nista vstavljeni s pravilno polarnostjo daljinski upravljalnik ne deluje Ko vstavite zati v re o pritisnite drugi konec da se zasko i na mestu Speci kacije baterije vrste AAA Napajanje Napajanje...

Страница 183: ...ovnika Na in senzorja za prah 5 Ikona se vklopi kadar je omogo en na in senzorja za prah Turbona in 6 Ikona se vklopi kadar je omogo en turbona in Zaslon na ina sesanja 7 Ko pritisnete gumb za na in s...

Страница 184: ...ik lahko omejite na dolo eno obmo je tako da uporabite na in Fence Ograja navidezna stena Vklop ali izklop stikala za napajanje Za uporabo robotskega sesalnika vklopite stikalo za napajanje e stikalno...

Страница 185: ...b steni 4 e so tla lesena namestite polnilnik v enaki smeri kot so 5 polo ena tla OPOMBA Napajalni kabel polnilnika naj bo vedno vklju en v napajalno vti nico e polnilnik ni priklju en na napajanje ro...

Страница 186: ...e Izpraznite postajo za samodejno praznjenje prahu iz sesalnika O istite vstopno odprtino za zrak na spodnji strani O istite lter Robotski sesalnik ne more izprazniti te kih delcev Redno praznite zbir...

Страница 187: ...prikaz stanja baterije utripa robotski sesalnik preneha istiti in se samodejno napolni na polnilniku e robotski sesalnik za ne sesanje na drugem mestu in ne polnilni postaji in polnilne postaje med i...

Страница 188: ...baterijo Li ion funkcija za prepre evanje prekomernega polnjenja pa zagotavlja dolgo ivljenjsko dobo baterije Garancijska doba baterije je 6 mesecev od datuma nakupa Ob nakupu baterije od centra za po...

Страница 189: ...stavitev dneva v tednu Utripa Utripa Zmanj aj Zmanj aj Pove aj Pove aj Pritisnite gumb za uro 3 Pritisnite gumb Y ali Z za nastavitev ure Utripa Utripa Zmanj aj Zmanj aj Pove aj Pove aj Pritisnite gum...

Страница 190: ...J ustvari nevidno pregrado ki je robotski sesalnik ne more pre kati Npr pred cvetli nimi posodami pohi tvom vhodnimi vrati itd Z gumbom za na in napajanje izberite na in Fence 1 Ograja navidezna stena...

Страница 191: ...ima signal daljinskega upravljalnika prednost pred signalom NAVIDEZNEGA UVAJA Pri uporabi robotskega sesalnika v majhnem prostoru ali na kratkih razdaljah lahko pride do medsebojnih motenj infrarde eg...

Страница 192: ...da ne pride do izpraznitve baterije Napajanje znova vklopite tako da pritisnete in kratek as dr ite gumb za napajanje Start Stop Zagon ustavitev na glavni enoti Zagon ali zaustavitev sesanja Zagon Da...

Страница 193: ...sesalnik manj kot 1 5 m oddaljen od polnilnika Odpravljanje te av ko se robotski sesalnik ne vrne k polnilniku Preverite namestitev polnilnika e je polnilnik name en na mestu kamor ne more voditi robo...

Страница 194: ...ega upravljalnika Potek nastavitve Obi ajni na in Obi ajni na in Turbona in Turbona in Na in senzorja za prah Na in senzorja za prah i enje kon ano i enje kon ano Enkrat Enkrat Nastavite na in 1 Prekl...

Страница 195: ...otski sesalnik posesa 1 5 m dolgo in 1 5 m iroko obmo je Ko je sesanje zaklju eno se na zaslonu prika e sporo ilo End Kon ano Stop Ustavitev ali Standby V pripravljenosti e je robotski sesalnik priklj...

Страница 196: ...na in Turbona in Turbona in Na in senzorja za prah Na in senzorja za prah Trikrat Trikrat 2 krat v na inu polnjenja 2 krat v na inu polnjenja Nastavite na in 1 Prekli ite na in 2 Funkcija nadaljevanj...

Страница 197: ...ja ni vzvratnega premikanja ni podprta podprta Nastavite na in 1 Prekli ite na in 2 e je robotski sesalnik priklju en na polnilnik na in ro nega sesanja ni podprt e 1 minuto ne storite ni esar preklop...

Страница 198: ...po urniku tedensko sesanje as se pove uje zmanj uje v korakih po 5 minut Pritisnite gumb Y ali Z za nastavitev minut Utripa Utripa Utripa Utripa Zmanj aj Zmanj aj Pove aj Pove aj Pritisnite gumb Timer...

Страница 199: ...ekunde Pritisnite gumb Y ali Z za nastavitev dneva v tednu e urnik sesanja ni bil dolo en se prika e trenutni dan v tednu e urnik ni dolo en se prika e Utripa Utripa Utripa Utripa Zmanj aj Zmanj aj Po...

Страница 200: ...Sesanje po urniku tedensko sesanje Nastavljena vrednost utripa in nastavitve so zaklju ene Ko so nastavitve zaklju ene utripa nastavljeni dan v tednu Nadaljujete lahko s korakom 2 in dodate drug dan...

Страница 201: ...or Mode On Na in senzorja za prah vklopljen Ko sesalnik v na inu samodejnega sesanja zazna da je na nekem obmo ju prah se zasuka in usmeri proti takemu obmo ju Ko ga posesa se vrne na prvotno pot Ko s...

Страница 202: ...spodnji strani glavne enote Delovanje robotskega sesalnika se utegne nepri akovano spro iti in povzro iti po kodbo i enje okenca senzorja in kamere Pred i enjem robotskega sesalnika morate vedno izkl...

Страница 203: ...in snemite 2 pokrov Odstranite lter in ltrirno mre ico iz posode za prah 3 Stresite prah s ltra ltrirne mre ice in posode za prah 4 Lahko jih sperete z vodo Po i enju z vodo Posoda za prah obri ite vs...

Страница 204: ...ol e elite odpreti pokrov posode za prah Stresite prah iz posode za prah 3 Zaprite pokrov posode za prah tako da se sli no zasko i in nato 4 znova vstavite posodo za prah v glavno enoto I ENJE CIKLONS...

Страница 205: ...ce Odstranite lter iz posode za prah 4 4 5 5 6 6 Ko odstranite posodo za prah stresite prah s ltra Filter sperite z vodo Filter posu ite v senci 7 7 8 8 9 9 Najprej namestite zgornji del ltra nato nam...

Страница 206: ...te 6 pritrdilnih vijakov s pomo jo kovanca kot je prikazano na sliki Odstranite pokrov spodnjega dela 2 postajo za samodejno praznjenje prahu iz sesalnika s pomo jo kovanca in o istite spodnji pokrov...

Страница 207: ...e enote Da ne bi raztresli prahu iz posode za prah pred i enjem zmogljive krta e najprej izvlecite posodo za prah Preverite ali je morda na priklju ku polnilnika nesnaga nato 1 pritisnite kljukico s k...

Страница 208: ...namestite tako da jo 5 potiskate navzdol dokler se ne zasko i Da prepre ite zama itev robotskega sesalnika ne sesajte zobotrebcev in bomba nih blazinic e tujkov ne morete odstraniti stopite v stik s...

Страница 209: ...ite Obrnite stransko vrtljivo krta o in ponovite postopek opisan v 3 koraku 2 e so se okoli glavne enote in stranske vrtljive krta e ovili lasje 4 ali vrvice krta o odvijte s kri nim izvija em in jo...

Страница 210: ...glavne enote e za ne robotski sesalnik nenadoma za ne begati je vzrok morda nesnaga ki ovira pogonsko kolesce Ko elite o istiti pogonsko kolesce na tla polo ite mehko krpo in 1 previdno obrnite glavn...

Страница 211: ...napolnjenosti baterije in je na nadzorni plo i prikazana oznaka Lo Dvignite robotski sesalnik in ga ro no priklju ite na polnilnik da ga napolnite Ali se je robotski sesalnik zataknil med ice na tleh...

Страница 212: ...bateriji vrste D LR20 Ali je lu ka na ina vklopljena Preverite ali je NAVIDEZNI UVAJ izklopljen in ga nato nastavite na eleni na in as delovanja baterij NAVIDEZNEGA UVAJA je prekratek Ali uporabljate...

Страница 213: ...no praznjenje Preverite ali je lter postaje za samodejno praznjenje name en Izklopite postajo za samodejno praznjenje in nato vstavite posodo za prah do konca Preverite ali se je lter snel s posode za...

Страница 214: ...iz desnega pogonskega kolesca Preverite senzor odbija a Izklopite stikalo na spodnji strani in nato odstranite oviro pred robotskim sesalnikom ali pa prestavite robotski sesalnik na drugo mesto Na oke...

Страница 215: ...e glavne enote 40 W Poraba energije postaje za samodejno praznjenje 600 W Speci kacije baterije 14 4 V 31 68Wh Speci kacije i enja Na in polnjenja Samodejno polnjenje ro no polnjenje Na in sesanja Aut...

Страница 216: ...ary or consequential damages including but not limited to procurement of substitute goods or services loss of use data or pro ts or business interruption however caused and on any theory of liability...

Страница 217: ...memo...

Страница 218: ...memo...

Страница 219: ...memo...

Страница 220: ...DJ68 00632B REV 0 0...

Отзывы: