


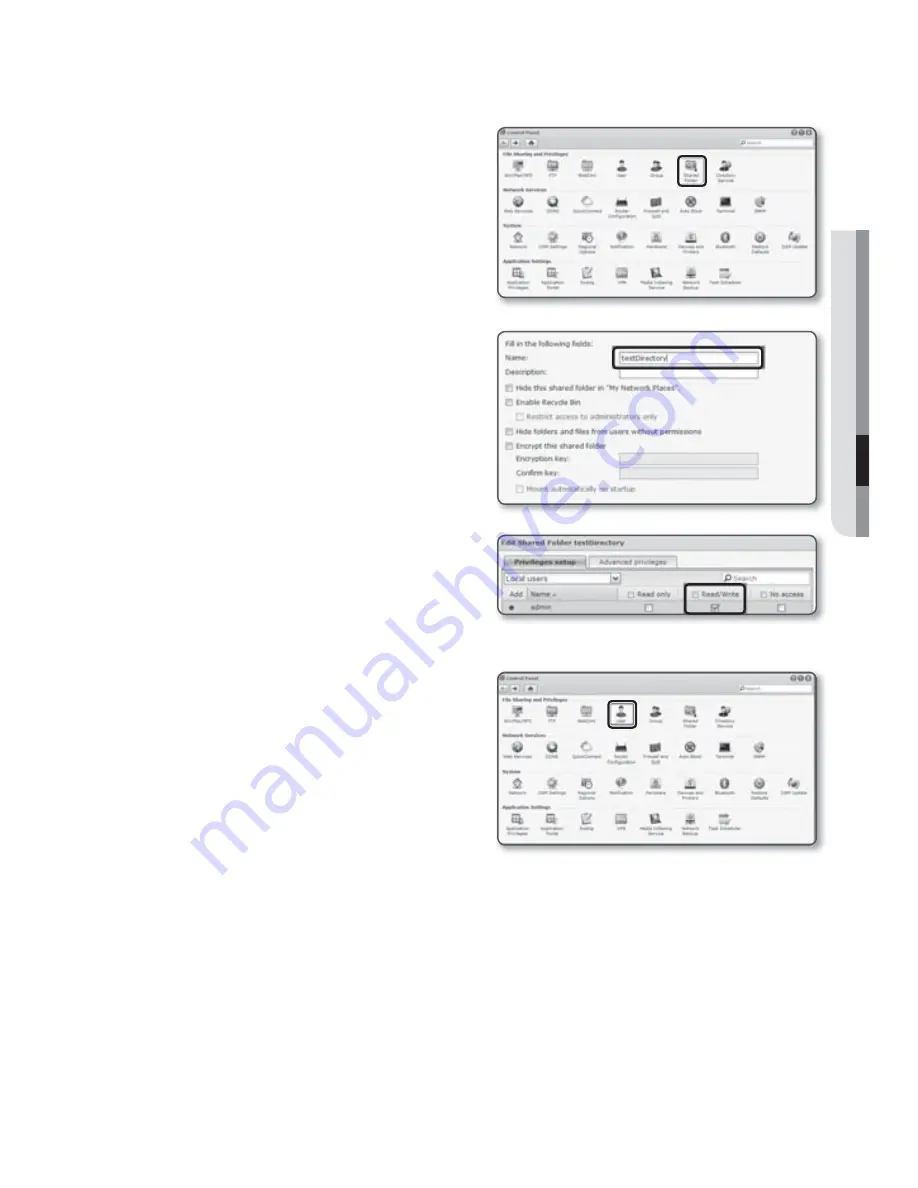
3.
Click the <
Shared Folder
> in the file
sharing and privilege menu.
4.
Click the [
Create
] button.
5.
After entering the shared folder
name(ID), click the [
OK
] button to
create a shared folder.
In this example, the shared folder name
is [
testDirectory
].
6.
In Windows, for NAS access, set
the privilege for the shared folder as
follows.
Check the admin’s [
Read/Write
].
7.
Click on the <
User
> in the file sharing
and privilege menu.
English
_85
●
SETUP SCREEN


