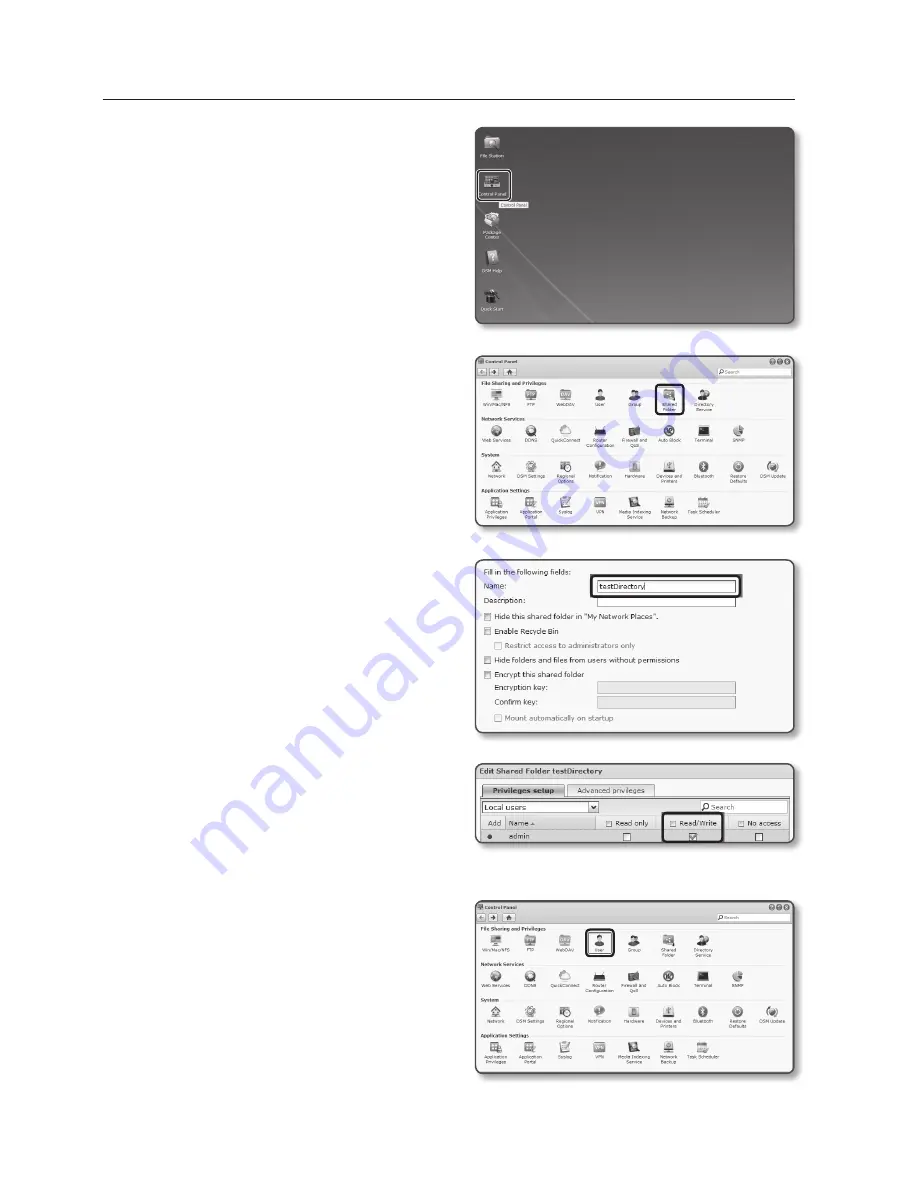
2.
If you access it as an admin, the
following screen will be displayed. Click
the [
control panel
].
3.
Click the <
Shared folder
> in the file
sharing and privilege menu.
4.
Click the [
create
] button.
5.
After entering the shared folder
name(ID), click the [
oK
] button to
create a shared folder.
In this example, the shared folder name
is [
testDirectory
].
6.
In Windows, for NAS access, set
the privilege for the shared folder as
follows.
Check the admin’s [
read/write
].
7.
Click on the <
user
> in the file sharing
and privilege menu.
setup screen
112_
setup screen
Содержание SND-L5083R
Страница 1: ...NETWORK CAMERA User Manual SND L5013 SND L5083R SNO L5083R SNV L5083R...
Страница 16: ...overview 16_ overview Components NETWORK ACT LINK RESET c d e a NETWORK ACT LINK FRONT b...
Страница 19: ...English _19 overview Components FRONT ACT LINK NETW ORK c d b N F RESET ACT LINK NETWORK i h g f e a...
Страница 21: ...English _21 overview At a Glance SNO L5083R Appearance a b c d e f...
Страница 132: ...appendix 132_ appendix Product Overview SND L5013 Unit mm inch 110 4 334 86 3 386 95 3 3 752 r40 1 575...
Страница 133: ...English _133 appendix SND L5083R Unit mm inch 9 5 4 3 7 5 119 8 4 71 89 3 5 53 9 2 12 98 8 3 89...
Страница 135: ...English _135 appendix SNV L5083R Unit mm inch 137 5 39 100 3 93 57 7 2 27 106 1 4 17...
Страница 163: ...MEMO...


