ENGLISH
9
8
Installing the CD Record Utility
Installing the Device Driver
3
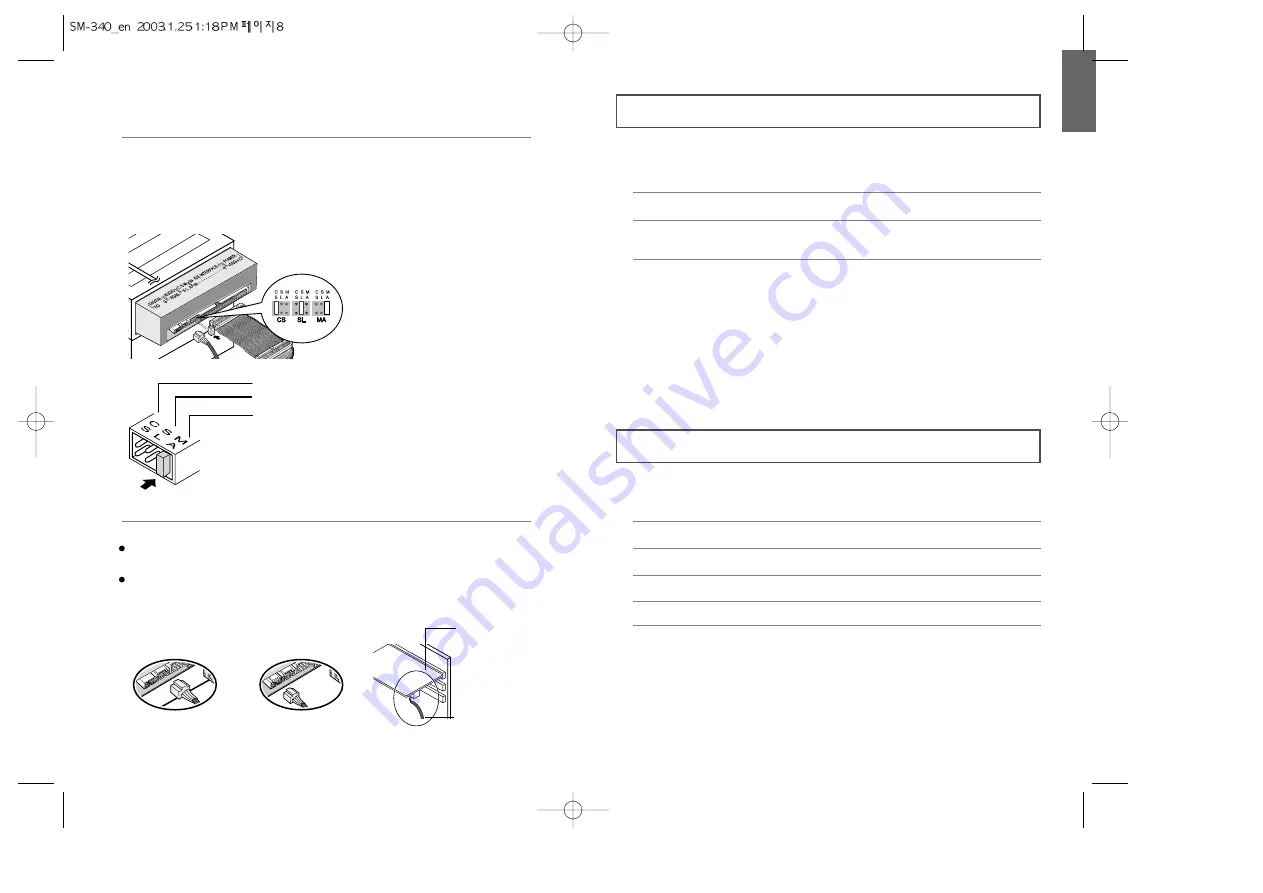
Installing a jumper on the master/slave select terminal
Connect a jumper to the rear side of the COMBO.
If the jumper is connected to MA (Master), it will work in the Master mode.
If the jumper is connected to SL (Slave), it will work in the Slave mode.
If the jumper is connected to CS (CSEL), you can control the device by using
the host interface signal CSEL. (In general, connection to MA is recommended.)
CS : Cable Select(CSEL)
SL : Slave
MA : Master
4
Connecting the audio cable from a sound card
Connect the 4-pin audio cable between the sound output terminal on the
COMBO drive and the audio input terminal on the sound card.
For clearer sound, use a digital output terminal.
(Available only for the CAID that supports digital output)
This may not be available for general sound cards.
Sound Card
Sound Output Terminal
Digital Output Terminal
Audio Input Terminal
of the Sound Card
To record data on a CD-R or CD-RW disc in the COMBO drive, you must first
install the CD record utility. For compatibility reasons, you are recommended to
uninstall any existing software of the same type before installing this utility.
No additional device driver is needed for Windows 95/98/2000/ME/XP/NT4.0,
as the default Windows device driver is used. You can check that the COMBO
drive has been correctly detected by Windows. To do so, proceed as follows.
The SAMSUNG device driver enables discs in the COMBO drive to be read but not
recorded in an MS-DOS environment;
the driver is located in the D driver folder on the CD record utility disc.
1
Insert the disc supplied with the COMBO drive in the drive.
1
Double-click on the
My Computer
icon on your desktop.
2
Double-click on the
Control Panel
folder.
3
Double-click on the
System
icon.
4
Click on the Device
Manager
tab.
5
Expand the CD-ROM branch.
The
SAMSUNG COMBO SM - ***
device name is displayed.
2
Follow the instructions displayed on the screen to install the utility.
Refer to the separate utility documentation for further details.
3
Store the utility disc in a safe place.


