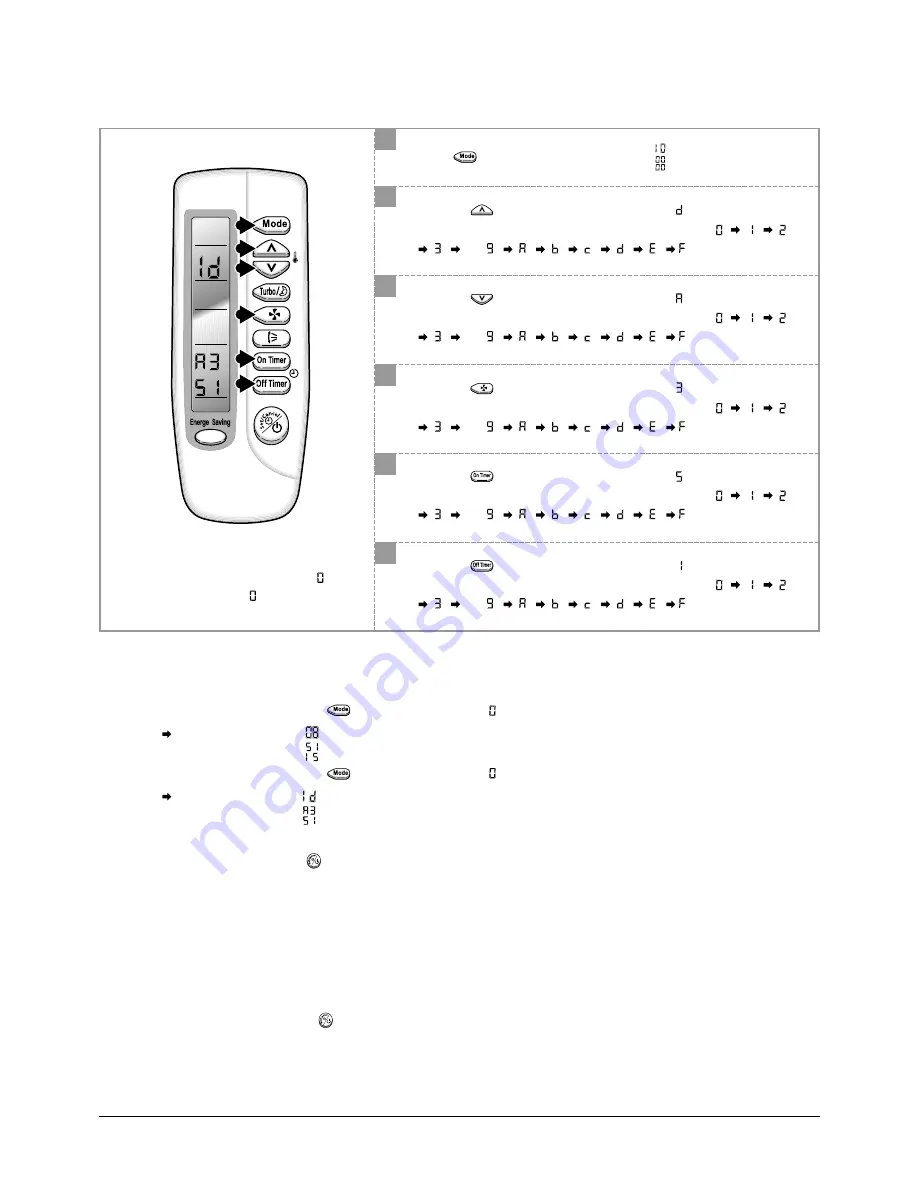
Set Up the Model Option
13
Samsung Electronics
7
8
9
10
11
12
7
8
Press button, then the default value is .
Push the button to set the display panel to
.
Every time you push the button, the display panel reads
. . .
repeatedly.
✳
Setting is not required if you must
a value which has a
default.
9
Push the button to set the display panel to
.
Every time you push the button, the display panel reads
. . .
repeatedly.
10
Push the button to set the display panel to
.
Every time you push the button, the display panel reads
. . .
repeatedly.
11
Push the button to set the display panel to
.
Every time you push the button, the display panel reads
. . .
repeatedly.
12
Push the button to set the display panel to
.
Every time you push the button, the display panel reads
. . .
repeatedly.
Step 3 : Upon completion of the selection, check you made right selections.
Press the Mode Selection key,
to set the display part to
and check the display part.
The display part shows
.
Press the Mode Selection key,
to set the display part to
and check the display part.
The display part shows
.
Step 4 : Press the ON/OFF button
.
When pressing the operation ON/OFF key with the direction of remote controller for unit, the sound "Ding" or "Diriring" is
heard and the OPERATION LED lamp is flickering at the same time, then the input of option is completed.
(If the diriring sound isn’t heard, try again pressing the ON/OFF button.)
Step 5 : Unit operation test-run
First, Remove the battery from the remote controller.
Second, Re-insert the battery into the remote controller.
Third, Press ON/OFF button(
) with the direction of remote controller for set.
DB98_15968A(1)_1 11/25/03 1:52 PM Page 13
Содержание SH18AS0
Страница 16: ...MEMO 15 Samsung Electronics ...
Страница 23: ...Samsung Electronics 22 6 3 Ass y Control In Indoor Unit DB93 02580A ...
Страница 32: ...MEMO 31 Samsung Electronics ...
Страница 37: ...MEMO Samsung Electronics 36 ...


